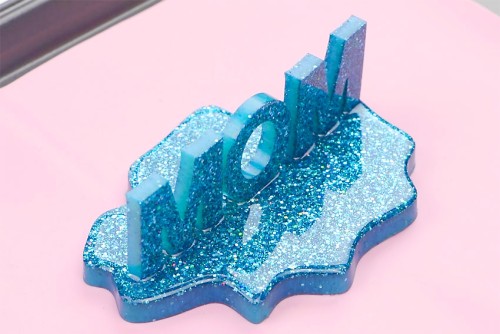
Have fun making this Mother’s Day resin craft! This glittery DIY nameplate is such a cute and easy resin project, perfect for beginners.
Follow our step by step photo and video tutorials to make this easy resin art, and be sure to check out all our helpful tips and tricks below. Show your love by making this homemade resin gift in Mom’s favourite colour!

This post contains affiliate links. If you use these links to buy something we may earn a small commission which helps us run this website.
DIY Mother’s Day Resin Gift Idea
Equipment:
- Popsicle stick (or silicone stir stick)
Watch the step-by-step video tutorial:
Instructions:
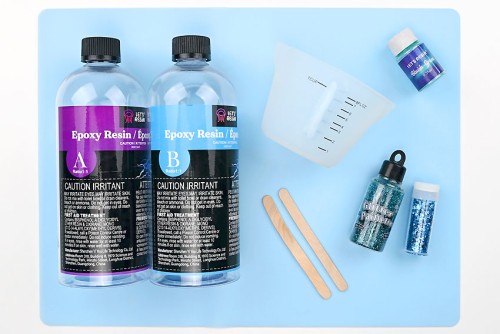
Step 1: Find what you need
- Gather your supplies and materials. Choose glitter and mica powder in Mom’s favourite colour.

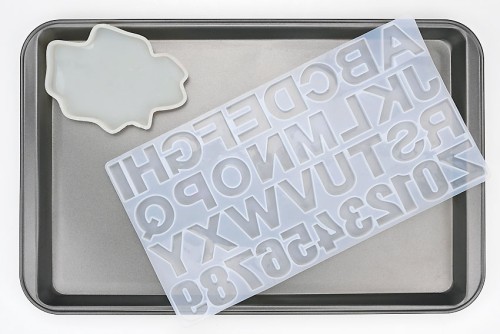
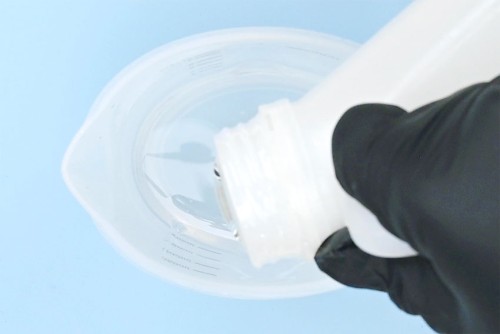
- You’ll also need silicone molds for the letters and the base.
Step 2: Mix the resin
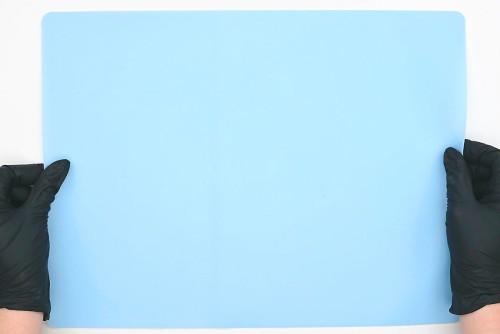
- Protect your working surface with a silicone mat, and wear protective nitrile gloves and eye protection when working with resin.Check your resin label for other safety requirements, such as a respirator.
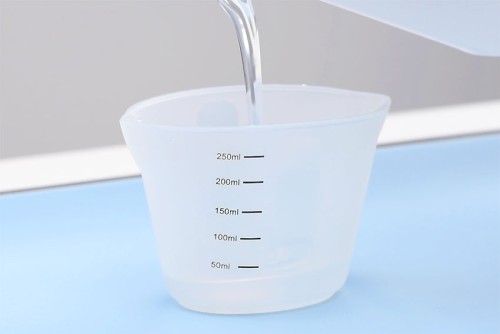
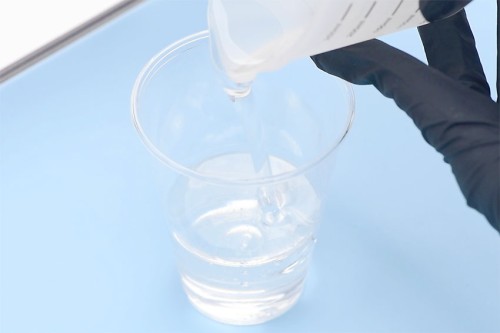
- Mix the amount of resin needed for your letters and the base. We mixed 150 ml of resin, but you’ll need to adjust the amount depending on the size of your molds.Start by adding 1 part of Part A to the silicone measuring cup. The amount of Part A should be half the total amount needed. (In our case, 75 ml.)Follow your specific resin’s instructions for ratios, drying times, and curing times.
- Add an equal amount of Part B to the measuring cup, or whatever ratio your brand of resin suggests. (In our case, 75 ml.)
- Mix the resin and hardener together with a popsicle stick or a reusable resin stir stick.Stir slowly, scraping down the sides and bottom of the measuring cup. Continue mixing for 3 to 5 minutes or until the mixture is clear.
- Pour the resin into a disposable plastic cup.We recommend this whenever working with glitter, since cleaning the glitter out of the silicone cup is very difficult and time consuming.


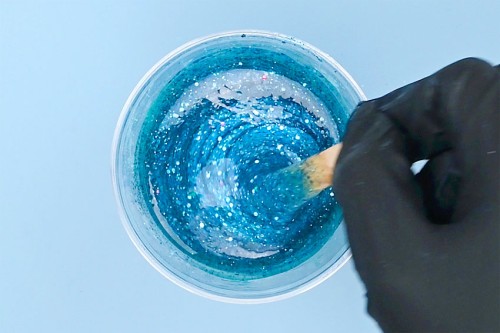
Step 3: Add pigment and glitter
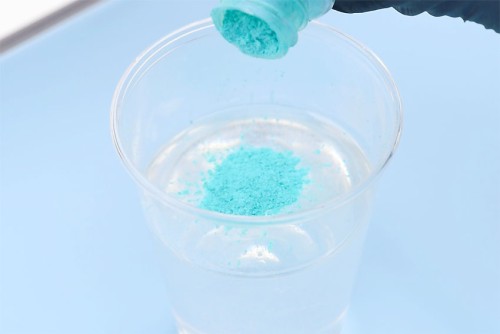
- Add mica powder to the resin.Start with a small amount of coloured pigment and continue to add it until you reach the colour you’re looking for.It’s recommended that your pigment is less than 6% of the volume of your resin.
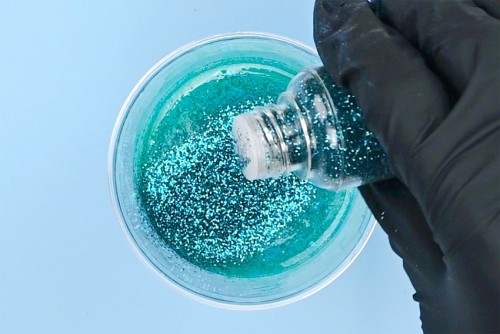
- Stir the mica powder into the resin well, and then add the glitter.Add about 1 Tablespoon of glitter total, using different sizes and textures to give the piece depth. We used several blue shades of fine and chunky glitter, plus white/clear holographic glitter.
- Stir gently, until the glitter is completely mixed in.
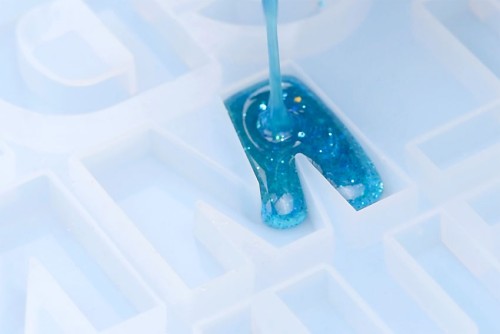
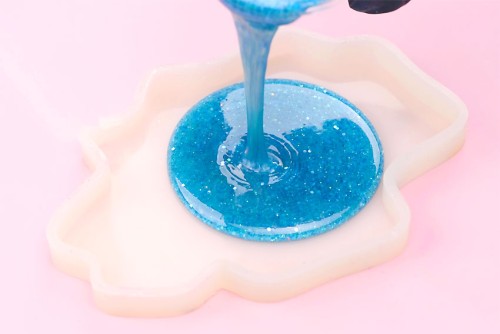
Step 4: Pour the resin into the molds
- Pour the resin mixture into the “M” and “O” of your letter mold. You’ll have to wait and make a second small batch for the other “M” unless the “W” is the same as the “M”.Use a toothpick to get rid of any air bubbles around the edges.
- Pour the remaining resin into the base mold until it’s full. Spray the surface with rubbing alcohol to help pop any air bubbles, if necessary.
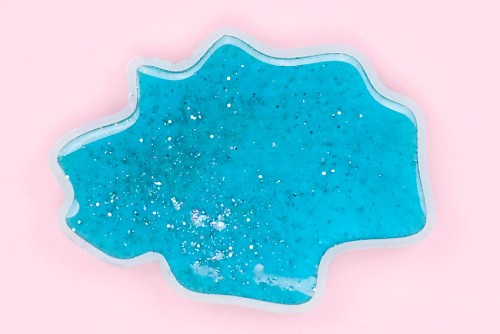
- Let the letters and base sit, untouched, for the recommended dry (or demold) time.Our resin’s dry time is 12 – 18 hours, but we recommend waiting 24 hours so that the base is hard enough to handle without warping.
Step 5: Demold and put the pieces together
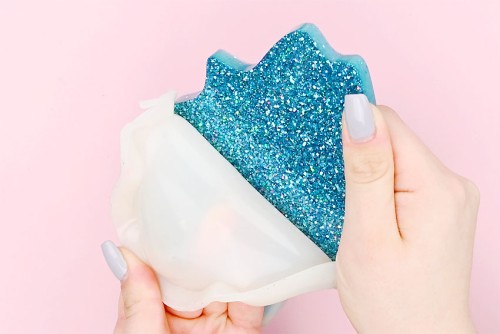
- Once your resin pieces are dry you can demold them.Gently pull away the side of the mold and stretch it a bit as you peel it back. The pieces should come out easily.
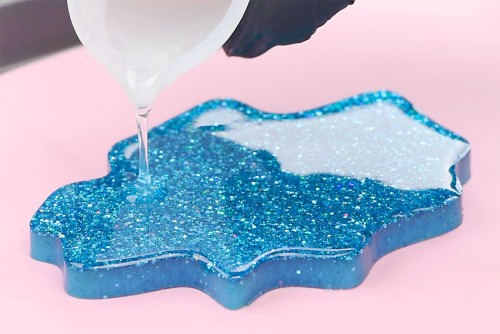
- Mix a second small batch of clear resin, following the instructions above.We mixed about 10 ml total.
- Carefully pour a thin layer of clear resin on top of the flat base. Start with a small amount and add more, if needed.
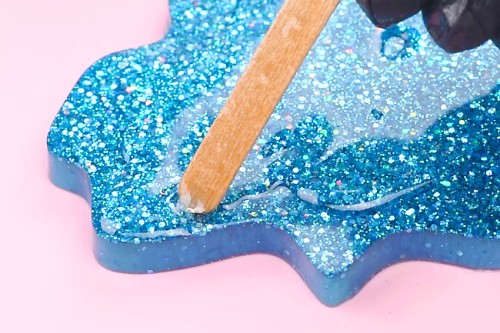
- Use a popsicle stick to spread the resin to the edge of the base, making sure it doesn’t spill over the edge.
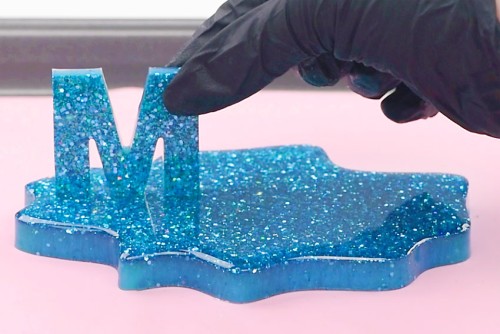
- Place the letters into the top coat of resin, arranging them on the base.At this point you can also add other small details or resin pieces to the top. Read below for some ideas!
- Allow the topcoat of resin to dry and harden overnight before moving or touching the nameplate.
- Your Mother’s Day resin craft is complete!Wait for the recommended cure time (72 hours for our resin) and then sand off any rough edges from the bottom of the base or back of the letters.


Helpful Tips:
- Protect your working surface and do resin pours in a well ventilated room. Wear basic PPE whenever working with resin: nitrile gloves, long sleeves, and eye protection. You should also wear a respirator with most resins.
- Wipe your silicone mold with rubbing alcohol and a lint free cloth to remove any dust before pouring resin into it.
- If you use resin in a mold it is no longer food safe. Only use these silicone molds for resin and non-food products.

What type of resin is best for making this Mother’s Day resin craft?
We used casting epoxy resin to make our Mother’s Day craft. Deep pour resin is recommended for anything thicker than 1/2 inch, so casting resin is a good choice to buy if you only want to work with one type of resin. The base and the letters are thinner, but the casting resin still works well and has a fast drying time.
If you have a tabletop resin you can also use that to make this display piece. Tabletop resin actually cures a bit harder than casting resin, but it also might take longer to cure.

What type of silicone mold is used for the base of this resin craft?
We used an irregular oval mold shaped like an agate or geode. You can also buy a silicone tray mold, which gives the base a lip to contain jewelry or other items.
Whichever mold you choose, make sure that the base is large enough to place your letters. (Our base is about 5-1/2 inches across.)
Do I have to add glitter to this resin gift for Mom?
We definitely love the glitter look (check out our resin ornaments for another fun, glittery project!), but pressed flowers also look beautiful in resin. See our resin keychain post for how to add them. You can also add things like beads or buttons.
Or you can just add pigment, whether you use mica powder or a liquid resin dye. Acrylic paint and alcohol ink will also add colour to resin.

What else can I add to this resin gift?
We added a pyramid ring holder to some of our Mother’s Day gifts. To add this to the base, simply place it at the same time as your letters.
You can also add a little bowl or dish, hearts or stars, or a mini trinket box. And if you don’t want to spell out “MOM” you can add monogram initials or a short name. Choose whichever elements you think your Mom would like!

Show your appreciation for Mom with this cute Mother’s Day resin craft. This tray is such a fun display item, the perfect addition to a dresser or side table.

Here’s even more Mother’s Day craft ideas:


Our book Low-Mess Crafts for Kids is loaded with 72 fun and simple craft ideas for kids! The projects are fun, easy and most importantly low-mess, so the clean up is simple!

Where to buy:
You can purchase Low-Mess Crafts for Kids from Amazon, or wherever books are sold:
Amazon | Barnes and Noble | Books-A-Million | Indiebound | Amazon Canada


Leave a Reply