
This DIY iceberg slime is SO SATISFYING — especially when you crack into that thick, crunchy top layer! It starts out as super fluffy slime, and then transforms into a totally unique, textured slime with an airy crust that breaks apart in the most delightful way.
Kids will have a blast making this slime recipe, and honestly, adults will too. With just a few simple ingredients, you can whip up the coolest slime that’s crunchy on top and stretchy underneath. Follow our full recipe and tutorial to make your own iceberg slime today!

This post contains affiliate links. If you use these links to buy something, we may earn a small commission at no extra cost to you. This helps support our website and allows us to keep creating fun, free content.
How to Make Iceberg Slime
Instructions:
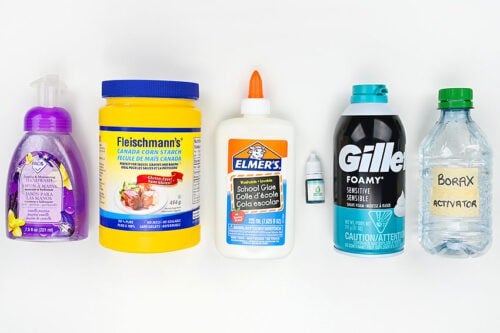
Step 1: Find what you need
- Gather your supplies and materials.

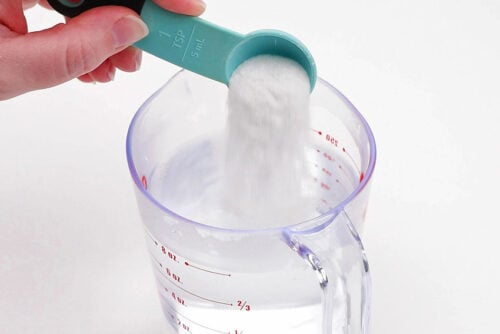
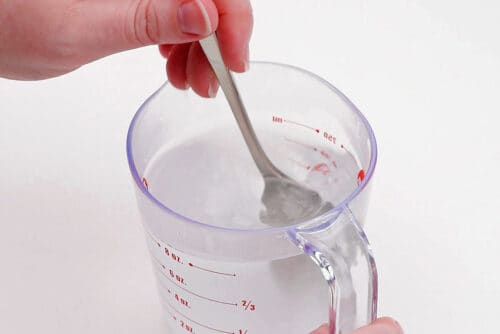
Step 2: Make the borax mixture
- Add 1 tsp of borax into 1 cup of hot water.

- Stir until the powder is dissolved. Then allow to cool to room temperature before using.
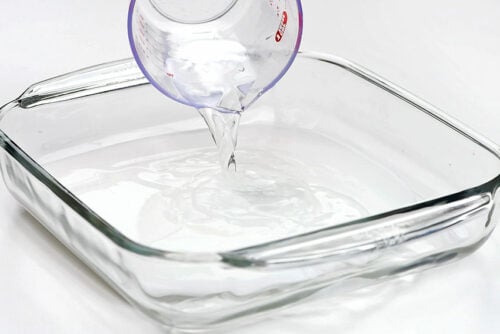
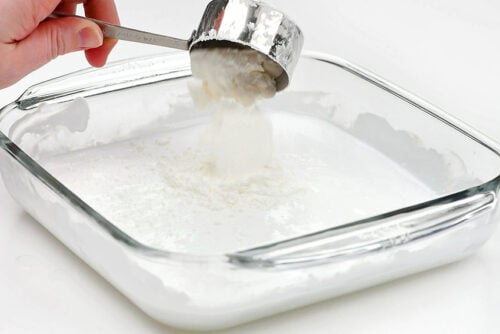
Step 3: Mix the first ingredients
- Add 1 cup of white glue and 1/4 cup of water to a large bowl or container. (We’re using a square glass baking dish.)
- Stir carefully to mix together, and then add in 1/4 cup cornstarch.
- Again, stir together, removing as many lumps as possible.
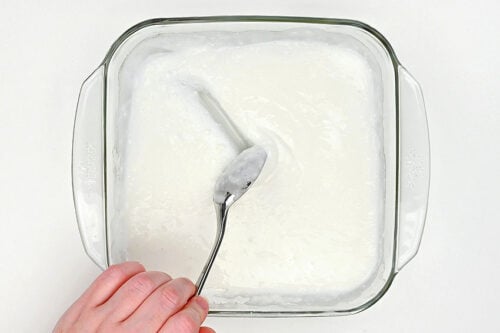
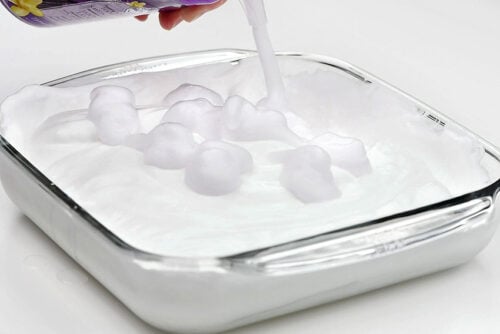
- Add in about 3 cups of foam shaving cream.You can measure it out (we did the first time we made this slime) or just measure with your heart like we did here.
- Mix in the shaving cream slowly and carefully. You want the glue mixture to combine nicely, but you don’t want to knock too much air out of the shaving cream.
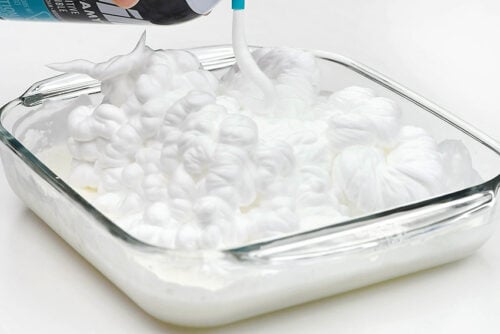
- Then add 10 pumps (about 1/3 cup) of foaming hand soap. Again, stir in gently.
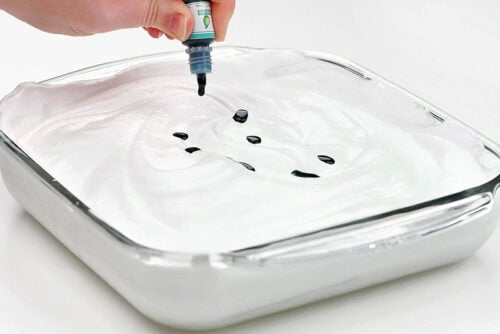
- Add about 10 drops of food colouring to the mixture. And, guess what? Stir in gently until the colour is nicely combined.
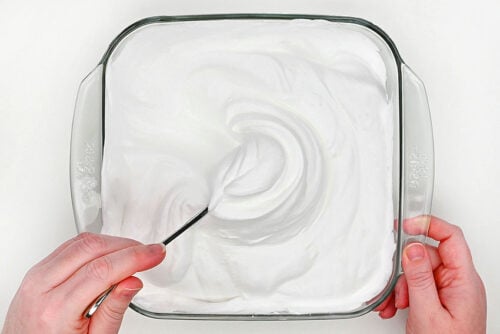
Step 3: Activate the slime and then wait
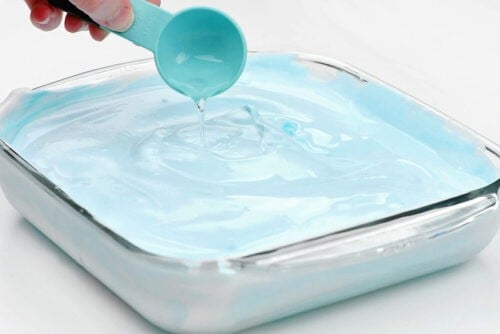
- Once the food colouring is nicely mixed in you can activate your slime. Start by adding 1 Tablespoon + 1 teaspoon of the borax activator you made earlier.
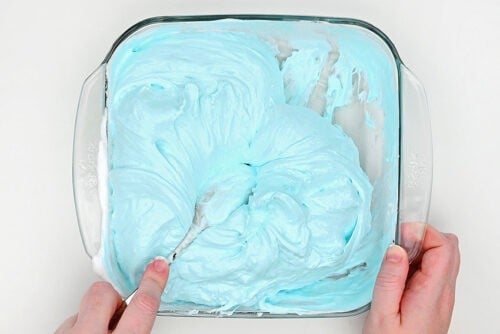
- Now for more of our favourite activity. Stir, stir, stir.The slime will begin to thicken and pull away from the dish. It looks like a fluffy marshmallow!
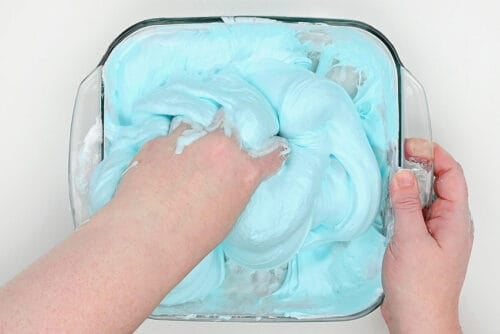
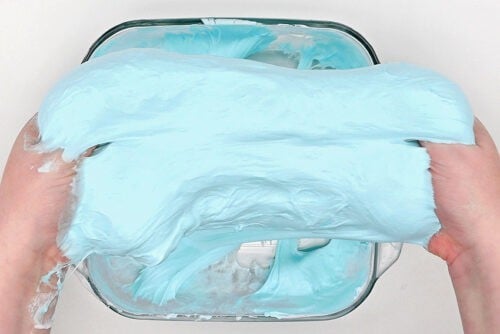
- Once you’ve mixed the slime really well you’ll need to get your hands in there.Start with one hand so that you have another free to add more activator, if needed. Start by squishing it around and stretching it up.
- Then you’ll need to pick up the slime and knead it with your hands. Working it really does help it to become less sticky.Again, you might need a few more drops of activator, depending on the exact amount of shaving cream you’ve added.
- Now comes the waiting. Place the slime back in its dish and allow the slime to sit with no lid or covering for at least 3 days. We ended up waiting 5 days.

Step 4: Enjoy your iceberg slime!
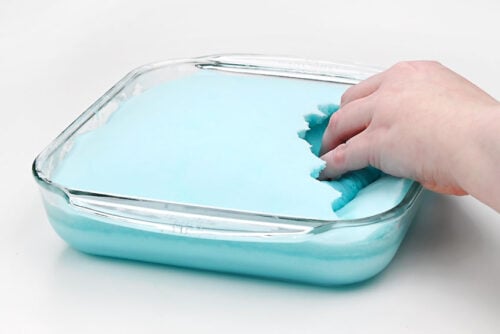
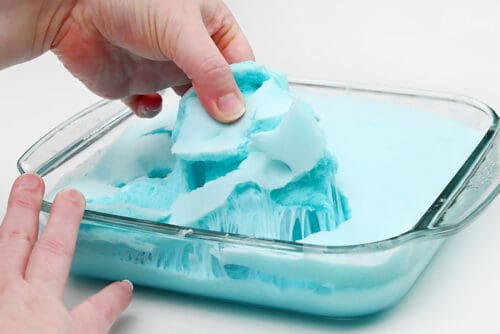
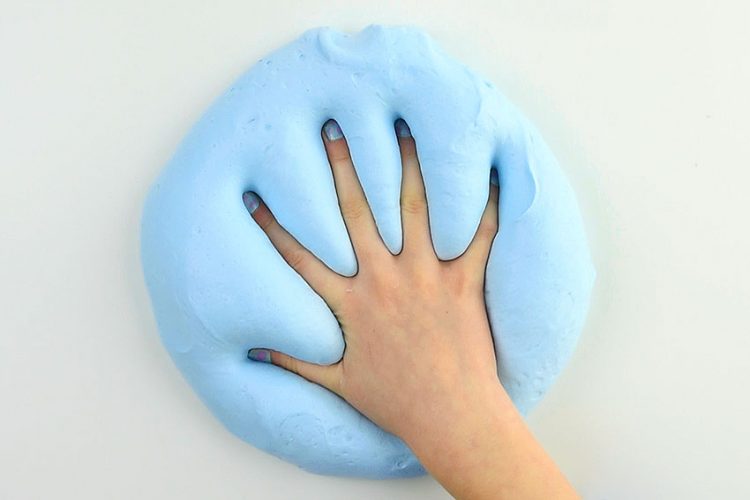
- Your iceberg slime is ready to play with!The slime should have a hard top on it, and if you used a clear dish you’ll be able to see on the side how much of the slime has hardened.You can run your whole hand over the top and tap or knock on it lightly. Then push your hand in, breaking through the “ice”.
- You can now scoop up the top layer and pull it up. The top of the slime will feel hard and squishy, almost like Styrofoam, while the bottom of the slime is thick and stretchy.Have fun cracking into this top layer, and then once you’re done, mix all the slime together to play with a thick and glossy slime!
Helpful Tips:
- Fold the shaving cream in gently: Stir slowly and carefully so you don’t knock too much air out of the fluffy mixture. The extra air helps create that thick, crunchy iceberg top layer.
- Choose your favourite colour: Blue food colouring gives the perfect icy vibe, but you can make iceberg slime in any colour you like!

What is iceberg slime?
Iceberg slime starts as fluffy slime, but when you leave it out to dry, the top forms a hard, crunchy layer, while the inside stays soft and stretchy. When you break through the surface, it makes super satisfying crackles and reveals a cool mix of textures underneath.
Will iceberg slime harden again after breaking it once?
Yes! If you leave the slime out again, the surface will dry and form another crust. The top layer is thinner the second time, but you’ll still get that fun icy layer.

How long does iceberg slime need to sit?
We let ours rest for five days before breaking it open, which gave us a really thick, crunchy top. You’ll want to leave it for at least three days to get the full effect (this is how long we waited the first time we made this slime).
By the second day the slime will already have a thin crust, but not one deep enough to “break” into. This is where using a glass dish helps — you can actually see the layers forming as the top dries out.

What’s the best activator for iceberg slime?
We used a borax activator, and it worked extremely well. You could try contact solution and baking soda, but in our experience borax tends to make thicker, sturdier slimes — exactly what you want for iceberg slime!

Cracking into iceberg slime is such a fun and satisfying experience, and making it is just as enjoyable. From the fluffy base to that thick, crunchy top layer, this slime has the coolest mix of textures to explore.
Whether you’re trying it for sensory play, ASMR fun, or just because it looks amazing, the whole process is a blast from start to finish. Have fun creating — and breaking into — your own iceberg slime!
Here’s even more slime recipe ideas:


Now available
Low-Mess Crafts for Kids Book
72 cute and fun crafts that kids and parents alike can enjoy. All with as little mess as possible!
Where to buy:
You can purchase Low-Mess Crafts for Kids from Amazon, or wherever books are sold:
Amazon | Barnes and Noble | Books-A-Million | Indiebound | Amazon Canada


Leave a Reply