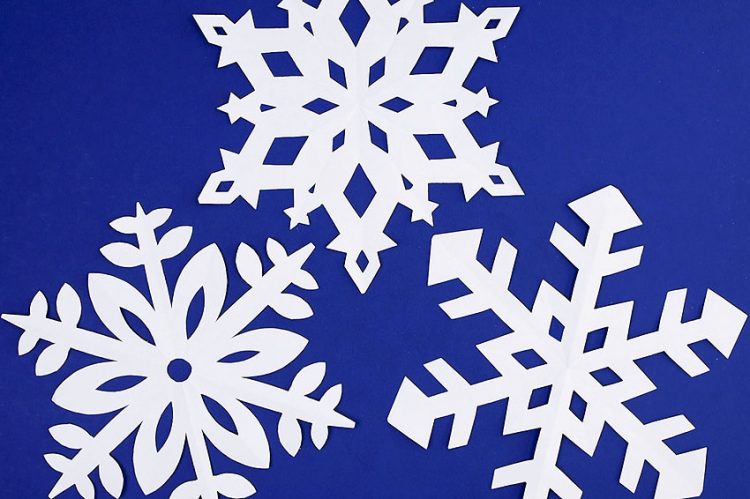
These Halloween snowflakes are so cute!! Folding and cutting snowflakes is a classic winter craft, but did you know that you can make snowflakes in fun Halloween shapes?! So cool!
Transform a regular piece of paper into a festive Halloween themed snowflake! Use our free, printable templates to make a jack-o-lantern pumpkin, spider, bat, ghost, or witch hat. So grab your paper and scissors and get ready for some seriously awesome, hands-on fun!

This post contains affiliate links. If you use these links to buy something we may earn a small commission which helps us run this website.
How to Make a Halloween Snowflake
Materials:
- Free Printable Halloween Snowflake Pattern (optional; find more templates below the tutorial)
- Coloured printer paper (or construction paper)
Equipment:
Watch the step-by-step video tutorial:
Instructions:
Step 1: Find what you need
- Gather your supplies and materials.


Step 2: Fold the “snowflake” shape
- Start with an 8-1/2 by 11 inch piece of paper.Set it down with the short edge towards you.
- Fold the top right corner of the paper down so that the top edge meets the left side of the paper.
- Cut off the bottom rectangle part of the paper. This gives you a square piece of paper.

- Keeping the paper folded in half, turn the triangle so that the long, folded edge is at the bottom.
- Bring the right bottom corner over to meet the left.Mark the middle of the paper by making a small crease at the bottom, but don’t fold the paper completely.
- Open the paper back up.There will be a small crease at the bottom center of the triangle.
- Fold the right point of the triangle up to the top point. Press this fold down.
- Unfold the triangle and see the angled fold mark.
- Fold the top corner and left edge of the triangle down to meet up with the fold line.
- Unfold again.Then fold the bottom right corner up as shown in the photo below. Make the fold starting at the bottom center crease mark, so that the bottom right edge meets the top right crease mark.
- Now fold the bottom left corner up and right so that the bottom edge lines up with the other bottom fold.
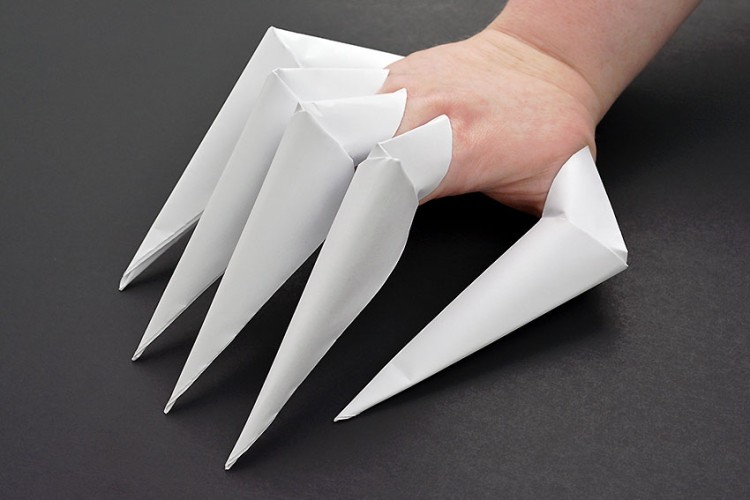
- Then bring both right layers over to the left, lining up the edges. Press down the fold.You should have a tall triangle shape with 3 pointed edges at the top.


Step 3: Draw the Halloween design
- Draw your Halloween design on the triangle.Follow the pumpkin pattern from this tutorial, or see the templates below for 4 other spooky-cute designs!For a jack-o-lantern snowflake, first draw half of a pumpkin outline. The right side of the triangle will be the center of the shape.
- Next, draw half of the mouth and nose up against the fold.Mark a little circle where you’d like the eye to be.


Step 4: Cut out your Halloween snowflake
- Cut out the pumpkin shape.
- Then cut out the nose and mouth.
- Next, use a one hole punch to “cut out” a circular eye.
- This is what the paper should look like after you finish the cutting and punching out the eye.
- Unfold the paper to reveal a super fun jack-o-lantern snowflake!
- Smooth out the folds and your Halloween snowflake is complete!


Helpful Tips:
- Use markers to add details to your Halloween snowflakes. Draw eyes on the spider and bat, or a band onto the witch’s hat.
- Cut smaller and bigger pieces of square paper to make different sizes of decorations.
- Remove the creases from your Halloween snowflake by ironing it on a low temperature. Place the paper between two pieces of parchment paper to prevent the iron from tearing the smaller details of the Halloween designs.

Get our free printable Halloween snowflake patterns:
The links below will take you to our free, printable Halloween snowflakes templates! The PDF files will open in a new window. Then simply print the patterns on 8.5 x 11 (letter size) printer paper and follow the instructions on the page.
When you’re using the templates, the process is exactly the same as the tutorial above, but we’ve marked out the lines and patterns where you need to fold and cut.
Just make sure that the printed lines stay on the outside as you fold. Don’t fold towards the lines, or you won’t be able to see them when it comes time to cut out the pattern.
>>> Pumpkin Halloween Snowflake Template <<<
>>> Spider Halloween Snowflake Template <<<
>>> Bat Halloween Snowflake Template <<<
>>> Ghost Halloween Snowflake Template <<<
>>> Witch Hat Halloween Snowflake Template <<<

What’s the best paper for making Halloween snowflakes?
We used coloured printer paper and construction paper to make our snowflakes, and both types of paper worked well. You want to use paper that’s thin enough to cut cleanly and easily (24 lb weight or thinner).
You can also use wax paper or parchment paper. They’re really easy to cut (although this does make them more delicate) and they add a semi-transparent, spooky vibe to the craft.

Where can I hang my Halloween snowflakes?
You can add tape to the back of these Halloween paper snowflakes and use them as wall decorations for at home, for a school or library, or for a Halloween party.
You can even hang the snowflakes as ornaments by tying fishing line around one of the thinner parts. Or you can also use a one hole punch to create a place to connect the cord.

Do I have to use the Halloween snowflake templates?
No, feel free to draw the design with pencil like we did in the tutorial above. You can also experiment and come up with your own Halloween snowflake patterns!
What if I make a mistake when cutting my Halloween snowflake?
It’s not a big deal if your first cuts are a little bit off. You can easily refold and try again to perfect the shape. Practice makes perfect, and if the cuts aren’t completely clean you can trim the excess paper once the snowflake is unfolded.
Plus, you can always turn small mistakes into distinctive designs! After all, each snowflake is unique.

Who says snowflakes are just for winter? Use a classic paper folding technique to make spooktacular Halloween snowflakes!
This simple paper cutting craft is a fun and unique way to get festive. Decorate your windows, classroom, or use these Halloween snowflakes patterns as fun and colourful party decor.

Here’s even more Halloween craft ideas:


Our book Low-Mess Crafts for Kids is loaded with 72 fun and simple craft ideas for kids! The projects are fun, easy and most importantly low-mess, so the clean up is simple!

Where to buy:
You can purchase Low-Mess Crafts for Kids from Amazon, or wherever books are sold:
Amazon | Barnes and Noble | Books-A-Million | Indiebound | Amazon Canada


Leave a Reply