This egg in vinegar experiment is such a fun science activity for kids! Did you know that you can change regular eggs into bouncy eggs in one simple step?! So cool!

Naked Egg
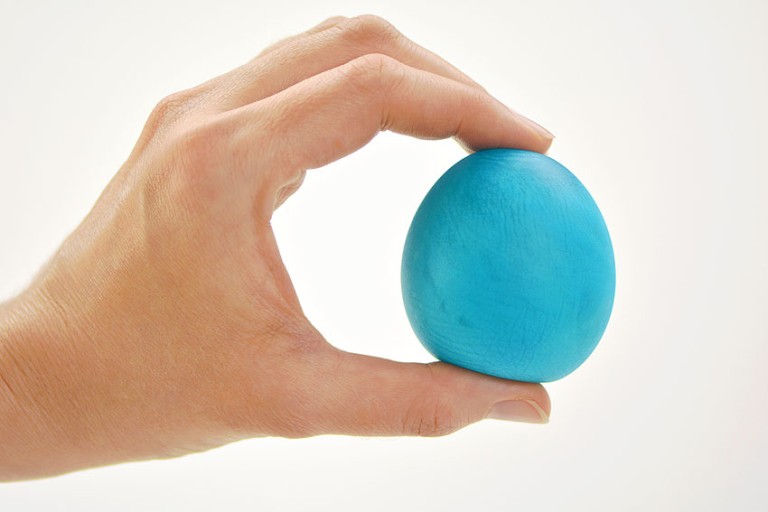
The egg in vinegar experiment, also known as a “naked egg” or “bouncy egg”, is the perfect simple STEM activity. Kids and adults alike will enjoy squeezing and bouncing the naked egg. It’s so cool to see an egg staying together without its shell!
This chemistry experiment uses basic pantry items and is great for practicing scientific observation. The bouncy egg experiment helps kids understand acid-base reactions and osmosis.
I’d recommend a tiled kitchen floor or an outdoor area for the bouncing part of this experiment… not that I speak from experience, like maybe a blue egg rolled off the table onto the carpet. Nope, definitely didn’t happen here…
Check out our Egg in Vinegar video tutorial:
*Note: Scroll down for the step-by-step photo tutorial.
Looking for more science experiments? Here’s some of our favourites:

Here’s what you’ll need:
This post contains affiliate links. If you use these links to buy something we may earn a small commission which helps us run this website.
The full printable instructions are at the end of this post, but here’s a list of products on Amazon that are similar to the supplies we used:
- Vinegar
- Mason jar
- Food colouring (optional)
- Highlighter (optional)
- Blacklight flashlight (optional; for glowing highlighter egg)

How does the egg become bouncy?
The egg and vinegar experiment creates a bouncy egg by dissolving the shell of the egg! Vinegar is made up of water and acetic acid, while an eggshell is mostly calcium carbonate.
Leaving the egg in vinegar creates a classic acid-base chemical reaction. The acetic acid dissolves the calcium carbonate, leaving the egg white and egg yolk protected by the egg’s membrane. This membrane is why the egg becomes a bouncy “rubber egg”.
Why is the rubber egg larger after sitting in vinegar?
The naked egg becomes larger because of osmosis. Osmosis, in this experiment, is when the water in the vinegar passes through the egg’s semipermeable membrane.
A semipermeable membrane is a membrane that allows certain substances (like water) through. Water molecules move from the vinegar into the egg until the water concentration is equal on both sides of the membrane. The egg gets larger as more water moves inside the egg’s membrane.
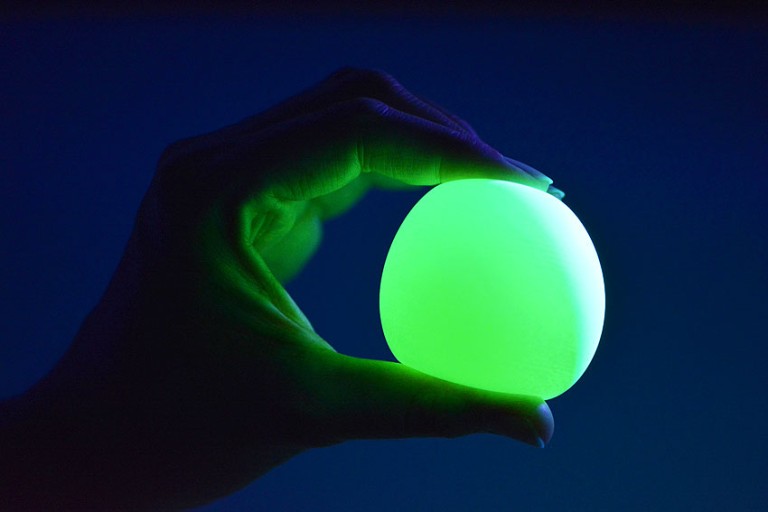
How do you make the egg glow?
The full instructions are below, but in a nutshell, you soak the egg in vinegar with the ink from a highlighter. Then turn off the lights and use a blacklight flashlight to see the egg glow like in the photo below!

How long does the egg have to sit in the vinegar?
As soon as the vinegar touches the eggshell you can see carbon dioxide gas bubbles, created as the acetic acid starts to eat away at the calcium carbonate. While you can see that immediate reaction, you will have to wait a day or two for the eggshell to dissolve.
The shells on our eggs were soft after 24 hours, but it took about 48 hours for the shell to completely dissolve. We left some in the vinegar as long as 4 days, but there wasn’t any difference between the ones that sat for 2 days compared to 4 days.
How else can I experiment with naked eggs?
Instead of vinegar, put your egg in Coca-Cola, orange juice, or another acidic liquid. How do the results compare to the vinegar?
After doing the egg in vinegar experiment, try putting the naked egg in corn syrup! How long does it take for the egg to shrivel up? Corn syrup has a lower concentration of water, meaning that water leaves the egg in order to equalize the water on both sides of the membrane. Will it grow again if you put it back in water?
Measure and weigh a raw egg compared to the bouncy egg. How much did it grow in the vinegar? There are many simple observations and predictions you can make with this experiment, making it a great science activity for kids.

Egg in Vinegar Experiment
Materials:
- raw egg in shell
- 1-3 cups vinegar (enough to cover egg)
- Food colouring (optional)
- highlighter (optional)
Equipment:
- Mason jar (or other glass or container)
- spoon/stir stick (if using food colouring)
- blacklight/UV flashlight (optional, for highlighter glowing egg)
Instructions:
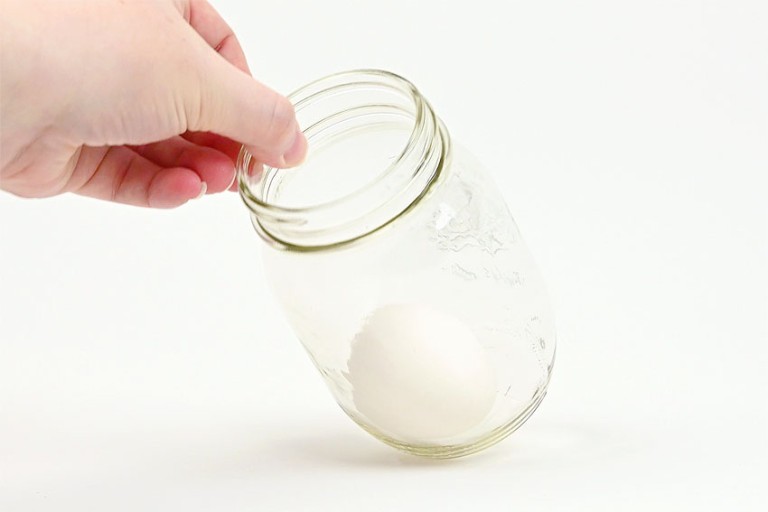
Step 1: Make a naked egg
- Put an egg in a mason jar or glass.

- Pour vinegar into the jar, enough to generously cover the egg.

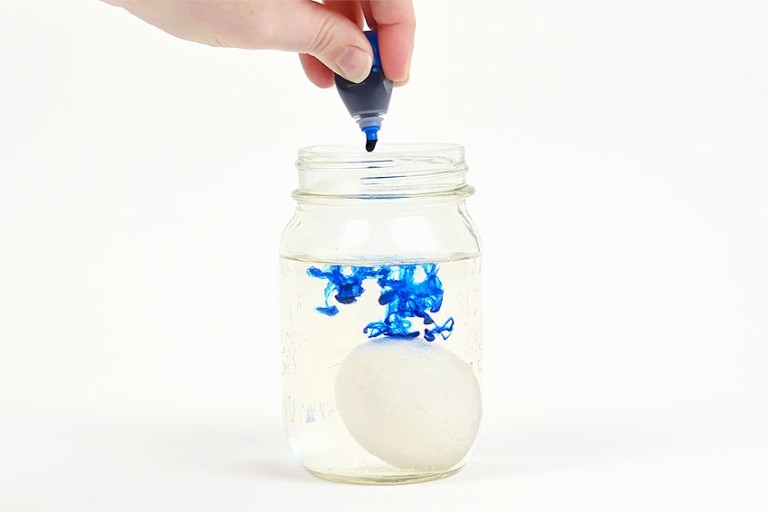
Step 2: Make a coloured egg (optional)
- Follow step 1, then add 8 to 10 drops of food colouring. Stir.
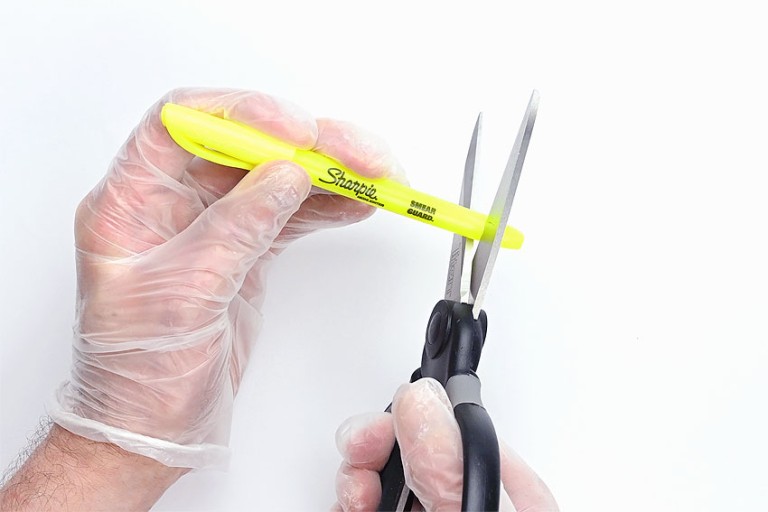
Step 3: Make a glowing egg (optional)
- Follow step 1. Have an adult cut the end off of a highlighter and pull the ink tube out of it with needle nose pliers or tweezers. We used utility scissors to cut through the plastic but you might be able to remove the highlighter end with pliers.
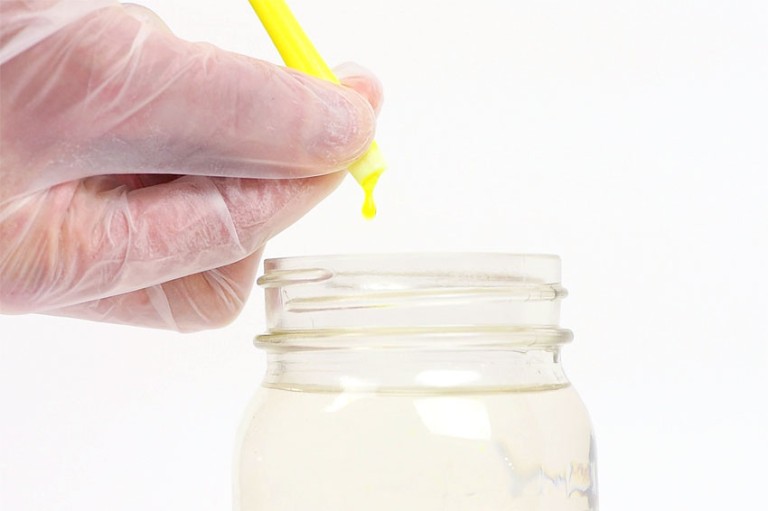
- Squeeze the ink into the vinegar. Place the ink tube in the vinegar with the egg and leave it to soak along with the egg.

Step 4: Wait for shell to dissolve
- Allow the egg to soak in the vinegar for 24 to 48 hours.
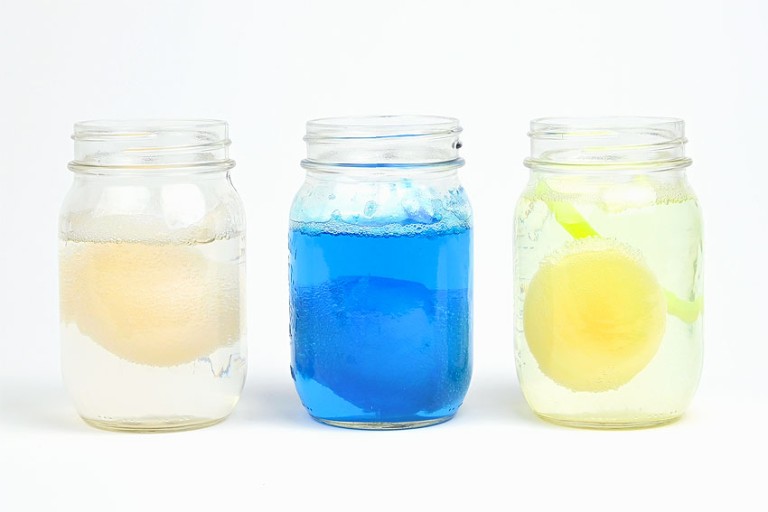
- Check the egg in 24 hours to see if it’s translucent. If any hard parts of the shell remain, leave it in vinegar for another day.Notice the difference in the size of the eggs in the photo above when the eggs were first put in the vinegar compared to the next photo after they had soaked for 48 hours.
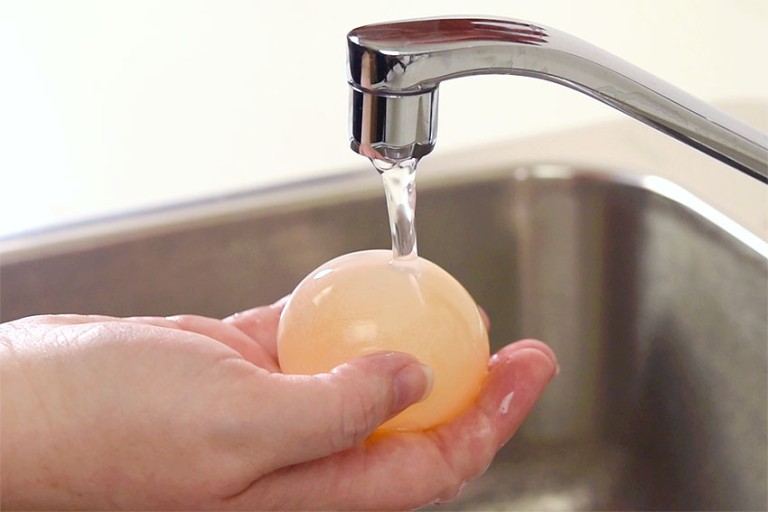
- Remove the egg from the jar. You can pour out the jar over a sink and catch the egg in your hand, or you can tip the jar and take it out with a spoon.
- Rinse the egg to remove the remains of the shell. Dry the egg with a paper towel and let it sit for a few minutes to dry.
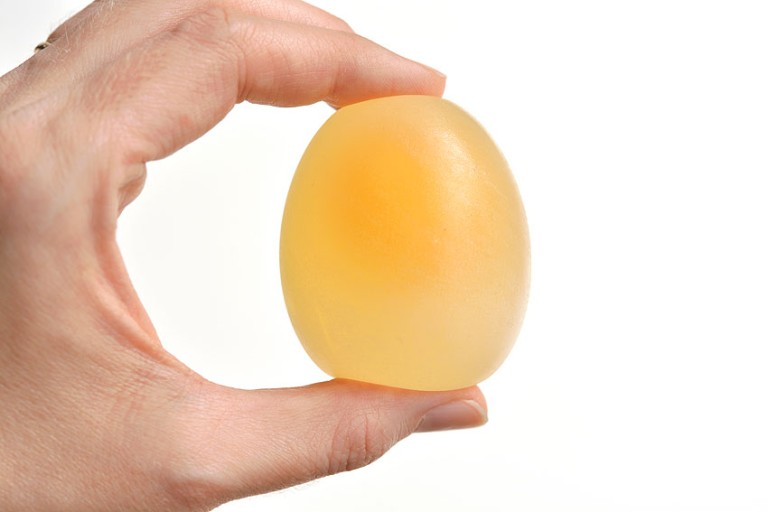
- Your rubber egg is complete!
- Bounce and squeeze your egg. (Gently!)
- Use a blacklight/UV flashlight to see the highlighter glowing egg.

Helpful Tip:

The rubber egg is such a classic science experiment! This STEM hands on learning activity is a must try because of how easy it is to set up.
Bounce and squeeze your naked egg, shine a light through it to see the yolk, and even make a coloured or glowing egg!

Here’s even more science experiments:


Our book Low-Mess Crafts for Kids is loaded with 72 fun and simple craft ideas for kids! The projects are fun, easy and most importantly low-mess, so the clean up is simple!

Where to buy:
You can purchase Low-Mess Crafts for Kids from Amazon, or wherever books are sold:
Amazon | Barnes and Noble | Books- A- Million | Indiebound | Indigo | Amazon Canada


Leave a Reply