This salt dough recipe is SO EASY to make and it works perfectly every time! It’s soft and easy to roll, and you can make it with only 3 ingredients! Combine flour, salt, and water into a dough that hardens perfectly in the oven.
Salt dough is really fun to work with, and you can use it to make all kinds of ornaments and keepsakes! It’s also a great recipe for kids to help with measuring and mixing – they may even be able to make it themselves!

This post contains affiliate links. If you use these links to buy something we may earn a small commission which helps us run this website.
How to Make Salt Dough
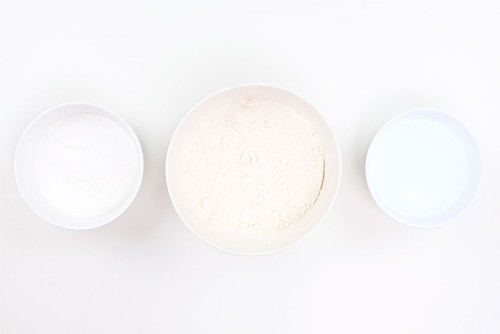
Materials:
- 1 cup All-purpose flour
- 1/2 cup Salt
- 1/2 cup Warm water
Equipment:
- Rolling pin (optional)
- Cookie cutter(s) (optional)
- Drinking straw (optional)
Watch the step-by-step video tutorial:
Instructions:
Step 1: Find what you need
- Gather your materials!

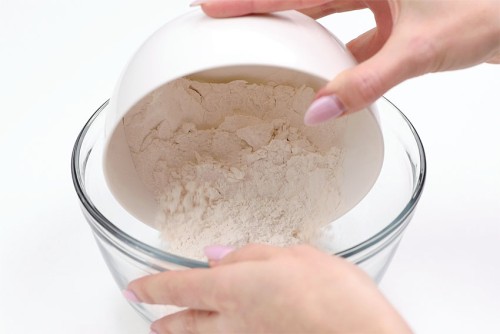
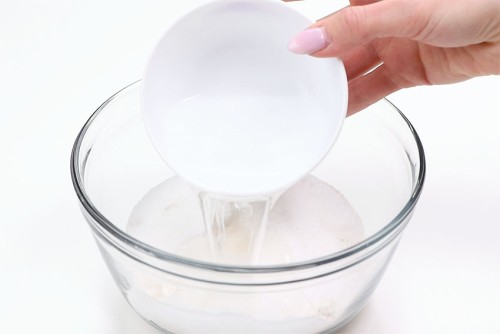
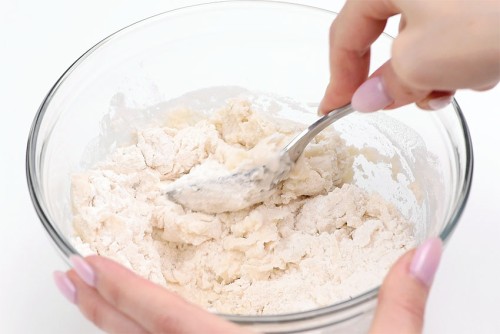
Step 2: Mix the salt dough
- Add 1 cup flour and 1/2 cup salt into a bowl.
- Microwave 1/2 cup water until warm (around 45 seconds), then pour it into the flour and salt.
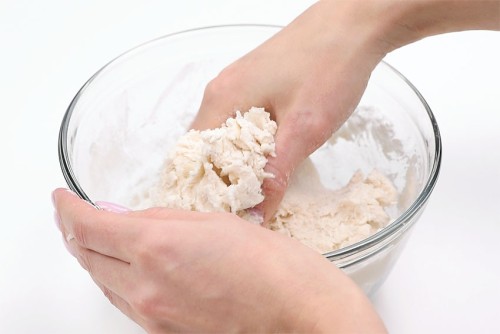
- Mix the dough with a spoon until it becomes hard to stir.
- Then squeeze the dough with your hands until all the ingredients are combined.
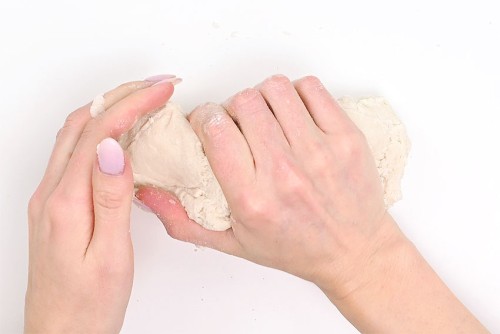
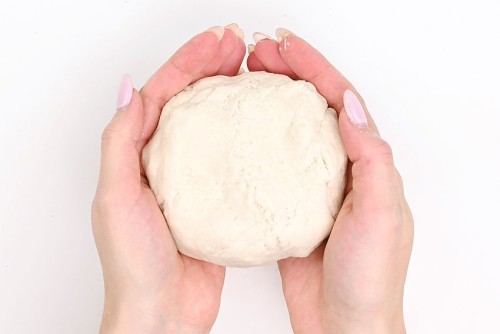
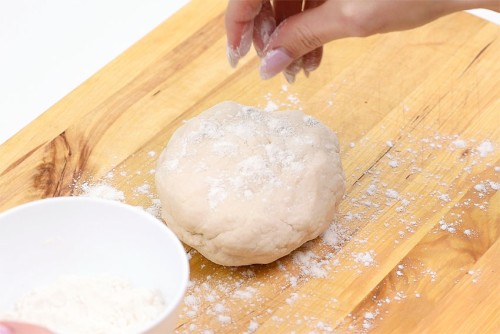
- Knead the dough with your hands on a flat surface until you have a nice, soft dough ball.
- Your salt dough is ready to work with! You can mold it into little sculptures, make handprint keepsakes with it, or roll it out into shapes to make ornaments.
Step 3: Roll out the salt dough
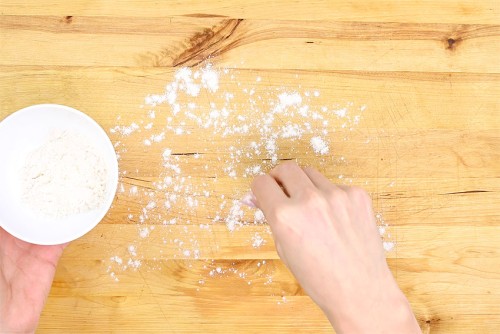
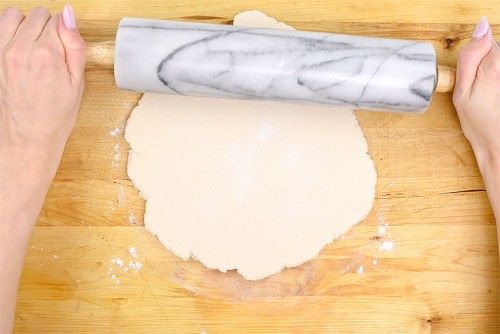
- If you’re planning to roll out your salt dough, sprinkle a bit of flour onto your counter or cutting board.
- Place the ball of dough on the flour and sprinkle a bit more flour on top.
- Use a rolling pin to roll out the dough to around 1/4 inch thick.
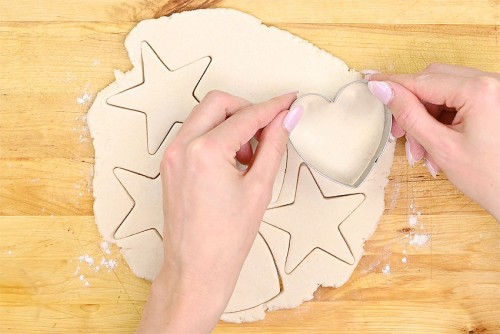
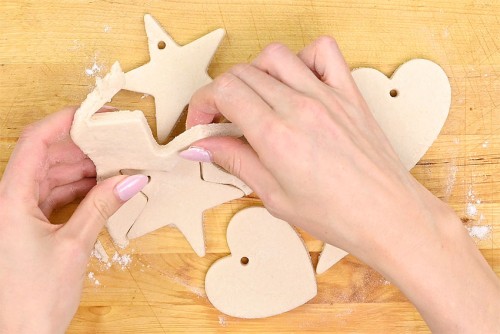
- Cut out shapes with cookie cutters, or form your own creations.
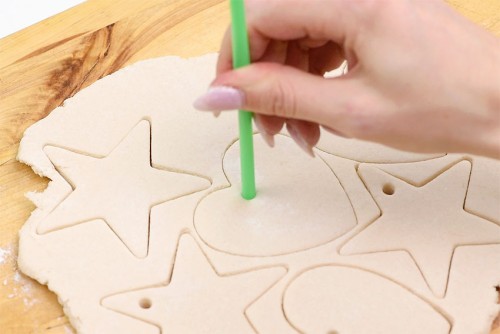
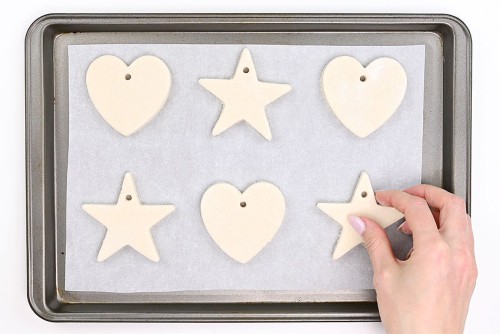
- For ornaments, use a drinking straw to create a hole for a hanger.
- Remove the scrap from in between and, if there’s enough, roll it out again to make another ornament or two.
Step 4: Bake the salt dough
- Bake the salt dough at 225F for 4 – 6 hours, or until it’s completely dried out and hard.Be sure to flip the salt dough half way through to ensure both sides are dry.Larger or thicker creations may need to dry longer.
Step 5: Finish off your ornaments (optional)
- To finish off your ornament, cut a length of twine or ribbon and loop it through the hole, tying a knot.
- Tie another piece of twine around the first piece, closer to the ornament, and tie it into a bow.
- Your salt dough ornament is complete!


TIPS:
- If your dough is too sticky: add some extra flour, 1 teaspoon at a time.If your dough is too dry and crumbly: add water 1 teaspoon at a time.

How many ornaments does this recipe make?
This will depend on how thick your creations are – but we were able to make 12 ornaments (about 3 inch in size) with the dough rolled out to 1/4 inch thick.
You can probably make 2 or 3 handprint keepsakes that are about 1/2 inch thick with this recipe.
This recipe makes about 2 cups of salt dough. Feel free to cut the recipe in half to make a smaller batch.
Can you let salt dough air dry?
Yes, you can let salt dough air dry – but it can take a long time for the salt dough creations to dry. An ornament can take from 3 days to a whole week to completely air dry, depending on how thick it is. It’s much quicker to dry them in the oven.

Can I make the salt dough ahead of time?
Yes, you can definitely make the salt dough the day before – or even a few days ahead of time. Simply wrap the dough tightly in plastic wrap and store it in the fridge. Then bring the dough to room temperature before working with it!
How long does the salt dough last?
This salt dough should last for about 1 week if stored in the fridge. It will dry out slightly in the fridge so try not to make it too far in advance.

How can I colour my salt dough?
For a colourful dough, you can add food colouring or liquid watercolour paint to the water before mixing. See our Salt Dough Monster Pets for more on that – it’s easy to make the dough brightly coloured!
You can also paint your salt dough creations with acrylic paint after they are fully dry.
Should I seal my salt dough creations?
Your salt dough creations should last several years if they aren’t sealed. Probably even longer.
If you want your salt dough creations to last for decades (yup, decades!), we suggest sealing them with Mod Podge or a spray sealer. Just make sure your ornaments are completely dry before painting and sealing them.
Paint will also seal the salt dough to some degree. Add at least 2 coats of paint to both the front and back of your ornaments before decorating them. Adding a layer of Mod Podge after painting will help keep the moisture out and make them last for years!

Making salt dough is such a fun indoor activity! It’s a classic dough that makes great handprint or paw print ornaments. And don’t forget to write the year on the back, or mark it in with a toothpick before baking!

Here’s even more salt dough craft ideas:

Paw Print Salt Dough Ornaments


Our book Low-Mess Crafts for Kids is loaded with 72 fun and simple craft ideas for kids! The projects are fun, easy and most importantly low-mess, so the clean up is simple!

Where to buy:
You can purchase Low-Mess Crafts for Kids from Amazon, or wherever books are sold:
Amazon | Barnes and Noble | Books- A- Million | Indiebound | Indigo | Amazon Canada


Leave a Reply