Have fun making your own DIY American flag rhinestone patch. This bedazzled patch is a perfect way to accessorize for the 4th of July, and it’s really easy to make!
Show your patriotism with this blinged out rhinestone flag patch. Rhinestone crafts are a lot of fun to make, and you can attach this DIY patch to a denim jacket, backpack, tote bag, or hat!

This post contains affiliate links. If you use these links to buy something we may earn a small commission which helps us run this website.
How to Make an American Flag Rhinestone Patch
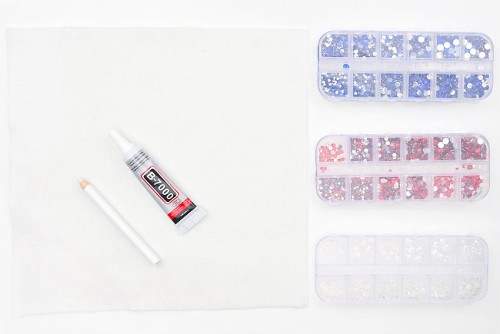
Materials:
- White felt
- Rhinestone glue (see recommendations below)
- Red rhinestones
- Clear rhinestones (or white)
- Blue rhinestones
Equipment:
Check Out The Video Tutorial:
Instructions:
Step 1: Find what you need
- Gather your supplies and materials.

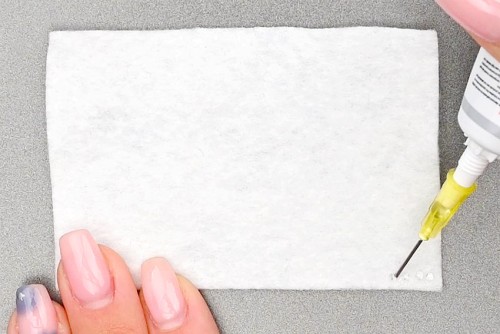
Step 2: Cut a piece of felt
- Cut a rectangular piece of felt (or fabric) for the base of your patch.Ours is roughly 3-3/8 inches across by 2-1/4 inches tall.

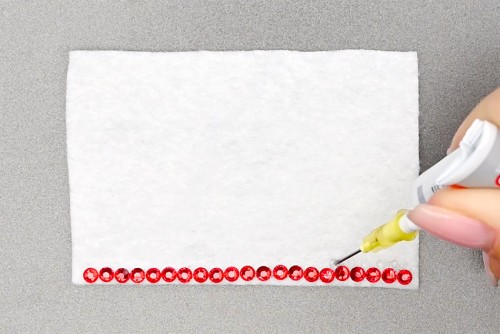
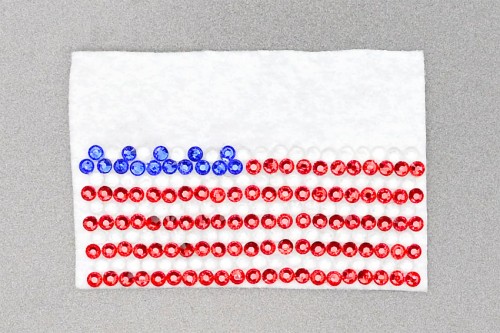
Step 3: Add the first row of red rhinestones
- Begin by placing small dots of glue along the bottom of your fabric, 1 dot for each rhinestone. You can do the whole row at once, or do just a few at a time.For this rhinestone pattern we find it best to start with the bottom row, since it's made up of one color all the way across.
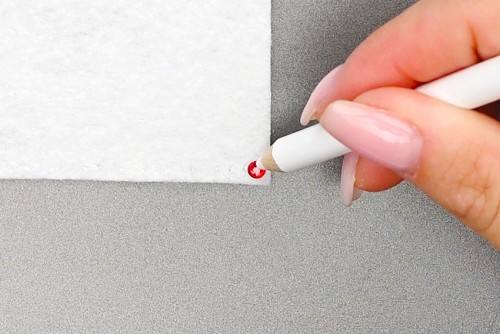
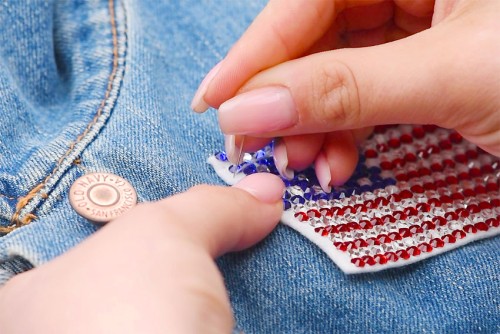
- Use your wax pencil to pick up a red rhinestone and place it on your first dot of glue at the bottom right.If you're going to sew your patch onto your jacket, place the rhinestone a millimeter away from each edge.
- Continue adding red rhinestones into the line of glue, until you reach the other side. Try to keep the line as straight as possible.We added 21 red rhinestones into this first row.
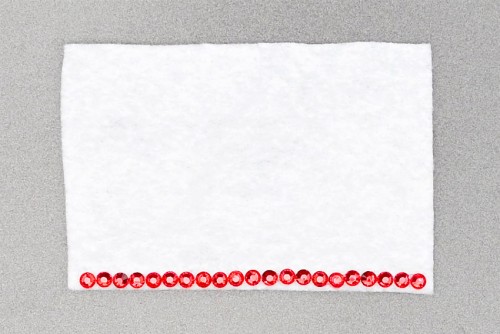
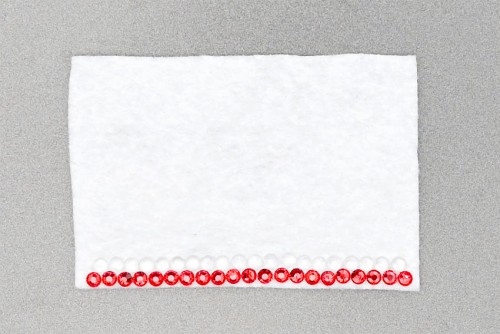
Step 4: Add a row of clear rhinestones
- Add glue for your next row of rhinestones.For this row, place the glue dots above and between the rhinestones from the first row, so that the rhinestones will be staggered.
- Place your clear rhinestones into the glue, working your way across the row. Nestle the rhinestones in as close as you can.We used 20 clear rhinestones for this row.
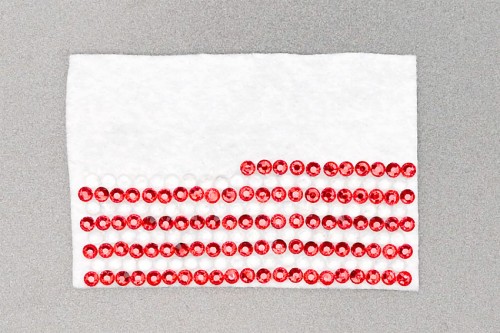
Step 5: Add more rhinestones to form the flag
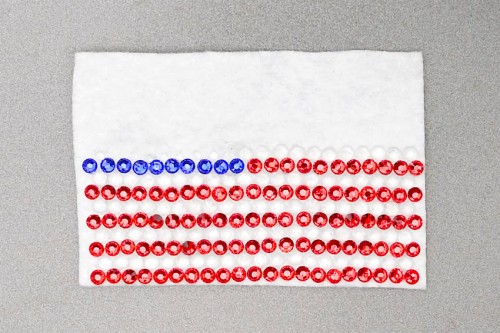
- Repeat Steps 2 and 3 until you're roughly half way up the patch. (We did 4 rows of each color.)Remember to stagger the rows, with the rows of red rhinestones closer to the edge.Then add another half row of 11 red rhinestones to the right side.

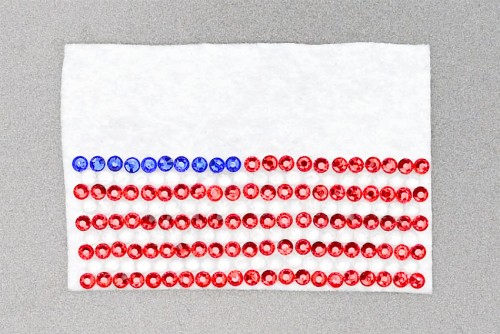
- Finish the row using 10 blue rhinestones.
- Make a half row of 11 clear rhinestones above the red.
- Then, for the second half of the row, alternate between blue and clear stones.The white stones here represent the stars on the flag. Make sure you start and end each half row of this section with a blue rhinestone.
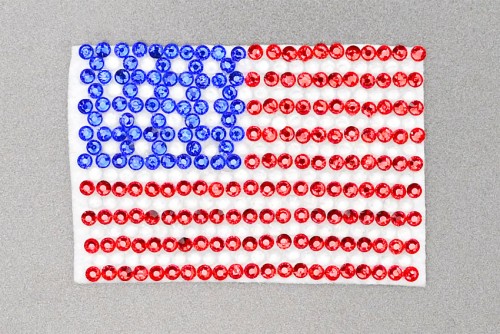
- Repeat, alternating between the half rows.When you use red rhinestones for the first half, end with a full half row of blue. When you do a clear half line, alternate between blue and clear for the other half.Make 17 rows total, ending on a solid red and blue row.Then allow to dry for about 24 hours. The exact time needed will depend on the glue you're using.
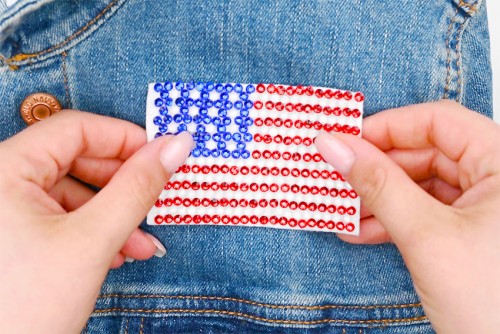
Step 6: Sew the rhinestone patch to a jacket (optional)
- To sew your flag patch onto a jacket or other item, follow the instructions below. You can also use fabric glue.Or, if you'd like to iron your patch on, keep reading below the tutorial for instructions.Start by placing your patch where you'd like it to sit on your jacket or other clothing item.
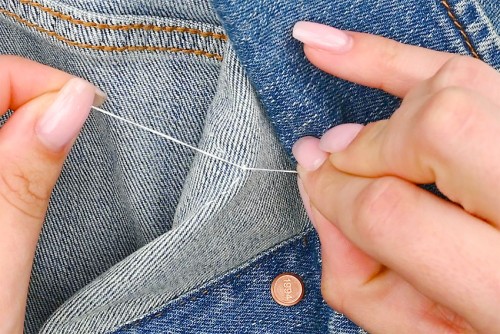
- Sew around the outside of the patch using a running stitch.
- Once you've sewn all the way around the patch, tie off the thread in a double knot on the inside of the jacket. Cut off the excess thread.
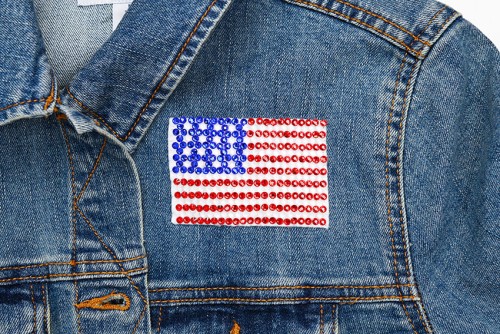
- Your American flag rhinestone patch is complete!
Helpful Tips:
- A small dot of glue is enough to attach each rhinestone! If you use too much glue it’ll ooze out between the rhinestones, making the fabric stiff and affecting the look of the stones.
- These rhinestone patches work best on non-stretchy fabric, like denim or canvas.
- A pair of craft tweezers can make it easy to adjust the rhinestones as needed.

Can I make an iron-on rhinestone patch?
Yes, you can iron your patch onto a jacket using fuse tape or fusible interfacing, like Stitch Witchery or no-sew Heat ‘n Bond.
We used fuse tape for one of our patches, and found it easiest to pin the patch in place and then iron from the back. This ensures that the heat evenly fuses the patch and clothing together.
Or you can buy a blank iron-on patch and attach your rhinestones to it.
What type of rhinestones are best for making an American flag rhinestone patch?
We used ss12 flat-back rhinestones. The ss12 refers to the size of the rhinestone (3mm). You can also make your patch a little bit bigger and use ss16 rhinestones (4mm).
Flat back rhinestones are accessible and easy to secure in place with glue. This also allows you a little leeway to re-position the rhinestone before the glue dries.
You can also make rhinestone patches using hot-fix rhinestones. These rhinestones come with adhesive on the back and are fused to the fabric with heat, using a special tool. These rhinestones are more difficult to use, because you can’t adjust the placement of the rhinestone afterwards.

What type of glue is best for making DIY rhinestone patches?
There are several glues that are great for attaching rhinestones to fabric. Each of these options would work well, so you can use whichever is the most accessible. Some rhinestone kits will even come with a tube of glue.
- B7000: This self-leveling adhesive came with our rhinestones. It’s strong, flexible, and stays clear. Plus it’s very nice to work with because the tube has a small tip.
- E6000: A great all-purpose craft glue that creates a permanent bond on a variety of surfaces. This adhesive is waterproof, tough, and flexible.
- Gem-Tac: This water-based glue is made specifically for rhinestones and gems. It’s flexible and it dries fast and clear.
- Liquid Fusion: A very strong glue, made by the same company that makes tacky glue (another of our favorites). This glue is UV resistant, low odor, and creates a very strong bond.

What tool is best for placing rhinestones on a rhinestone patch?
We used a wax tip pencil that came with our rhinestone kit. You may also see it referred to as a wax pencil or wax picker. You can also buy a metal tool called a rhinestone picker (aka jewel picker or rhinestone applicator pen).
Both of these tools pick up the stones easily, and then release them smoothly onto the glue. They’re great for placing and positioning rhinestones perfectly onto a detailed design.
Don’t want to buy a special tool? Make a small pool of hot glue and dip the end of a wooden skewer into it. Shape the glue as it cools and then use this to pick up your rhinestones.
And if you’re using hot-fix rhinestones you won’t need glue, but you’ll need a hot-fix applicator/setter.

Celebrate Memorial Day or Independence Day by making these DIY American flag rhinestone patches. This bedazzled patch sparkles just like fireworks on the 4th of July, and it’s so much fun to make!
Attaching each individual rhinestone can be a bit tedious, but rhinestoning is also really satisfying – the perfect way to occupy your mind. Plus the end result is so worth it!

Here’s even more American flag craft ideas:
4th of July Mason Jar Lanterns


Our book Low-Mess Crafts for Kids is loaded with 72 fun and simple craft ideas for kids! The projects are fun, easy and most importantly low-mess, so the clean up is simple!

Where to buy:
You can purchase Low-Mess Crafts for Kids from Amazon, or wherever books are sold:
Amazon | Barnes and Noble | Books-A-Million | Indiebound | Amazon Canada

Let us know what you think: