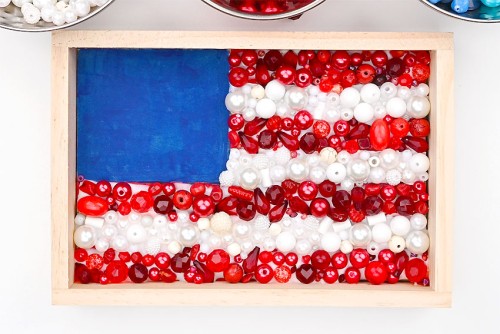
This American flag bead art is SO PRETTY! Use red, white, and blue beads to make this simple – but beautiful – patriotic craft that’s fun for both kids and adults.
Glue beads into a wooden frame to make this bead art for Memorial Day or Independence Day. This 4th of July craft is so easy to make, and it looks so cute on display, you’ll want to keep it out all year-round!

This post contains affiliate links. If you use these links to buy something we may earn a small commission which helps us run this website.
How to Make American Flag Bead Art
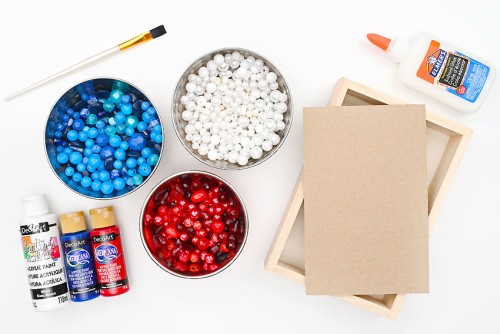
Materials:
- Acrylic paint (red, white, and blue)
- Wood shadow box frame
- White glue
- Red, white, and blue beads (assorted sizes)
- Silver star beads
Equipment:
Check Out The Video Tutorial:
Instructions:
Step 1: Find what you need
- Gather your supplies and materials.

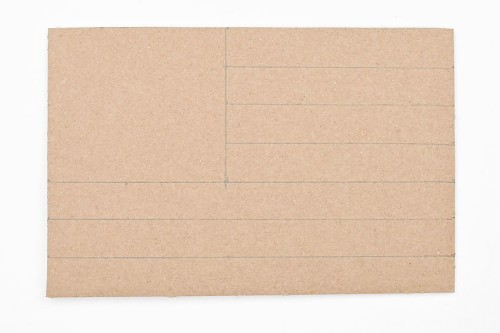
Step 2: Add a cardboard base to your frame
- Cut a piece of cardboard that will fit in your frame. (Ours is 6 x 9 inches.)Then use a pencil to draw an American flag shape. Draw a rectangle in the top left corner for the stars, and then divide the rest of the cardboard into 7 horizontal stripes.You can add more, or fewer, stripes, but try to do an uneven number so your flag can have red on the top and bottom.

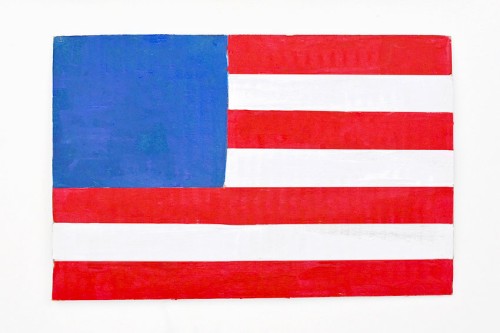
- Paint the cardboard base in the colors of the flag.Add blue paint in the rectangle, and alternate between red and white stripes, starting with red at the top.Allow to dry.
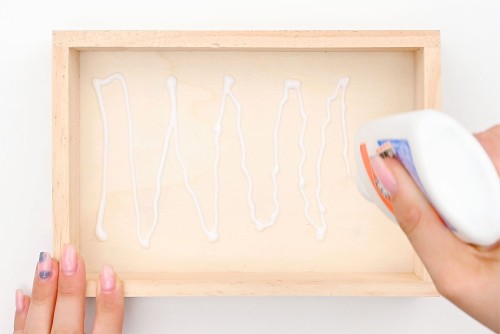
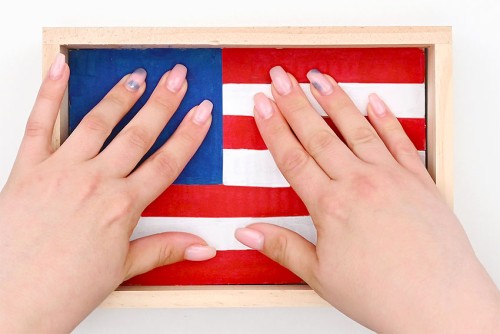
- Add lines of glue to the inside of your frame.
- Set the cardboard flag template into the frame.Push it down, making sure it's nice and flat and secure in the bottom.
Step 3: Glue beads to the stripes
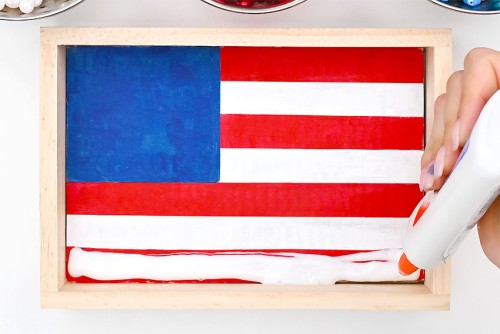
- Add a generous amount to glue to the first red stripe. Use a paintbrush to spread the glue evenly, if you'd like.You can start either at the top or the bottom.
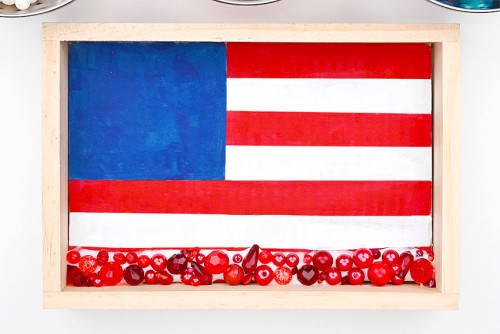
- Place red beads into a single layer on the glue covered red stripe.Play around with different sizes and shapes of beads, covering as much of the stripe as you can. We found it easiest to add larger beads randomly across the stripe and then fill in the rest with smaller beads.
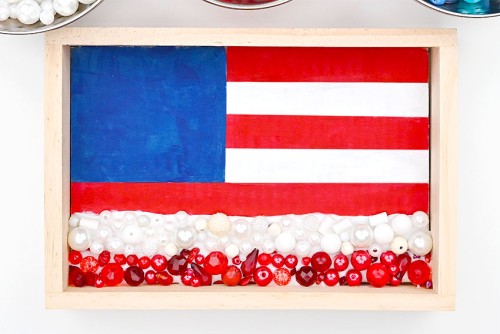
- Add glue to the next stripe (a white one), and add white beads to cover the stripe.
- Repeat until all the stripes are covered in beads.Press down on the beads, pushing them into the glue as much as possible to help them adhere.
Step 4: Glue beads and stars to the flag
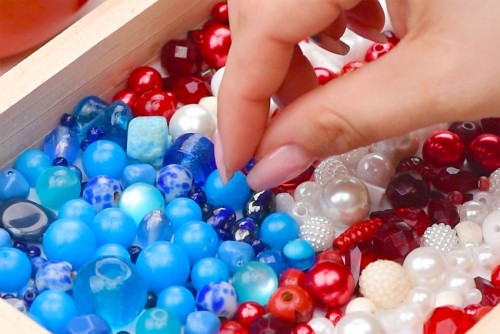
- Add glue to the blue section of the flag, and add blue beads in mostly the same way as you did for the stripes.With this section, try to imagine where you're going to add your star beads so there are flat areas for them to sit on.
- Look over the flag as a whole and see if there are any gaps or spaces visible.Add smaller seed beads to fill any gaps you find. If the glue is already drying you can use a toothpick to add more, either in the space or onto the bead itself.
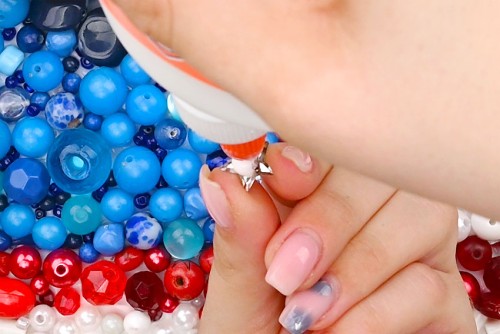
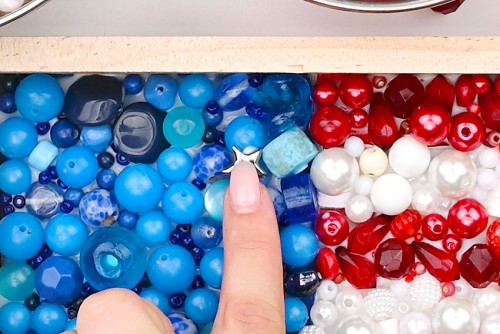
- Add glue to the back of a star bead.If you don't have star shaped beads you can also use rhinestones, star shaped paper fasteners, or star shaped thumb tacks.
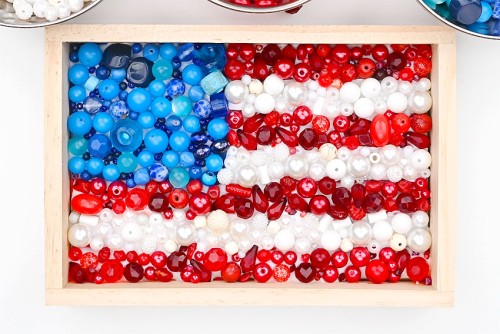
- Set your star beads into place on top of the blue beads. Arrange the stars in whichever pattern you'd like.
- Let your bead art sit overnight to dry.
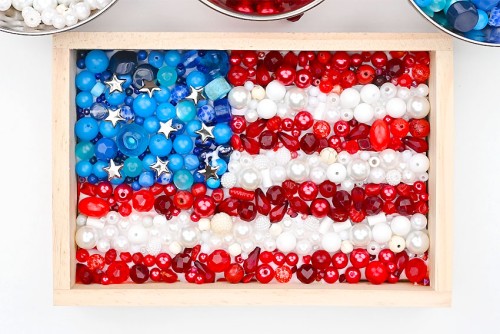
- Your American flag bead art is complete!
Helpful Tips:
- Using cardboard is optional, but it will add a bit of height in the frame, making it easier to see the beads.
- Use tweezers to place small beads into areas your fingers can’t reach.

What type of beads are best for making this American flag bead art?
What makes this project special is that you don’t need a specific type of bead to make it look great. We love the huge variety of beads we got to use for this bead art!
To make this 4th of July craft, grab a bunch of beads in different sizes, shapes, and textures. The only specific beads we recommend using are seed beads. These tiny beads are perfect for filling in little gaps between the larger beads.

Where can I buy beads for making patriotic bead crafts?
You can buy a large selection of beads at the craft store or online. But it can get expensive to get a huge variety of bead styles in the right colors.
We recommend looking at thrift stores, or even checking out local garage/yard sales and auctions. We used a combination of beads from our craft stash and beads from thrifted costume jewelry.
You can also check the dollar store for bead kits and inexpensive jewelry to take apart.

What type of frame do you need for making American flag bead art?
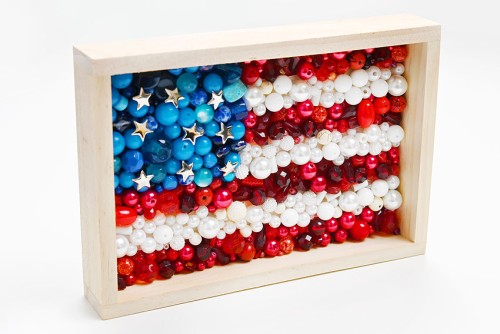
You need a wood shadow box or wood tray with at least a 1/2 inch lip for the beads to fit in.
We used a wood panel board to make our bead art. They’re meant to be painted or decorated on the other side, but we glued the beads into the “wrong” side. A picture frame would also work well if you can find one with a lip.
What’s the best glue for making bead art?
To make this bead craft you need a glue that will dry clear. We used white school glue, but tacky glue would also work really well.
For a more advanced craft, you can encase the beads in resin, or simply use resin as the base glue.

Show your American pride with this American flag bead art. It’s so easy to make and this bead craft makes such a cool display piece! Gather up all different sizes and shapes of beads to make this textured art in the shape of the flag.

Here’s even more 4th of July craft ideas:
4th of July Mason Jar Lanterns


Our book Low-Mess Crafts for Kids is loaded with 72 fun and simple craft ideas for kids! The projects are fun, easy and most importantly low-mess, so the clean up is simple!

Where to buy:
You can purchase Low-Mess Crafts for Kids from Amazon, or wherever books are sold:
Amazon | Barnes and Noble | Books-A-Million | Indiebound | Amazon Canada

Let us know what you think: