This resin keychain is SO PRETTY and it’s really fun to make. Create a personalized initial keychain with epoxy resin and decorate it with your favourite colours of pressed flowers — it’s really easy!
Follow our step by step photo and video tutorials to make this easy resin project for beginners, and be sure to read all our helpful tips and tricks. These resin key chains are a great way to express yourself, and they also make an awesome homemade gift!

This post contains affiliate links. If you use these links to buy something we may earn a small commission which helps us run this website.
How to Make a Resin Keychain
Materials:
- Pressed flowers
- Casting resin
- Keychain findings (key ring, chain, jump ring)
- Eye pins
Equipment:
- Popsicle stick (or silicone stir stick)
- Hand drill (or electric drill with small bit)
Watch the step-by-step video tutorial:
Instructions:
Step 1: Find what you need
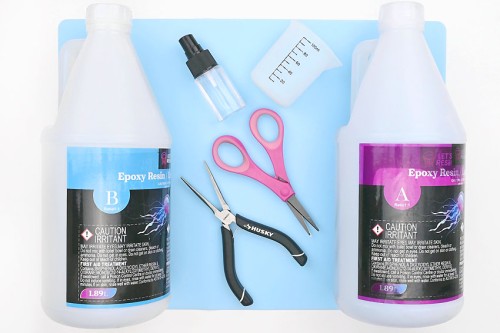
- Gather your supplies and materials.First, you’ll need your basic resin supplies.
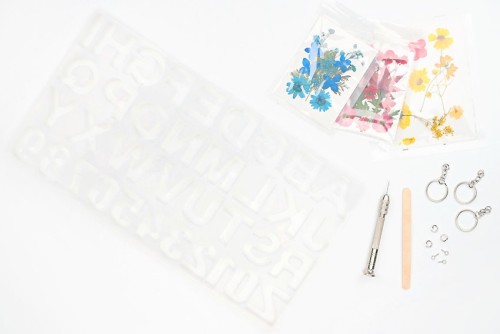
- You’ll also need a silicone mold, pressed flowers, and keychain hardware.Find links to all these items in the materials and equipment lists above.
Step 2: Cut the pressed flowers
- Cut the pressed flowers small enough so they’ll fit inside your letter mold.
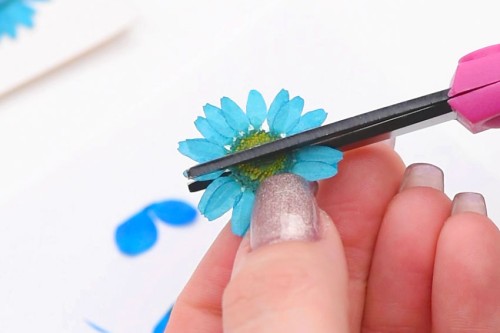
- Repeat until you have a variety of sizes and types of flowers.

Step 3: Mix the resin
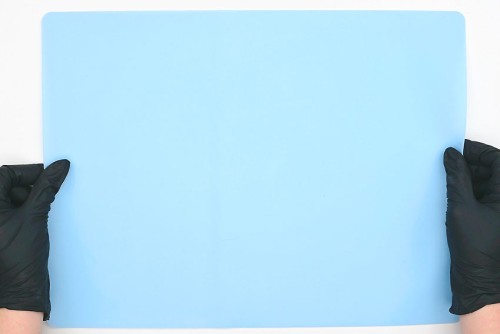
- Before working with resin, protect your working surface with a silicone mat, and be sure to wear protective nitrile gloves and eye protection.You may also need to wear a respirator, depending on the resin. Check your resin label for the safety requirements.
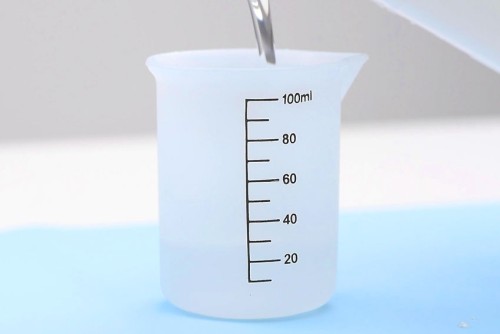
- Mix the amount of resin needed for the number of keychains you’d like to make. We made 6 keychains (3 were off camera) so we mixed 40 ml of resin total. You’ll need to adjust the resin amount depending on the size of your molds.Start by adding 1 part of Part A to the silicone measuring cup. The amount of Part A should be half the total amount needed. (In our case, 20 ml.)Follow your specific resin’s instructions for ratios, drying times, and curing times.
- Add an equal amount of Part B to the measuring cup, or whatever ratio your brand of resin suggests. (In our case, 20 ml.)
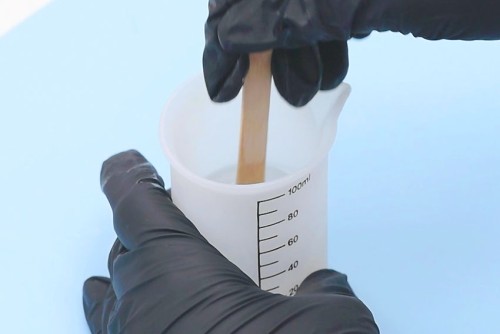
- Mix the resin and hardener together with a popsicle stick or a reusable resin stir stick.Stir slowly, scraping down the sides and bottom of the measuring cup. Continue mixing for 3 minutes or until the mixture is clear.
Step 4: Pour the resin keychains
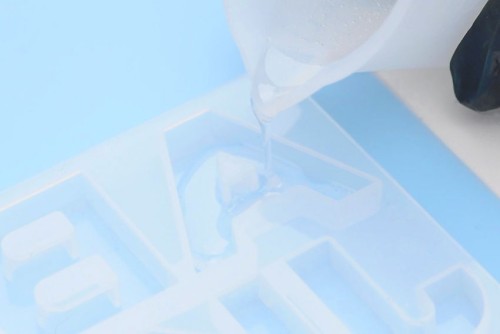
- Pour resin into the silicone mold, filling it about 1/3 of the way.This first layer of resin helps to prevent air bubbles from forming between the flowers and the mold.If there are any surface bubbles, spritz the top of the resin with rubbing alcohol or use a heat gun.
- Add a pressed flower into the resin, face down, pushing it down below the surface.To do this you can use tweezers, or you can wet a popsicle stick with resin to pick it up.
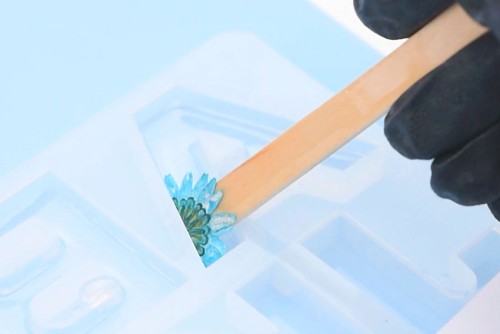
- Continue, layering flowers into the mold, pushing them into the resin until you’re happy with the look.
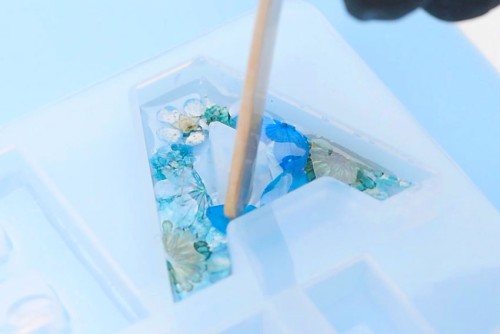
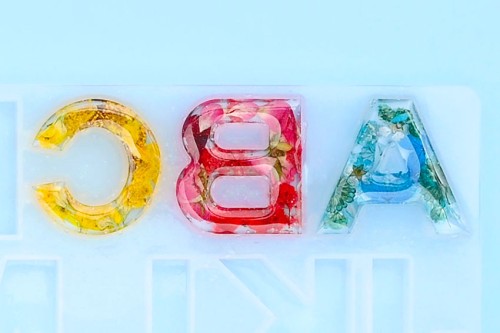
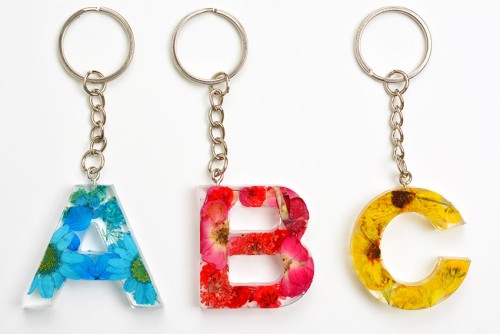
- Repeat with other letters of keychains you’d like to make.We made “A”, “B”, and “C” here in different colours.

- Now pour more resin in until the molds are full and the pressed flowers are completely covered.

- Repeat with the other letters and let the resin sit, untouched, for the recommended dry (or demold) time.Our resin’s dry time is 12 – 18 hours, but we recommend waiting close to 24 hours so that the keychains are hard enough to handle without warping.
Step 5: Demold and attach the keychain
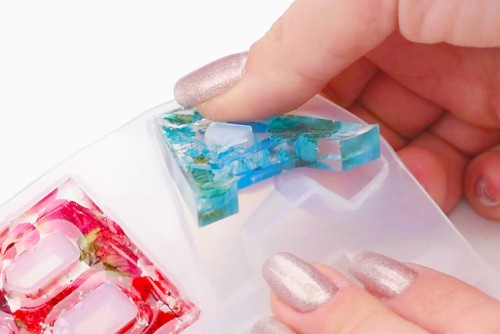
- Once your resin letter is dry you can demold it.Push from the bottom of the mold and stretch it a bit as you pull the letter out.
- Use a mini hand drill to drill a hole in the top of the keychain, wherever you’d like the keychain to attach.Make sure you use a drill bit that matches the size of your eye pin. Our letter molds came with the hand drill we used.
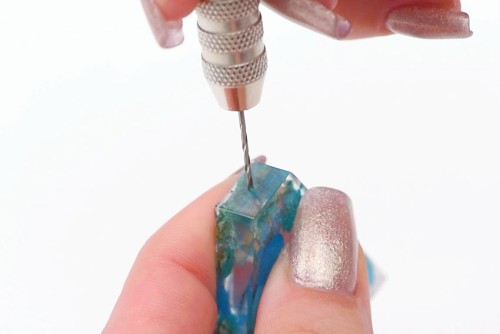
- Screw an eye pin into the hole. Use pliers to tighten the pin once it becomes too difficult to turn.
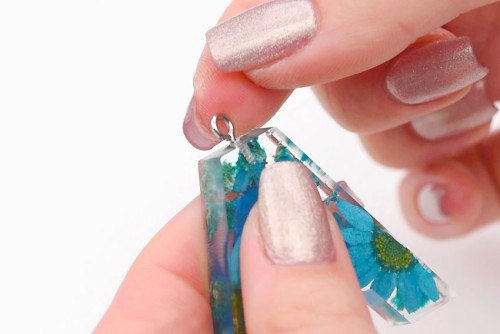
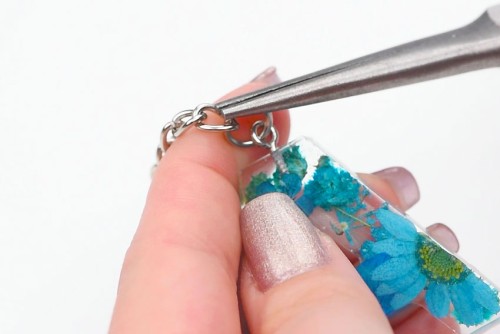
- Use pliers to open a jump ring and attach it to the eye pin. Then attach the end of the chain to the jump ring.

- Close the jump ring with your pliers.
- Your resin keychain is complete!Once your resin keychain has completely cured (72 hours for our resin) you can sand any rough areas off the back.
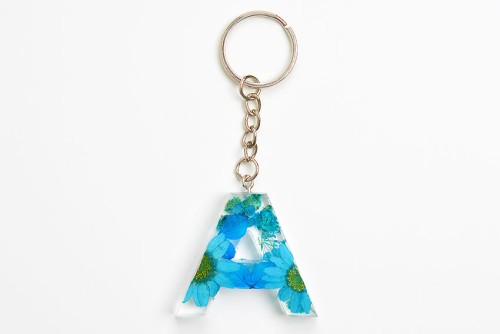
- Repeat, adding keychain findings to the rest of your resin keychains.Enjoy making one in every letter and colour combination you’d like!
Helpful Tips:
- Do your resin pours in a well ventilated area and protect your work area. Make sure that you also wear basic PPE: nitrile gloves, eye protection, and long sleeves. Some resin also requires wearing a respirator.
- To keep your keychains free of dust particles, wipe the mold with rubbing alcohol and a lint free cloth before pouring resin into it.
- Once you use a silicone mold for resin it’s no longer food safe. Be sure to only use this mold for resin and non-food products.

How much resin is needed per resin keychain?
We mixed 40 ml of resin and were able to get 6 letter keychains out of it. So you’ll need around 7 ml of resin per keychain, though the amount will vary, since each letter is different (eg. an “I” will require less resin than a “W”).
What type of mold is used to make resin keychains?
Silicone molds are perfect for making resin crafts. We prefer the style of letter mold that has the letters backwards when you look at it. This ensures that the flat “good” side is on the bottom, and the letters will be right side up when demolded.
If you don’t want to make initial keychains you can find small silicone molds in almost any shape imaginable. Hotel key tag molds make really cute keychains, and so do zodiac sign molds.

Where can I get pressed flowers for making a resin keychain?
You can buy pressed flowers on Amazon or Etsy. This makes pressed flower crafts really easy to make, because they come with a variety of flowers in each colour.
But if you’d like to use flowers that you picked yourself, or from a special occasion, it’s really easy to learn how to press flowers.
How can I prevent and get rid of air bubbles in my resin keychain?
You can use a toothpick to remove small bubbles from resin, or spritz the resin with rubbing alcohol to remove surface bubbles. Heat guns or lighters will also remove bubbles from resin.
To prevent bubbles in resin in the first place, mix the resin slowly and carefully. Warm your silicone molds in a 150F oven and be sure to pour your resin in a warm (70 – 75F) room.
For even more tips and tricks, check out our flowers in resin post.

How else can I decorate my resin keychain?
If you don’t have any pressed flowers, or don’t like the look of them, there are so many other options for adding some colour or personality to your resin keychain.
Glitter looks so cool in resin, and it’s awesome to choose what colours and shapes you want to include. Be sure to check out our resin ornament post for how to add glitter to resin.
You can also add colour to your resin with alcohol inks, mica powder, acrylic paint, or food coloring. You can also buy special resin dyes in either liquid or powder form.
Other add-ins you can put in resin include gold or silver flakes, shells, beads, and buttons.

This monogram resin keychain is super cute! It’s lightweight, making it practical to use, and you can use your creativity to add pressed flowers or whatever add-ins you’d like. Make them for yourself, your friends and family, or even make them to sell!


Here’s even more resin craft ideas:

How to Preserve Flowers in Resin


Our book Low-Mess Crafts for Kids is loaded with 72 fun and simple craft ideas for kids! The projects are fun, easy and most importantly low-mess, so the clean up is simple!

Where to buy:
You can purchase Low-Mess Crafts for Kids from Amazon, or wherever books are sold:
Amazon | Barnes and Noble | Books-A-Million | Indiebound | Amazon Canada


Leave a Reply