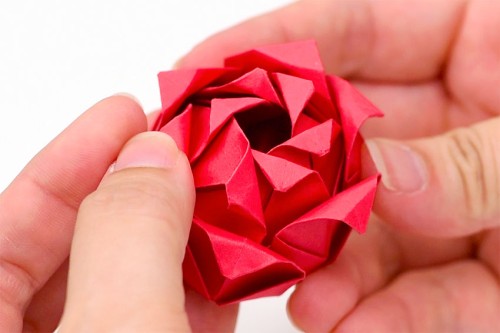
Learning how to make a paper rose is so EASY! These DIY paper roses are soooo pretty, and you can make one in less than 15 minutes.
Transform a regular piece of printer paper into a beautiful folded paper rose. Then make a whole bouquet! These paper flowers also make an impressive homemade gift for someone special, whether for Valentine’s Day, Mother’s Day, a birthday, or a wedding shower!

This post contains affiliate links. If you use these links to buy something we may earn a small commission which helps us run this website.
How to Make a Paper Rose
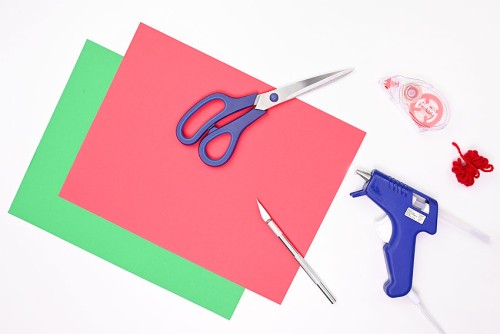
Materials:
- 1 piece Red paper
- 1 piece Green paper
- Red yarn
Equipment:
Watch the step-by-step video tutorial:
Instructions:
Step 1: Find what you need
- Gather your supplies and materials.

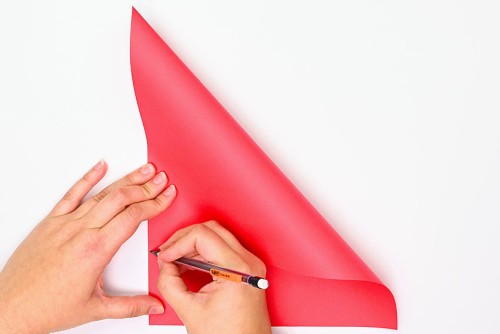
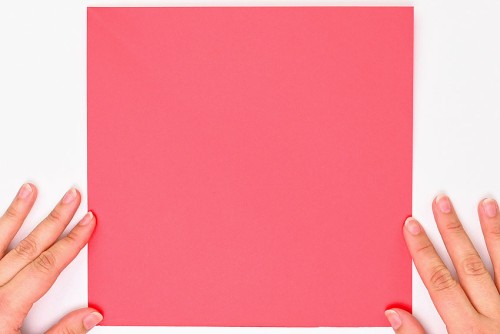
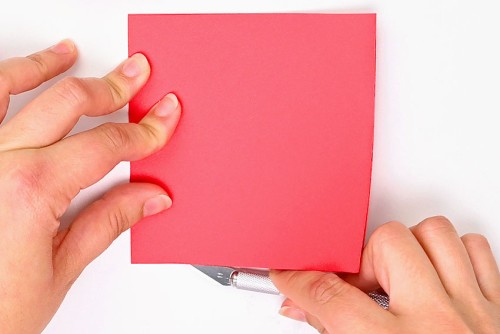
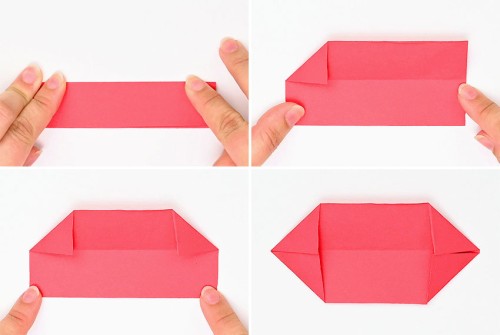
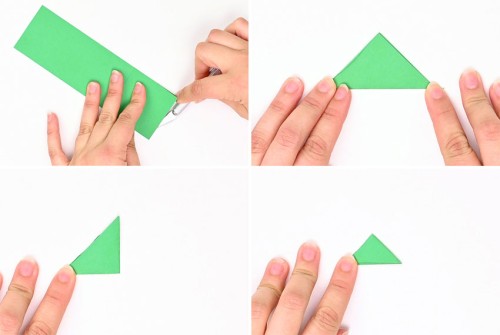
Step 2: Cut the paper to a square
- Fold the top right corner of the red paper down so that the top edge lines up with the left edge, but don’t press the fold down. Mark the point where the right corner meets the left edge.
- Open the paper and fold the bottom of the paper up at the pencil mark. Use a craft knife or scissors to cut off the bottom of the paper at the fold.You should now have an 8.5 inch square piece of paper.
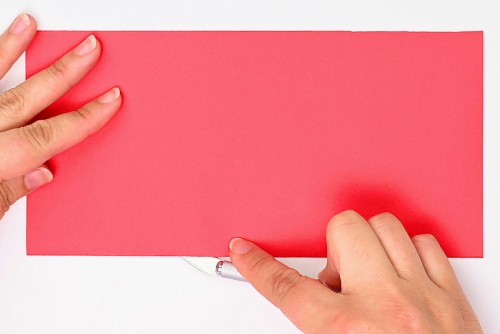
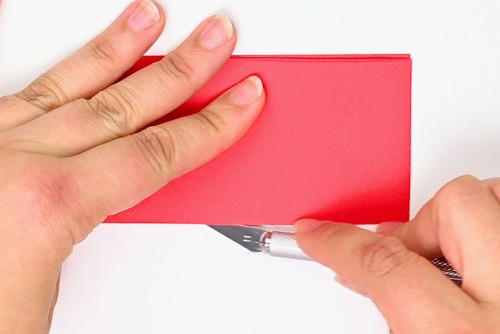
Step 3: Cut 6 rectangles
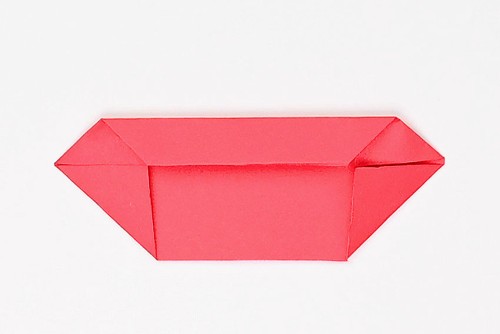
- Fold the square piece of paper in half, from bottom to top, and slice (or cut) the paper at the fold line.
- Fold one of these smaller rectangles in half, from right to left, and slice along the fold mark.
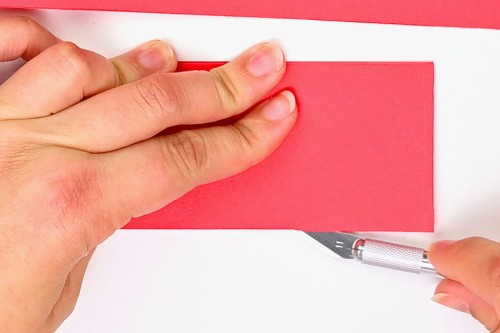
- Fold one of the smaller squares in half again, from bottom to top, and slice in half on the fold mark.
- Repeat with the other square so you end up with 4 rectangular pieces.

- Fold one of the other large rectangles in half and slice, discarding one half.
- Fold and cut the last square so you end up with 6 small, identical rectangles. These will be used to make the rose petals.
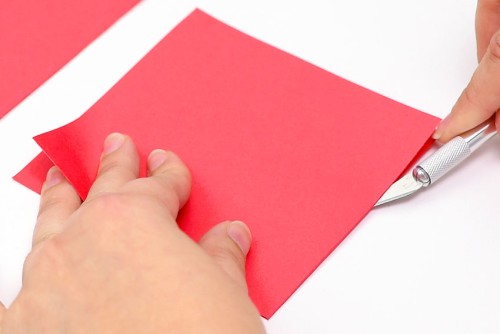

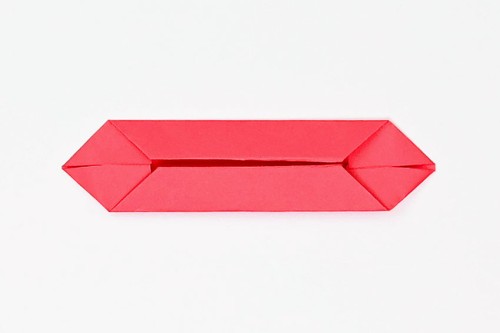
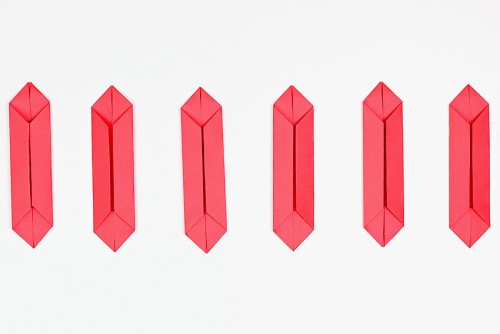
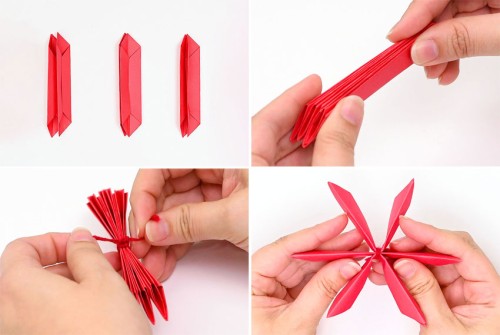
Step 4: Make the rose petals
- Fold one of the red rectangles in half lengthwise, from top to bottom.Open it back up and fold the left corner down and in, so that the left side meets the fold line. Repeat, folding the top right corner down and in to the fold line.Do the same to the bottom corners, folding them up and in to the fold line.

- Fold the top edge of the paper down to the center fold.
- Bring the bottom edge up to the center fold, creasing it in place.
- Repeat all of Step 4 for the next 5 pieces of paper. You should have 6 folded petals.
Step 5: Connect and fold the rose petals
- Fold the petals in half again at the center fold line and then group them into pairs, placing 1 on top of another. Gather the 3 groups together and use a scrap piece of yarn (about 5 inches long) to tie them together in the center.Then bend the outside sections in towards the yarn, creating a flower shape.
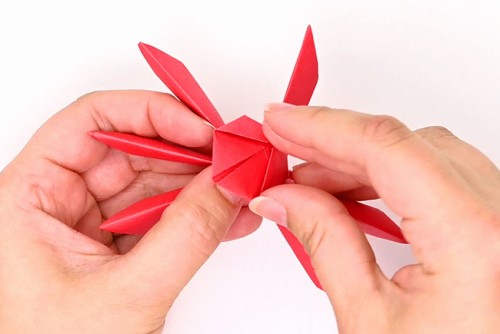
- Grab the top layer of one of the petals and fold it in towards the center.You’ll need to push down on the top of the petal as you bend it up.
- Continue folding the petal up until it points up towards the center of the flower.
- Repeat, folding the next top layer up. Continue working clockwise to fold the rest of the petals up. They will overlap as they’re folded up.
- Fold the bottom layer of the petals up in the same way, forming a rosebud.
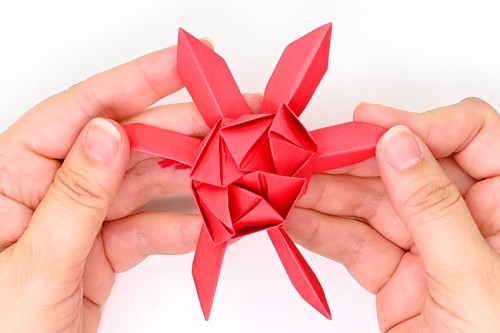
- Bend the top 1/4 inch or so of the petals outwards to give the petals a more natural, curling look.Start with the outside petals and then fold the tips of the inside petals down as well.

Step 6: Make the stem and leaves
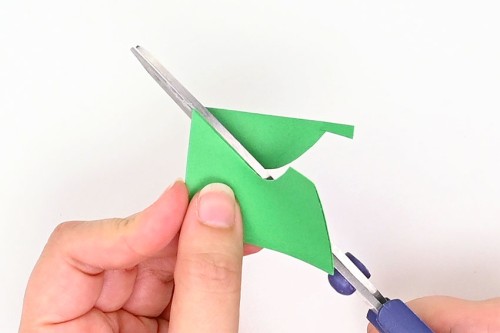
- Cut a 2 inch square piece of green paper. Fold it in half diagonally, from bottom to top, forming a triangle.Fold it in half again, from right to left. Then fold the triangle in half once again, bringing the top corner down to the bottom left.
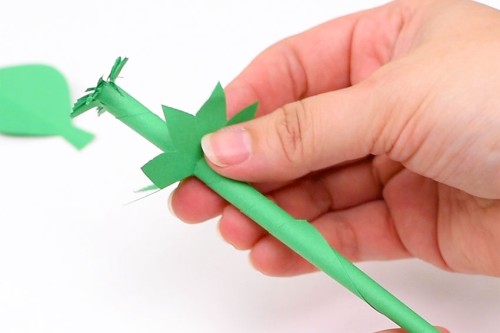
- Cut the tip of the triangle off. While holding the folded edge, turn the paper so that the edge you just cut is at the bottom.Cut up and to the left, creating a leaf shape. Then cut off the tip of the folded edge.Unfold to see the flower shape that will be attached to the bottom of the rose.
- Fold another 2 x 2 inch green piece of paper in half. Cut out a leaf shape with a stem. (You can trace the shape with pencil first, to make it easier.)
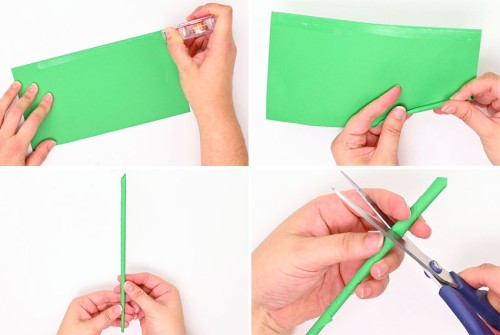
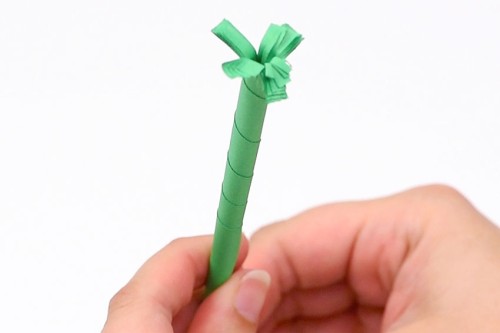
- Take the rest of the green paper (it should be about 11 inches long by 6-1/2 inches tall) and add glue tape to the top of the long edge.Begin rolling the paper up tightly from the bottom right corner. Continue rolling until you’ve connected the glue taped edge and created the rose’s stem. Cut off the top so that the stem is about 6-1/2 inches long.
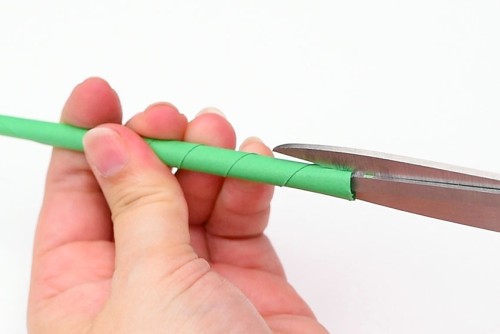
- Slide the scissors inside the top of the stem and cut down about 1/2 inch.
- Repeat 3 more times so there are cuts on each side of the stem, and then press down the cut edges.

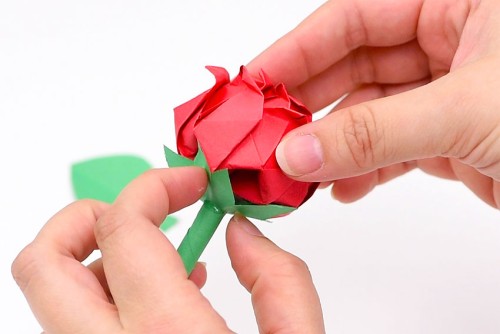
Step 7: Connect all parts of the rose
- Slide the green flower shape on the bottom of the stem and push it up to the top.
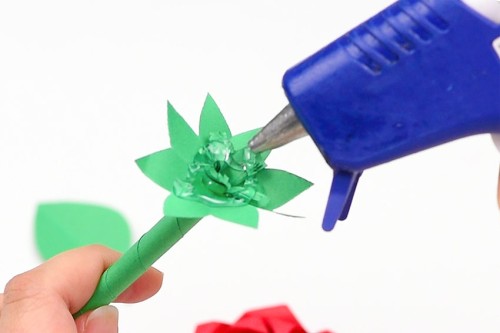
- Add hot glue to the top of the stem.
- Place the bottom of the rose on the hot glue, pressing it down to keep it in place.
- Add hot glue to the stem of the leaf and attach it to the flower stem, about half of the way down.
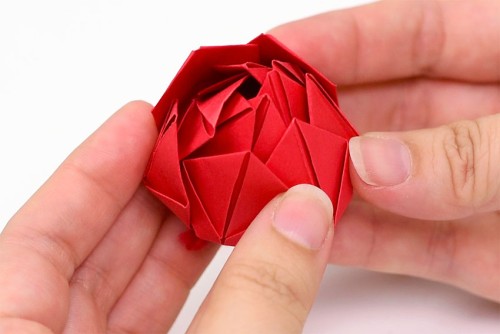
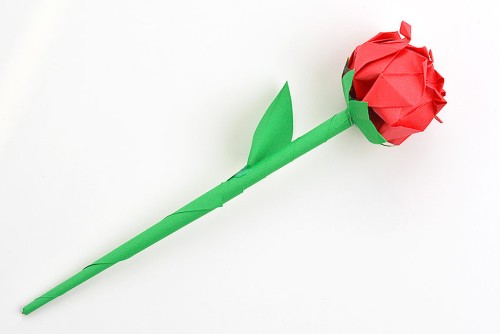
- Your paper rose is complete!

Helpful Tips:
- Start with a square piece of paper or cut a piece of paper to size. You can make flowers in various sizes simply by using different sizes of paper.
- You can also wrap a skewer or wire in floral tape to make the rose’s stem.

What materials do you need for a paper rose?
All you need to make this easy paper rose is a red piece of paper, a green piece of paper, and a bit of red string. Then simply attach the paper with glue and you’re ready to go! We love simple crafts that use minimal supplies!

What’s the best paper to use for making paper roses?
Thinner paper, like regular printer paper or origami paper, works the best, because of all the folds you need to make. Wrapping paper or magazine pages are also good options.
Any size of paper will work well to make a paper rose, as long as you cut it into a square. Try making different colours of roses, or even use two different colours to create one rose. For example, use a brighter pink for the inside of the rose and a pale pink for the outside.

What other simple crafts can you make with paper?
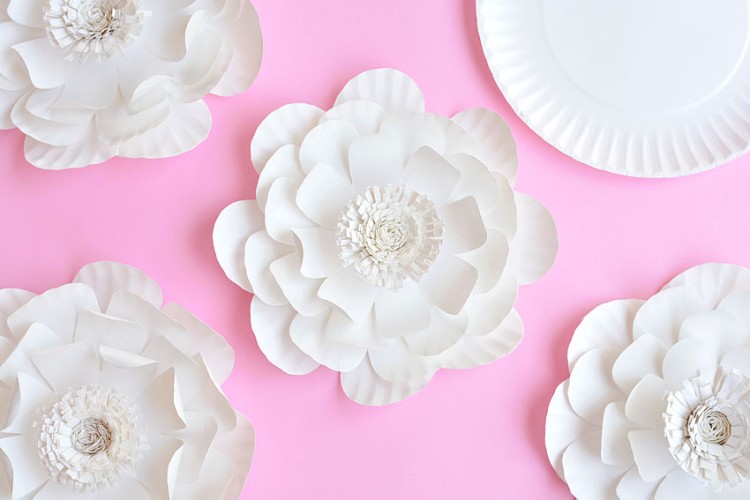
You can make a lot of different flowers from a variety of paper types. We loved making crepe paper flowers, coffee filter flowers and paper plate flowers! But you can also use regular paper to make rolled paper flowers or paper hyacinths.
Plus there are so many origami or kirigami projects that only require a simple piece of paper. Try making paper stars, paper hearts, or even paper claws!

Use this simple folding technique to make a red rose, or make paper flowers in multiple colours, like pink, white, orange, or yellow.
These DIY paper roses look so pretty arranged in a vase, perfect for setting on the mantle or windowsill! No need to water these paper roses!

Here’s even more flower craft ideas:
How to Make Paper Hyacinth Flowers


Our book Low-Mess Crafts for Kids is loaded with 72 fun and simple craft ideas for kids! The projects are fun, easy and most importantly low-mess, so the clean up is simple!

Where to buy:
You can purchase Low-Mess Crafts for Kids from Amazon, or wherever books are sold:
Amazon | Barnes and Noble | Books-A-Million | Indiebound | Amazon Canada


Leave a Reply