These DIY felt roses are SO PRETTY! Make these beautiful no-sew flowers using a simple technique – with no special tools required! It’s such a fun and easy craft project, and a great way to use up leftover felt pieces.
Follow our step by step photo and video tutorials to make this beautiful flower craft using a few simple supplies. These felt roses look beautiful in a vase and they also make a thoughtful homemade gift for Valentine’s Day or Mother’s Day!

This post contains affiliate links. If you use these links to buy something we may earn a small commission which helps us run this website.
How to Make Felt Roses
Watch the step-by-step video tutorial:
Instructions:
Step 1: Find what you need
- Gather your supplies and materials.


Step 2: Cut out the rose petals and greenery
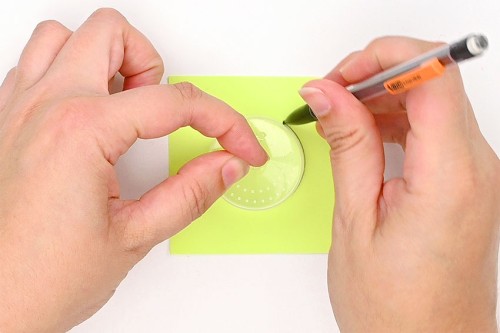
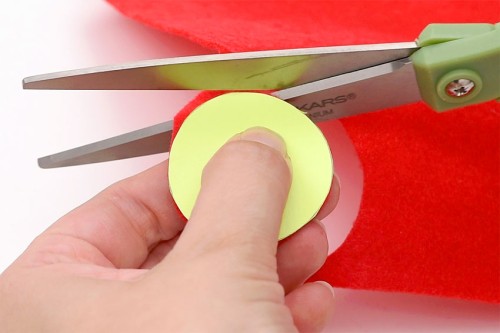
- Trace a small circle onto a piece of cardboard (or cardstock). We used a plastic cap with a 1-1/2 inch diameter.Then cut out the cardstock circle.

- Hold the circle on top of the red felt. Use the circle as a guide to cut out a felt circle.Repeat 11 times so that you end up with 12 petal shapes total.
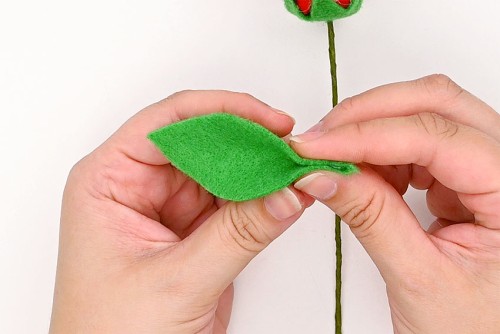
- Cut out a rough star shape from green felt, about the same size as a petal.Fold the green star in half and cut a small snip in the center of it.
- Now cut a basic leaf shape from green felt.You should have 12 rose petals (felt circles), the base of the rose (the star), and a leaf (or two if you want!).


Step 3: Make the rose stem
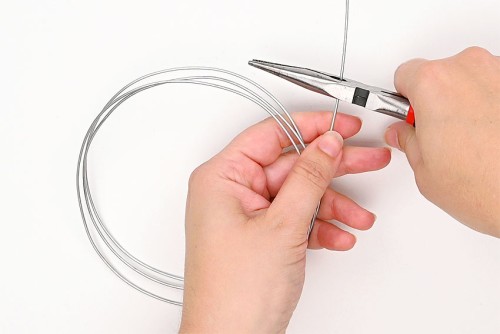
- Use wire cutters to cut an 8 inch piece of wire.
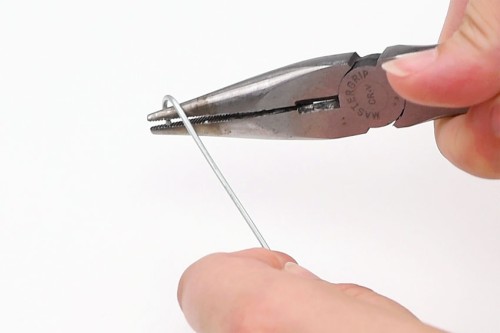
- Use pliers to bend a “U” shaped hook at one end of the wire.
- Wrap the wire in green floral tape, leaving the “U” shape uncovered.

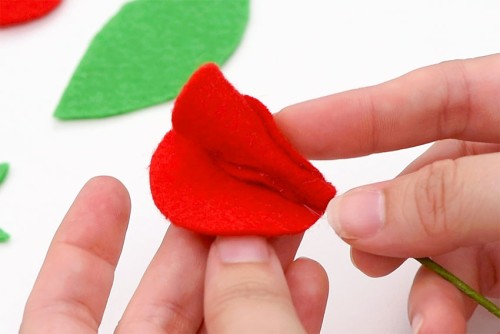
Step 4: Glue together the rose petals
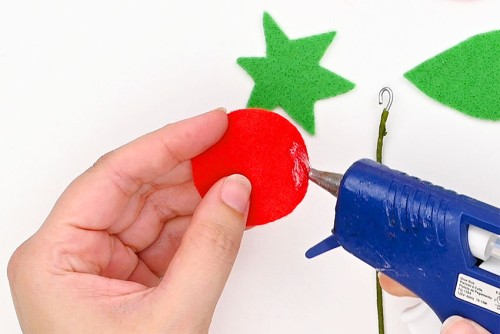
- Add a short line of hot glue near the edge of one of the felt circles.
- Press the wire “U” into the hot glue on the petal.
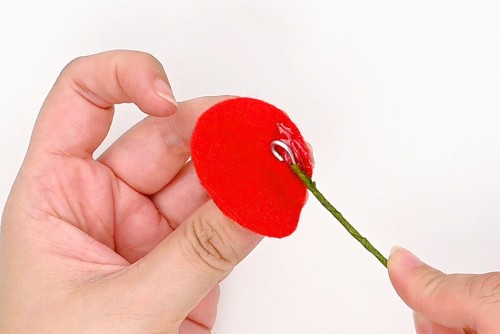
- Roll the felt piece around the wire. Add more hot glue to secure it and hold the petal until it stays in place.This is the rose bud, or the middle of the rose.
- Now add a short line of glue near the edge of a second felt circle.
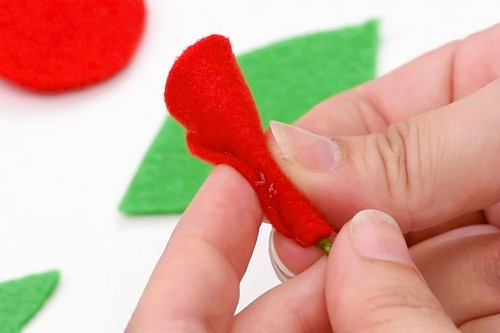
- Attach the second petal, pressing it onto the center bud so the bottoms of the circles line up.
- Add glue to the other side of this petal and wrap it around the center petal, holding it in place again until the glue is dry.
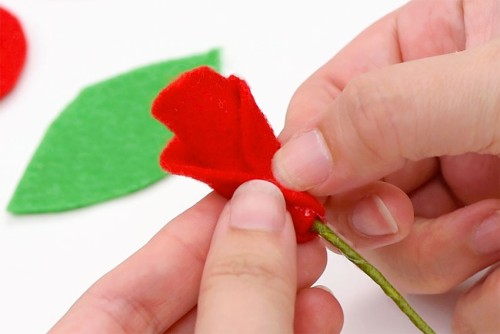
- Wrap and attach another felt circle in the same way, placing it on the other side so that the rosebud is surrounded.
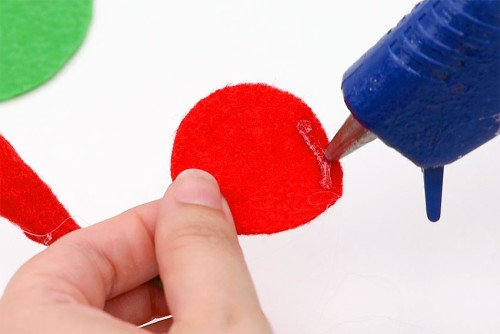
- Now you can continue adding petals, working in a clockwise direction. Overlap the petals slightly, attaching the next one just before the edge of the last petal.
- Continue until you’ve added the last petal.
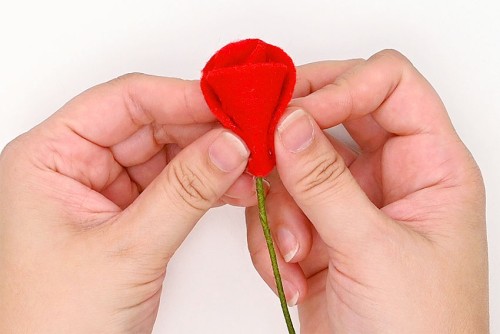

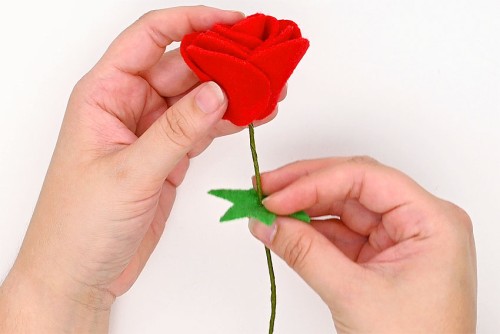
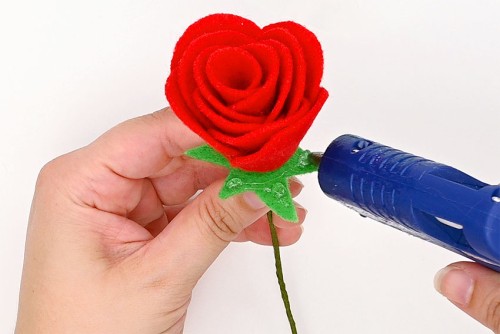
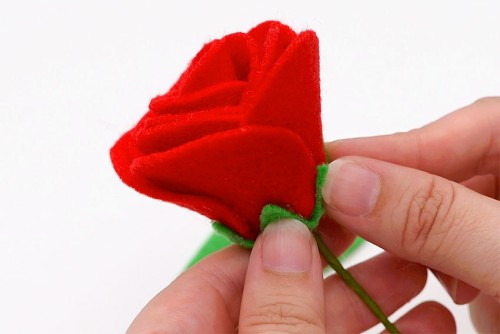
Step 5: Add the greenery to the rose
- Slide the green “star” up from the bottom of the rose’s stem, putting the wire through the center hole.
- Add hot glue to several of the star’s points.
- Press the points up onto the bottom of the rose and repeat with the remaining points.
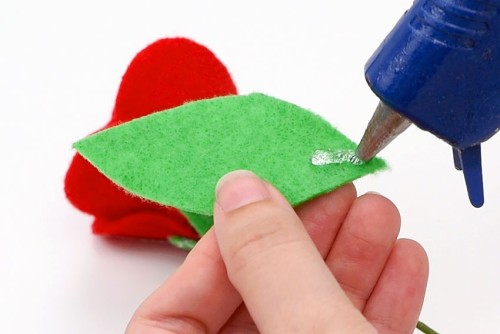
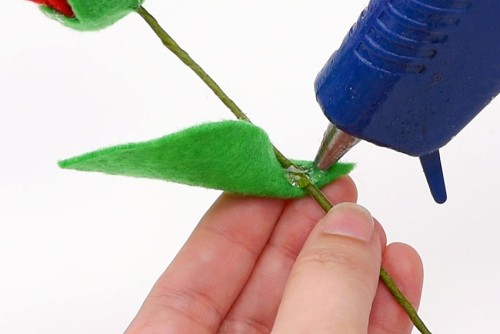
- Add a small line of glue to the bottom quarter of the leaf in the center.
- Pinch the sides of the leaf in half, holding until the glue stays in place.
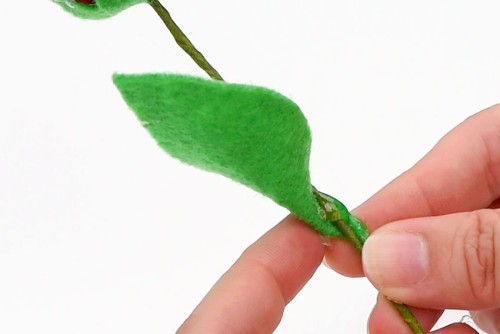
- Hold the glued part of the leaf under the rose stem, partway down. Add hot glue over top of the taped wire.
- Twist the bottom of the leaf around the wire and hold it until the leaf stays in place.
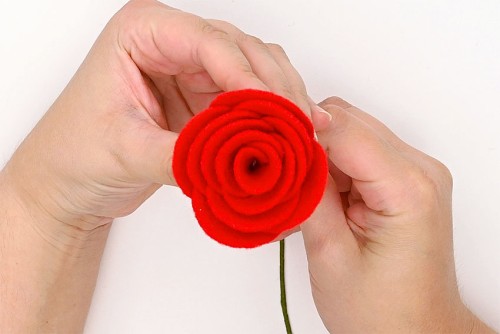
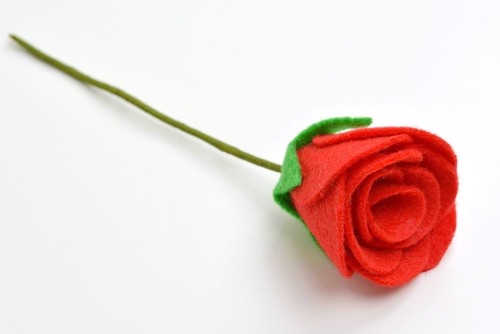
- Your DIY felt rose is complete!
Helpful Tips:
- If you want your rose petals to look less perfect and more natural, simply cut out the circles freehand!
- Make an ombre rose by starting with a lighter shade of felt in the center and using a darker hue for the outer petals.

What kind of felt do you use for DIY felt roses?
We used a basic polyester craft felt to make our felt roses! You can buy an individual felt sheet at any craft store, or purchase a larger pack on Amazon. If you’re looking on Amazon, make sure you’re purchasing “soft felt” as opposed to “stiff felt”.
How much felt do you need to make a felt rose?
With a regular sheet of felt (9 x 12 inches) you can make 2 full roses and have enough left to make 1/2 of another rose. This craft is perfect for using up scraps of leftover felt!

What size felt roses does this make?
These roses are about 2-1/4 inches across and 1-1/2 inches tall. We cut the stems to be about 8 inches long, but you can make them however short or long you want.
We traced a circle with a 1-1/2 inch diameter to make our petals. If you’d like to make smaller flowers (or a larger rose), simply start with a different size of petal.

What’s the best way to cut out the felt rose petals?
We found it easiest to make one petal template from a thick paper and then hold it in place while cutting. But you do have to be careful that the template doesn’t move around as you cut.
If you’re having trouble keeping the template steady, you can also trace the circles on the felt with a chalk tracing pencil or an erasable fabric pen. Regular gel pens also draw nicely on felt, but you have to make sure you cut inside the pen markings since you don’t want pen showing on your petals.
What can you do with DIY felt roses?
These DIY felt roses look so pretty as a bouquet in vase or mason jar. But you can also make the roses without a stem, simply by rolling the first petal around itself instead of around the wire.
These stemless felt roses look super cute as part of a flower crown or as an ornament for a barrette, hair clips, or a headband. You can also glue them onto a picture frame or use them as a gift topper!

These DIY felt roses are SO EASY to make! Glue felt petals together around wire to create these beautiful flowers. Make a homemade bouquet in a single colour, or make all kinds of roses in red, pink, white, yellow, and more!

Here’s even more flower craft ideas:


Our book Low-Mess Crafts for Kids is loaded with 72 fun and simple craft ideas for kids! The projects are fun, easy and most importantly low-mess, so the clean up is simple!

Where to buy:
You can purchase Low-Mess Crafts for Kids from Amazon, or wherever books are sold:
Amazon | Barnes and Noble | Books-A-Million | Indiebound | Amazon Canada


Leave a Reply