These paper plate flowers are SO PRETTY and they’re so easy to put together! With only a few simple supplies you can make elegant and fun party decorations.

Paper Flower Wall Decor
Who knew you could make such pretty flowers out of paper plates?! They look complicated, but they’re actually so easy to make. Why buy expensive wall decor when you can make such pretty decorations for pennies??
Paper plate flowers look great in a kids room or nursery, but they’re also the perfect party decoration. You can use these DIY paper flowers for bridal showers, baby showers, or an anniversary party. They’re quite large, so they’re the perfect addition to a photo booth backdrop or selfie wall.
You can make a wall of beautiful blooming white flowers for the cost of a few inexpensive paper plates. Make your flowers different sizes by making some with paper dessert plates and others with paper dinner plates. They’re pretty, cheerful, and so simple to make!
Check out our Paper Plate Flowers video tutorial:
*Note: Scroll down for the step-by-step photo tutorial.
Looking for more DIY paper flowers? Here’s some of our favourites:

Here’s what you’ll need:
This post contains affiliate links. If you use these links to buy something we may earn a small commission, which helps us run this website.
The full printable instructions are at the end of this post, but here’s a list of products on Amazon and Target that are similar to the supplies we used:

What kind of paper plate should I use?
You want to use a thin paper plate, the kind with the rippled edge. You know the ones you hate to eat off of, because they start collapsing the moment you have a bit of food on them? Yeah, that kind. Bad for eating, but perfect for crafts!
Our paper plates are 9 inches, which makes fairly large flowers, but you could also use smaller plates for variation. Plain unwaxed plates are best, since you want to be able to write on them with pencil and fold them easily.
How do I hang up these DIY paper flowers?
For a more rustic look you can glue or tape a loop of twine to the back of the flower and hang it from there. For a traditional flower wall back drop you can use double sided tape or Command Poster Hanging Strips to hang the paper plate flowers.

Can I colour my paper flower decorations?
These paper plate flowers look elegant in plain white, but you can definitely add some colour to them to match your party theme.
Watercolour paints give the flowers a beautiful soft colour, while acrylic paint pens could be used to add finer patterns or designs.
How else can I decorate my paper flower wall decor?
These paper plate flowers really shine on their own, but there are a couple additions you could make.
Paint a light coat of white glue on the center of the flower and sprinkle it with glitter. You could also glue rhinestones or sequins around the center of the flower.

Paper Plate Flowers
Materials:
- 4 Paper plates (9 inch size)
- paper fastener
Instructions:
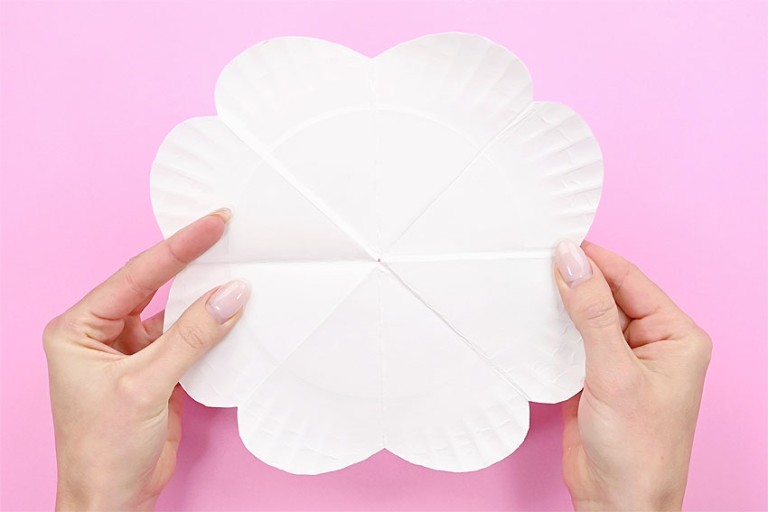
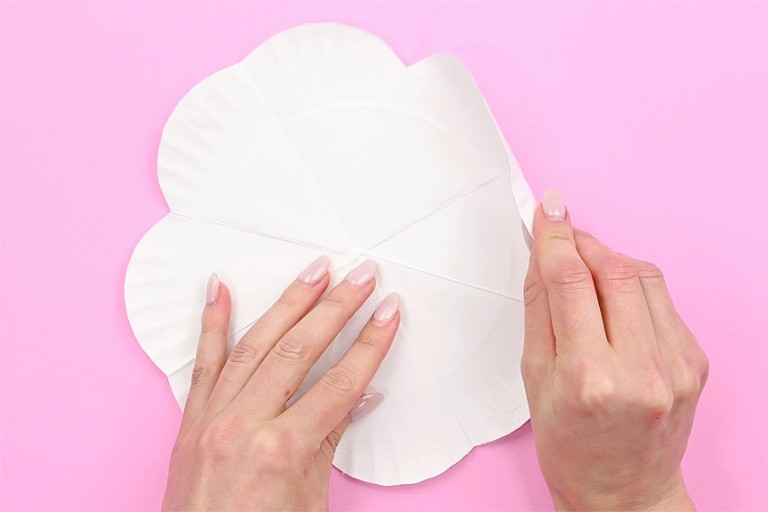
Step 1: Fold paper plates
- Fold one paper plate in half. Fold it in half again. Fold it in half one last time.Repeat this process with the remaining plates (three more times).

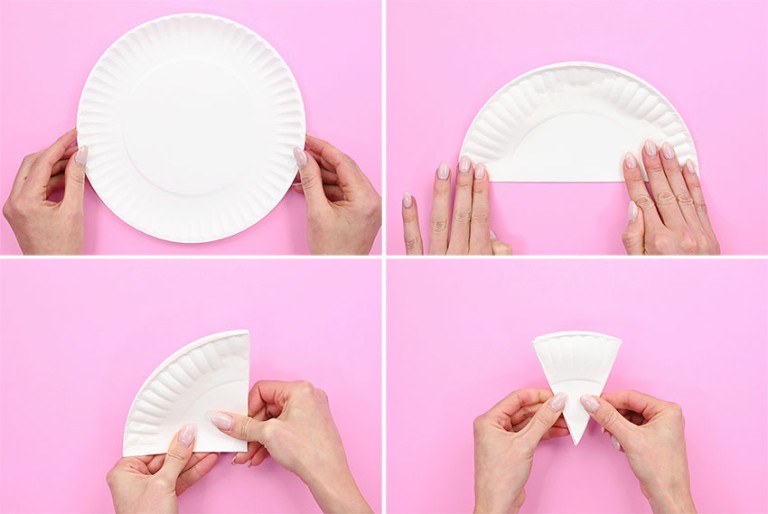
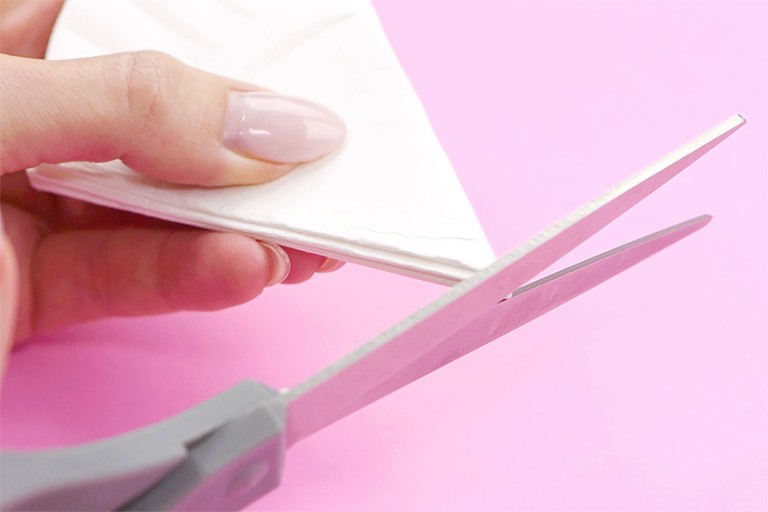
Step 2: Cutting edges
- Draw a guideline for cutting off the edge of the flower. The line should be deeper on the left side.

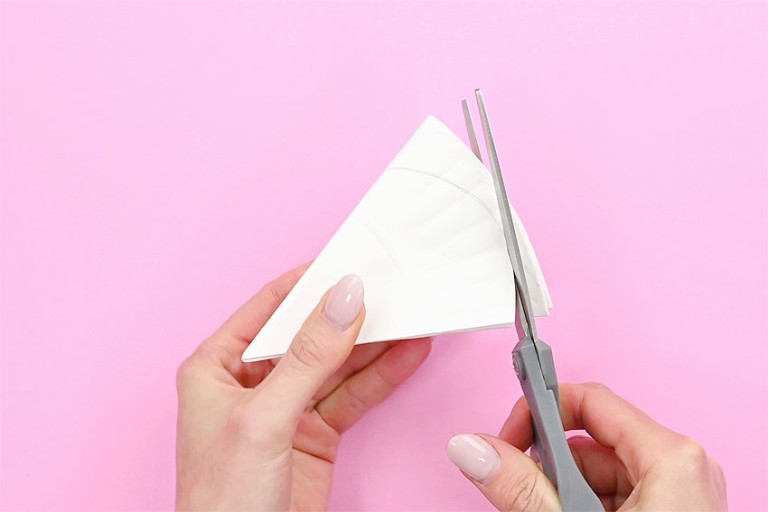
- Cut the plate on this guideline.
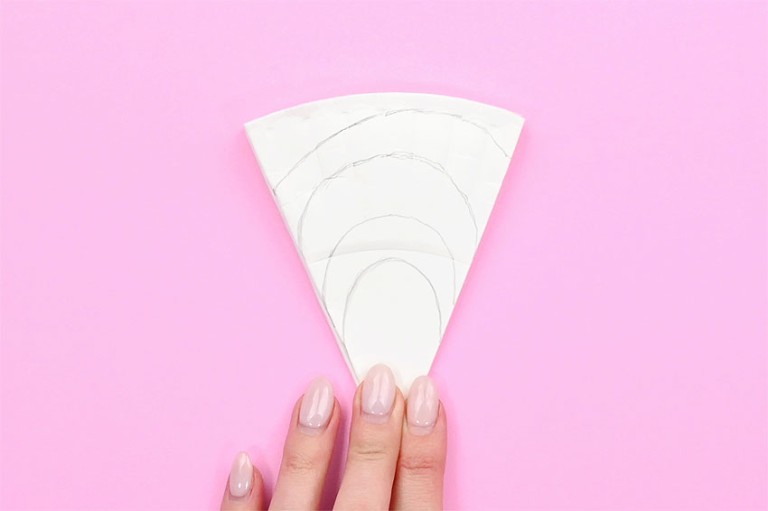
- Draw guidelines on the remaining paper plates, a little deeper each time. Make these lines even on both sides.

- Cut the other three plates. Save the 3 scraps you cut off (they will be used later for the flower’s center).

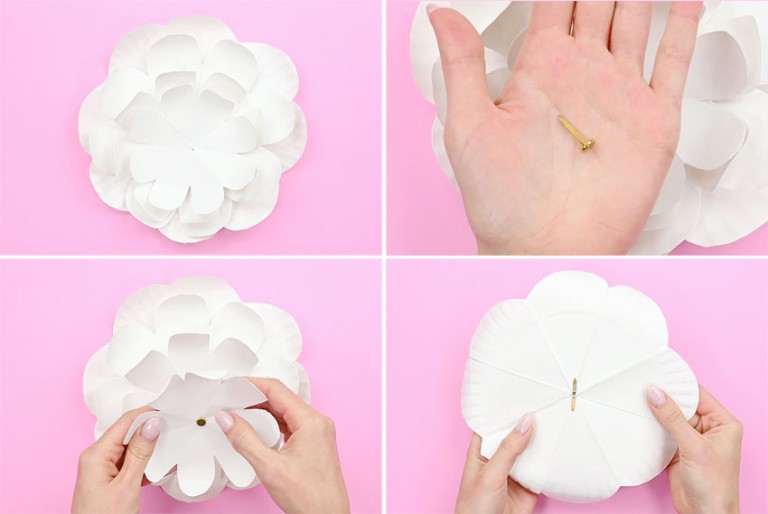
Step 3: Make holes in middle of plates
- Using scissors, cut the tiniest tip off the folded plate.
- Do this for all four plates, creating a tiny hole in the center of each plate.
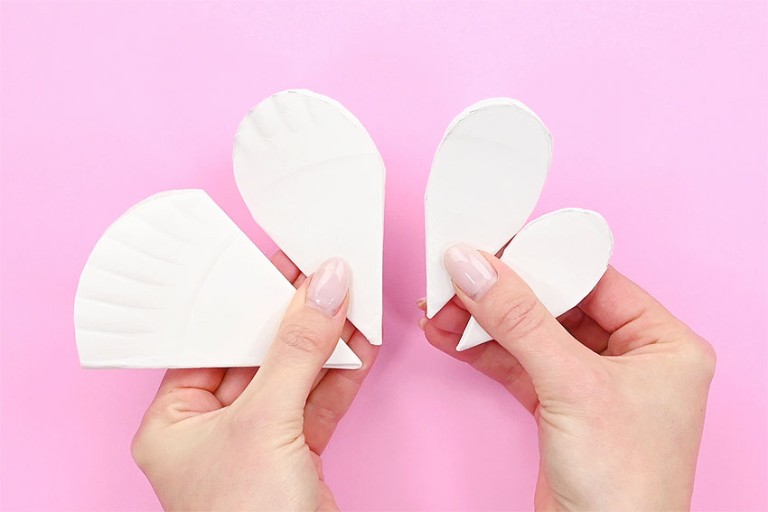
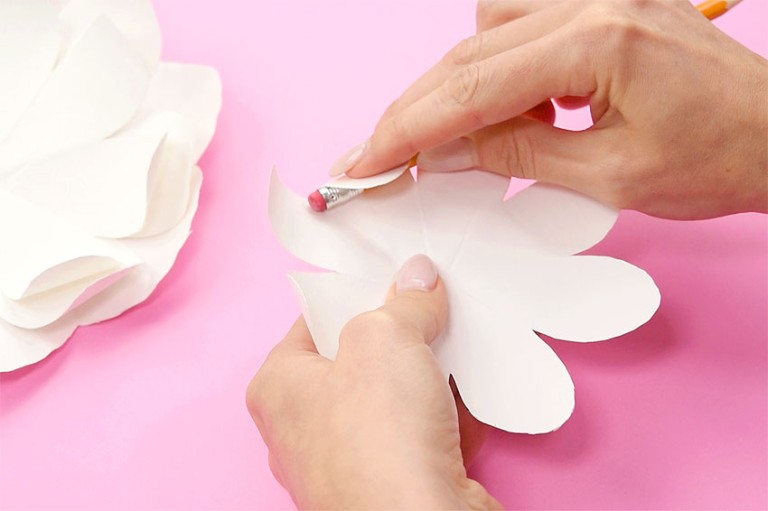
Step 4: Curl the edges of the flower
- Unfold the plates and use your fingers to curl the edges up on the largest plate.
- Use a pencil to curl the petals of the other three plates.
Step 5: Connect paper plates
- Place the paper plates on top of one another, the largest on the bottom.Put a paper fastener through the center of the plates and push the edges down, fastening it on the back of the flower.
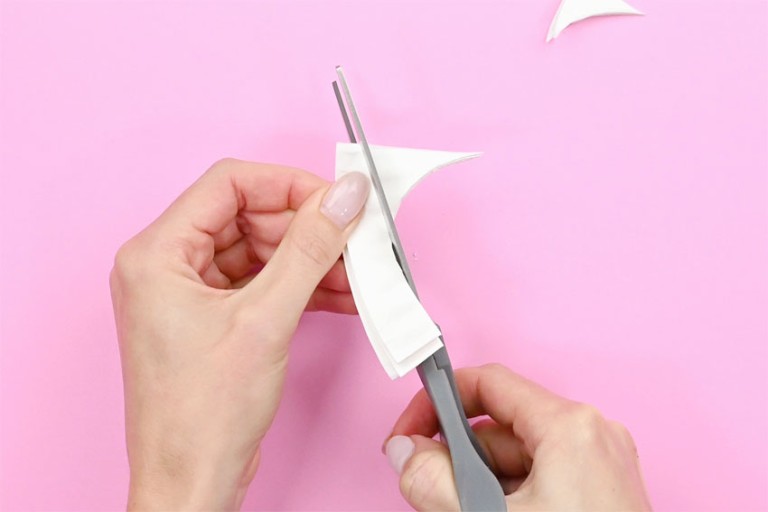
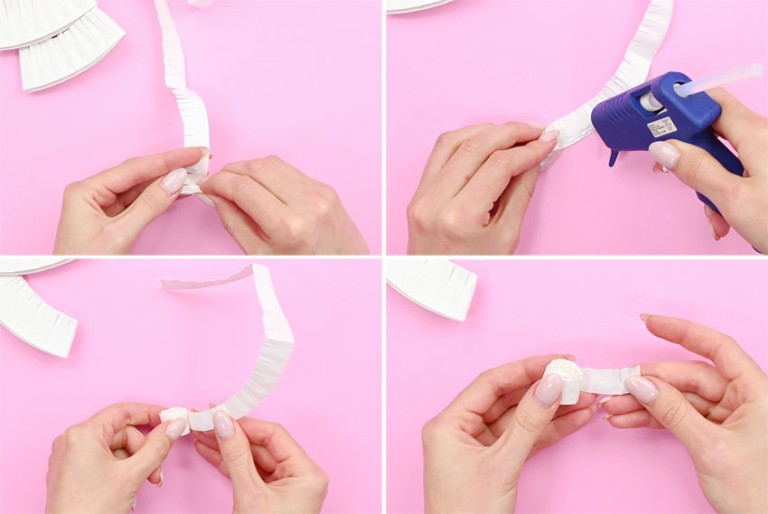
Step 6: Make the center of the flower
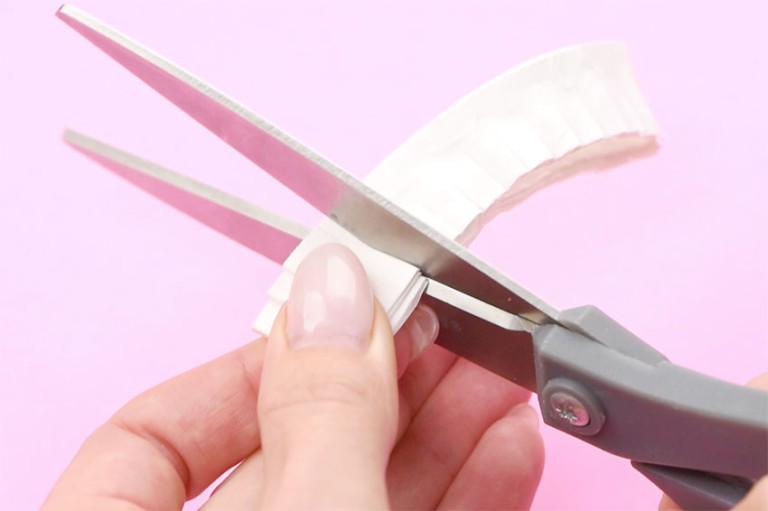
- Take one of the scraps you set aside (when cutting the paper plates) and cut off the bottom pointed parts, creating a curved edge to match the outside edge of the plate.
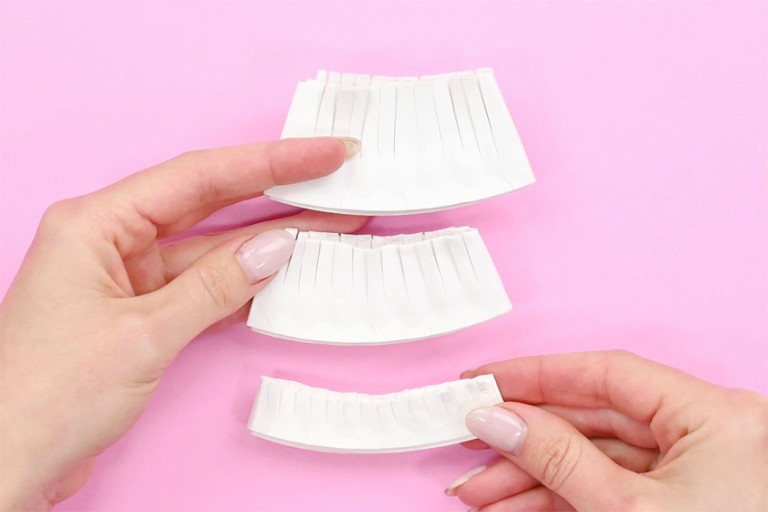
- Make repeated cuts along the inside of this edge piece, creating a “fringe”.
- Repeat this process with the other two plate edges.
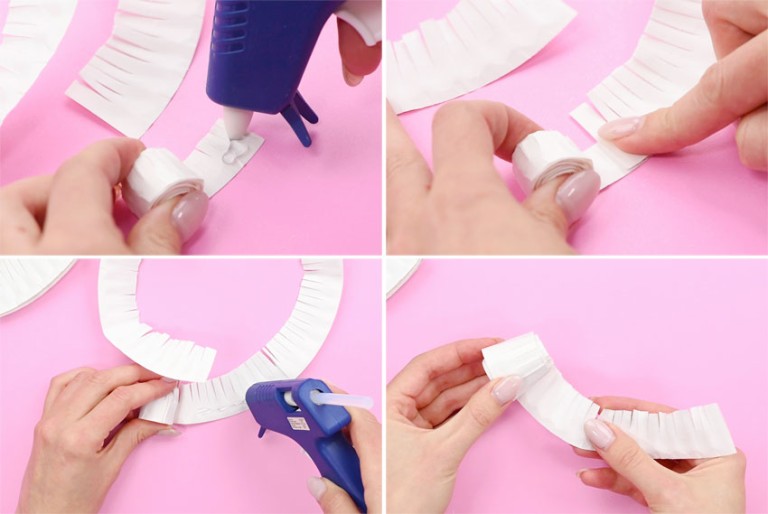
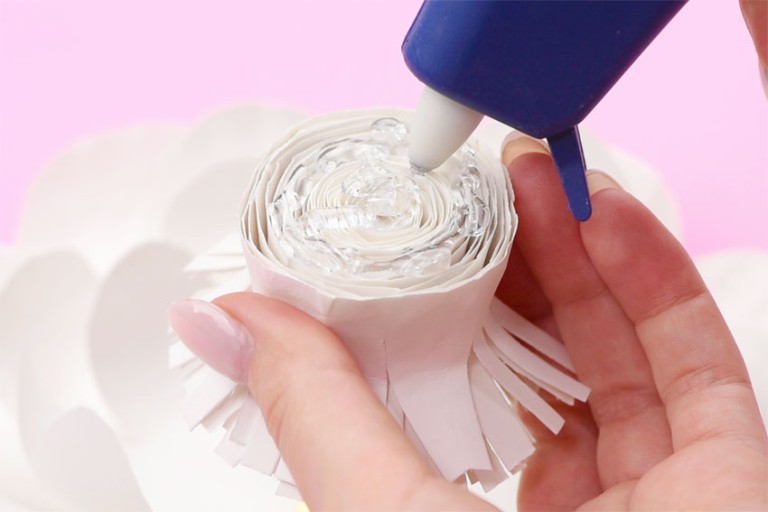
- Unfold the smallest fringe and cut through it, creating one long strip. Beginning at one end, start rolling the strip. Add a bit of hot glue, and continue rolling. Keep rolling and adding glue.Leave the last 2 inches unglued.
- Unfold and cut the next largest fringe. Add hot glue to the inside of the loose part of the smallest fringe.Attach the first fringe roll to one end of the second, making sure to keep the fringe on the same side.Continue rolling and adding hot glue, as with the previous fringe. Again, leave the last two inches unglued.
- Repeat this process, connecting the largest fringe to the previous two, this time gluing it together until the end.You’ve created the flower’s center!
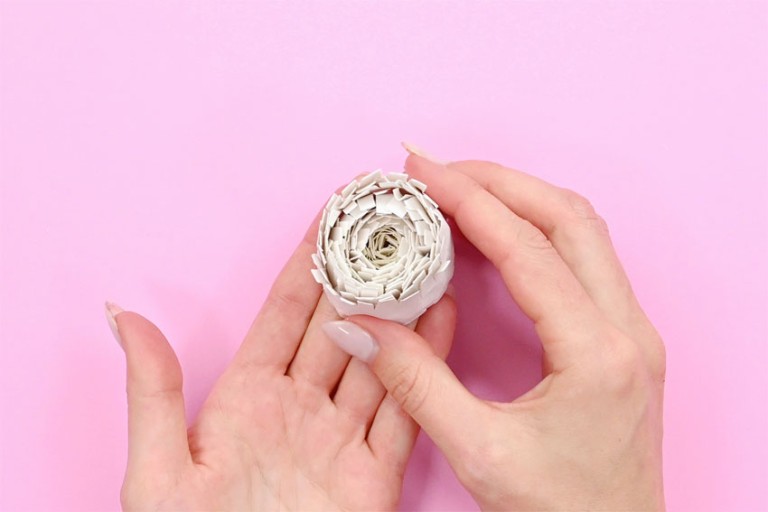
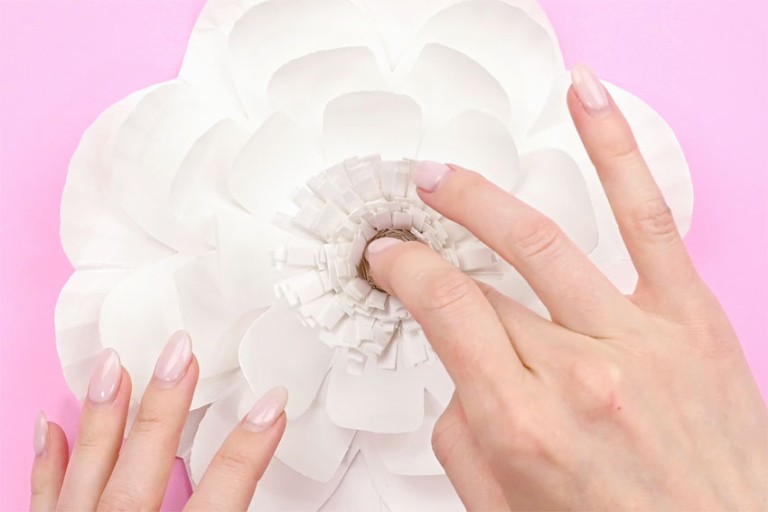
Step 7: Arrange and attach center
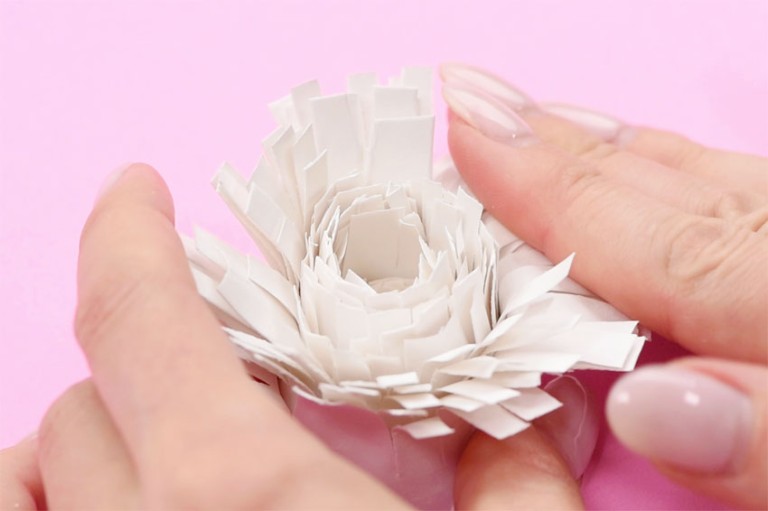
- With the cut side of the fringe up, begin bending down the outside cut pieces, creating a sunflower look.Repeat with the next inside layer of cut pieces.
- Add hot glue to the bottom (rose looking) part of the flower center.
- Attach this piece to the center of the connected plates.
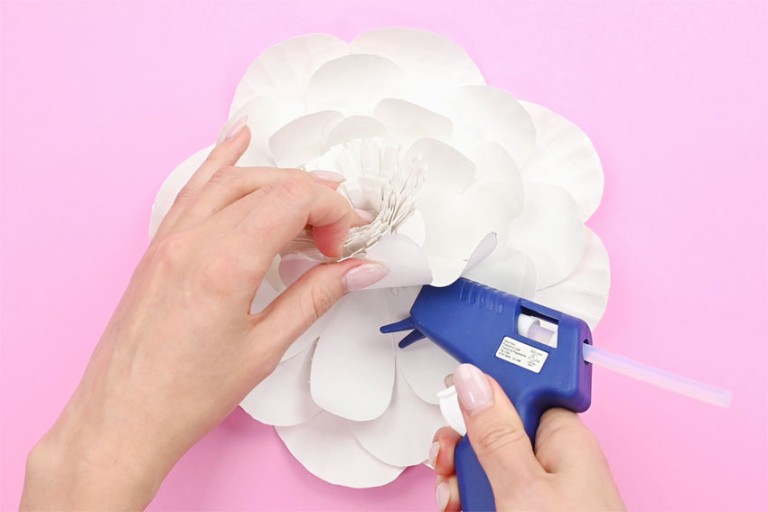
Step 8: Secure flower
- Arrange the petals of the large flower, turning and adjusting them as you like.Use hot glue to attach the bottom plate to the one above it. Glue close to the center and push the plate on top down to connect them. Repeat for all layers until the flower pieces are secure.
- Your paper plate flower is complete!
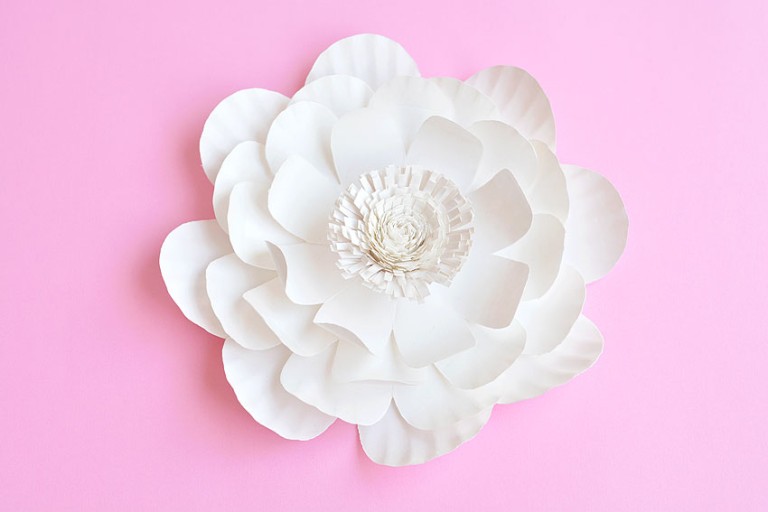

Paper plate flowers make it clear that paper plate crafts aren’t just for kids! These paper plate flowers are so simple to make, but look so elegant. Make paper plate flowers for party decor or place them on top of a large gift box.

Here’s even more flower craft ideas:


Our book Low-Mess Crafts for Kids is loaded with 72 fun and simple craft ideas for kids! The projects are fun, easy and most importantly low-mess, so the clean up is simple!

Where to buy:
You can purchase Low-Mess Crafts for Kids from Amazon, or wherever books are sold:
Amazon | Barnes and Noble | Books- A- Million | Indiebound | Indigo | Amazon Canada


Leave a Reply