


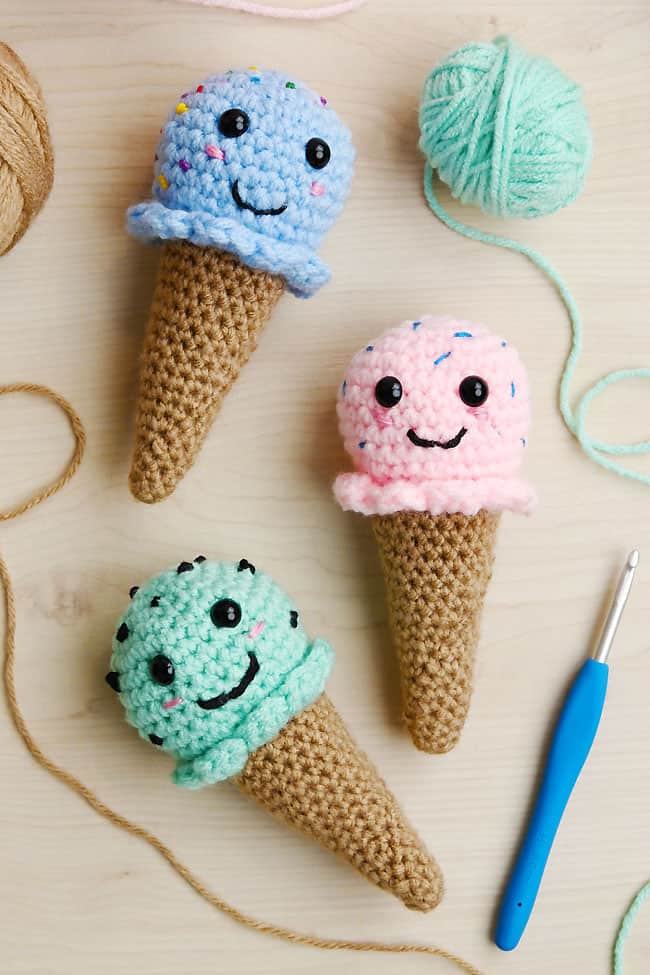
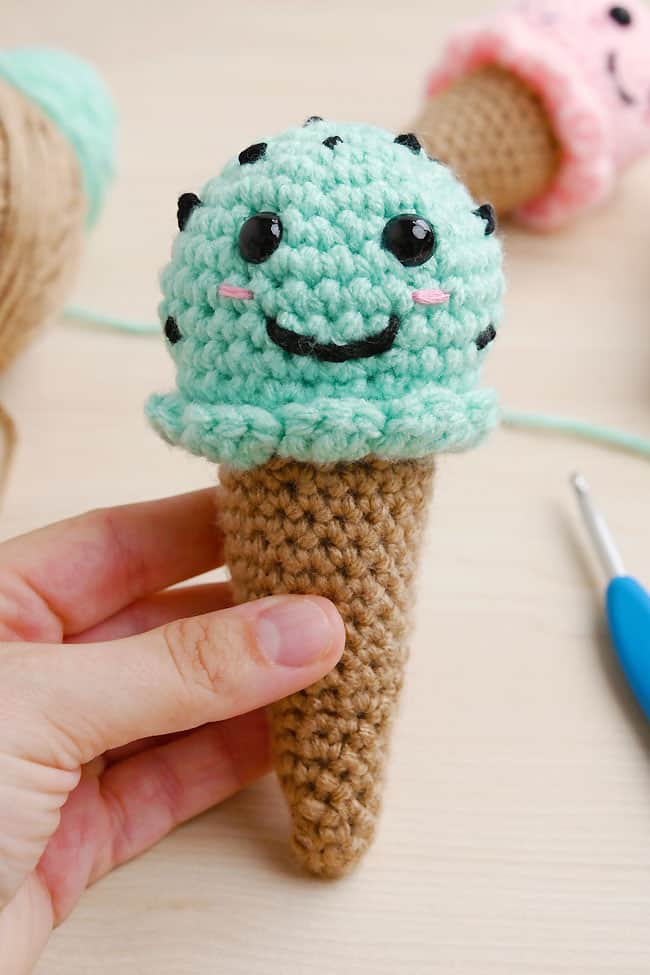
This crochet ice cream cone is such a sweet summer project! Each one is made with a cute waffle-style base, a rounded scoop of ice cream, and a ruffled edge of melty ice cream sitting on top of the cone. Add sprinkles, chocolate chips, or a cute face with safety eyes and an embroidered smile to make each one unique.
Use the FREE crochet ice cream cone pattern below or purchase the printable, ad-free pattern with BONUS Quick Guide from our Etsy shop! This easy amigurumi ice cream cone is a fun crochet project for summer markets, play food sets, and pretend ice cream shops. Use our beginner-friendly pattern and have fun making your favourite flavours!
This post contains affiliate links. If you use these links to buy something, we may earn a small commission at no extra cost to you. This helps support our website and allows us to keep creating fun, free content.
How to Make a Crochet Ice Cream Cone
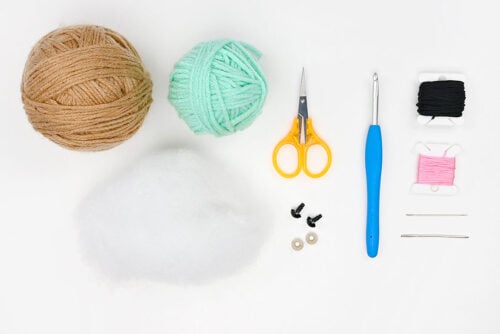
Materials:
- Worsted weight yarn (2 colours)
- Safety eyes (8mm)
- Polyester fiber fill
- Embroidery floss (black and pink)
- Crochet Ice Cream Cone Pattern (No Ads)
Equipment:
See the craft in action:
Instructions:
Find what you need:
- Gather your supplies and materials.

Ice Cream Cone:
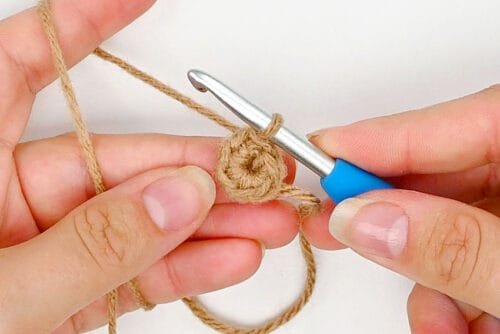
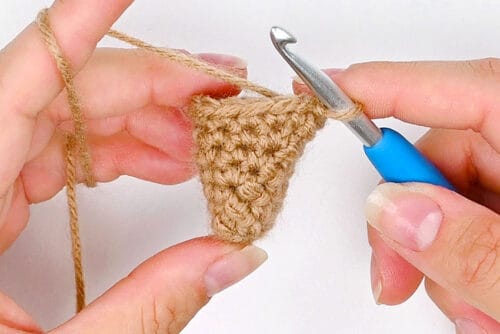
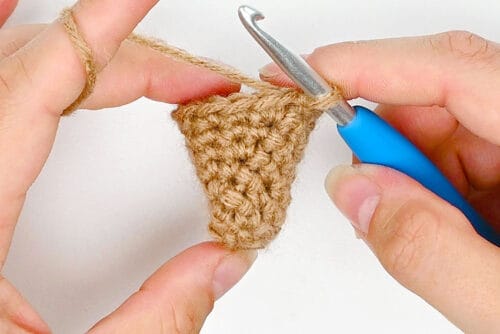
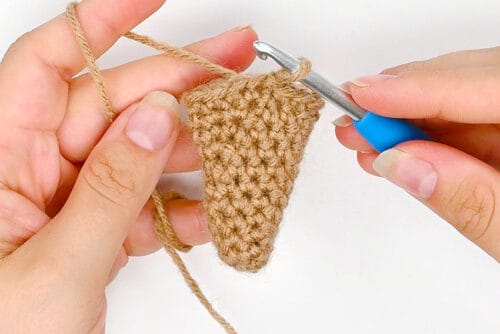
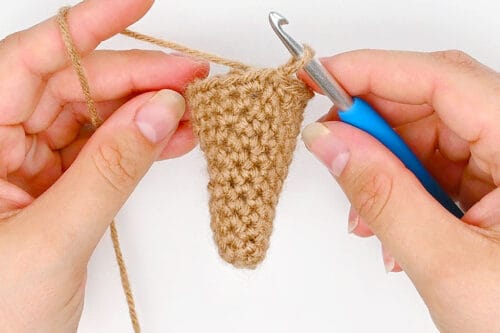
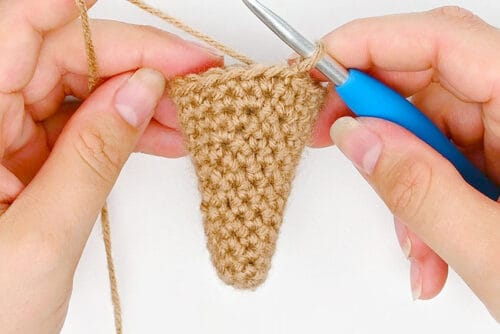
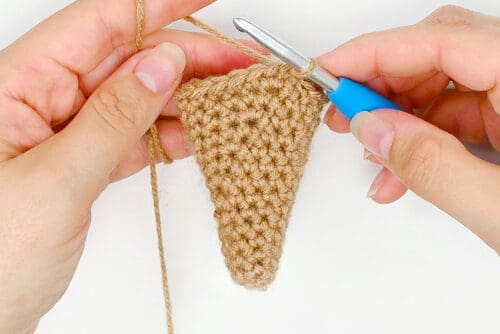
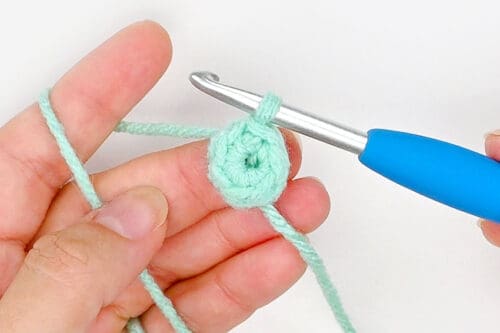
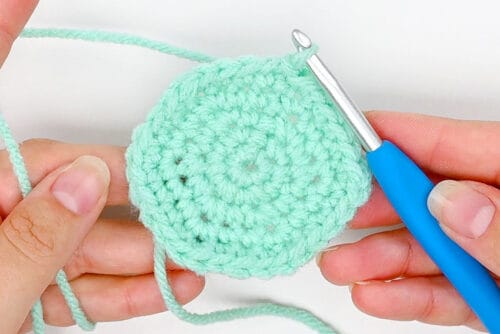
- Round 1:Using the cone colour yarn, work 6 single crochet in a magic circle. Pull the tail to tighten the circle and slip stitch in the first st to join the round. (6)
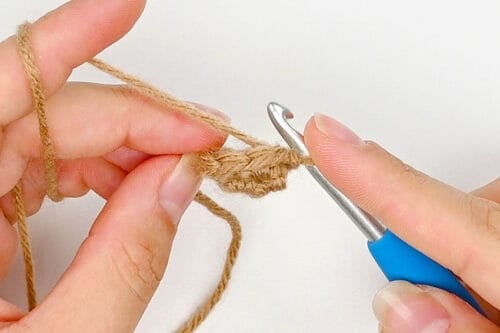
- Round 2:Chain 1 and insert 2 sc in the first st (an increase). Insert 1 sc in each remaining st around.Sl st in the first st to join the round. (7)

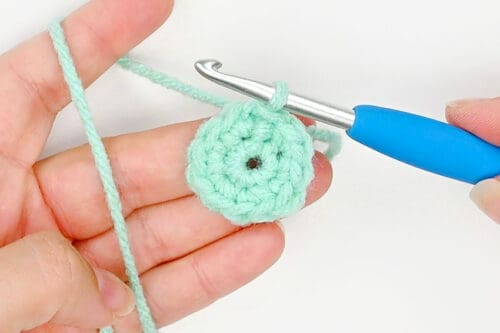
- Round 3:Ch 1 and insert 1 sc in each of the first 3 sts. Inc in the next st, then insert 1 sc in each of the remaining 3 sts.Sl st in the first st to join the round. (8)
- Round 4:Ch 1 and inc in the first st. Insert 1 sc in each remaining st around.Sl st in the first st to join the round. (9)
- Round 5:Ch 1 and insert 1 sc in each of the first 4 sts. Inc in the next st, then insert 1 sc in each of the remaining 4 sts.Sl st in the first st to join the round. (10)
- Round 6:Ch 1 and inc in the first st. Insert 1 sc in each remaining st around.Sl st in the first st to join the round. (11)
- Round 7:Ch 1 and insert 1 sc in each of the first 5 sts. Inc in the next st, then insert 1 sc in each of the remaining 5 sts.Sl st in the first st to join the round. (12)
- Round 8:Ch 1 and inc in the first st. Insert 1 sc in each remaining st around.Sl st in the first st to join the round. (13)
- Round 9:Ch 1 and insert 1 sc in each of the first 6 sts. Inc in the next st, then insert 1 sc in each of the remaining 6 sts.Sl st in the first st to join the round. (14)
- Round 10:Ch 1 and inc in the first st. Insert 1 sc in each remaining st around.Sl st in the first st to join the round. (15)
- Round 11:Ch 1 and insert 1 sc in each of the first 7 sts. Inc in the next st, then insert 1 sc in each of the remaining 7 sts.Sl st in the first st to join the round. (16)
- Round 12:Ch 1 and inc in the first st. Insert 1 sc in each remaining st around.Sl st in the first st to join the round. (17)
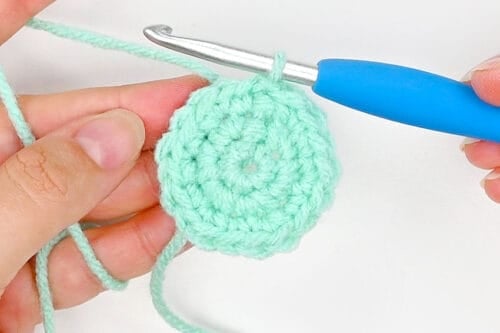
- Round 13:Ch 1 and insert 1 sc in each of the first 8 sts. Inc in the next st, then insert 1 sc in each of the remaining 8 sts.Sl st in the first st to join the round. (18)
- Round 14:Ch 1 and inc in the first st. Insert 1 sc in each remaining st around.Sl st in the first st to join the round. (19)
- Round 15:Ch 1 and insert 1 sc in each of the first 9 sts. Inc in the next st, then insert 1 sc in each of the remaining 9 sts.Sl st in the first st to join the round. (20)
- Round 16:Ch 1 and inc in the first st. Insert 1 sc in each remaining st around.Sl st in the first st to join the round. (21)
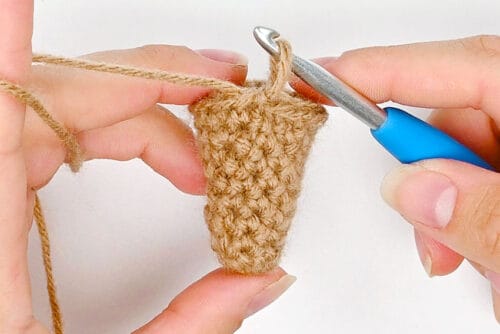
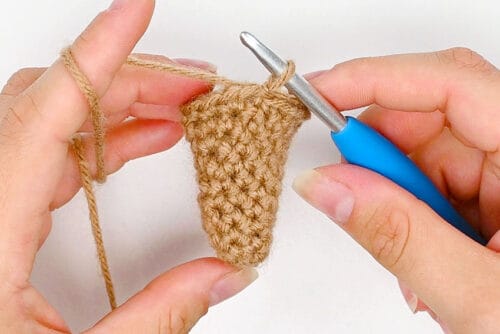
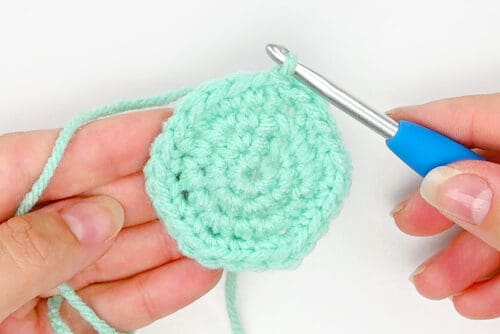
- Round 17:Ch 1 and insert 1 sc in each of the first 10 sts. Inc in the next st, then insert 1 sc in each of the remaining 10 sts.Sl st in the first st to join the round. (22)
- Fasten off the yarn, leaving a 10 inch tail.
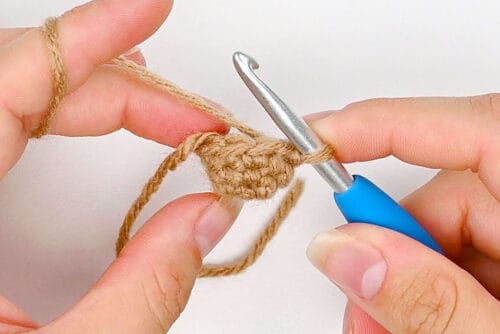
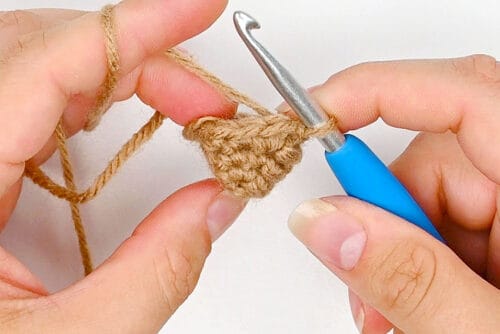
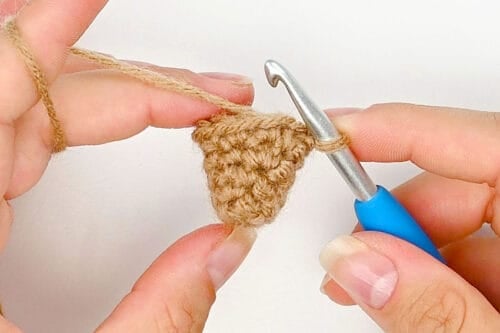
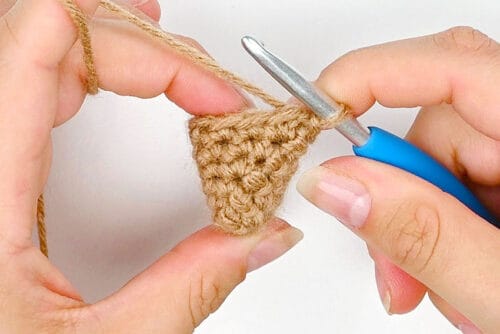
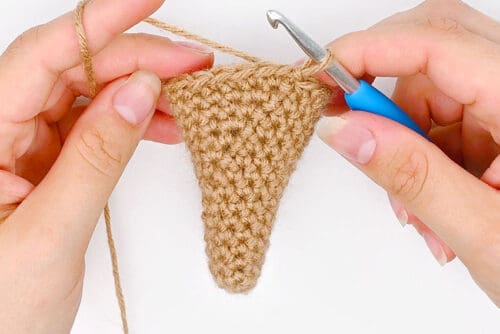
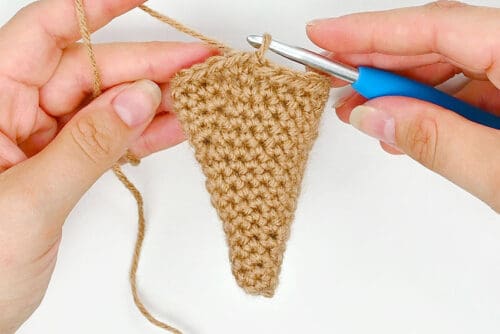
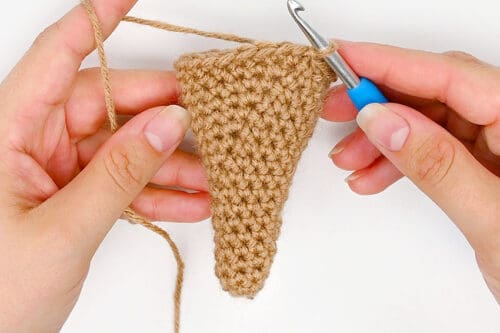
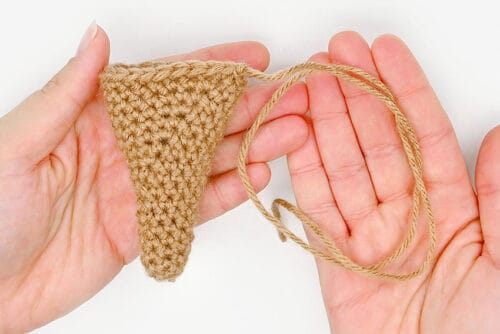
Ice Cream Scoop:
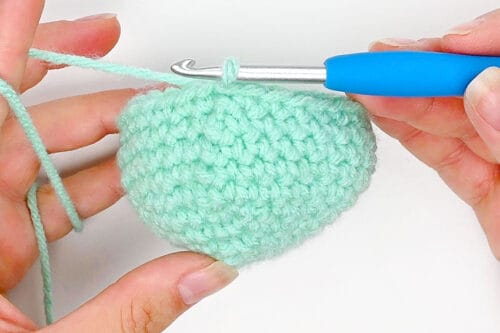
- Round 1:Using the ice cream colour, insert 6 sc in a magic circle. Pull the tail to tighten the circle and sl st in the first st to join the round. (6)
- Round 2:Ch 1 and inc in each st around. Sl st in first st to join the round. (12)
- Round 3:Ch 1 and *insert 1 sc in first st. Inc in the next st.* Rep from * to * around.Sl st in the first st to join the round. (18)
- Round 4:Ch 1 and *insert 1 sc in each of the first 2 sts. Inc in the next st.* Rep from * to * around.Sl st in the first st to join the round. (24)
- Round 5:Ch 1 and *insert 1 sc in each of the first 3 sts. Inc in the next st.* Rep from * to * around.Sl st in the first st to join the round. (30)
- Rounds 6–10:Ch 1 and insert 1 sc in each st around.Sl st in first st to join the round. (30)
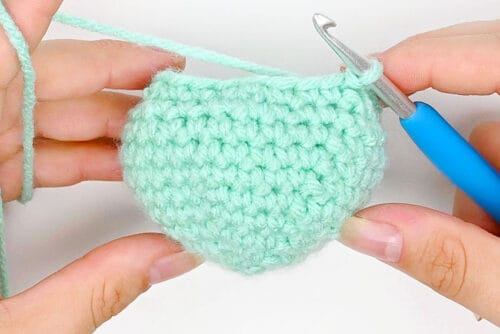
- Round 11:Ch 1 and *insert 1 sc in each of the first 3 sts. Sc the next 2 sts together (a decrease).* Rep from * to * around.Sl st in the first st to join the round. (24)
- Round 12:Ch 1 and *insert 1 sc in each of the first 2 sts. Dec across the next 2 sts.* Rep from * to * around.Sl st in the first st to join the round. (18)
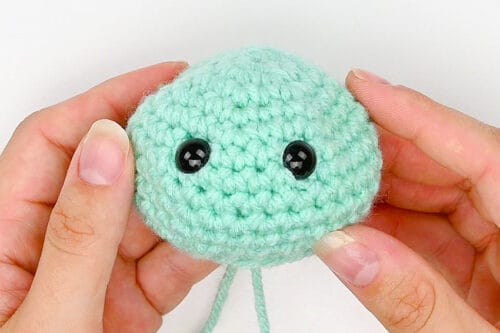
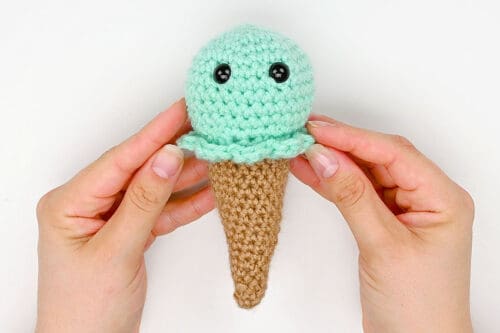
- Insert safety eyes between round 6 and 7, placing them about 4 sts apart.
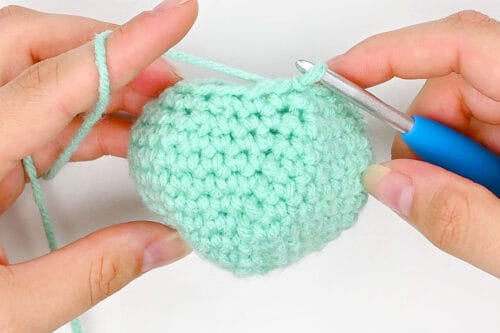
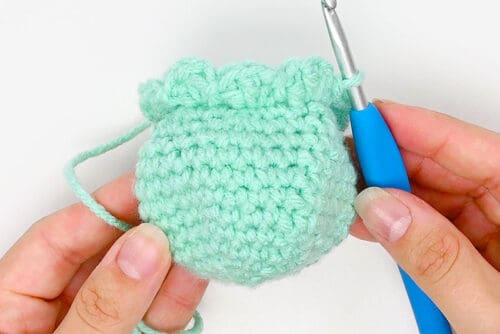
- Round 13 (Ruffles):Working in the FLO of round 12, ch 2 and *insert 3 double crochet in the first st. Sl st in the next st.* Rep from * to * around.Sl st in the first st to join the round and fasten off the yarn. (32)
Assembly:
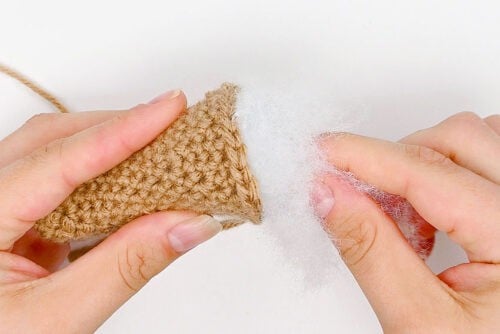
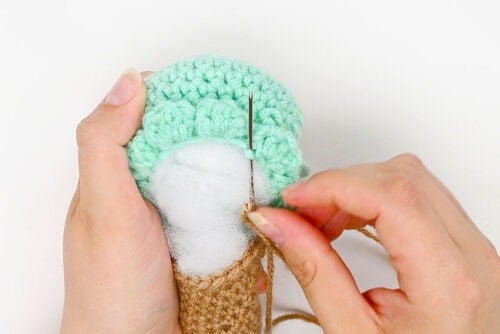
- Add poly-fil stuffing into the cone until it keeps its shape.
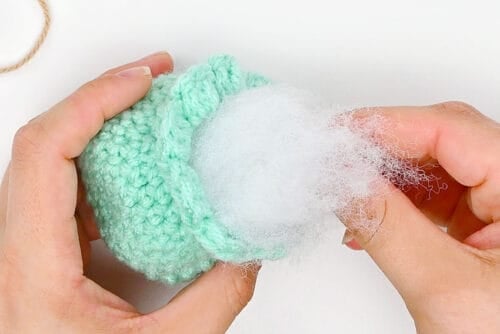
- Repeat, stuffing the ice cream scoop.
- Sew the cone to the ice cream using the long tail from the cone.Stitch into the ridge at the base of the ruffles, created by crocheting into the FLO of Round 12.
- Connect the scoop all the way around and then weave in any loose ends.
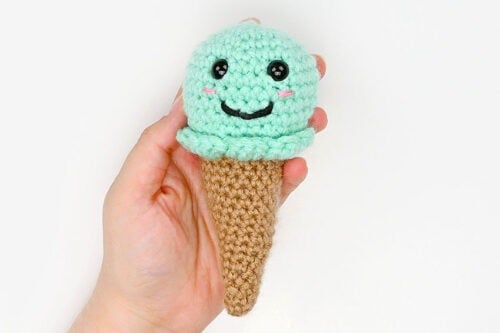
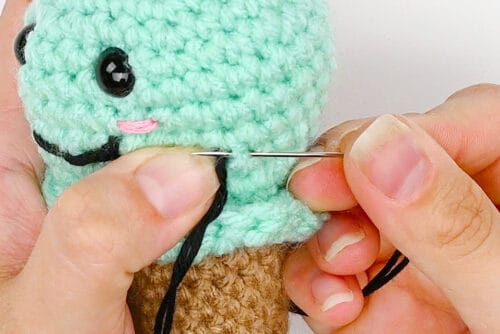
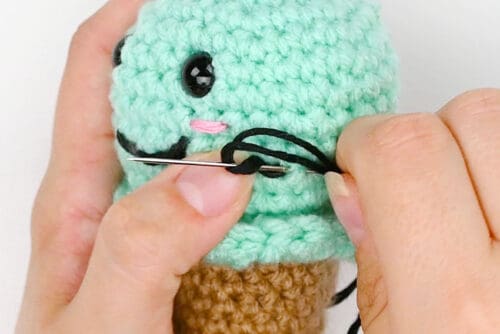
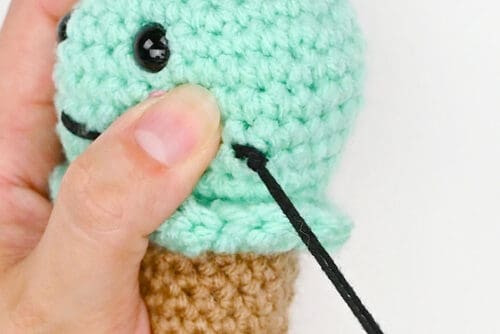
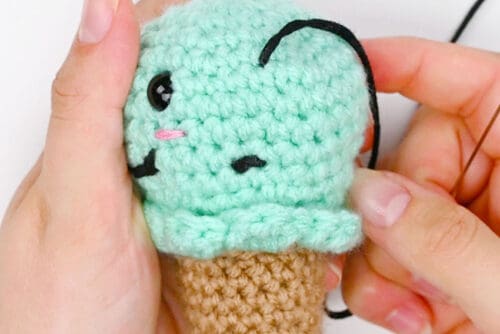
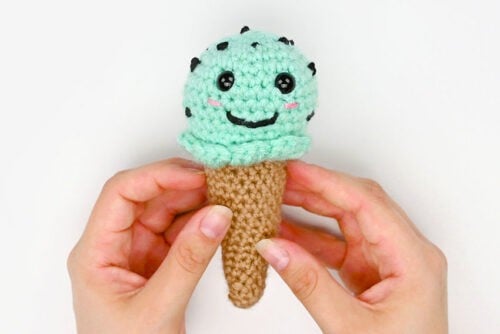
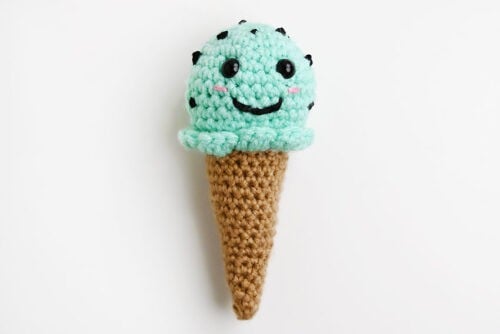
- Use black embroidery floss to sew on a smiling mouth. Then use pink embroidery floss to sew on 2 lines of blush below the eyes, creating rosy cheeks.
Add toppings (optional):
- Now you can embroider sprinkles or chocolate chips onto the ice cream scoop.Make French knots to create the chocolate chips. Begin by sewing dark brown or black embroidery floss into the ice cream scoop.Pull the floss through until the end is hidden inside.
- Insert the needle into the ice cream again, right beside where it was pulled through.
- Wrap the floss around the needle twice.
- Pull the needle through while holding the the looped floss.
- Insert the needle into the scoop right by where the knot was made.Now bring the floss up in a new spot to make another knot.
- Repeat, covering the ice cream scoop with as many chocolate chips as you’d like.
- Your crochet ice cream cone is complete!
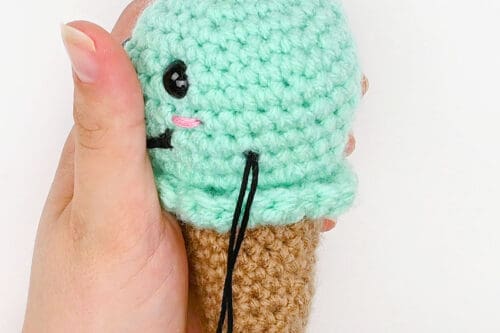
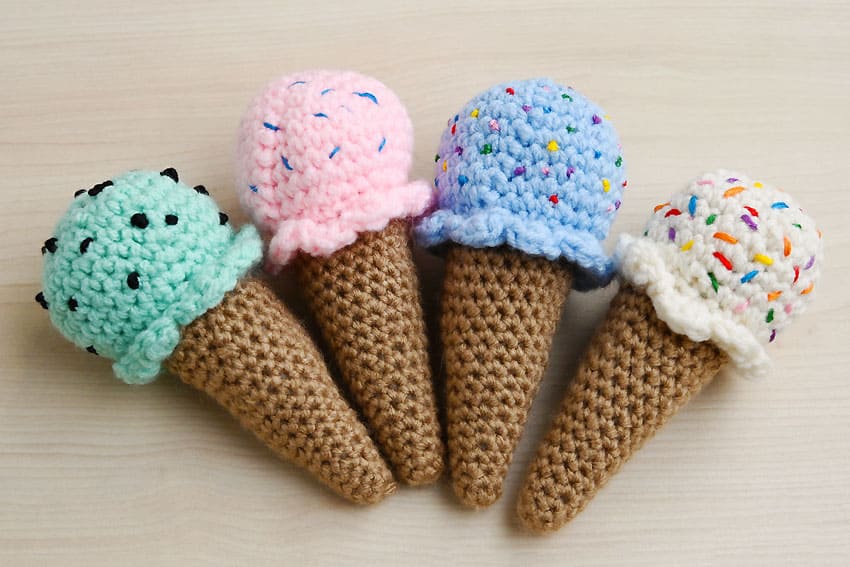
- Have fun making different “flavours” of ice cream and adding different “toppings”. Read more details below!

Helpful Tips:
- Want to study up on simple crochet stitches and techniques? Visit our crochet basics posts for step-by-step tutorials and helpful tips!
- Add a cute face on your ice cream scoop to create an amigurumi ice cream cone, or leave off the face to create a cute soft toy for pretend play kitchens.
Crochet Abbreviations & Terms:
This pattern uses standard US crochet terms. Here’s what each abbreviation means:
ch(s) = chain(s)
dc = double crochet
dec = decrease
FLO = front loop only
inc = increase
rep = repeat
sc = single crochet
sl st = slip stitch
st(s) = stitch(es)
Get our crochet ice cream cone pattern:
You can follow the full crochet ice cream cone pattern with step-by-step instructions for free right here in this post (supported by ads). Or, if you’d like a printable amigurumi ice cream cone PDF pattern with BONUS Quick Guide, you can purchase it in our Etsy shop. It’s perfect to keep by your side as you crochet!
Printable Crochet Ice Cream Cone Pattern
Get the printable Crochet Ice Cream Cone Pattern PDF with step-by-step photos + BONUS Quick Guide in our Etsy shop!
What size is this crochet ice cream cone?
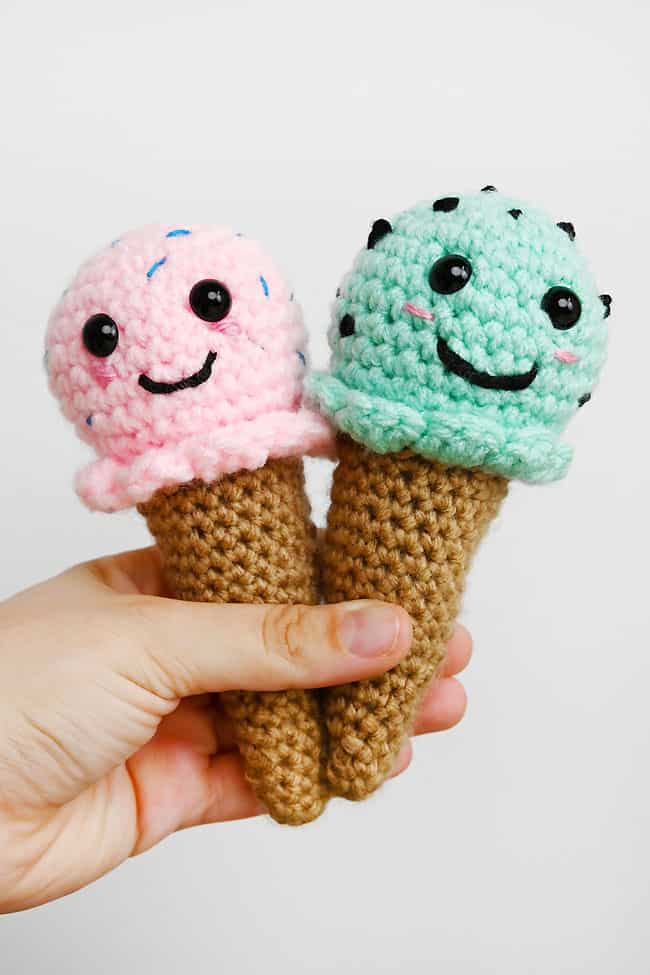
This pattern makes an ice cream cone about 5-1/2 inches tall, with a scoop about 2 inches across.
The exact size will, of course, depend on your specific yarn and tension. We used a thinner worsted weight yarn for the cone, so yours might turn out a little bit bigger.
What’s the best yarn for making a crochet ice cream cone?
We used worsted weight acrylic yarn to make our ice cream cone. This makes a small but realistic sized ice cream amigurumi, perfect for a play kitchen. But you can also use chenille bulky yarn for a larger cone, or even jumbo blanket yarn for an extra-large soft toy.
What kind of “toppings” can I add on my crochet ice cream cone?
You can follow the instructions in the pattern above to create chocolate chips, using dark brown or black embroidery floss.
Make short stitches in different colours to create sprinkles, or you can even sew on seed beads or bugle beads for a little extra sparkle.
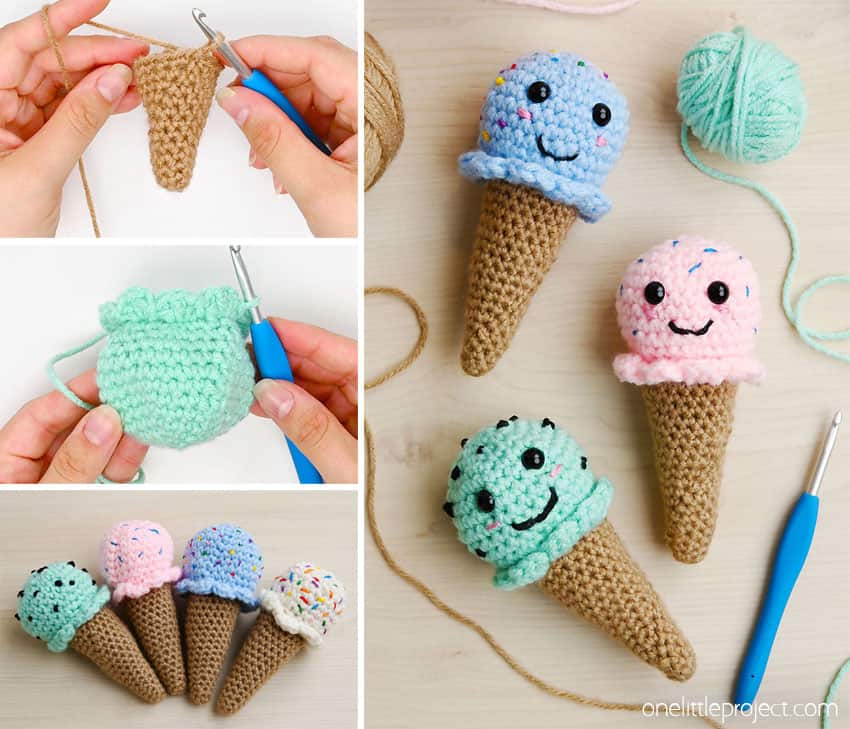
This crochet ice cream cone is such a fun way to make a sweet treat that never melts! With the textured cone, rounded scoop, and cute ruffled edge, it’s a playful amigurumi project that’s easy to customize with your favourite ice cream colours and toppings.
Make one ice cream cone as a small gift or decoration, or crochet a whole batch in different flavours for pretend play or summer craft shows. Whether you add a cute face, colourful sprinkles, or keep it simple, this little ice cream cone is a sweet project to make again and again.
Here’s even more crochet craft ideas:

Now available
Low-Mess Crafts for Kids Book
72 cute and fun crafts that kids and parents alike can enjoy. All with as little mess as possible!
Where to buy:
You can purchase Low-Mess Crafts for Kids from Amazon, or wherever books are sold:
Amazon | Barnes and Noble | Books-A-Million | Indiebound | Amazon Canada






Leave a Reply