

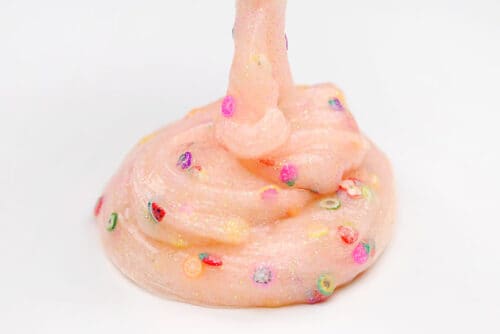
This fruit slime is bright, stretchy, and packed with the cutest little clay fruit slices! With sparkly glitter, a clear slime base, and a sweet orange scent, it’s a full sensory craft experience. Poke it, stretch it, and squish it while enjoying the fruity smell and soft, satisfying texture.
This slime recipe is also easy to customize with your favourite colours, scents, glitter, and add-ins. Make this homemade fruit slime for summer break, day camp, birthday parties, or any time you want to experiment with a fun new slime recipe. Keep reading for the full recipe and helpful tips!

This post contains affiliate links. If you use these links to buy something, we may earn a small commission at no extra cost to you. This helps support our website and allows us to keep creating fun, free content.
How to Make Fruit Slime
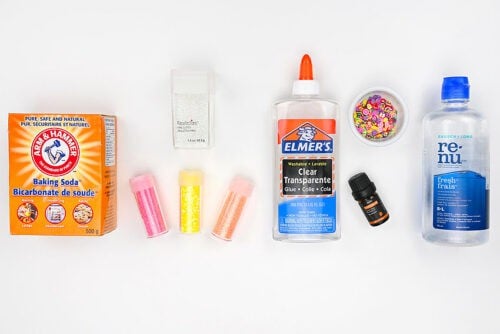
Materials:
- Clear glue
- Baking soda
- Glitter (several colours)
- Clay fruit slices
- Essential oils (sweet orange, or another fruit scent)
- Contact lens solution
Equipment:
See the craft in action:
Instructions:
Step 1: Find what you need
- Gather your supplies and materials.

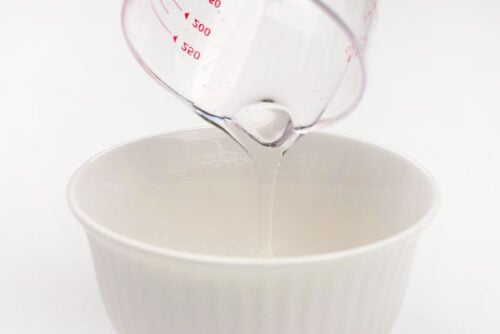
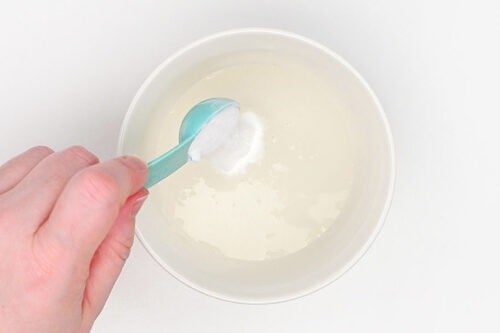
Step 2: Mix the first ingredients
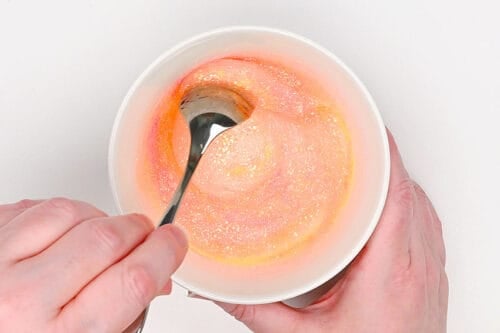
- Pour 1/2 cup of clear glue into a bowl.
- Then add 1-1/2 teaspoons of baking soda. Stir to combine.

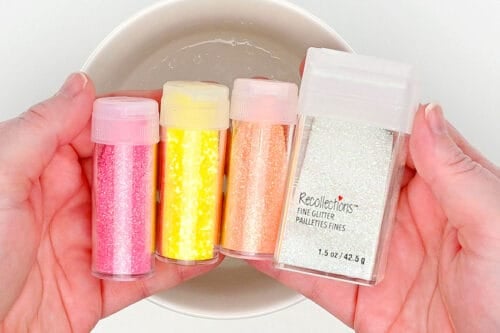
- Gather a few colours of glitter. We chose white iridescent glitter and a few citrus shades.
- Stir to mix the glitter in fully.
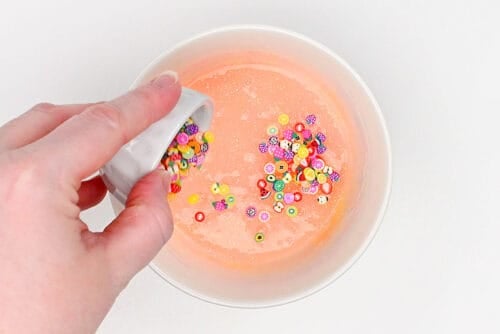
- Then add in polymer clay fruit slices, or other fruit charms.
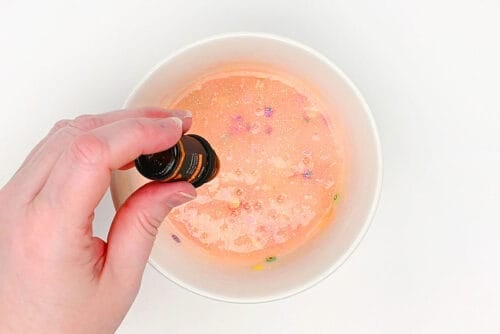
- To add a fruit scent to your slime, shake in 5 to 10 drops of essential oil or fragrance oil. We used sweet orange, but any fruit scent will do!
Step 3: Activate the slime
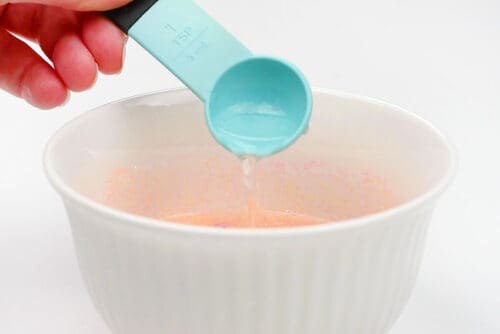
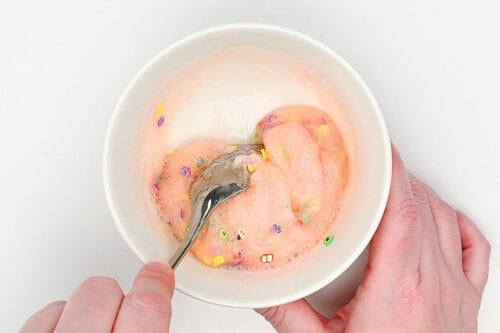
- To activate the slime, add 2 teaspoons of contact lens solution to the glue mixture.
- Stir to combine, stirring until you can’t anymore. Use the spoon to press the slime down, incorporating as much activator as you can.
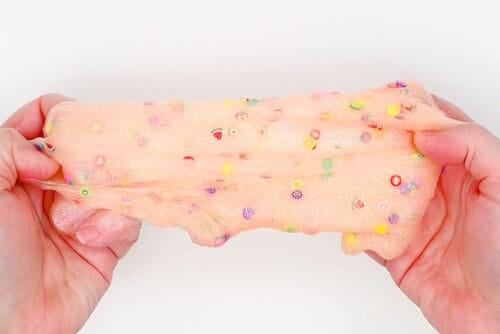
- Then pick up the slime and knead and stretch it. It will be sticky at first, but this will go away as you work with it.If it’s still sticky, add more contact solution, adding only a few drops at a time.
- Optional: Place the slime in an airtight container and wait overnight. This will allow the bubbles to rise and the slime to become more clear.
- Your fruit slime is complete!
Helpful Tips:
- Add the activator slowly, a little bit at a time. Two teaspoons should be the perfect amount, but it’s always best to start slowly since different brands of glue and contact lens solution can have different amounts of boric acid. Knead and stretch the slime well before adding any more activator. If it’s still sticky, add more contact solution a few drops at a time.
- Choose your favourite fruit scent to add a whole extra sensory element to the slime. Try bright strawberry, zesty citrus, sweet orange, tropical pineapple, or summery watermelon!

What’s the best glue for making fruit slime?
We definitely recommend using clear glue for fruit slime. The clear slime base lets the glitter, clay fruit slices, and other add-ins show through really well, making the slime look extra colourful and fun.
White glue will still work, but the slime will be more opaque, so the fruit slices and glitter won’t be quite as visible.
What add-ins can I use for fruit slime?
We used glitter to give the slime sparkle and a bit of colour, then added polymer clay fruit slices. The clay fruit slices are super cute, lightweight, and soft on your hands when you play with the slime.
You can also add fruit-themed slime charms, colourful foam beads, fishbowl beads, bingsu beads, or tiny homemade polymer clay fruit pieces. Just make sure the add-ins are small, smooth, and comfortable to stretch and squish in the slime.

Do I have to leave my fruit slime sitting overnight?
No, you don’t have to leave the slime overnight, but it does help if you want a clearer slime. The baking soda and the bubbles from mixing can make the slime look cloudy at first. Letting it sit overnight gives the bubbles time to rise, so the slime looks clearer and you can see the glitter and fruit slices better.
But if you like how the slime looks right after making it, go ahead and play with it right away! It’s perfectly fine to use immediately, and it’s extra fun when it’s fresh, soft, and super stretchy.

Do I have to add a scent to my fruit slime recipe?
No, you don’t have to add scent to the slime, but it does make the sensory experience even more fun. A fruity scent smells amazing when you stretch, poke, and squish the slime, and it goes perfectly with the clay fruit slices.
We used sweet orange scent, but you can try strawberry, watermelon, peach, pineapple, or any fruit fragrance oil you like. Add the scent slowly and use only a small amount, since a little fragrance oil can go a long way.

This fruit slime is such a fun way to combine colour, scent, sparkle, and texture into one playful slime recipe. The clear slime base lets all those tiny clay fruit slices and glitter pieces show through, making it just as pretty to look at as it is satisfying to squish and stretch.
However you customize it, this fruit slime is a bright, stretchy sensory activity that’s perfect for summer crafting, parties, or anytime you want your slime to have a little extra fruity fun.
Here’s even more summer slime ideas:


Now available
Low-Mess Crafts for Kids Book
72 cute and fun crafts that kids and parents alike can enjoy. All with as little mess as possible!
Where to buy:
You can purchase Low-Mess Crafts for Kids from Amazon, or wherever books are sold:
Amazon | Barnes and Noble | Books-A-Million | Indiebound | Amazon Canada


Leave a Reply