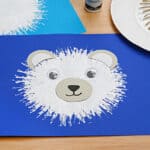
How to Make an Easy Polar Bear Painting
Use a recycled paper roll as a paintbrush in this easy winter art project for kids. Perfect for animal lovers and winter art lessons, this cute polar bear painting is SO EASY to make!
Yield: 1 polar bear painting
Cost: $1
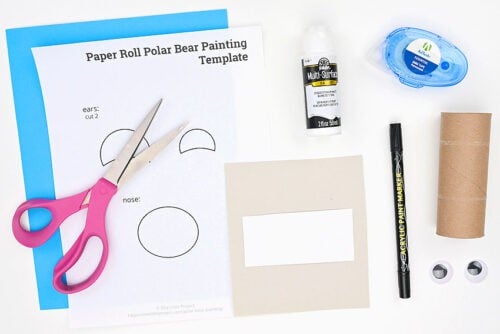
Equipment
- Paper plate (or paint palette)
Materials
Instructions
Step 1: Find what you need
- Gather your supplies and materials.
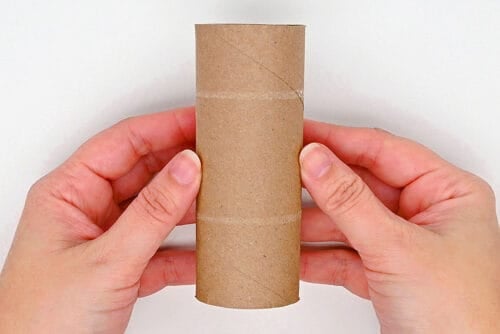
Step 2: Prepare your "paintbrush"
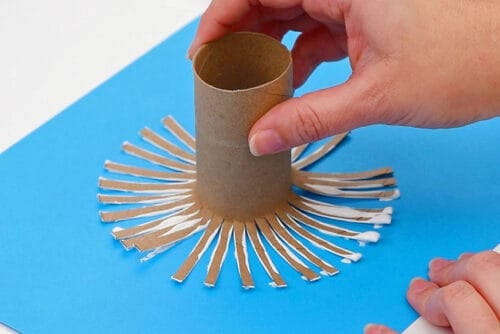
- To make this polar bear painting you'll be using a paper roll as a paint brush!
- Cut thin vertical strips (about 1/4 inch wide) on one end of the paper roll, going close to halfway up.
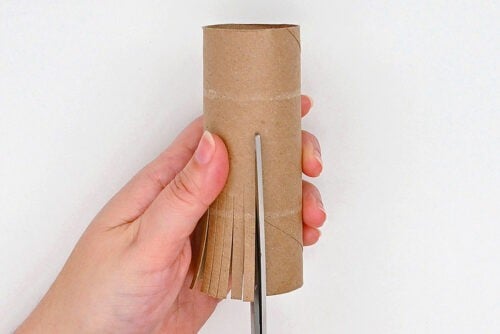
- Push the cut pieces up with your hand so they face out from the paper roll.
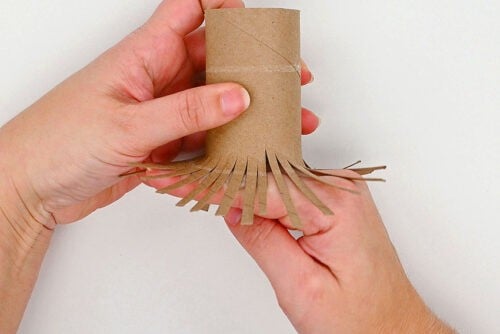
- Then push the paper roll down on your working surface so the strips are fully out, making your paper roll look like a sun.

Step 3: Paint the polar bear's fur
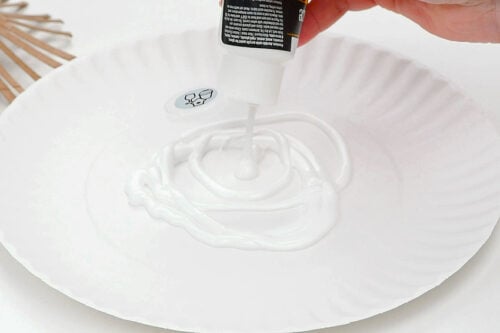
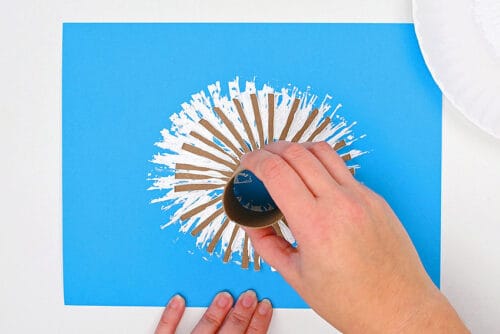
- Add a generous amount of white paint to a paper plate (a baking sheet covered with foil works, too).Spread the paint out so that your "paintbrush" will be able to catch all the paint.
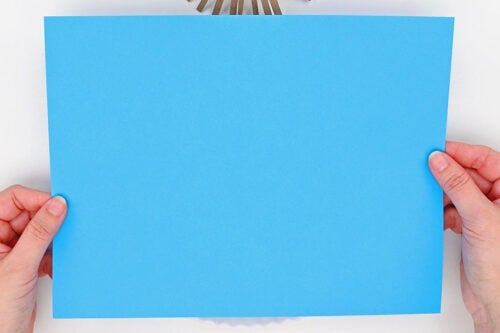
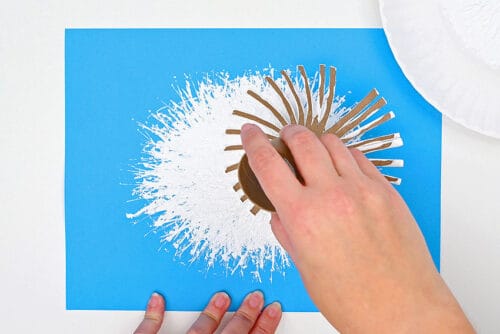
- Choose a piece of coloured cardstock to make your painting on. We found that different shades of blue made a nice, wintery background.
- Dip the paper roll into the paint, covering all the "brush" parts.
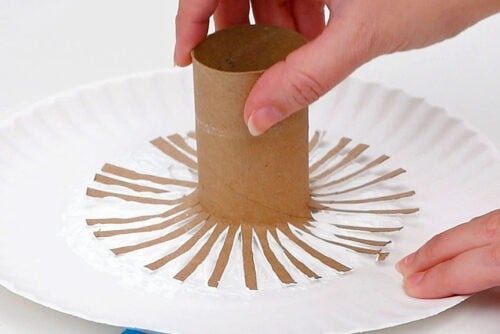
- Now press the paper roll on your paper, stamping paint onto it.
- Move the paper roll around as you lift it up and stamp again.
- Add more paint when needed and continue stamping your polar bear fur onto the page, forming the polar bear's head.You may need to press it down at an angle to ensure the middle gets well covered. Repeat until you're happy with the look and then allow to dry.
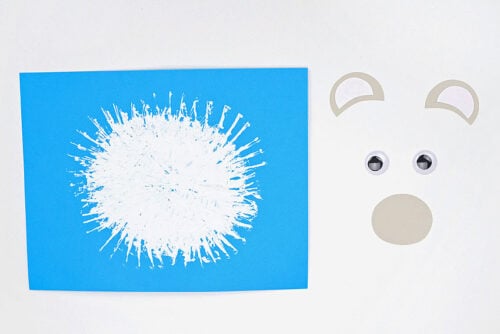
Step 4: Add face details
- Use our free printable template and cut out the ears and snout.
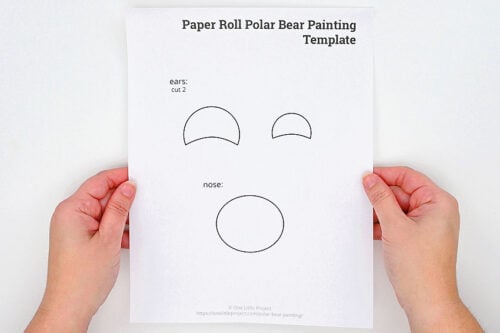
- Cut the ears and snout from light grey cardstock, and the inner ears from white cardstock.
- To attach the pieces we'll be using glue tape. Add glue tape onto the center of the ears.
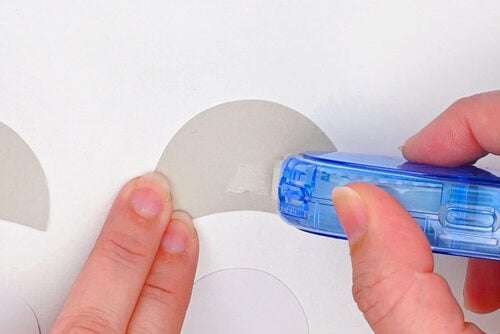
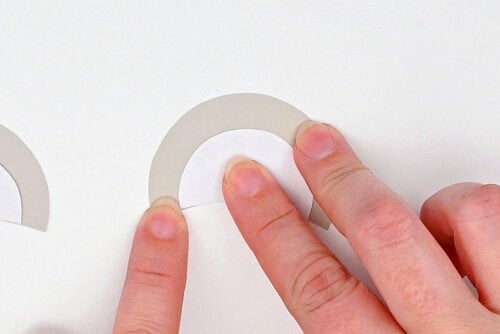
- Then attach the inner ears to the bigger ear pieces, lining up the bottoms.
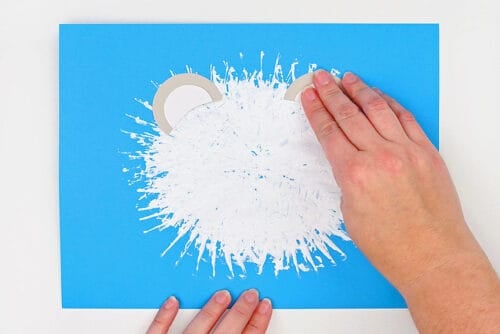
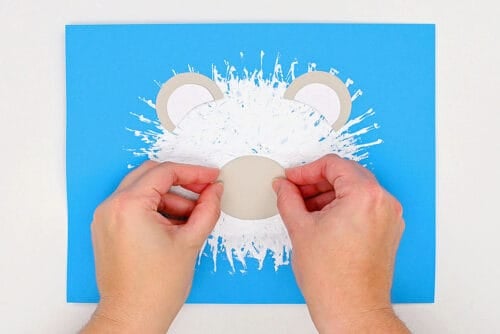
- Add glue tape to the back of the ears and attach them near the top of the head.
- Then glue the snout to the center of the page.
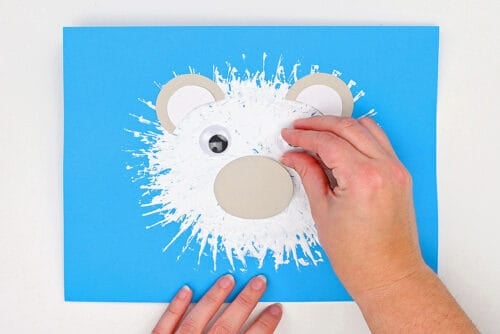
- Then glue on the googly eyes. (You may want to use tacky glue or hot glue to attach these.)
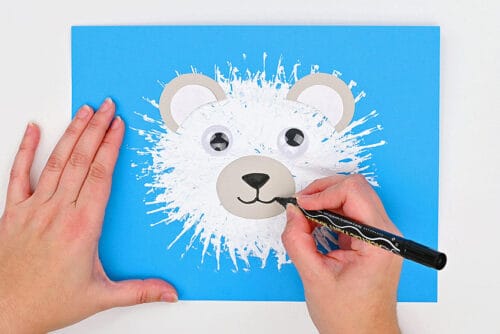
- Finally, use a black marker to add a nose and smiling mouth to the snout.
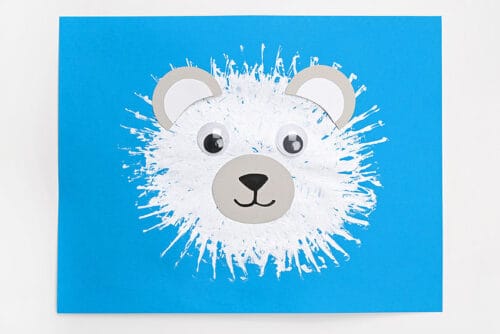
- Your paper roll polar bear painting is complete!
Notes
Don't want to get messy with paint? Here's some low-mess bear craft ideas:
Free Printable Bear Mask
Clay Bear
Bear Coloring Pages