
DIY Father's Day Gift Bags
Add Dad's favourite treats, a small gift, or a heartfelt note to one of these DIY Father's Day gift bags. It's such a fun present for Dad!
Yield: 1 Father's Day gift bag
Cost: $2
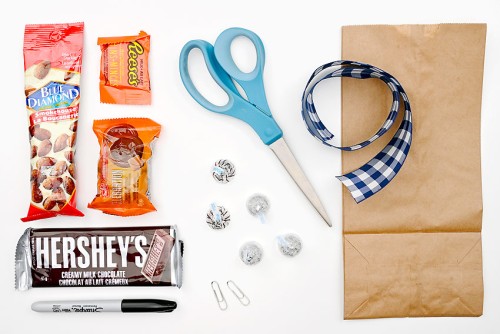
Equipment
- Ruler (optional)
- Paper clip(s) (optional)
Materials
- Paper sandwich bag(s) (5 x 3 x 10 inches)
- Candy or treats for Dad (see below for some gift suggestions)
- Plaid ribbon (1 to 1-1/2 inches wide)
- Black marker
Instructions
Step 1: Find what you need
- Gather your supplies and materials.
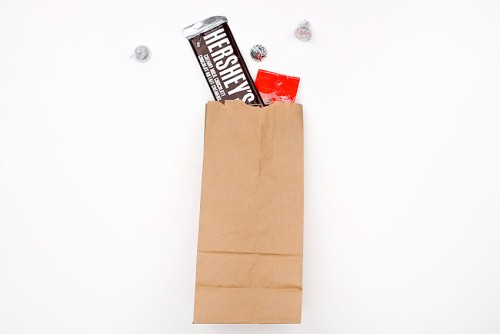
Step 2: Add your gift(s) to the paper bag
- Gather some small gifts for Dad and add them into the paper bag. Don't fill the bag more than 1/2 full.
Step 3: Connect the ribbon to the bag
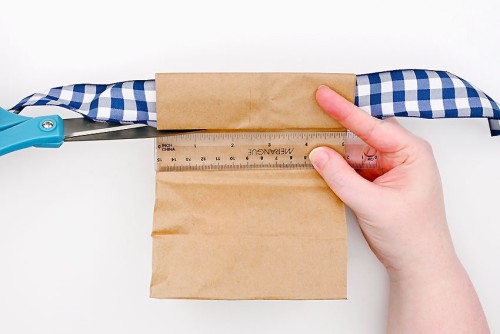
- Cut a piece of ribbon to be 20 inches long.

- Place the ribbon about 1 inch below the top of the bag. Set it so that the left side is a bit longer.
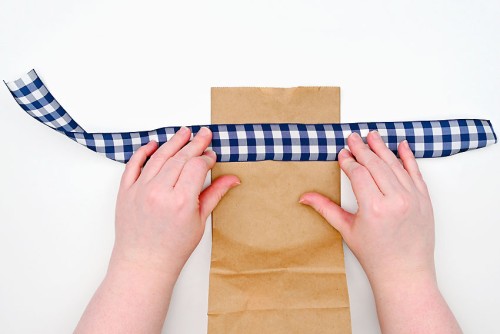
- Fold the bag down over the ribbon 2 to 3 times.
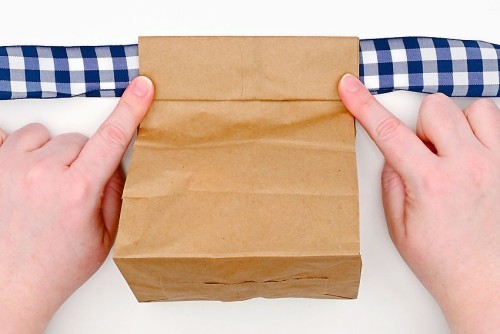
- Cut through the bag just below the folds, going in 1 inch on each side.We measured, so that the sides would be even, but you can just guesstimate if you'd like.
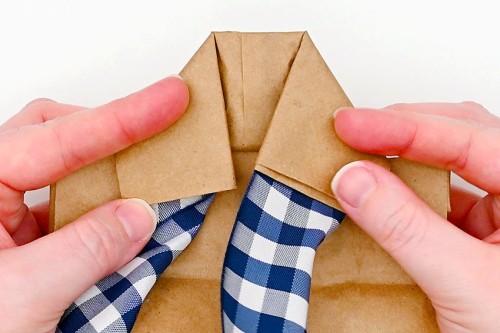
- Fold the top of the bag and ribbon down in towards the center of the bag, with the top corners meeting so it looks like a shirt collar.
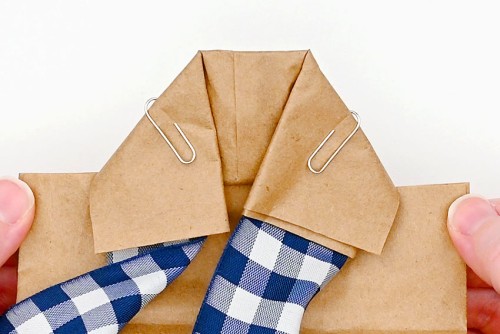
- Optional: Use paper clips to keep the folds of the bag down. You don't have to do this, but it makes it a lot easier to tie the ribbon!
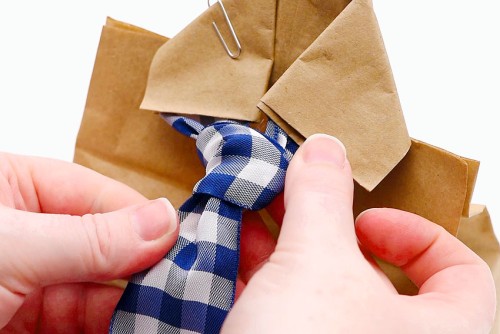
Step 4: Tie the ribbon into a tie
- Tie the ribbon into a tie.To do this, put the left side over the right and then bring it back to the left underneath. Loop it back to the right and then bring it up between the "collar" pieces of the bag.
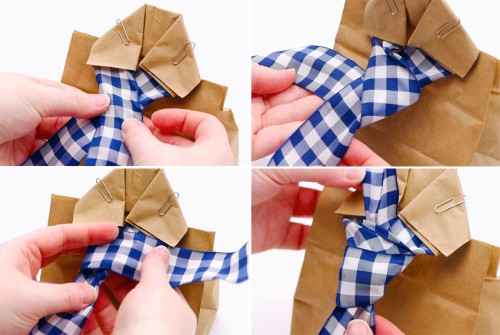
- Finally, bring the ribbon piece down to the front through the loop created.Adjust the tie, tightening it up to the collar area.
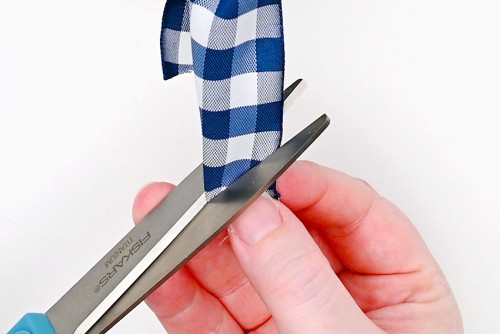
- Cut the back piece of ribbon shorter than the front.Then fold the bottom of the longer front piece together and cut up at an angle to create a pointed tie shape.
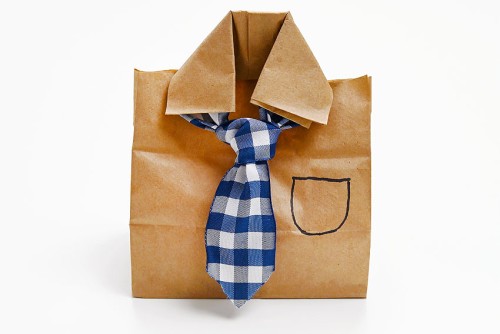
Step 5: Add the finishing touches
- Use a black marker to draw shirt buttons below the tie and a pocket on the right side.

- Your DIY Father's Day gift bag is complete!
Video
Notes
Looking for more Father's Day crafts? Here's a few of our favourites:
Superhero Father's Day Gift
Sharpie Mustache Mug
DIY Father's Day Pop-Up Card