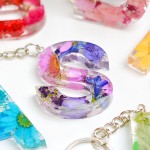
How to Make a Resin Keychain
These resin keychains are such a cool way to use pressed flowers! Have fun making your initial in your favourite colour.
Yield: 3 resin keychains
Cost: $5
Equipment
- Popsicle stick (or silicone stir stick)
- Hand drill (or electric drill with small bit)
Materials
- Pressed flowers
- Casting resin
- Keychain findings (key ring, chain, jump ring)
- Eye pins
Instructions
Step 1: Find what you need
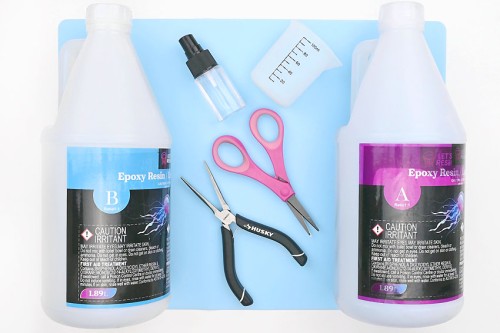
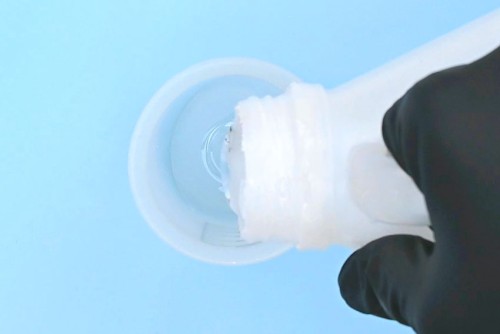
- Gather your supplies and materials.First, you'll need your basic resin supplies.
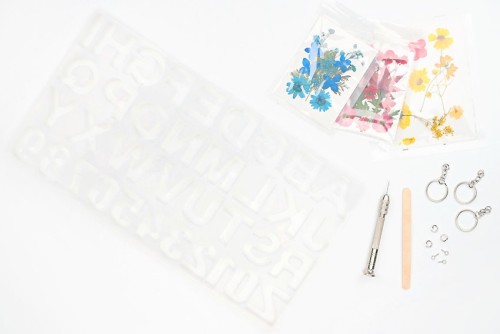
- You'll also need a silicone mold, pressed flowers, and keychain hardware.Find links to all these items in the materials and equipment lists above.
Step 2: Cut the pressed flowers
- Cut the pressed flowers small enough so they'll fit inside your letter mold.
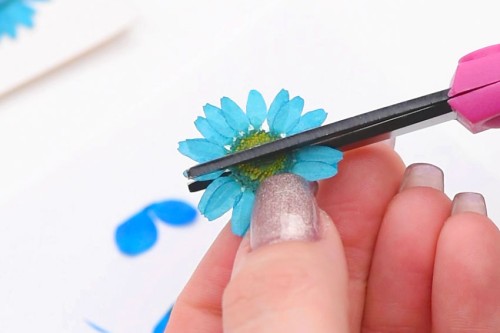
- Repeat until you have a variety of sizes and types of flowers.

Step 3: Mix the resin
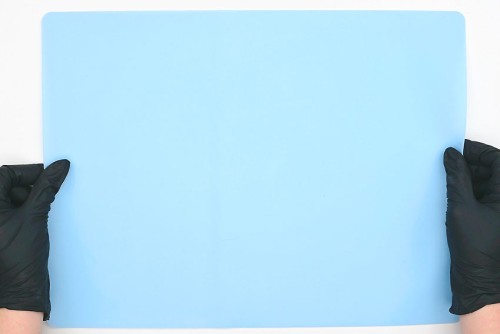
- Before working with resin, protect your working surface with a silicone mat, and be sure to wear protective nitrile gloves and eye protection.You may also need to wear a respirator, depending on the resin. Check your resin label for the safety requirements.
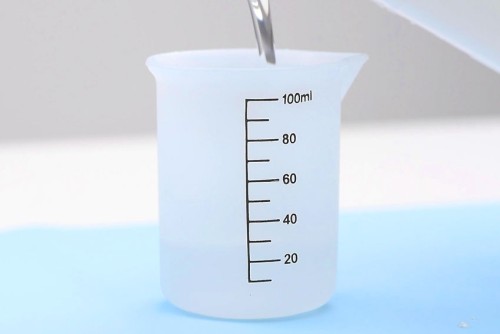
- Mix the amount of resin needed for the number of keychains you'd like to make. We made 6 keychains (3 were off camera) so we mixed 40 ml of resin total. You'll need to adjust the resin amount depending on the size of your molds.Start by adding 1 part of Part A to the silicone measuring cup. The amount of Part A should be half the total amount needed. (In our case, 20 ml.)Follow your specific resin's instructions for ratios, drying times, and curing times.
- Add an equal amount of Part B to the measuring cup, or whatever ratio your brand of resin suggests. (In our case, 20 ml.)
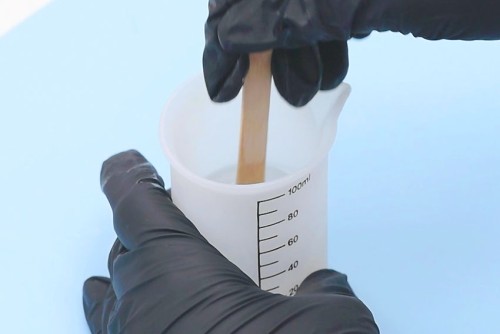
- Mix the resin and hardener together with a popsicle stick or a reusable resin stir stick.Stir slowly, scraping down the sides and bottom of the measuring cup. Continue mixing for 3 minutes or until the mixture is clear.
Step 4: Pour the resin keychains
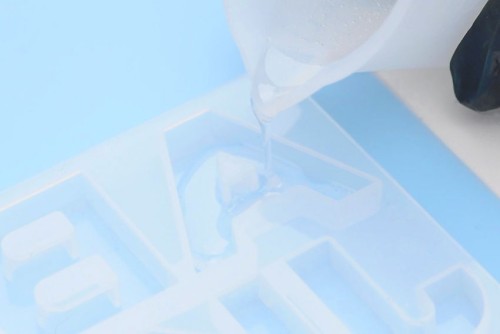
- Pour resin into the silicone mold, filling it about 1/3 of the way.This first layer of resin helps to prevent air bubbles from forming between the flowers and the mold.If there are any surface bubbles, spritz the top of the resin with rubbing alcohol or use a heat gun.
- Add a pressed flower into the resin, face down, pushing it down below the surface.To do this you can use tweezers, or you can wet a popsicle stick with resin to pick it up.
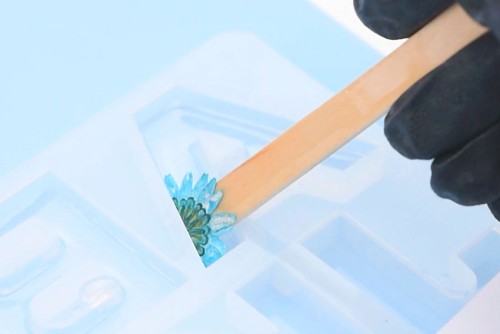
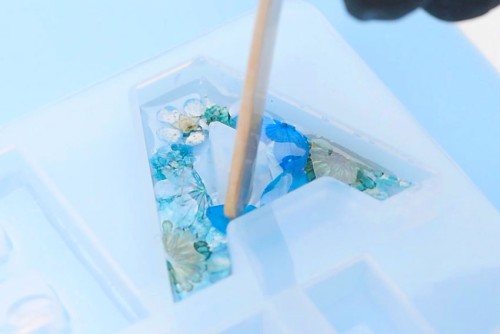
- Continue, layering flowers into the mold, pushing them into the resin until you're happy with the look.
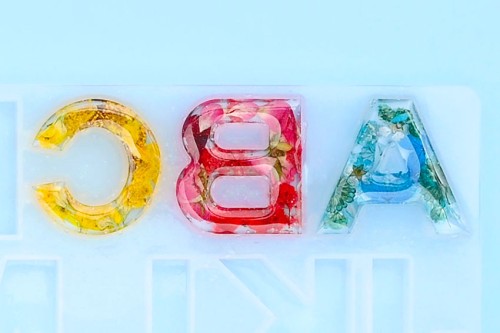
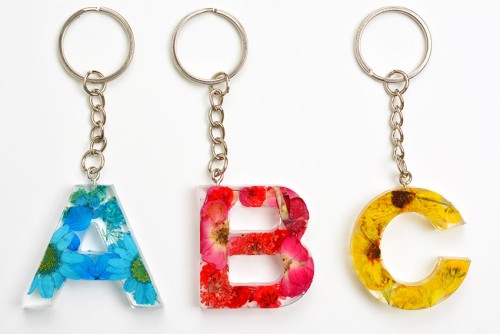
- Repeat with other letters of keychains you'd like to make.We made "A", "B", and "C" here in different colours.

- Now pour more resin in until the molds are full and the pressed flowers are completely covered.

- Repeat with the other letters and let the resin sit, untouched, for the recommended dry (or demold) time.Our resin's dry time is 12 - 18 hours, but we recommend waiting close to 24 hours so that the keychains are hard enough to handle without warping.
Step 5: Demold and attach the keychain
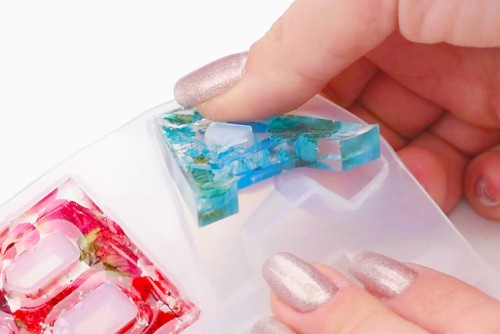
- Once your resin letter is dry you can demold it.Push from the bottom of the mold and stretch it a bit as you pull the letter out.
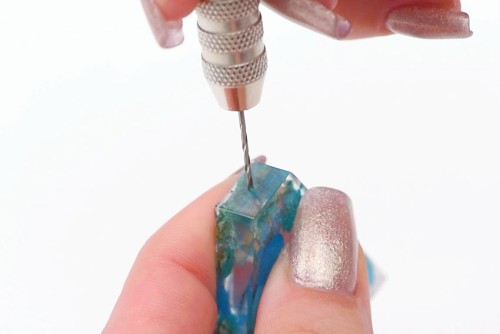
- Use a mini hand drill to drill a hole in the top of the keychain, wherever you'd like the keychain to attach.Make sure you use a drill bit that matches the size of your eye pin. Our letter molds came with the hand drill we used.
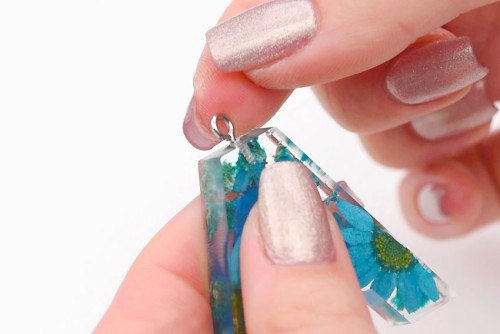
- Screw an eye pin into the hole. Use pliers to tighten the pin once it becomes too difficult to turn.
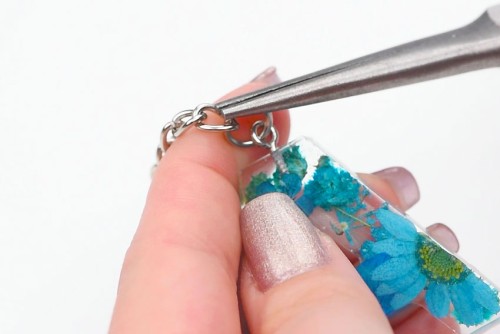
- Use pliers to open a jump ring and attach it to the eye pin. Then attach the end of the chain to the jump ring.

- Close the jump ring with your pliers.
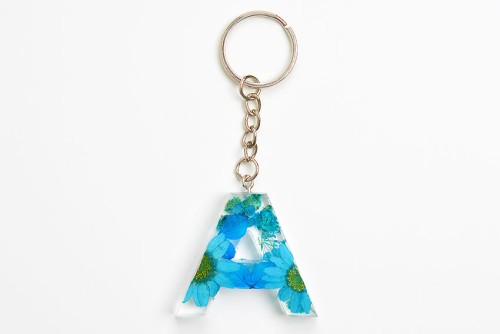
- Your resin keychain is complete!Once your resin keychain has completely cured (72 hours for our resin) you can sand any rough areas off the back.
- Repeat, adding keychain findings to the rest of your resin keychains.Enjoy making one in every letter and colour combination you'd like!
Video
Notes
Looking for more easy resin crafts? Here's a few of our favourites:
DIY Resin Ornament
How to Preserve Flowers in Resin
Resin Coasters