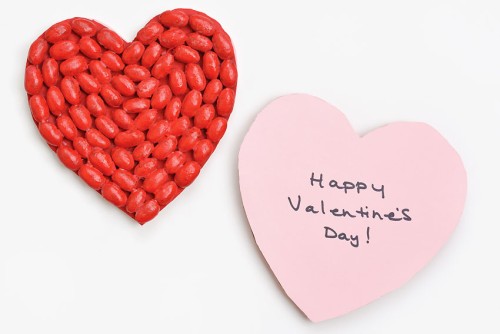
This Valentine’s Day bean art is SO CUTE and colourful! We had so much fun making our fall bean mosaics. So we decided to try the same process to make heart bean art and they look so cute!
Use our free heart outlines and simple supplies to make these homemade Valentines — it’s super easy and so much fun! Thanks to Handmade Charlotte for the adorable idea.

This post contains affiliate links. If you use these links to buy something we may earn a small commission which helps us run this website.
DIY Valentine’s Day Bean Art
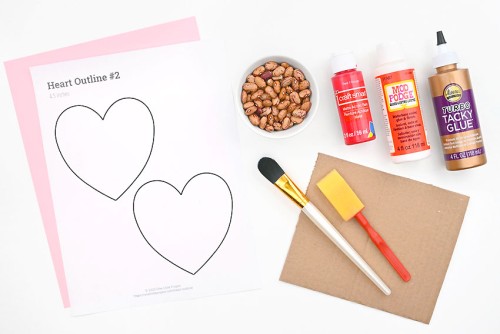
Materials:
- FREE Printable Heart Templates
- Cardstock – Valentine’s Day colours
- Cardboard (Amazon box, cereal box, etc)
- Acrylic paint (red, or another Valentine’s Day colour)
- Tacky glue
- Dried beans (romano, or another type)
- Glossy Mod Podge
- Black marker
- Glue tape
Equipment:
Watch the step-by-step video tutorial:
Instructions:
Step 1: Find what you need
- Gather your supplies and materials.

Step 2: Paint a cardboard heart
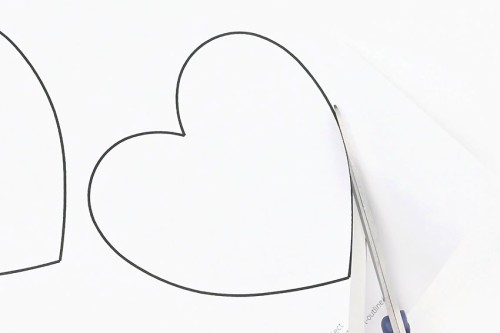
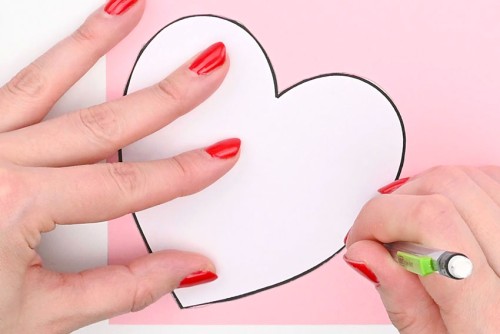
- Print one of our free heart outlines and cut out the shape.

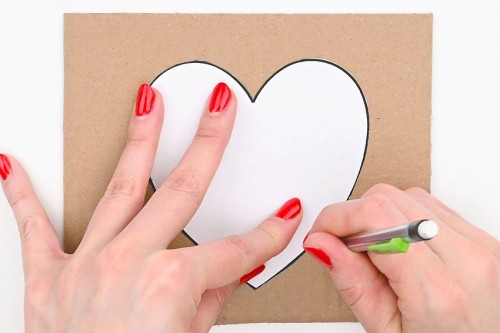
- Trace the heart template onto a piece of cardboard.Save the template for later.
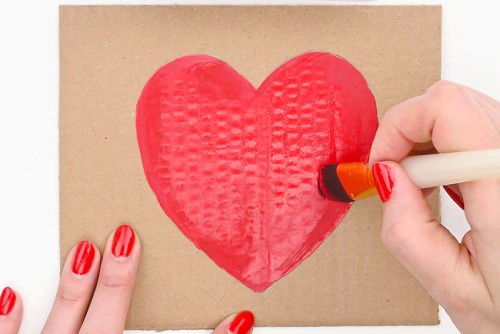
- Paint the cardboard heart with a Valentine’s Day red, or another colour of your choice.Allow to dry.
- Cut out the heart.

Step 3: Glue beans onto the cardboard heart
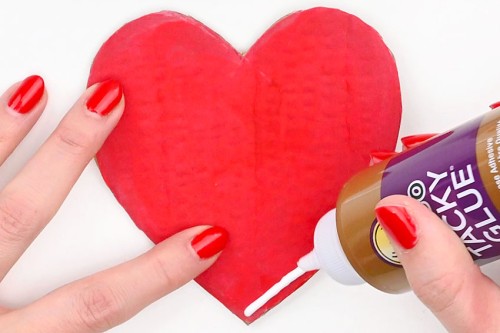
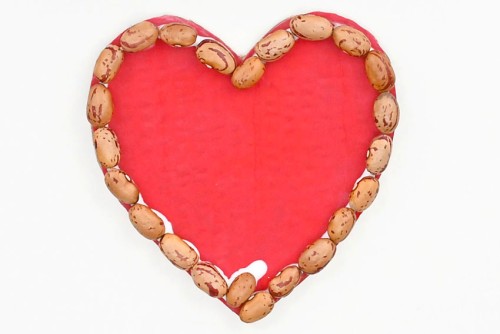
- Starting at the bottom of the painted cardboard heart, add a short line of tacky glue along the outside.
- Press beans into the glue so that the long edge faces the outside of the heart.
- Continue, adding more glue, working a few inches at a time.
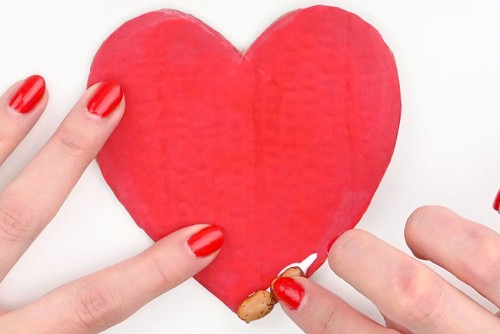
- Add more beans into the glue.
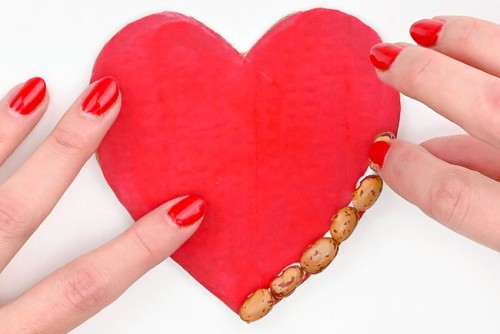
- Repeat these steps until the outside of the heart is filled. Then begin the next row of beans.If there’s only a small space towards the bottom, set one of the beans parallel to the first bean you placed, so the shorter edge fills the outside gap.
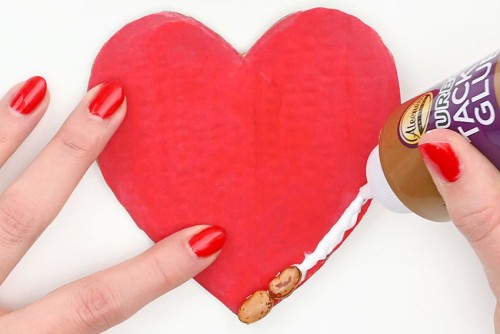
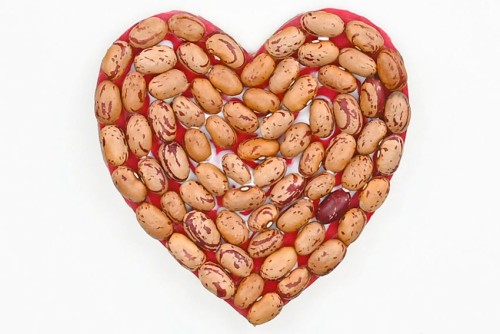
- Continue adding beans, working counterclockwise towards the center.
- Repeat until the heart is full.Allow the glue to dry.

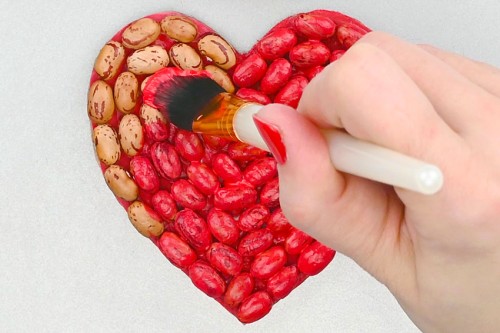
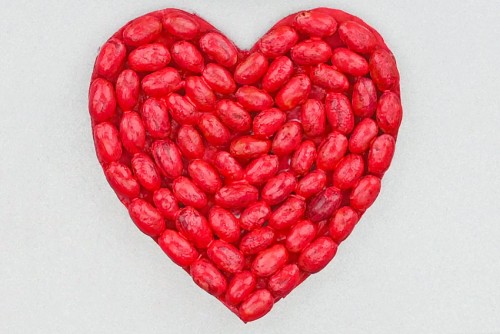
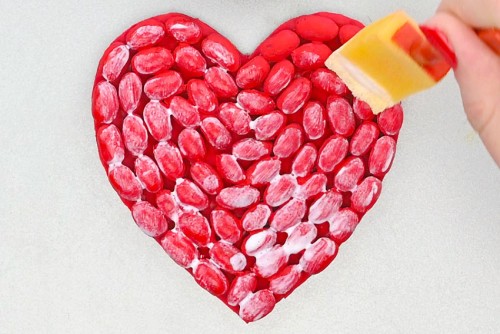
Step 4: Paint your heart bean art
- Place your heart on a tray, or another surface you don’t mind getting paint on.Use a medium or large sized paint brush to paint the beans the same colour as the cardboard background.
- Continue until all the beans are covered. Try to paint down between the beans as well so the coverage looks uniform. Allow to dry, and add a second coat of paint if needed.
- Optional: Use a sponge brush to add a coat of glossy Mod Podge to give your bean art a shiny look.
Step 5: Make your bean art into a Valentine
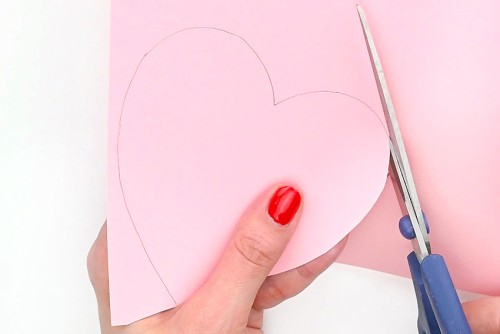
- Trace the heart outline onto a piece of cardstock or paper that complements your paint colour.(You can also print the template onto the coloured cardstock or paper.)
- Cut out the coloured heart shape.
- Use marker to write your Valentine’s message onto the paper heart.
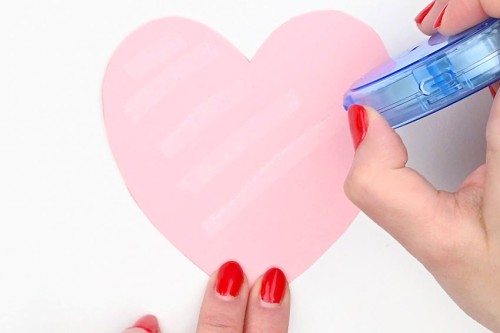
- Add glue tape to the back of the coloured heart.
- Attach it to the back of the bean mosaic heart (the plain cardboard side).
- Your bean art Valentine is complete!


Helpful Tips:
- Paint the back of the cardboard and write your Valentine’s message directly on the back, instead of cutting out a separate cardstock heart.
- Mix and match different kinds of beans on the same heart for a true mosaic look.
- Visit our heart outline page to to choose your favourite heart shape! There are 8 different heart outlines, each of them free to download and print.

What type of beans should I use for Valentine’s Day bean art?
We used romano beans to make the heart in the tutorial above. We also used chick peas, kidney beans, and yellow whole peas for the other hearts in the photos.
There are so many varieties of dried beans, and most of them would work really well to make these Valentines. We recommend larger beans like lima beans, black-eyed peas, or navy beans.
You can also use split peas or lentils, but it’s very time consuming to add them onto the cardboard, unless you spread a layer of glue and sprinkle them on.

What Valentine’s Day message can I write on the back of my heart bean art?
We kept it simple, with a straightforward “Happy Valentine’s Day” message, but there are so many fun bean puns you can add to the back of your Valentine. Here’s some of our favourites:
- You’re my favourite human bean.
- Where have you bean all my life?
- I love you with every fiber of my bean.
- Bean thinking of you.
- Will you bean my Valentine?
- You’re totally cool beans!
- Thanks for bean such a great friend.

How else can I decorate my Valentine’s Day bean art?
You can see from some of our photos that we glued a pom pom border onto a few of our hearts. It adds such an adorable look to the bean art, almost like a heart shaped doily or a Valentine’s chocolate box!
You can also sprinkle glitter onto the mod podge before it dries to add some extra sparkle to your Valentine.
What colours are best for making Valentine’s Day bean art?
We used various colours of acrylic paint on our bean art hearts. For the tutorial above we used red Craft Smart paint, but we used Apple Barrel brand for the rest of the heart mosaics.
We used “bright red”, “pure pink”, “light pink”, “orange cream”, and “wisteria” (light purple).
Red, pink, and purple are classic Valentine’s Day colours, but you can branch out and use whatever colour (and paint brand!) you like the best.

This heart bean art is so much fun to make, and these DIY Valentine cards look so cute! This Valentine’s Day art project will help younger kids with their fine motor skills, and it also encourages patience as you wait between dry times.

Here’s even more Valentine’s Day craft ideas:


Our book Low-Mess Crafts for Kids is loaded with 72 fun and simple craft ideas for kids! The projects are fun, easy and most importantly low-mess, so the clean up is simple!

Where to buy:
You can purchase Low-Mess Crafts for Kids from Amazon, or wherever books are sold:
Amazon | Barnes and Noble | Books-A-Million | Indiebound | Amazon Canada


Leave a Reply