Learn how to tie dye socks using our easy step by step photo and video tutorials. Transform ordinary white socks into colourful works of art with this quick and easy dyeing process. This DIY project is such a fun summer craft for both kids and adults!
Add some colour to your sock drawer and make your own custom socks using 3 different tying methods. Plus keep reading for some helpful tips and tricks for creating different patterns and colour combinations!

This post contains affiliate links. If you use these links to buy something we may earn a small commission which helps us run this website.
How to Tie Dye Socks
Materials:
- White cotton socks
- Tie Dye kit (including dye, bottles, elastics, etc)
Equipment:
- Nitrile gloves (or rubber gloves)
- Ziploc bags (sandwich size; or plastic wrap)
Watch the step-by-step video tutorial:
Instructions:
Step 1: Find what you need
- Gather your supplies and materials.

Step 2: Soak the socks in soda ash water
- Make sure you wear gloves and an apron while tie dyeing.Protect your working surface or tie dye outside if possible.

- Follow the instructions of your specific tie dye kit.Mix 1 ounce of soda ash into 2 cups of water. Stir well.
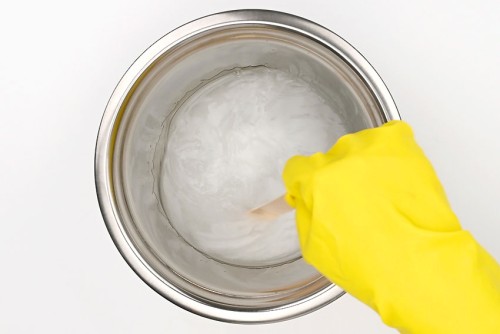
- Place your socks into the soda ash mixture and soak them, making sure they’re well coated.
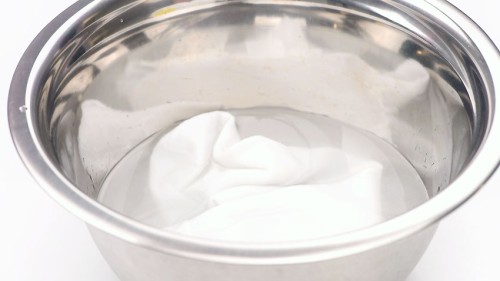
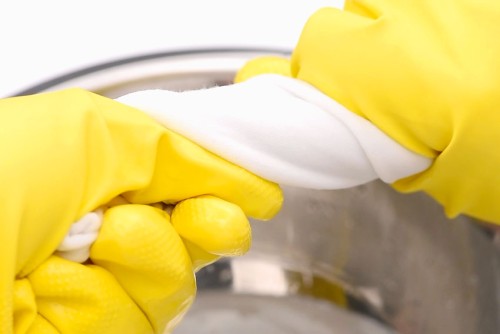
- Remove the socks from the soda ash mixture and wring them out well. The socks should be damp but not soaking wet.
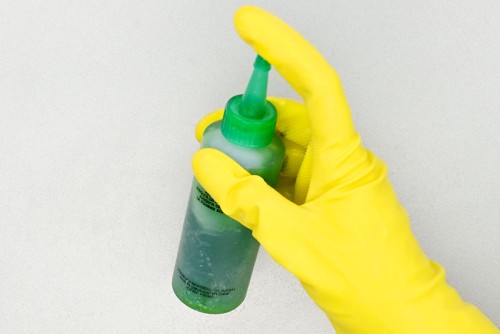
Step 3: Mix your dyes
- Pour water into the bottle with the tie dye powder in it. Your instructions should list a specific amount of water to add, or look for a fill line on the side of the bottle.
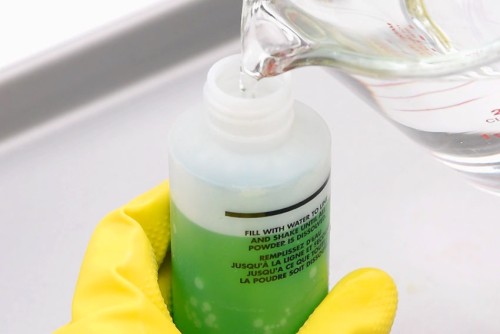
- Put the lid on the bottle and make sure it’s nice and tight. Shake the bottle well to combine the dye.Make sure there aren’t any clumps of powder remaining at the bottom.
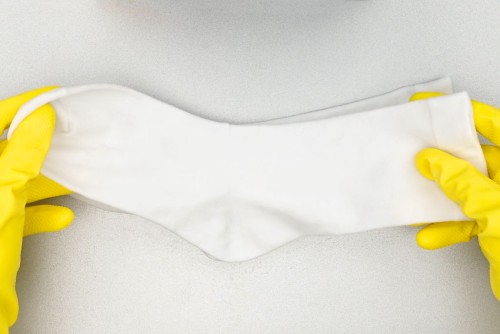
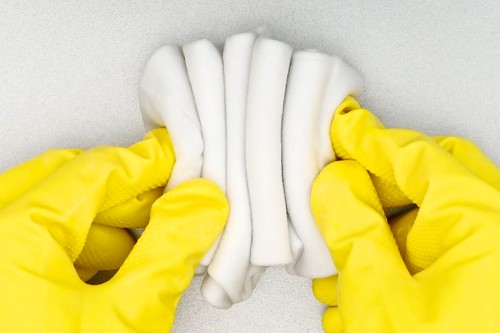
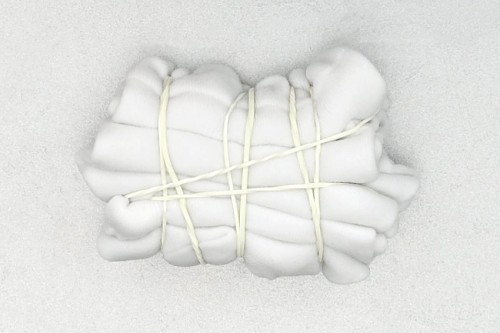
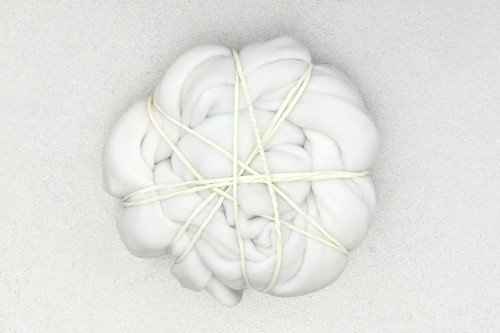
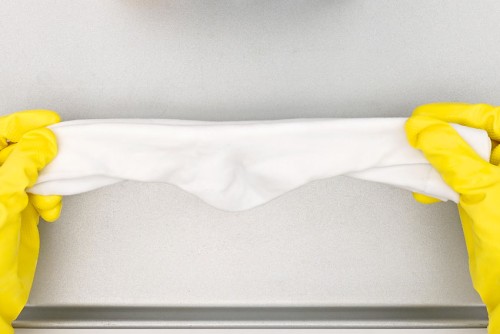
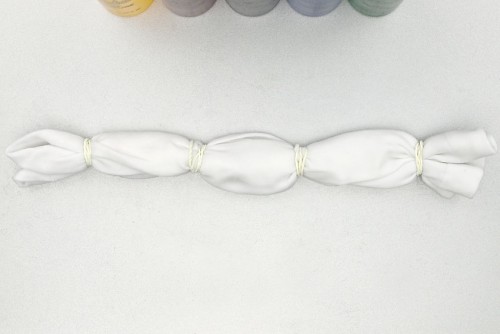
Step 4: Fold and tie your socks
- Lay a sock flat on a tray and add your second sock on top.We’ll be dyeing the socks together so that they have an identical pattern. But you can also do them separately if you don’t mind the patterns being different.
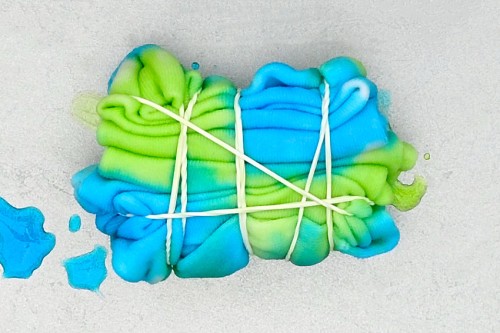
- Accordion fold your socks together.
- Add a rubber band around the center of the socks to bundle them together. Place two more on either side and then add another elastic going the other way across the socks (perpendicular to the last ones).This accordion fold method results in a sock with multi-coloured stripes.
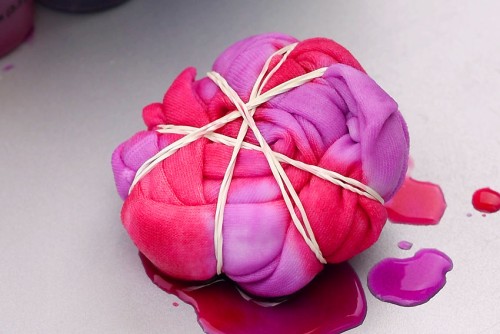
- You can also try a couple other different tying methods or experiment with your own design.Twist your socks together and then roll them together like a cinnamon bun.
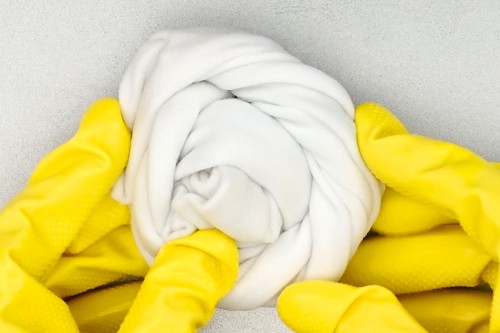
- Then add your rubber bands around the sock bundle at different angles, creating a “sliced pie” look.This method results in a sock with a swirl design.
- Or you can simply fold each sock in half lengthwise before placing them together.
- Add elastics across the sock, creating equal sections.This sectioned sock will result in a sock with vertical stripes.
Step 5: Add dye to the socks
- Uncap the dye and squeeze the bottle to apply dye onto the socks. Add enough so that the dye will go through all the layers.Apply a second colour of dye (or as many colours as you’d like).(You can also set your socks on a cooling rack before applying the dye. This will stop the dye from pooling and going where you don’t want it to.)
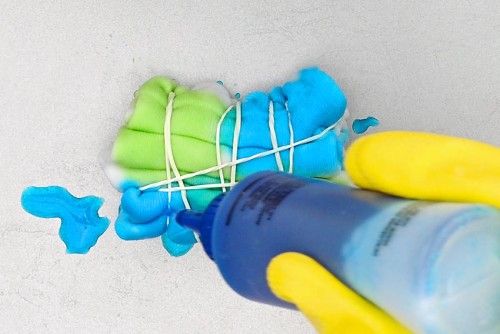
- Flip the socks over and add dye to the second side.
- You can add a colour to every other section of the “cinnamon bun” socks and use a complementary colour (or different shade) for the remaining sections.
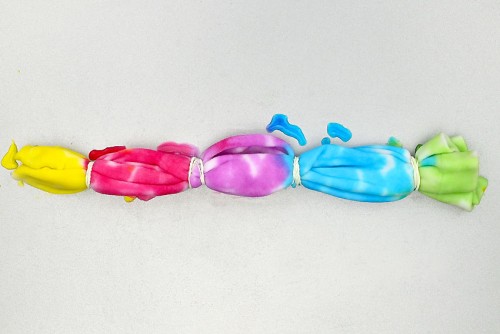
- Add 1 colour to each section of the long socks to create a rainbow pattern, or whatever colour combination you’d like.
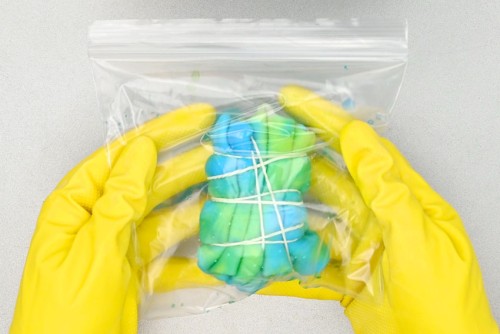
- Place each pair of socks in their own plastic Ziploc bag or wrap them in plastic wrap.Wait 24 hours.
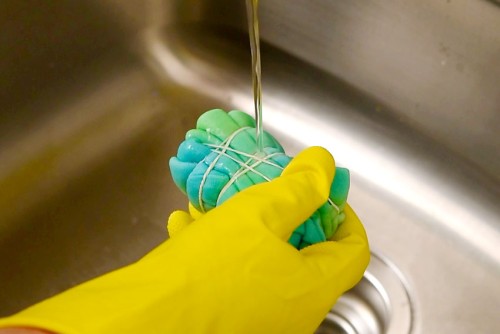
Step 6: Rinse out the excess dye
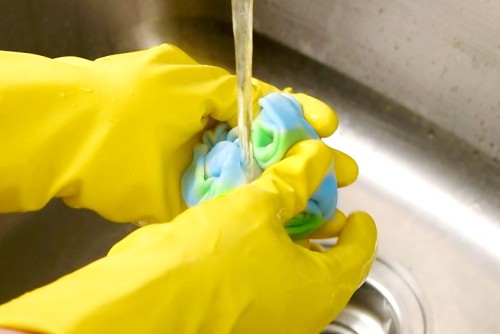
- Remove the socks from the bag and rinse them under cold water with the elastics still on.It’s okay if dye is running out at this point — it’s better that the extra dye comes out now.
- Once the water runs clear you can remove the elastics and either wash the socks by hand, or place them in a washing machine with warm water and mild detergent.The socks should be washed by themselves or by hand the first few times to make sure the dye doesn’t run.
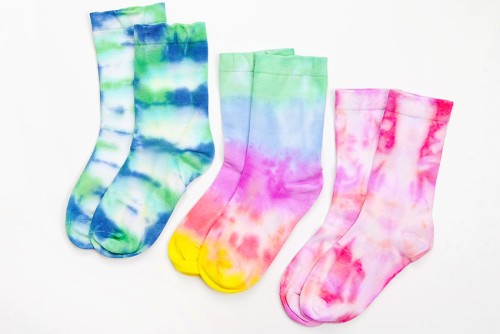
- Your tie dye socks are complete!
Helpful Tips:
- Pre-wash your socks before tie-dyeing to help the dye adhere better to the fabric.
- Experiment with different folding and tying methods to achieve unique designs on your tie dye socks.
- Make sure you follow the specific instructions for your brand of tie dye. Different kits will have different steps — for example the Tulip brand tie dye doesn’t have the soda ash as a separate ingredient.

What type of socks are best for tie dye?
Dye absorbs better into natural fibers, so make sure you buy a pair of white socks made from cotton or bamboo. Most socks are made from a blend of cotton and another fiber, so try to buy ones that have at least 70% cotton or more.
Synthetic fibers, like polyester, don’t hold the dye well. It’s okay if the sock is a cotton-poly blend, as long as the percentage of cotton is high enough.
Should you tie dye socks while they’re wet or dry?
You can tie dye the socks either wet or dry, but it’s recommended that beginners tie dye socks while wet or slightly damp.
Damp socks are easier to shape and tie together. The dye also penetrates the fabric better when the socks are at least a little bit wet.
Tie dyeing dry socks gives you good separation between colours, since the dye doesn’t spread as much. It gives you more control over where the dye goes, but it can also result in uneven colours.

How long do you leave socks in tie-dye?
You should leave your socks in the plastic bags at least overnight, about 8 – 12 hours. However, for the brightest colours it’s recommended to leave the socks in dye for 24 or even 48 hours.
How messy is it to make tie dye socks?
It can definitely be messy to do tie dye crafts. We recommend doing your tie dyeing outside if you can. Also make sure you wear an apron or play clothes you don’t mind getting dye on.
If you work inside, make sure you protect your working surface. Make sure the lids are tight on your tie dye bottles and shake them over a tray or the sink, just in case there’s any leaks.

What do I need to make tie dye socks?
To make tie dye socks you’ll need socks, of course, and a few other supplies. You can buy tie dye kits that contain all or most of the items you need.
Find these kits at Walmart, craft stores, or online. They make it really easy to get started!
If you want to buy supplies separately, be sure to grab the following:
- “Fiber reactive” dye: These are cold water dyes that are fixed chemically, instead of with heat.
- Rubber bands: Used to tie the socks before dyeing. You can also use string, but elastics are easier to work with.
- Squeeze bottles: To combine the dye and water and to make it easy to dye the socks.
- Soda ash: This substance activates the dye and helps it stick to the material.
- Ziploc bags or plastic wrap: Something to contain the mess and keep the fabric damp while the dye penetrates the material.
- Gloves: To stop the dye from getting on your hands!
What tie dye kit is best for making tie dye socks?
We recommend buying the Tulip brand tie dye kit. It’s a one-step dye, so there’s no need to add the soda ash separately, and it results in socks with bright and bold colours.
You can also buy tie dye kits at the dollar store if you’re looking for a low cost craft, but the quality of the dye isn’t as good. The dye itself doesn’t last for longer than a day (other brands can be used for several days), and in our experience it results in uneven dyes with dull pastel colours.

Learn how to tie dye socks and then have a tie dye party, turning this simple craft project into a fun group activity for the whole family. It’s so cool to create different designs and patterns!

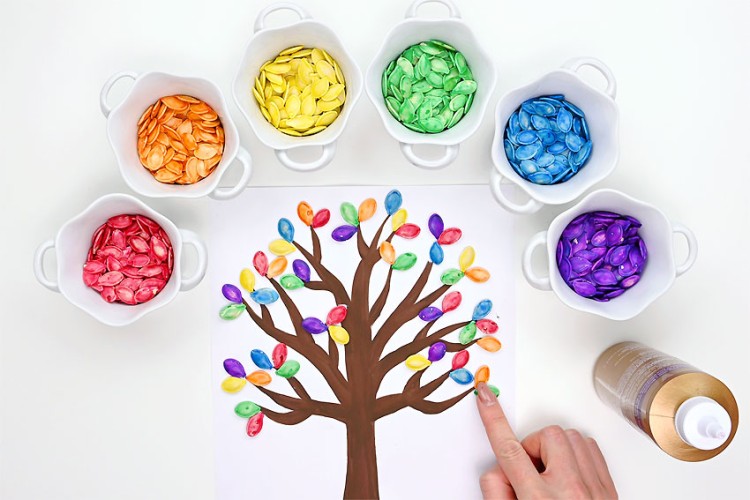
Here’s even more colourful craft ideas:


Our book Low-Mess Crafts for Kids is loaded with 72 fun and simple craft ideas for kids! The projects are fun, easy and most importantly low-mess, so the clean up is simple!

Where to buy:
You can purchase Low-Mess Crafts for Kids from Amazon, or wherever books are sold:
Amazon | Barnes and Noble | Books-A-Million | Indiebound | Amazon Canada


Leave a Reply