
These paper quilling heart cards are a beautiful way to turn simple paper strips into something truly special. With their curled paper details and heart-shaped design, they look impressive but are surprisingly relaxing to make — no fancy tools required.
Perfect for Valentine’s Day, Mother’s Day, birthdays, or just-because notes, these handmade heart cards are a lovely option for teens and adults who enjoy slower, creative crafts. Whether you’re new to paper quilling or looking for a meaningful card idea, this project is all about creating something heartfelt that feels just as good to give as it does to make!

This post contains affiliate links. If you use these links to buy something, we may earn a small commission at no extra cost to you. This helps support our website and allows us to keep creating fun, free content.
How to Make a Paper Quilled Heart Card
Instructions:
Step 1: Find what you need
- Gather your supplies and materials.


Step 2: Prepare the card
- Cut a piece of cardstock in half, so it’s 5-1/2 inches wide and 8-1/2 inches long.(You can use any paper size you’d like, but keep in mind that larger quilling projects take a long time to do!)
- Fold the paper in half to make a greeting card.
- Print one of our heart templates and cut the heart of your choosing.
- Use pencil to trace the heart on the front of the card.


Step 3: Make paper quilled flowers
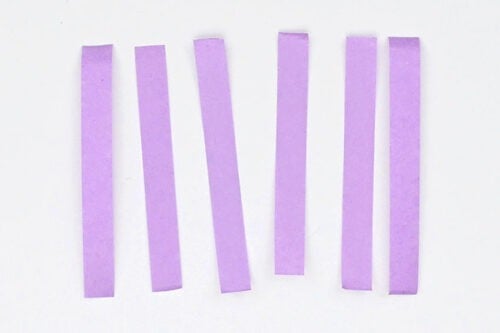
- Cut 3 pieces of purple quilling paper in half, so you have 6 pieces 4-1/2 inches long.
- Place a toothpick on top of the paper and begin rolling the paper around the toothpick.
- Once the roll will stay on its own, remove the toothpick and continue rolling until the end.
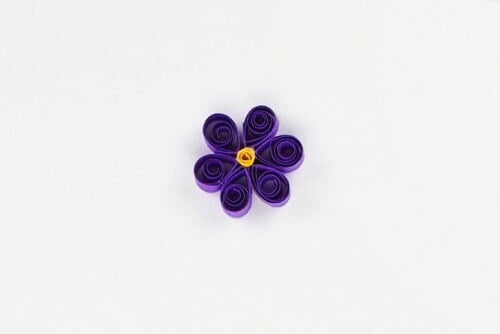
- Loosen the tension on the roll until it makes a circle about 1 cm across. Add glue to the end.
- Secure the circle with the glue and then pinch one side of it, creating a teardrop (petal) shape.
- Repeat with the other 5 sections of quilling paper.
- Cut a yellow piece of quilling paper to be 2 inches long.

- Use the toothpick to roll the yellow paper into a tiny circle. Secure the end with glue.
- Add glue along the pointed edge of one of the petals.
- Attach the petal to the yellow circle.
- Repeat, gluing the rest of the petals evenly around the flower.
- Choose a lighter shade of purple quilling paper. Grab 2 pieces and cut each into 3 even sections (giving you 6 pieces that are 3 inches long).
- Repeat the flower making process with these pieces. This time the circles will be about 1/2 cm.


Step 4: Make quilled circles
- Choose a main colour for your heart (we chose pink). You’ll need between 30 and 40 strips to fill a 3-1/2 inch heart.Leave some strips full length, and cut the rest into a variety of sizes, with 1-1/2 inches being the smallest.
- Use the same rolling technique to make circles in many sizes. Keep some of the circles tight, and loosen the tension on others.You’ll probably need to make more rolls as you work, but it helps to start with a variety of sizes.


Step 5: Attach quilled pieces to the card
- Begin by adding glue to the back of one of the flowers.
- Set it in place on the card, inside the heart.
- Next, glue the second flower in place.
- Then begin adding circles to the card. It’s best to add the first ones right against the flowers so you get a snug fit.
- Fill the heart shape with different sized circles, placing them where they fit best. You can add the glue to the card directly, or to the back of the circles — whatever works best for you.
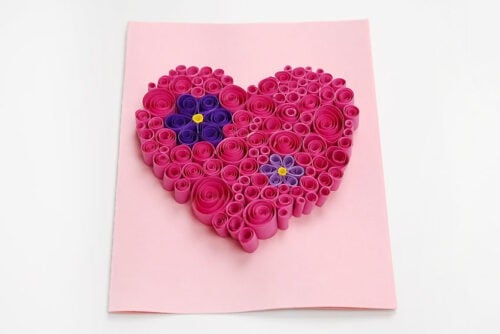
- Continue until the heart shape is filled in with quilled circles.
- Your paper quilling heart card is complete!


Helpful Tips:
- Have fun mixing heart colours: Try making your hearts in different shades, then pick a flower colour that matches (or contrasts) for a pop.
- Less glue = cleaner card: Use tiny dots of glue so it doesn’t seep out from under the paper. This ensures your card stays smooth and tidy!
- Add dimension to the heart: Mix tight and loose coils to create that “quilled texture” look. This is what makes the heart look extra special.

What type of paper is required for making this quilling heart card?
We used 65 lb cardstock for the card base, but thicker cardstock works too. You can also use pre-folded blank cards if you’d like to skip cutting and folding.
For the quilling pieces, we recommend using quilling paper strips. They’re pre-cut, come in lots of colours, and make the rolling step much easier and more consistent.

What glue is best for paper quilling?
We recommend tacky glue or another quick-dry craft glue. Regular school glue works too — it just takes longer to dry, so the pieces can shift more easily while you’re working.
For neat results, use a needle-tip bottle or dab glue on with a toothpick so you only apply a tiny amount at a time.

Do I need any special tools to make this quilled heart card?
A quilling tool makes it easier to roll the paper smoothly and evenly, but you can absolutely use a toothpick or embroidery needle to start. It’s a great way to try quilling with what you already have at home before buying anything.
If you want to level up later, a quilling kit (with a slotted tool and sizing board) helps you make coils in consistent sizes and shapes.

These paper quilling heart cards are such a sweet way to slow down and create something meaningful by hand. Each curled paper detail adds texture and personality, making every card feel unique and full of heart.
This is the kind of project that takes a little time and patience, but the finished card feels extra special because of it. Take your time, enjoy the process, and have fun turning simple paper strips into something truly heartfelt!
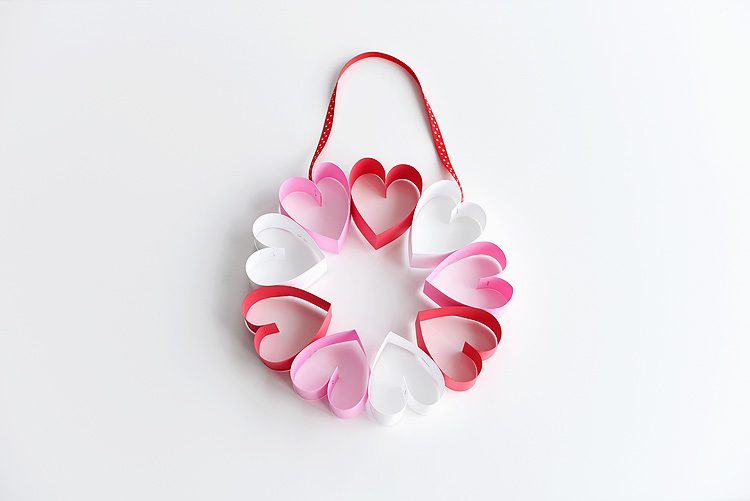
Here’s even more heart craft ideas:


Now available
Low-Mess Crafts for Kids Book
72 cute and fun crafts that kids and parents alike can enjoy. All with as little mess as possible!
Where to buy:
You can purchase Low-Mess Crafts for Kids from Amazon, or wherever books are sold:
Amazon | Barnes and Noble | Books-A-Million | Indiebound | Amazon Canada


Leave a Reply