Jack-o-lanterns are such a fun Halloween idea… in theory, right? I love carving pumpkins, I really do. And my kids get super excited to help me carve the pumpkins each year. But besides the giant mess they make on the dollar store table clothes we set out on the floor, (That’s right table cloths plural, and they still manage to get pumpkin pulp all over the surrounding floor and cupboards…), they get tired of the hard work that goes along with gutting a pumpkin and they give up after about 10 minutes.
Then I’m left with three super pumped, pumpkin covered kids running around the house and I have to wash my own hands, track all of the kids down and give them a good scrub and a wardrobe change, before I’m left alone on the kitchen floor carving the three large pumpkins they convinced me to get for them. I still love doing it, even with all the chaos, but I’m waiting for the fantasy of my three perfect children patiently helping me do all the hard work. Ah, dreams…
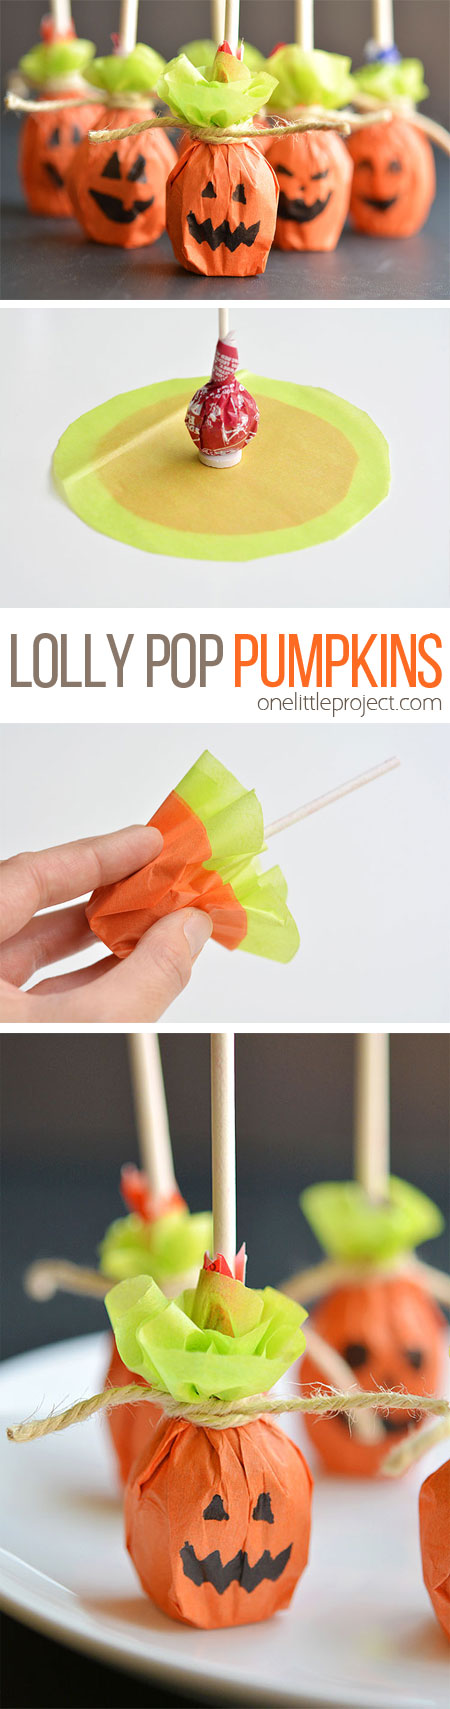
The kids LOVE the idea of jack-o-lanterns, but they’re too little to cut anything out themselves. Which is why these pumpkin lolly pops are pretty much FANTASTIC for them. They can draw half a dozen little faces on the pumpkins, and when their five minute attention span is up, they’re happy with themselves and what they’ve created! Maybe just give them a washable black marker instead of a Sharpie. I know that would help ease my nerves a little bit…
These lolly pop pumpkins are really easy to make! If your kids are older they can help with the cutting and assembling, but if they’re little like my kids, you can let them have the glory of drawing the faces on the pumpkins. These guys make awesome Halloween party favours or treat ideas, and you could even send them to school as a class treat!
I was inspired by the post over at The Gunny Sack. Such a simple and completely adorable Halloween craft/treat idea!
How to Make Lolly Pop Pumpkins
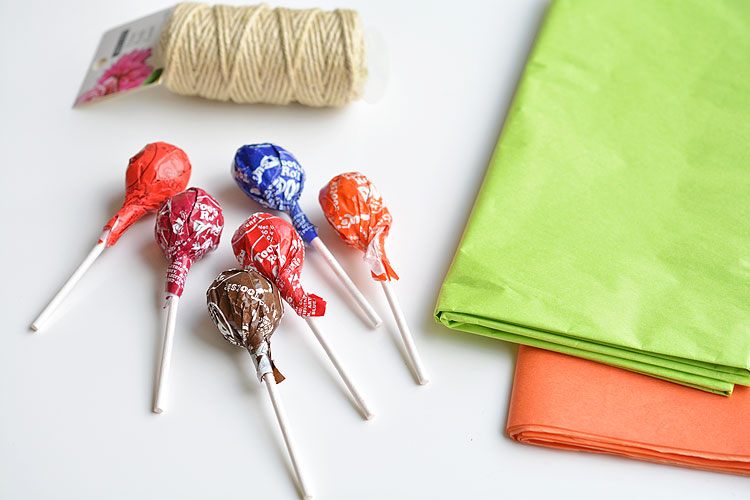
Here’s what you’ll need:
- Tootsie Pop Lolly Pops (Or other round lolly pops)
- Orange Tissue Paper
- Green Tissue Paper
- Twine
- Fine Tip Black Sharpie (Or use a washable black marker if your kids are little)
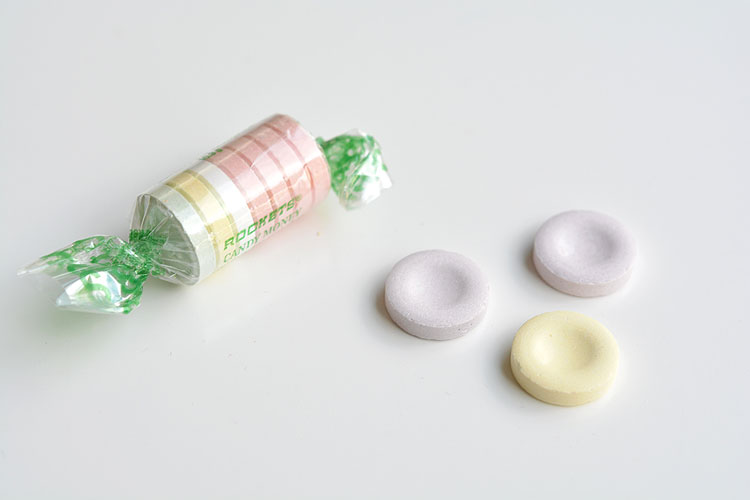
- Large Smartie/Rockets Candy Money
You should be able to get almost all of the supplies at the dollar store and Walmart.
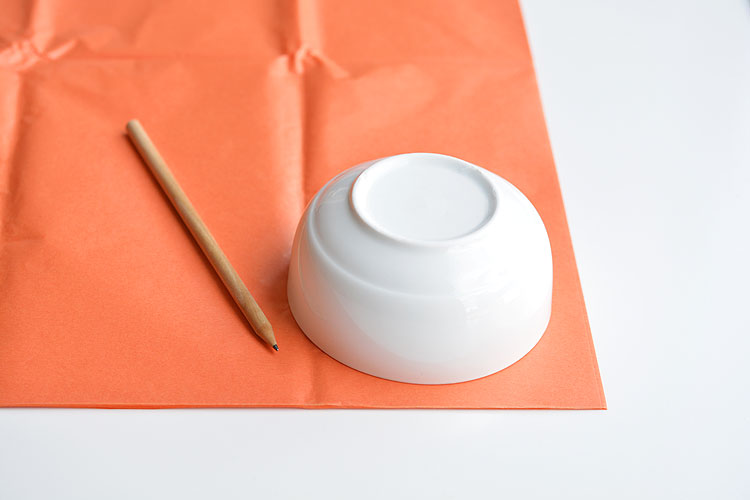
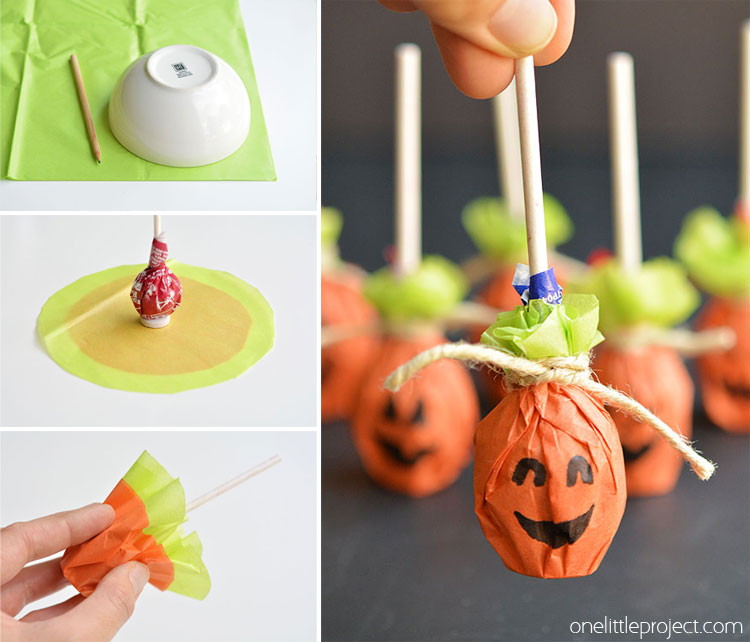
Each pumpkin has TWO layers of orange tissue paper. Check your cupboards and try to find a bowl that’s 4.5 inches wide. I was lucky and had two bowls that were exactly the right size for this. (Yay!)
To save time, you could probably cut up to 6 to 8 layers of tissue paper at one time, depending on your scissors.
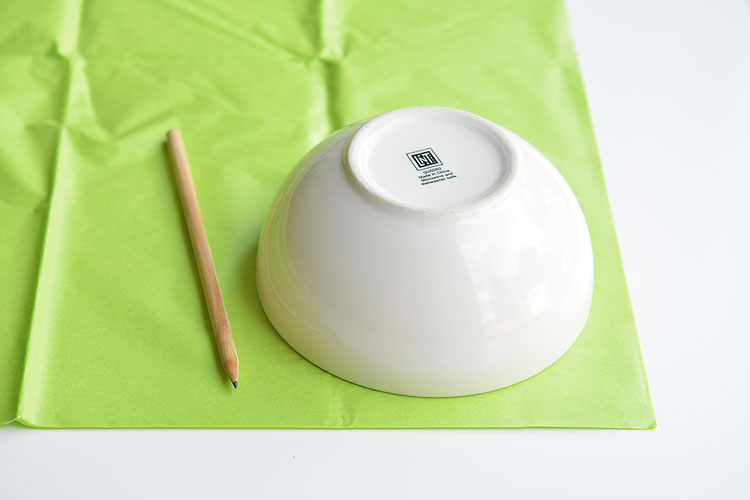
For the green, trace a bowl that’s about 5.5 inches wide. Each pumpkin has ONE layer of green tissue paper, but you can cut through as many as you can handle to speed up the process.
The lolly pop will fall over unless you have something to set it in. I found these Candy Money Rockets/Smarties worked PERFECTLY. They’re slightly larger than regular Rockets and they even have a little groove for the lolly pop to sit in. I had them left over from the big back of Rockets I used for the Halloween Candy People I made a few days ago.
If you can’t find these candies, you can use buttons, little foam craft circles or even those flat white breathmints. Just take a look down the aisles of the dollar store and see what you can spot.
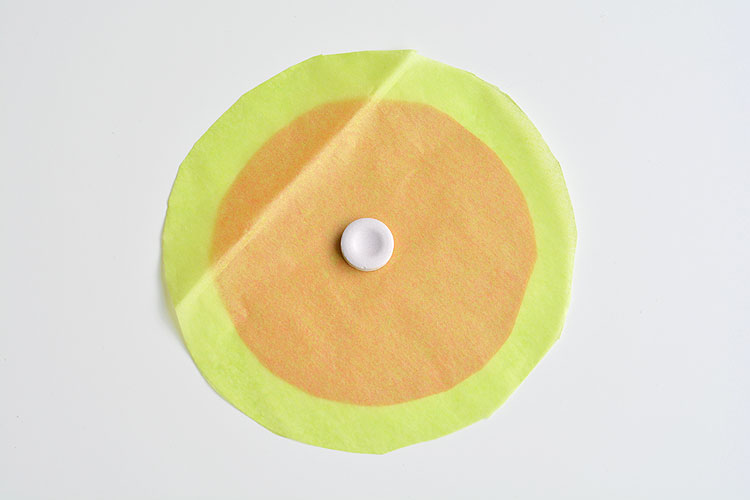
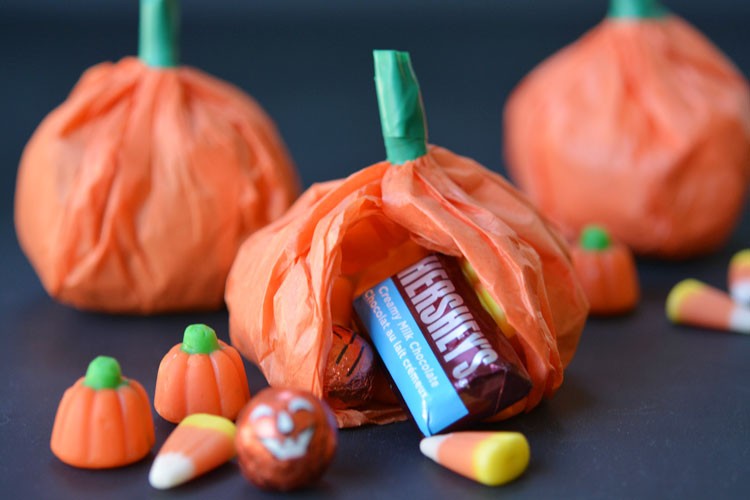
Take TWO layers of 4.5 inch orange circles and put ONE layer of 5.5 inch green circle on top of it. Then put one candy money piece in the center.
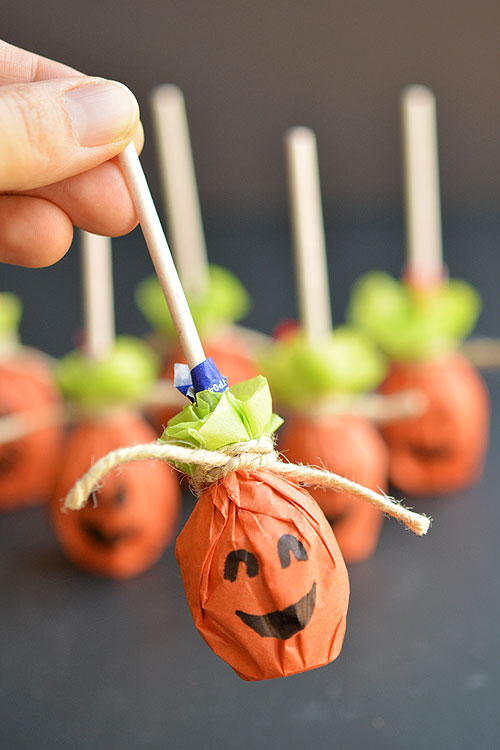
Set the lolly pop on top of the candy money piece. How perfect is it that the groove keeps the lolly pop in place and standing all on its own!?
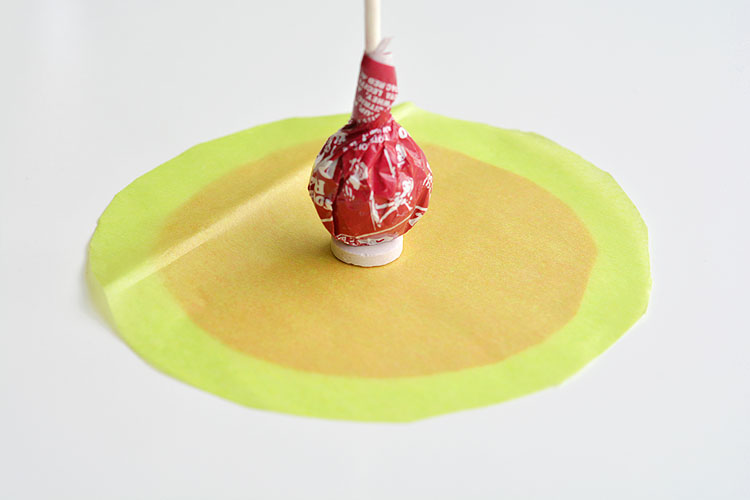
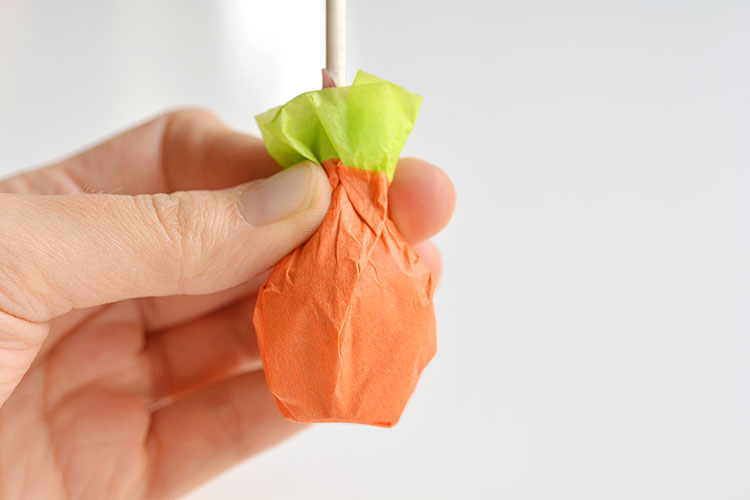
Gently fold up two sides around the lolly pop, then use your fingers to hold it in place as you press the layers of tissue paper around the lolly pop.
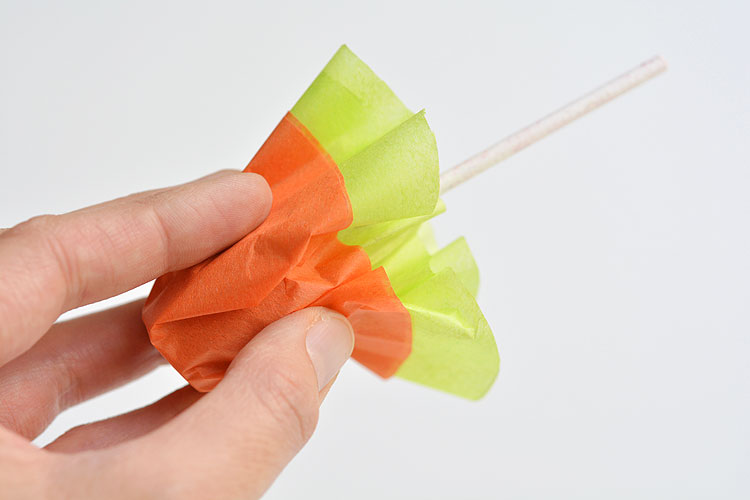
Pinch the tissue paper at the top of the lolly pop where the orange tissue paper meets the green tissue paper.
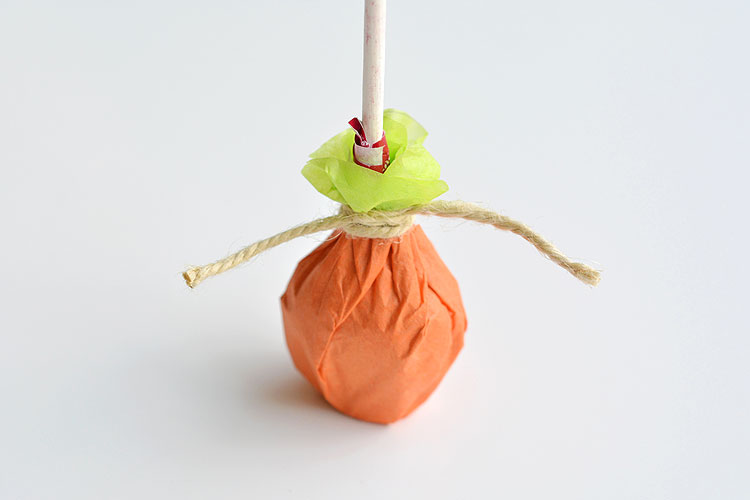
Then cut out a piece of twine or ribbon, loop it around the lolly pop twice to cover the seam between the green and the orange, and tie it. I only tied it once, but it seemed pretty secure.
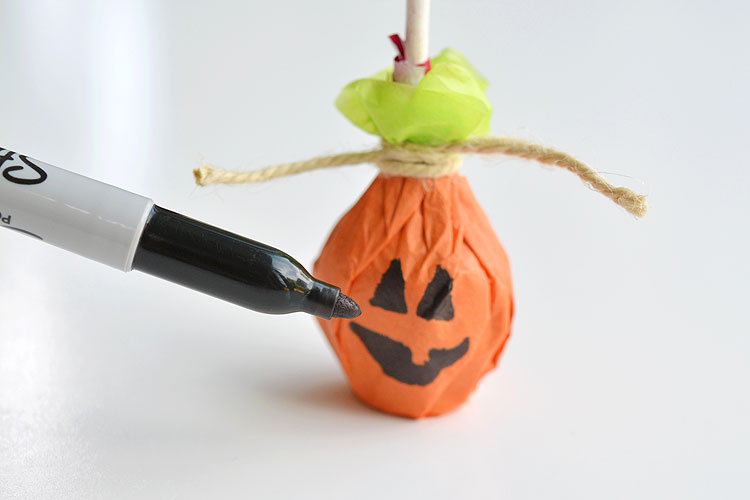
Then get creative and draw some jack-o-lantern faces on it with a fine tip Sharpie. Or if your kids are little, you can let them draw faces with a washable black marker.
I like happy pumpkins myself, but you can draw whatever you can think of. I used Google Image Search and looked up “easy pumpkin carving faces” for inspiration for my little guys. If I hadn’t, they all would have ended up looking exactly the same!
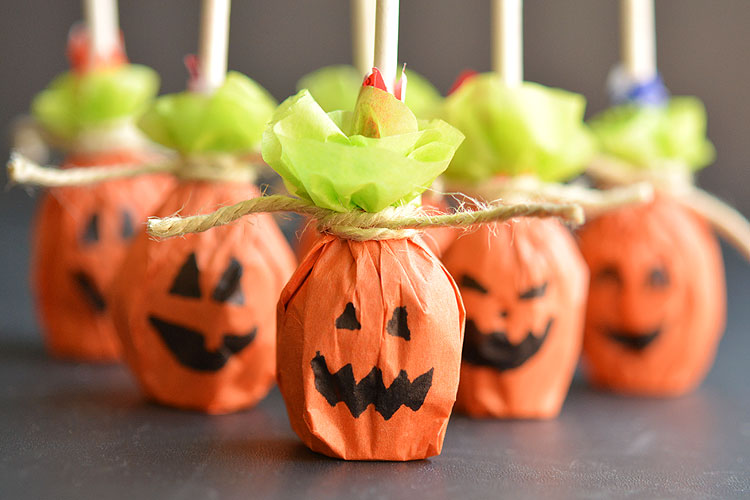
Here’s my little group of them. Aren’t they cute!?
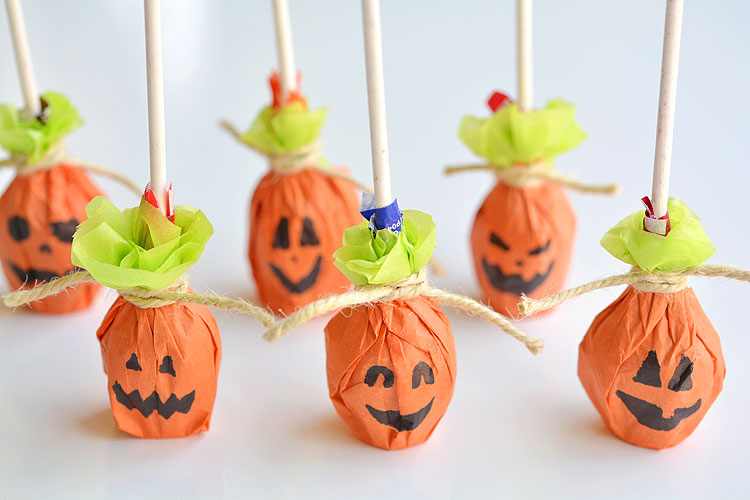
And they’re super quick to make too!
It took about 20 minutes to make the whole batch of these. The cutting is the most time consuming part, so the more layers of tissue paper you can layer up, the faster it will go.
They make perfect party favours or Halloween party treats! Just picture a whole platter of these guys sitting on a table. Talk about adorable!
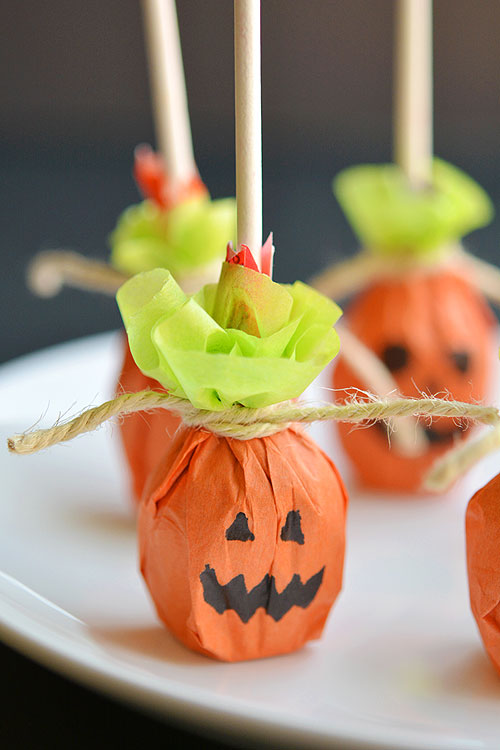
You can make them happy like my guys here or if you’re having a party for older kids or grown ups, you can make them with creepy/spooky faces. It’s completely up to you!
These pumpkin lolly pops are SO EASY to make and they’re completely adorable! They’d make a great treat to send to school with the kids!
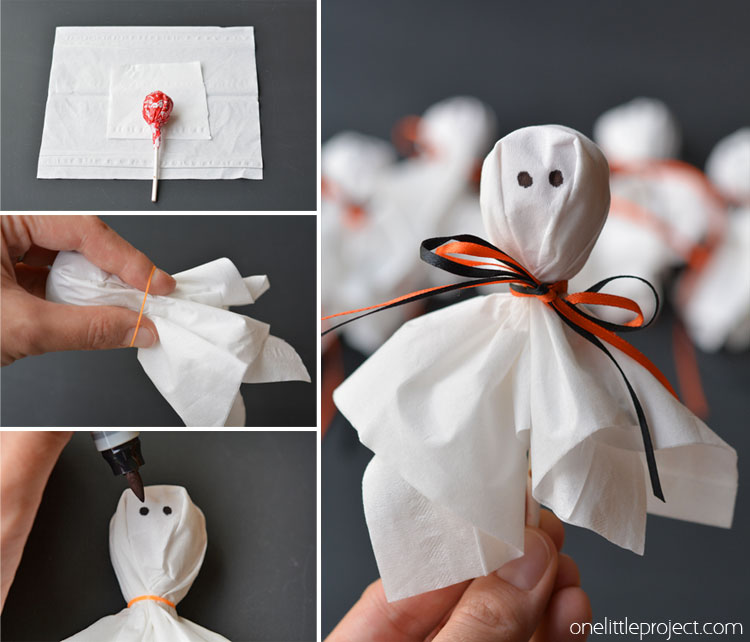
If you’re looking for more fun lolly pop treat ideas, check out our Lolly Pop Ghosts. Let me just say that a batch of Lolly Pop Pumpkins alongside a batch of Lolly Pop Ghosts would be totally and completely AWESOME for a Halloween party!


Leave a Reply