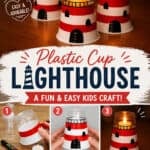

This plastic cup lighthouse craft is such a fun and creative summer project for kids! With just a few simple supplies, you can turn clear plastic cups into an adorable little lighthouse that even lights up with a battery-operated tea light. The colourful stripes make it bright and cheerful, and the glowing top gives it such a cute finishing touch.
This is a great craft for ocean themes, summer camps, or classroom art projects, and it would be especially fun alongside a beach or seaside unit. Kids will love seeing an ordinary cup transformed into a lighthouse, and the finished craft is great for pretend play. It’s easy to make, uses inexpensive materials, and has that extra bit of wow factor when the light is turned on.

This post contains affiliate links. If you use these links to buy something, we may earn a small commission at no extra cost to you. This helps support our website and allows us to keep creating fun, free content.
How to Make a Plastic Cup Lighthouse
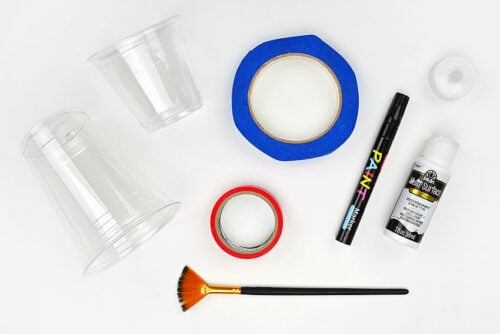
Materials:
- Large plastic cup(s) (clear, 16 oz)
- Multi-surface acrylic paint (white)
- Electrical tape (red, or other colour)
- Black oil paint marker
- Small clear plastic cup(s) (clear, 9 oz)
- Battery operated tealight candle
See the craft in action:
Instructions:
Step 1: Find what you need
- Gather your supplies and materials.

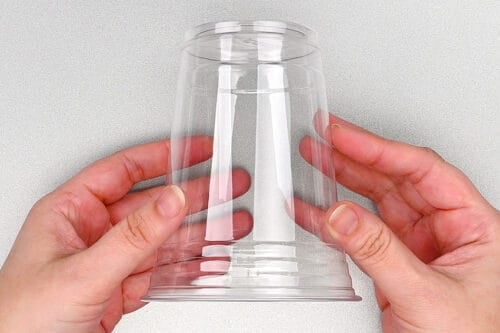
Step 2: Paint the large cup
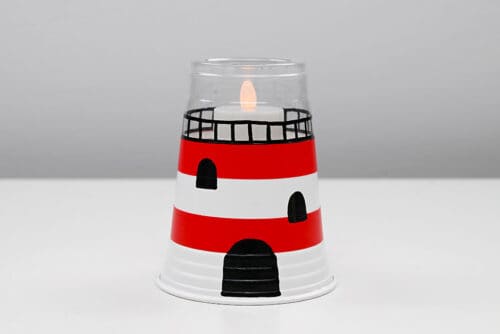
- To make the lighthouse you’ll need 2 sizes of plastic cups (read more details below the tutorial). We’ll be making the lighthouse design on the larger cup.

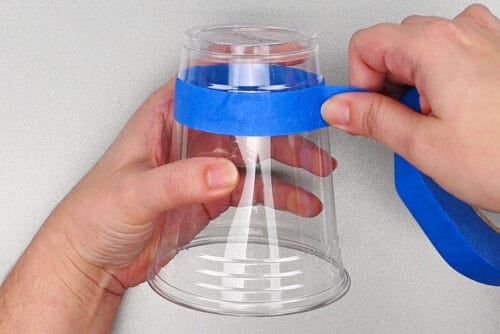
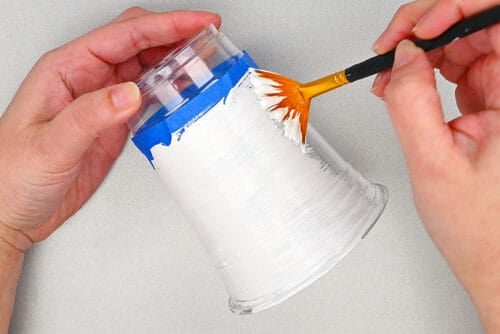
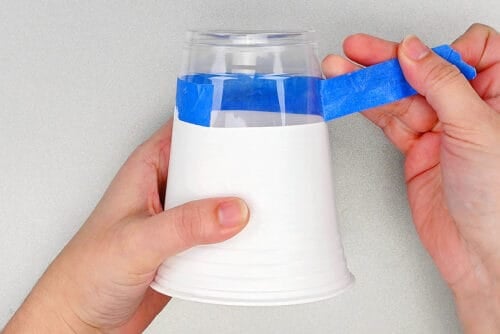
- Add painter’s tape around the cup, near the bottom. This will be the top of the lighthouse.The bottom point of the tape should measure just over 1-1/2 inches from the bottom of the cup.Keep the bottom of the tape really straight, so it attaches nicely to the cup. It’s okay if the top part is wrinkled or creased, so long as there is a good seal along the bottom.
- Paint the rest of the cup white, using multi-surface acrylic paint to get good coverage.Allow to dry.
- Once the paint is completely dry, remove the painter’s tape to reveal a crisp line of paint dividing the cup.
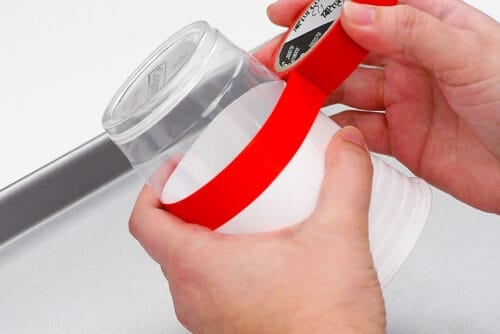
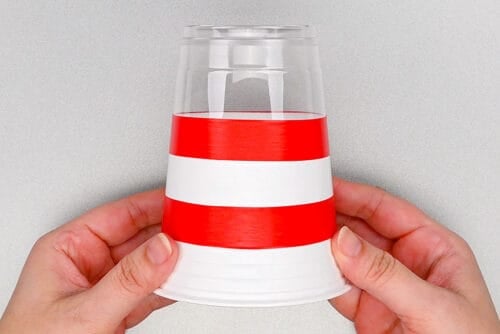
Step 3: Add the red stripes
- Carefully attach red electric tape around the cup, lining up the top of the tape with the top of the line. Work slowly, stretching the tape out a bit at a time so it applies smoothly.
- Apply a second line of tape, leaving about 3/4 inch of white space in-between.
Step 4: Add the lighthouse details
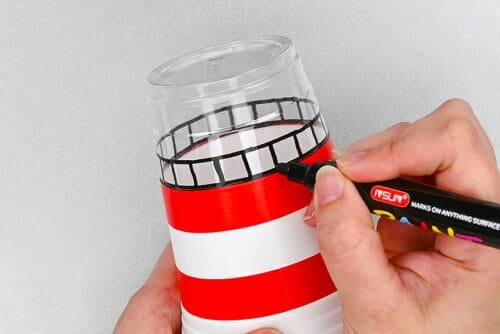
- Use a black paint marker to draw a railing near the top of the lighthouse.Start by drawing a line above the red tape. Then make another parallel line about 3/8 inch above the first. Connect the 2 lines with vertical lines about 3/8 inch apart.
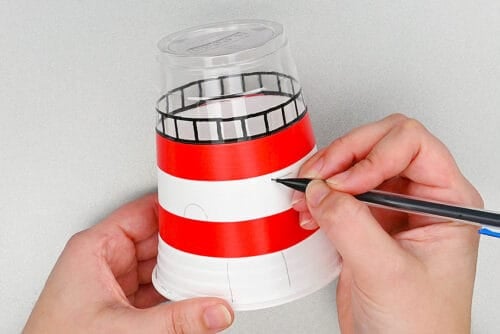
- Use a pencil to draw a door and windows on the front of the lighthouse. (You can also add a couple more windows around the lighthouse, if you’d like.)
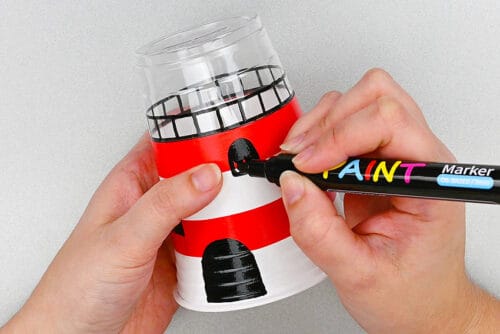
- Then colour the doors and windows with the black paint marker. Start by drawing the outline and then fill them in.
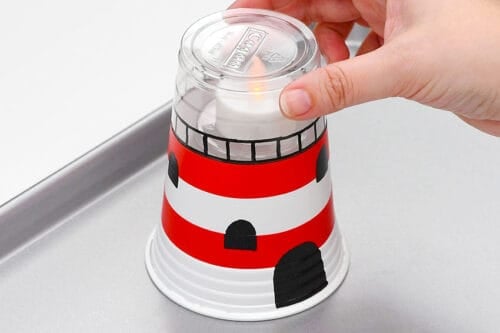
Step 5: Put the lighthouse together
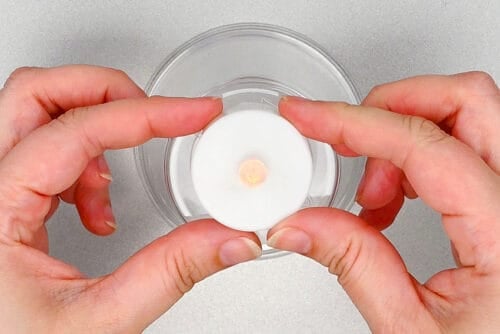
- Now’s the time to grab the smaller clear plastic cup. This will go inside the lighthouse.
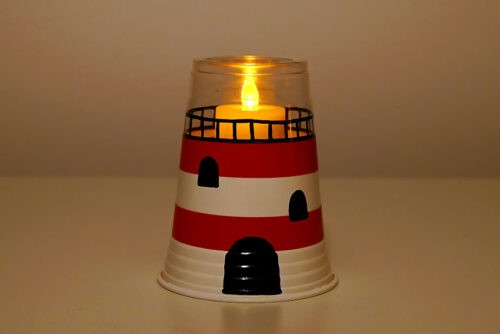
- Place the cup upside-down and set a lit battery operated tea light candle on top.
- Now place your lighthouse cup over-top.
- Your plastic cup lighthouse craft is complete!
- Now turn off the light and see the lighthouse shine!

Helpful Tips:
- Try different lighthouse colours and designs: We love the classic red and white look for this plastic cup lighthouse craft, but you can easily switch it up with blue, yellow, or even green stripes. It’s a fun way to customize your lighthouse and make each one a little different.
- Use sticky tack or painter’s tape to hold the tea light in place: If you want the battery-operated tea light to stay centered inside your lighthouse, add a small piece of sticky tack or a loop of painter’s tape underneath it. That will help keep it in place, but still makes it easy to take out when you want to turn the light off.

What size plastic cups do I need for this lighthouse craft?
For this plastic cup lighthouse craft, we used Cogan (dollar store brand) 16 oz clear plastic cups for the main lighthouse and 9 ounce cups for holding the candle inside.
The cup sizes we used were:
- 16 oz cup: about 4-3/4 inches tall and 3-3/4 inches across the top
- 9 oz cup: about 3 inches tall and 3-1/4 inches across the top
Clear plastic cups with smooth sides work best for this project. Smooth cups are much easier to paint and decorate, and they help the finished lighthouse look neat and crisp.

What type of paint works best on plastic cup lighthouses?
We highly recommend using multi-surface craft paint for this lighthouse craft. It gives really nice coverage on plastic and goes on much more smoothly than regular acrylic paint.
For the smoothest finish, use a fan brush or sponge brush. Both work well for painting the curved sides of the cup without leaving lots of brush marks.

What kind of tape works best for making the stripes on this lighthouse craft?
Electrical tape is definitely the best choice for this project. It’s stretchy and flexible, so it wraps around the plastic cup really easily and neatly. It goes on smooth, unlike regular tape, which bunches up and creases.
Electrical tape also comes in fun colours, which makes it easy to create different lighthouse designs. Make the traditional red and white stripes, or choose a different design with blue, green, yellow, and more.

This lighthouse craft is a super fun DIY. It’s a great way for kids to turn ordinary materials into something surprising and impressive looking. Painting the cup, adding the little windows and door, and then seeing the tea light glow inside makes the whole project feel special.
This lighthouse craft is also great for imaginative play and themed learning. Kids can use it with ocean activities, summer units, or pretend seaside scenes, and the finished lighthouse is even cute enough to keep out on display afterwards!
Here’s even more summer craft ideas:


Now available
Low-Mess Crafts for Kids Book
72 cute and fun crafts that kids and parents alike can enjoy. All with as little mess as possible!
Where to buy:
You can purchase Low-Mess Crafts for Kids from Amazon, or wherever books are sold:
Amazon | Barnes and Noble | Books-A-Million | Indiebound | Amazon Canada


Leave a Reply