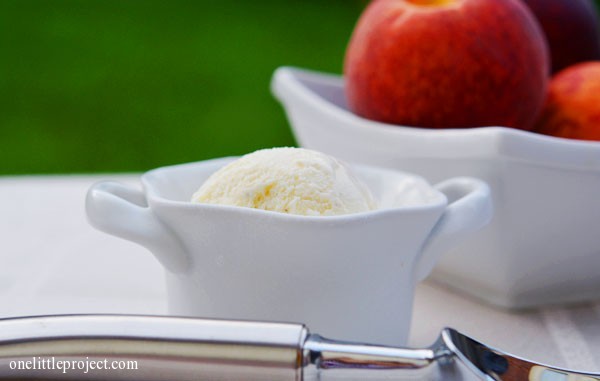
Did you know that you can make ice cream in a bag?! Create a delicious summer treat simply by shaking cream, sugar, and vanilla extract in a plastic Ziploc bag!
You can make a tasty bowl of ice cream in 15 minutes or less. No special machine or fancy tools needed! Combine dessert and science to make this easy recipe that doubles as a super cool (literally, haha) science experiment for kids.

This post contains affiliate links. If you use these links to buy something we may earn a small commission which helps us run this website.
Check out our Ice Cream in a Bag video tutorial:
Looking for more easy summer treats? Here’s a few of our favourites:

How to Make Ice Cream in a Bag
Equipment
- Ice, (3 cups)
- Salt, (1/3 cup)
Ingredients
- 1 cup Half and half cream
- 1/2 Teaspoon Vanilla extract
- 2 Tablespoons Sugar
Instructions
- Add the cream, vanilla extract, and sugar to a large Ziploc bag.Seal the bag well, removing as much air as possible, and swish the ingredients around.

- In a separate bag, add the ice and salt.
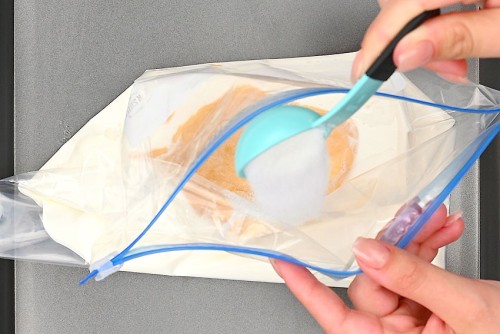
- Place the bag with the cream mixture inside the ice bag. Seal well.
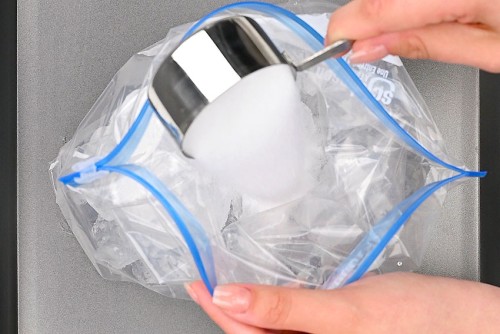
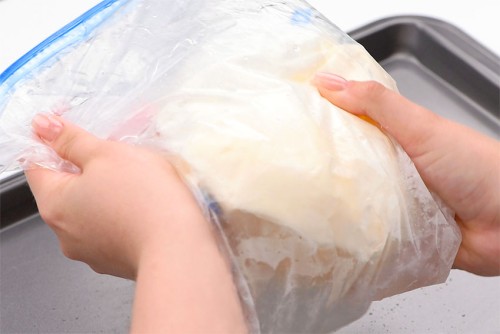
- Begin shaking the bags back and forth!Warning: You may want to wear gloves or wrap the bag in a towel, because it will get very cold!
- Continue shaking for 7 to 10 minutes until the mixture hardens into an ice cream consistency.
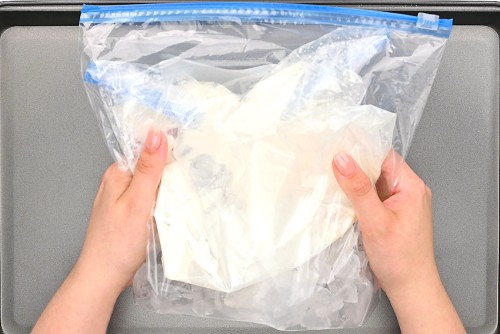
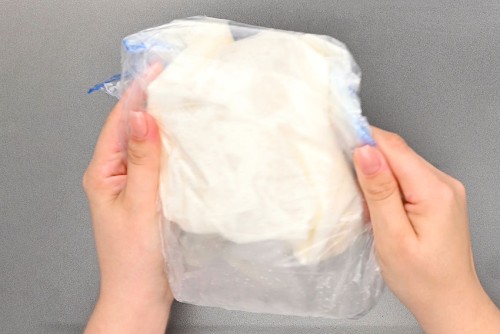
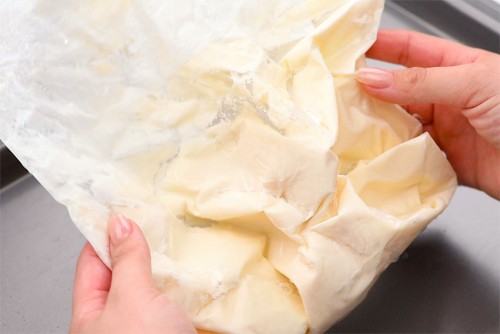
- Remove the ice cream bag from the ice bag. Rinse the ice cream bag under cold water to remove any salt residue.
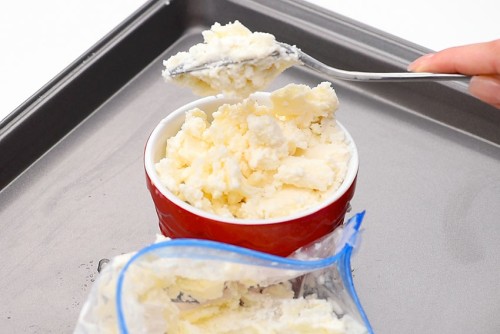
- Use a spoon or ice cream scoop to transfer the ice cream into a bowl.
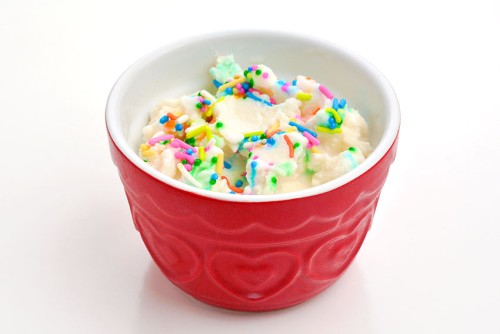
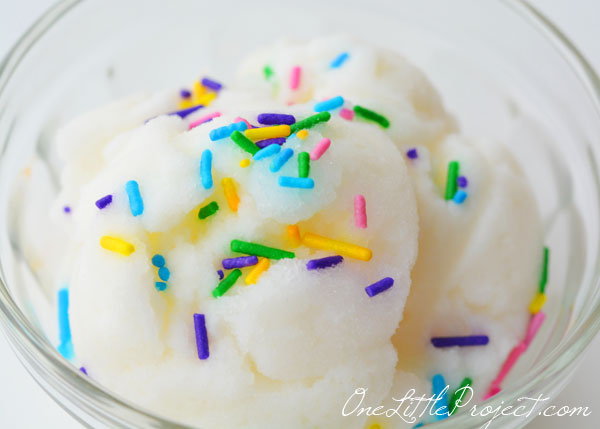
- Add any desired toppings (see some fun suggestions below!) and your ice cream in a bag is complete!
Notes
- Store any extra ice cream in the freezer in the sealed bag, or transfer it to an airtight container.
- CAUTION: The bag will become very cold as you shake it. Wear gloves or oven mitts when shaking the bag, or wrap it in a towel. You can also pass the bag back and forth between two people.
- Stir the ice cream well to get a smooth consistency. The ice cream in a bag has a soft serve texture to it. If you’d like your ice cream harder, place it in the freezer until it reaches a good firmness.
What’s the science behind ice cream in a bag?
Adding salt to the ice lowers the freezing/melting point of the ice. That means that after adding salt, the ice will start melting in the bag.
In order for the ice to melt, it needs to absorb heat from its surroundings, in this case the cream in the other bag (and from our hands, which is why we need to protect them as we shake!). As the ice melts, it pulls the heat out of the cream allowing it to freeze and turn into ice cream!
If you try making this recipe without the salt, you’ll notice that the ice doesn’t melt as much as you’re shaking the bag and that the cream doesn’t turn solid into ice cream. That’s because the ice on it’s own (without the salt) isn’t melting and isn’t drawing enough heat energy from the cream to freeze it.

Can I use milk to make ice cream in a bag?
Yes, you can also make ice cream in a bag with whole milk, but it might have a bit of a different texture. The higher the fat content of the milk or cream, the creamier the consistency!
You can also make this ice cream with non-dairy milks, like lactose-free milk, coconut milk, oat milk, etc.

How to prevent salty ice cream:
If you’re not careful, your ice cream may have a bit of a salty taste to it. But this can easily be avoided by following these simple tips:
- Use quality, name brand bags that seal well and are made of thick plastic.
- Double bag your ice cream mixture bag to be extra careful.
- Rinse the ice cream bag off under cold water once you’re done shaking it. Be sure to rinse above the Ziploc closure as well.
- Or use chunkier salt, like rock salt made for ice cream making. Because this salt is larger, it’s more difficult for it to transfer to your ice cream bag.
If you follow these easy steps you’ll have a delicious ice cream without any salty residue!

What toppings can I add to my ice cream in a bag?
You can switch out the vanilla extract for another flavour, like maple, mint, or coconut. Or you can even add chocolate or strawberry syrup to the ice cream to create a new flavour!
We recommend adding any other toppings to your ice cream after shaking it. Scoop the ice cream into a bowl and add one or more of the following:
- Sprinkles
- Chocolate chips
- Chopped nuts
- Gummy bears or other candy
- Fruit or jam
- Chopped Oreos or another cookie
- Chopped up candy bar
- Peanut butter
- Marshmallows or marshmallow fluff

Get shaking and make this delicious ice cream in a bag! Eat it plain or choose your favourite toppings. Either way, kids will love making their own homemade ice cream!
This is also such a fun science experiment, perfect for summer camp, sleepovers, birthday parties, or even for an ice cream social.

Here’s even more summer dessert ideas:


Our book Low-Mess Crafts for Kids is loaded with 72 fun and simple craft ideas for kids! The projects are fun, easy and most importantly low-mess, so the clean up is simple!

Where to buy:
You can purchase Low-Mess Crafts for Kids from Amazon, or wherever books are sold:
Amazon | Barnes and Noble | Books-A-Million | Indiebound | Amazon Canada


Leave a Reply