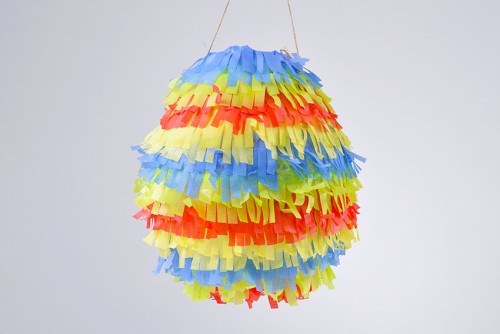
Learn how to make a pinata with a balloon – it’s SO EASY! With simple materials and a little bit of time you can create your own beautiful DIY pinata!
Pinatas are soooo much fun for birthdays and other celebrations. They add such a festive touch to any party, and you can easily make your own paper mache pinata to match your event! It’s a great activity for kids (and adults!), especially outdoors on hot summer days.

This post contains affiliate links. If you use these links to buy something we may earn a small commission which helps us run this website.
How to Make a Pinata with a Balloon
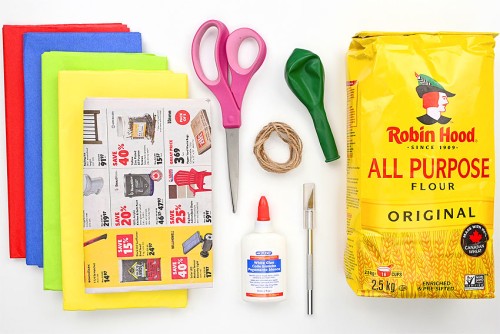
Materials:
- 1 cup Flour
- 1.5 cups Water
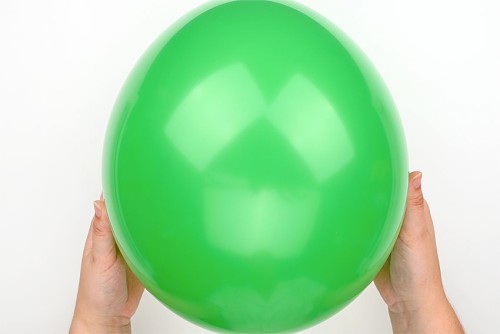
- 12 inch Balloon
- Newspaper
- Tissue paper (at least 4 colours)
- Twine
- Wrapped candy (or toys)
Equipment:
- Craft knife (or regular knife)
Watch the step-by-step video tutorial:
Instructions:
Step 1: Find what you need
- Gather your supplies and materials.

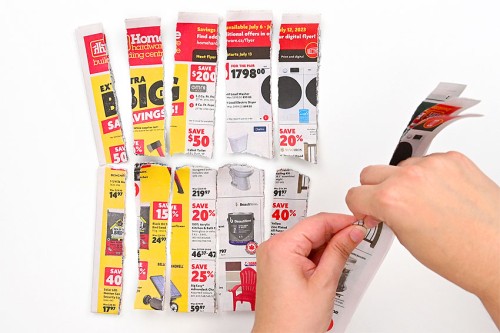
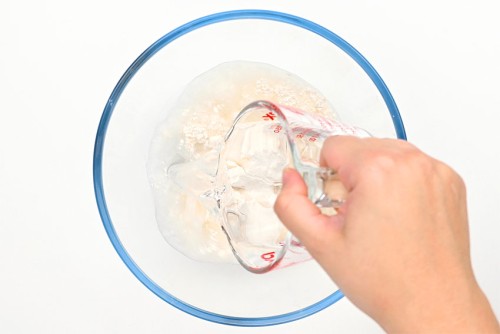
Step 2: Prepare the newsprint and make the glue
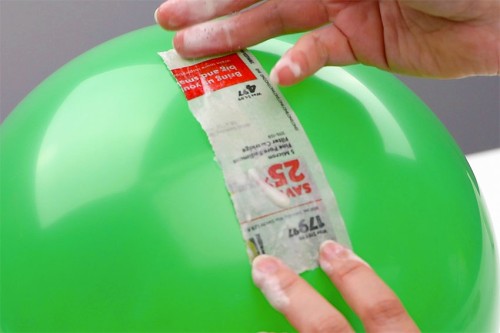
- Rip strips of newspaper into pieces that are about 1 inch wide and between 4 to 6 inches long.

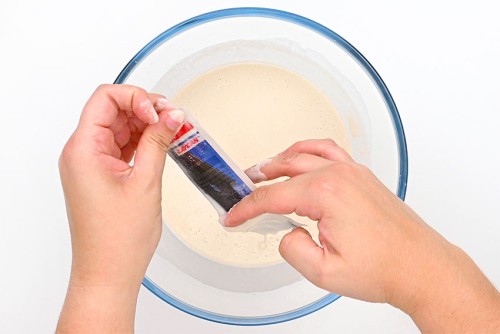
- Add the flour and water to a large mixing bowl.(We prefer glass or metal bowls, because the flour glue sticks to plastic more easily.)
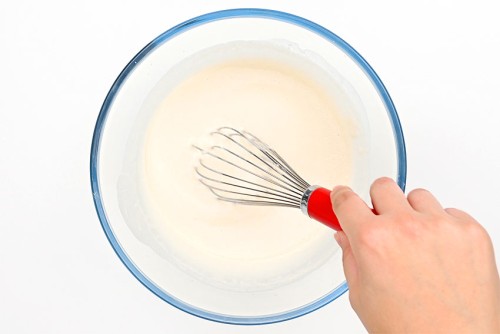
- Mix well with a whisk until there are no clumps remaining.
Step 3: Apply the paper mache to the balloon
- Blow up your balloon to the size you’d like your pinata to be and make a knot in the balloon neck.Place your balloon in a bowl to keep it steady.
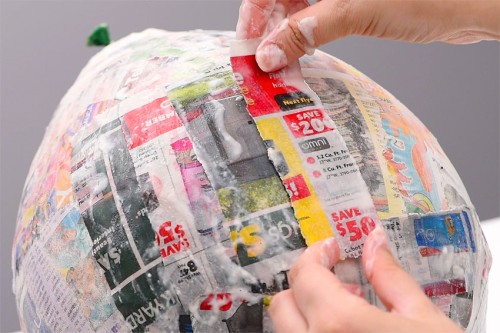
- Dip a newspaper strip into the paper mache mixture, saturating it completely. Slide the paper through your fingers to wipe off the excess paste.
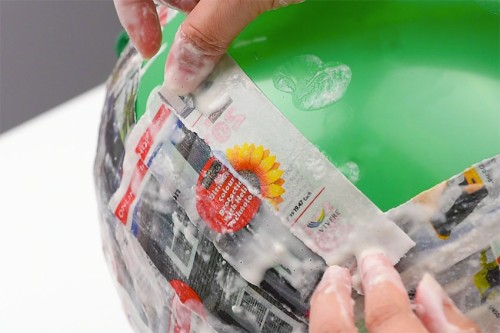
- Place the paper strip on the balloon, smoothing it down with your fingers.
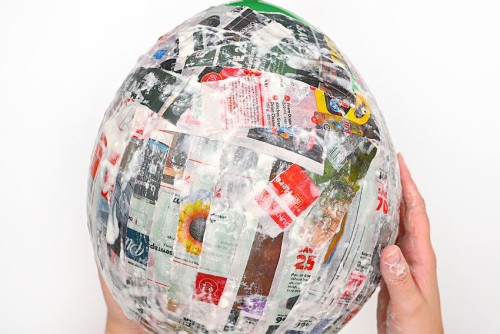
- Continue adding strips of newspaper, with paper mache paste on them, to the balloon.Add the strips in different directions, overlapping them as you make your way around the balloon.
- Continue until the balloon is completely covered and allow to dry. It may take 6 to 12 hours to dry depending on how much paste you added to your paper strips.
- Add a second layer of paper mache to the balloon. Allow to dry again.Then repeat for a third layer, again allowing it to dry.
Step 4: Prepare to decorate the pinata
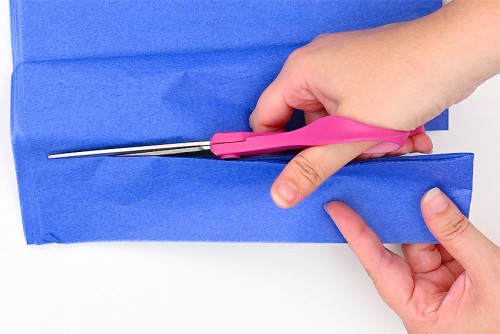
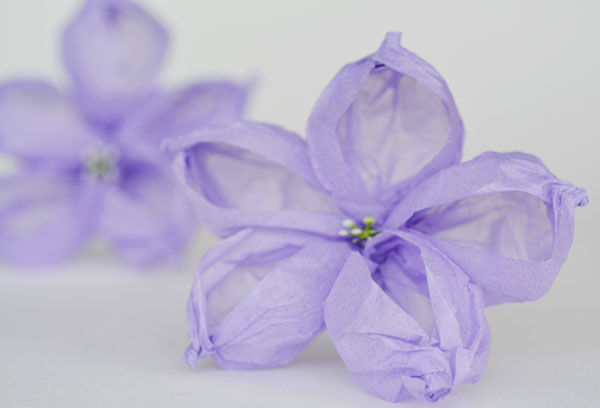
- While the last layer of paper mache is drying you can prepare your tissue paper frills to decorate the pinata.Unfold the tissue paper so that it’s still folded in half and cut a 2-1/2 inch wide strip, starting from the folded edge.
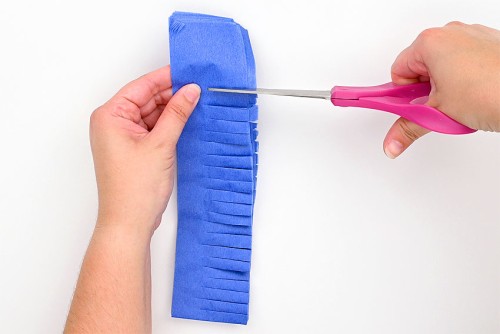
- Cut a fringe along one edge of the tissue paper strips, leaving about 1 inch uncut.We made our cuts every 1/4 inch or so, but you can make them thinner or thicker, depending on how you want your pinata to look. Repeat for other colours of tissue paper. We used blue, green, red, and yellow.
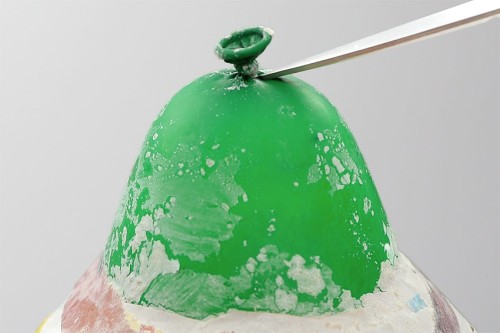
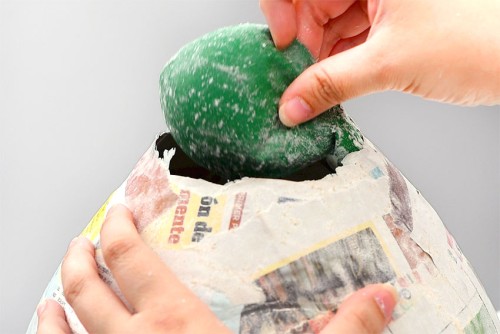
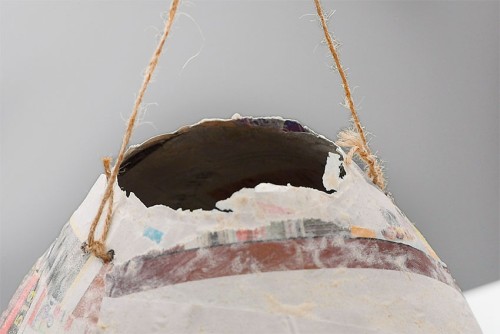
- Once the paper mache is dry you can cut a tiny snip near the knot of the balloon to deflate it.
- Remove the balloon from the pinata.
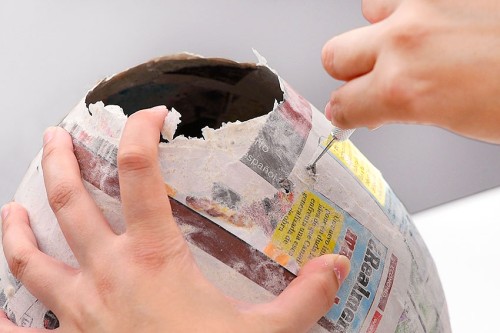
- Use a craft knife (or a knife tip, or scissors) to create a small hole about 1 inch from the top of the pinata. Then make a second hole about 3/4 inch away from the first one.
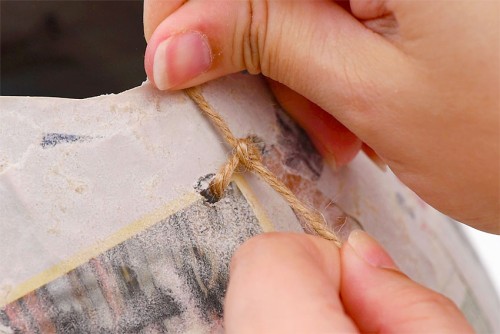
- Cut between 5 to 6 feet of twine (or another strong string) and slide the twine in one hole and back out the other. Secure the twine by tying it in a knot.
- Repeat on the other side, creating a hanger for the pinata.
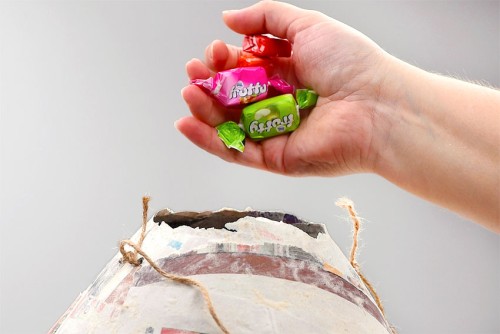
- Add candy (or whatever else you’d like to add) to the pinata now, or wait until you’ve added most of the tissue paper frills.We prefer adding candy at this point. It gives the pinata a bit of weight, so it stays in place as you decorate it.(And this way there’s no chance of forgetting to fill the pinata before closing it off!)
Step 5: Decorate the pinata
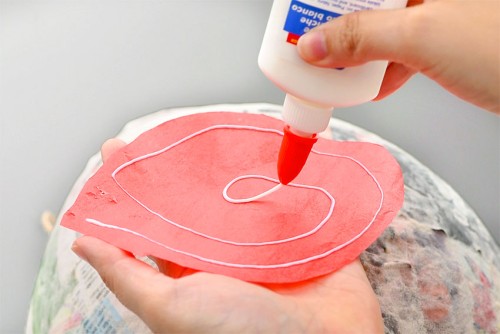
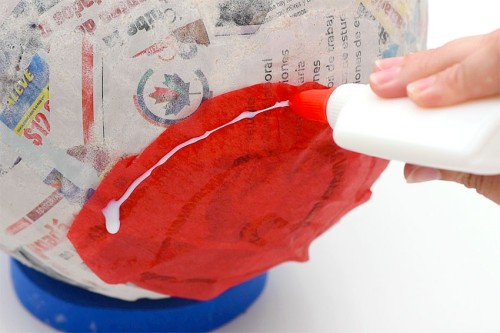
- Cut a circular piece of tissue paper that will fit on the bottom of your pinata and add lines of glue to it. The candy opening will be at the top of the pinata, so the bottom is the end without the hole.
- Attach the circle to the bottom of the pinata, smoothing it into place.
- Add a line of glue around the edge of the tissue paper circle you just added.
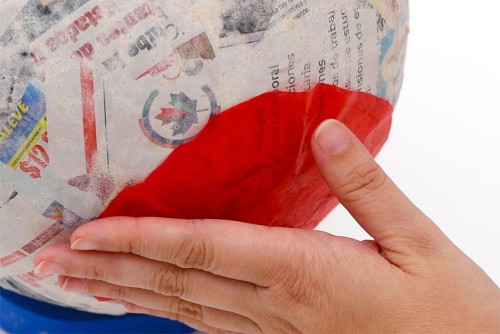
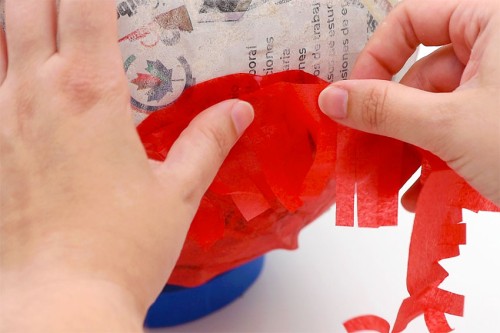
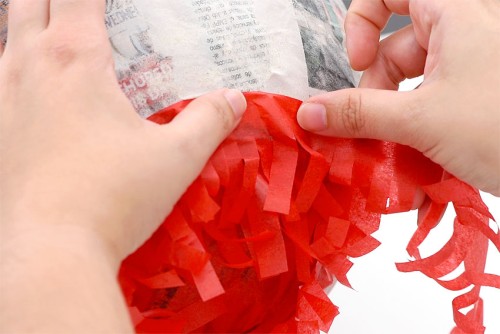
- Attach a fringe of the same colour onto the glue and begin wrapping it around the pinata.
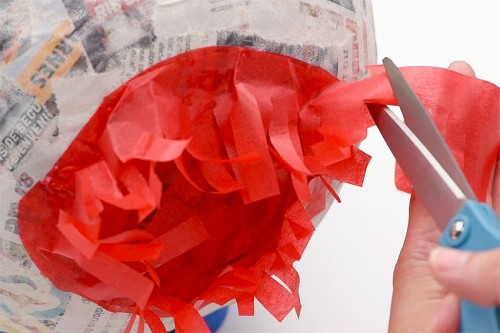
- Continue wrapping the fringe around and connecting it with glue. Once you’ve gone all the way around, cut off any extra tissue paper.
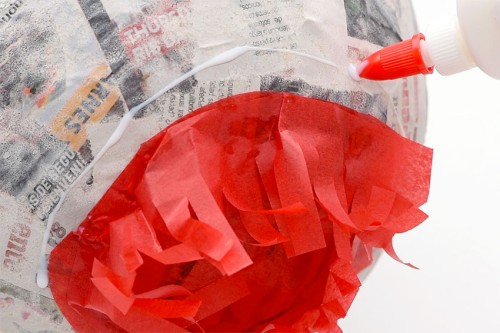
- Add a line of glue about 1/2 to 3/4 inch above the last frill layer.
- Add a 2nd layer of fringe in the same colour.
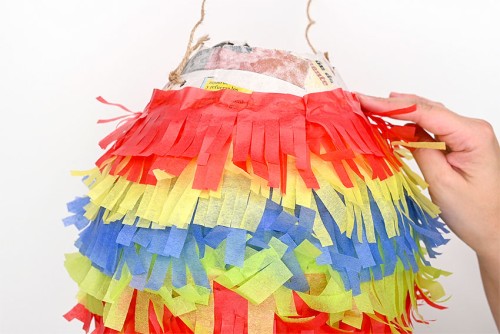
- Choose a new colour of fringe and wrap two layers around the pinata. Then continue the process, creating a pattern of different colours as you work your way up the pinata.Stop once you reach just below the twine hanger.
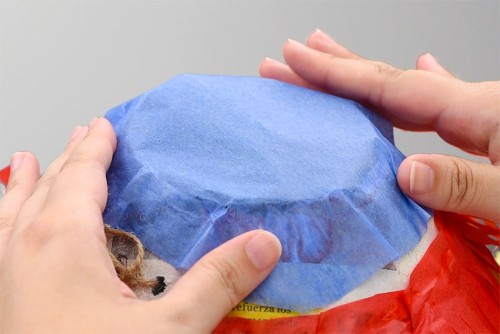
- Figure out what colour you’ll be ending your pinata with. Cut out another circle of tissue paper in that colour to cover the top hole.Make sure you’ve added your candy and then add glue around the top opening of the pinata. Press the tissue paper circle into place.
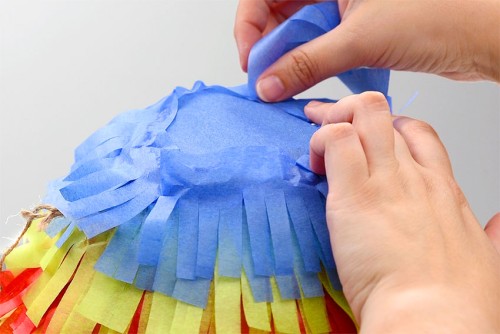
- Continue your fringe pattern of 2 layers of each colour, and finish by adding frills that match the top of the pinata.Allow the glue to dry.
- Your pinata with a balloon is complete!
Helpful Tips:
- Protect your working surface by setting down a plastic tablecloth or sheets of newspaper.
- Be sure to let each layer of paper mache dry completely before adding a new layer. If the previous layer isn’t dry you might get mold on your balloon pinata.

How many layers of paper mache do I need for a balloon pinata?
We recommend at least 3 layers of paper mache to make a pinata. The pinata needs to be strong enough to hold candy or whatever else you’d like to put in it. Plus you want it to be at least a little bit of a challenge to break open!

What paper mache paste is best to use?
We like using flour and water to make our paper mache glue. We always have flour on hand, and we really enjoyed the method when we made our paper mache pumpkins last year.
However, you can also use a recipe of 1 part water to 2 parts white glue. Some people even make paper mache using wallpaper paste!
What can I use to make a paper mache pinata if I don’t have newsprint?
If you don’t have any newspaper there are a few other options you can use instead. Try making paper mache with paper towels, construction paper, lined school paper, tissue paper, or even blue shop towels.
Just remember that the thinner the paper, the more layers of paper mache you’ll need.

How can I decorate my DIY pinata?
We made long strips of fringe with tissue paper, but you could also add colourful squares of tissue paper to your pinata. Or even buy fringe garlands and add them to save time cutting!
Instead of tissue paper you can also decorate your pinata with crepe paper streamers. Streamers hanging from the bottom can also look really festive!
Plus you can turn your balloon shaped pinata into a whole new character by adding legs, a tail, or even a unicorn horn out of thin cardboard. Tape or glue these items on after your first layer of paper mache has dried, and then add more paper mache over these extra parts. Then add eyes, a mouth and other features for your character.

What can I add into my homemade pinata?
Candy is, of course, the classic pinata treat! Make sure you add individually wrapped candy, such as:
- Suckers or lollipops
- Starburst
- Jolly Ranchers
- Warheads
- Tootsie Rolls
You can also include small party favours like:
- Bouncy balls
- Toy cars
- Stickers
- Pencil toppers
- Fun shaped erasers
- Glow sticks
- Plastic rings or other costume jewelry
Or, create a fun surprise by adding confetti to your pinata! If you’re doing this fun activity outdoors we definitely recommend using biodegradable confetti.

Learn how to make a pinata with a balloon! These DIY pinatas are so pretty, covered in rainbow coloured tissue paper.
And we love how inexpensive it is to make a balloon pinata! Why buy an expensive store bought pinata when you can put all your love into making one at home?!

Here’s even more fun craft ideas:


Our book Low-Mess Crafts for Kids is loaded with 72 fun and simple craft ideas for kids! The projects are fun, easy and most importantly low-mess, so the clean up is simple!

Where to buy:
You can purchase Low-Mess Crafts for Kids from Amazon, or wherever books are sold:
Amazon | Barnes and Noble | Books-A-Million | Indiebound | Amazon Canada


Leave a Reply