Learn how to make a bow with these 4 easy methods! It only takes a few minutes to make a pretty ribbon bow, and there’s no special tools required.
Making a perfect bow can seem intimidating, but it’s actually SO EASY! Follow our helpful step by step photo and video tutorials to make a beautiful bow that can be used for decorating crafts, a wreath, a gift box, the Christmas tree, and more.

This post contains affiliate links. If you use these links to buy something we may earn a small commission which helps us run this website.
Looking for some fun ways to use these bows? Here’s a few of our favourite craft ideas:

Method 1: How to Make a Triple Layered Bow
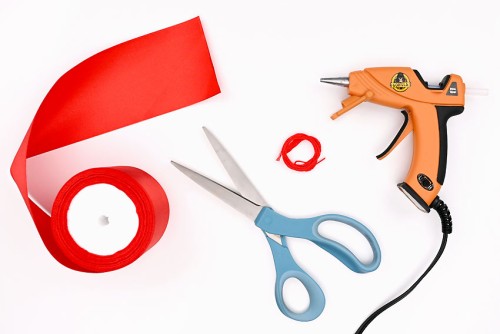
Materials:
- Wide ribbon (3 inches)
- Embroidery floss (or string, yarn)
Watch the step-by-step video tutorial:
Instructions:
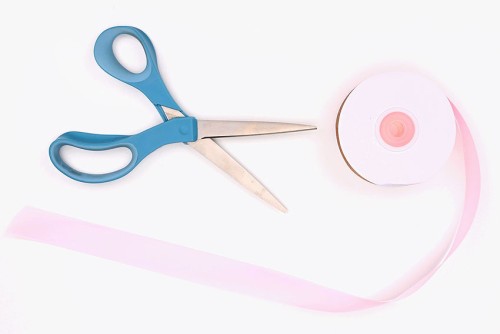
- Gather your supplies and materials.This large bow is made with a 3 inch wide ribbon, and you’ll also need a piece of string and a glue gun.

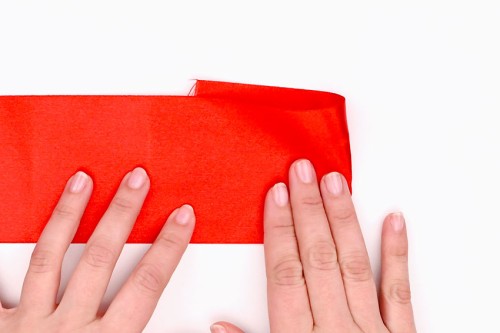
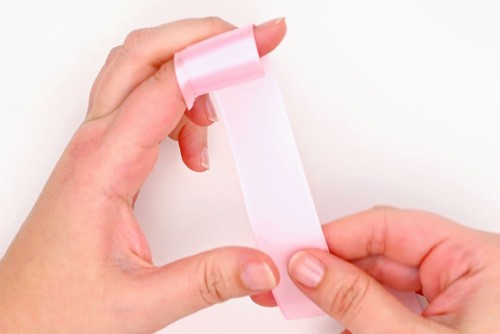
- Cut a 36 inch (approximately 1 meter) length of ribbon. Fold about 3-1/2 inches under at the right.

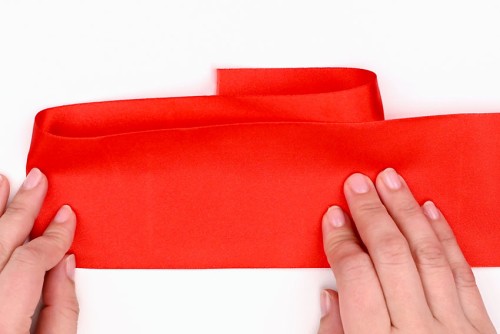
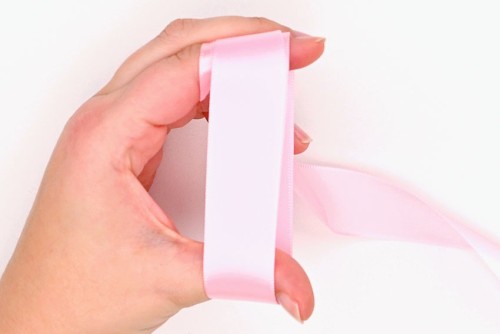
- At the 7 inch mark, fold the left part of the ribbon back over to the right.
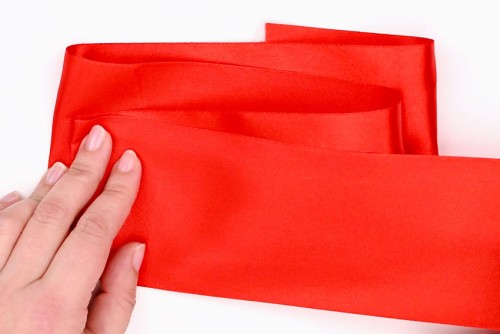
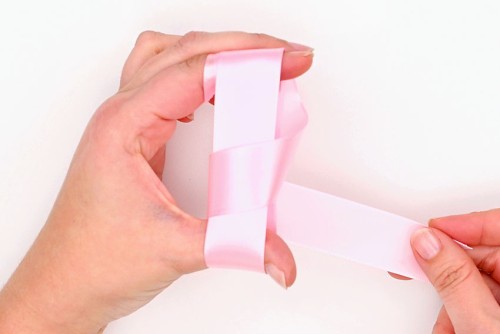
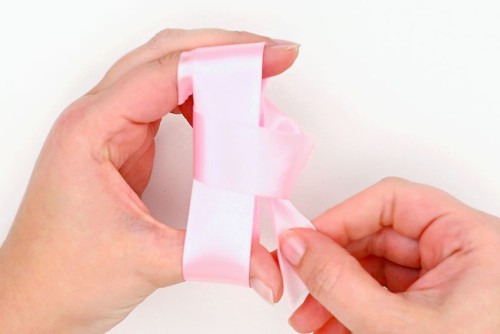
- Fold the top part of the ribbon back to the left, and then back to the right again, creating a second layer that’s about 1 inch smaller than the bottom piece (1/2 inch less on each side).
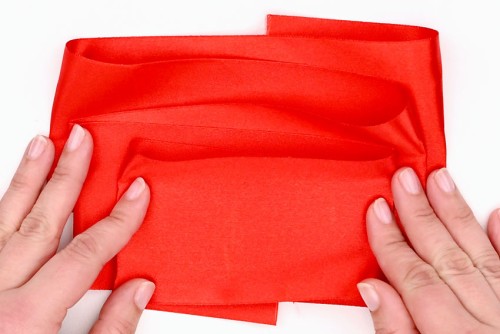
- Repeat the same folds, again making the layer 1 inch smaller than the previous layer.Tuck the end of the ribbon inside so it meets the center.
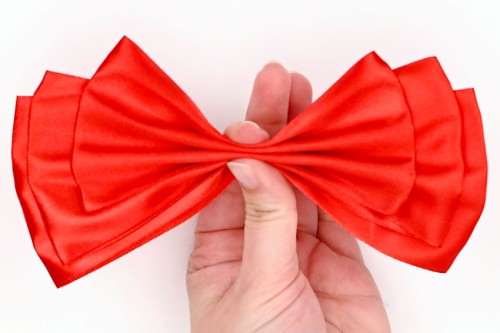
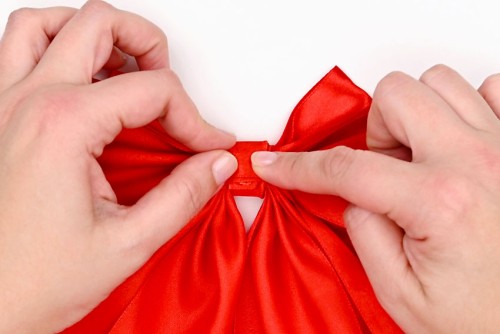
- Line the bundle up at the top and bottom and then accordion fold the center of the layered loops together.
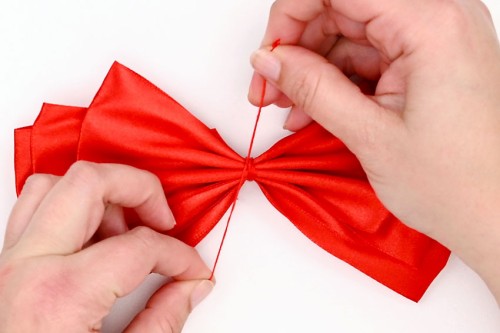
- Secure the center of the bow by tying it with matching string or yarn. You can even wrap a pipe cleaner around the bow to keep it together.Once you’ve tied the string in a double knot, cut off any extra string.
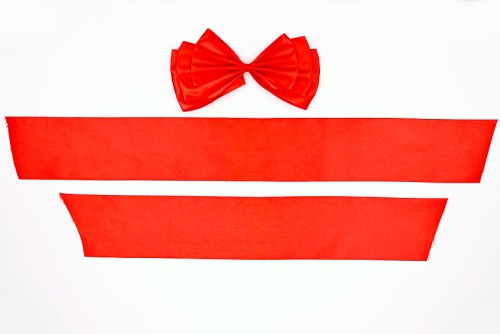
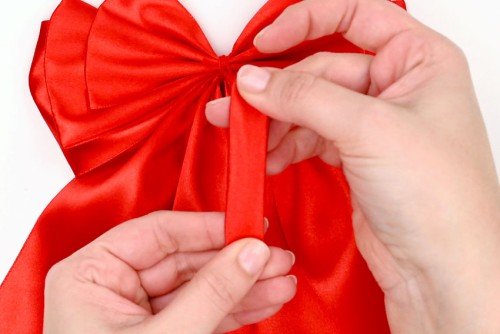
- Cut 2 pieces of ribbon, 18 inches and 22 inches long.Arrange the ribbon so that the longer piece is next to the bow.
- Accordion fold the center of the longer piece.
- Push the shorter piece right beside the longer, and accordion fold the center of it as well, holding them together.
- Push the folded centers against the middle of the bow.
- Tie another piece of string around the bundle, securing the tails to the bow. Tie a double knot, and then cut off the extra string.
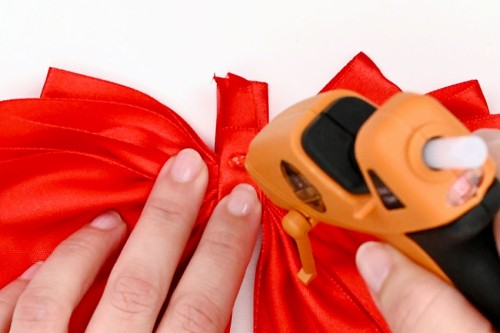
- Cut a 2 inch piece of ribbon and fold the left and right edges into the center. Then fold it in half lengthwise.
- Wrap this folded ribbon around the middle of the bow, and then flip the bow over.Add hot glue to the wrapped ribbon.
- Wrap the ribbon down into the glue and hold it in place until it stays on its own.Make sure the edge of the fold and the glue stays at the back of the bow.
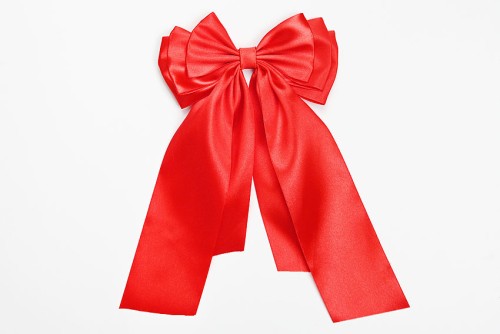
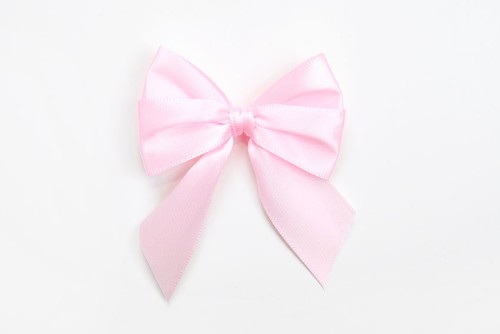
- Your triple layered bow is complete!


Method 2: How to Make a Double Looped Bow
Materials:
- Medium sized ribbon (1 inch)
Equipment:
Watch the step-by-step video tutorial:
Instructions:
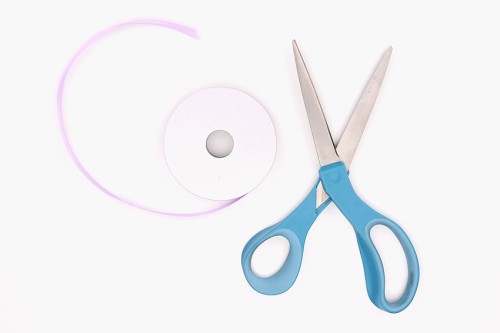
- Gather your supplies and materials.You’ll only need a ribbon of your choice and scissors to make this pretty bow.
- Cut a 30 inch piece of ribbon.Wrap one end of the ribbon around your pointer (index) finger three times, with the loose ribbon going down towards your thumb.
- Stretch your thumb out, holding it about 3 inches away from your wrapped finger.Now wrap the ribbon twice around your pointer finger and thumb.
- Leave a tail of about 6 inches and cut the ribbon.
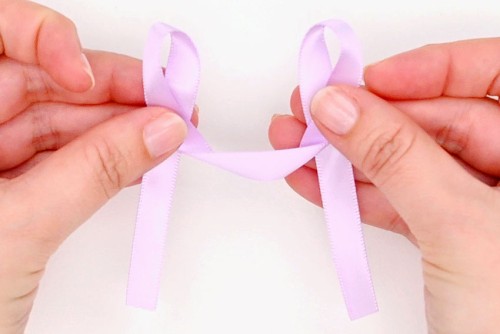
- Put the end of the ribbon over the looped ribbon and through the space between your finger and thumb.
- Now loop the ribbon end around and down through the new space created to the right of the ribbon loops.
- Pull the ribbon end tight, adjusting it so it creates a knot in the center of the loops.
- Remove the loops from your fingers, pulling the first wrapped ribbon end down and out of the bow loops. This is the other tail for your bow!
- Pull the loops apart on each side of the bow.
- Trim the ends, on an angle, to your desired length.
- Your double looped bow is complete!


Method 3: How to Tie a Classic Bow
Materials:
- Satin ribbon (3/8 inch)
Equipment:
Watch the step-by-step video tutorial:
Instructions:
- Gather your supplies and materials. You only need ribbon and some scissors to tie this classic bow.We made our bow with thinner ribbon, but the same concept should work with any size!
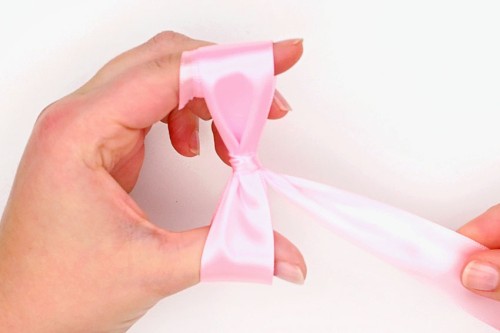
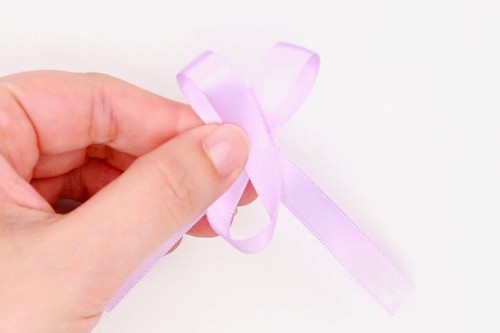
- Cut a 12 inch piece of ribbon. Make two loops in the ribbon with a space between them and the ends hanging down towards you.
- Fold the right loop over top of the left loop.
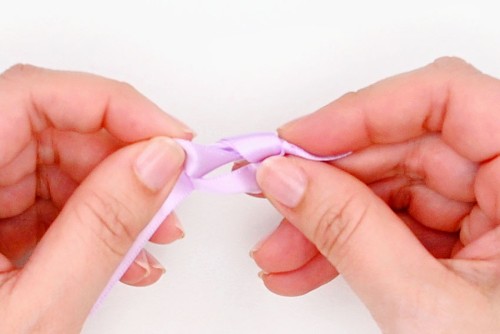
- Fold the new left loop back and down, bringing it up to the front through the circle in the center.
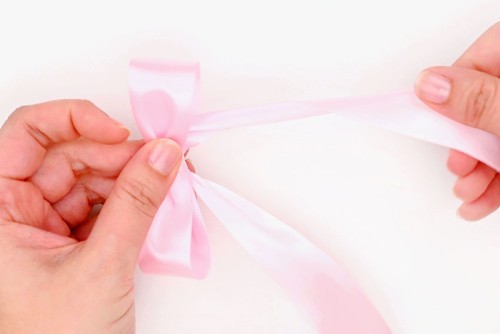
- Before pulling the bow tight adjust the bow loops so that they’re even and the size you’d like.
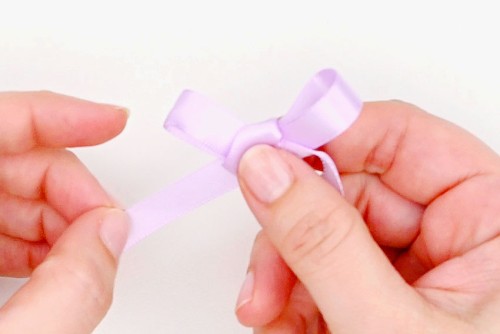
- Pull on the top loops to tighten the bow.
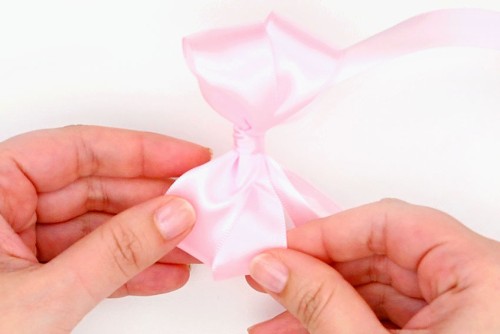
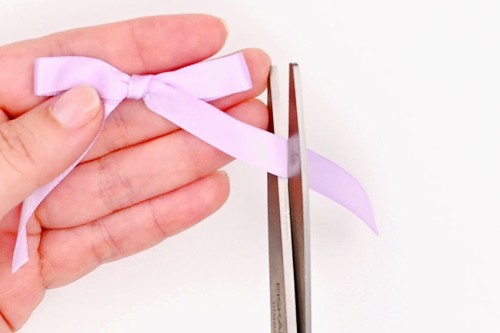
- Adjust the bow loops one last time and then cut the tails to your desired length.
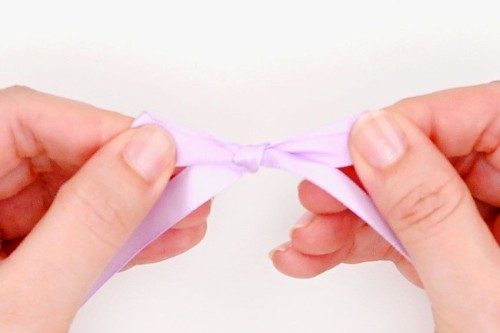
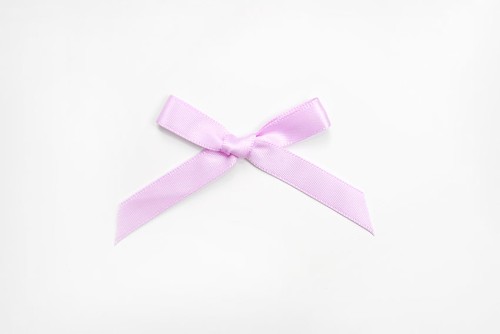
- Your classic ribbon bow is complete!

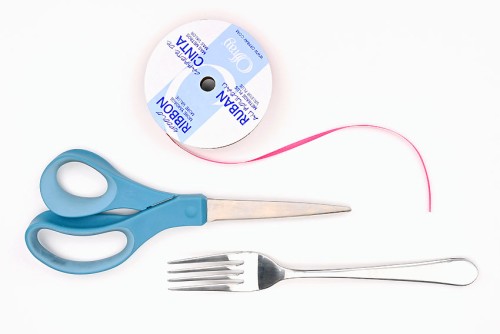
Method 4: How to Tie a Bow on a Fork
Materials:
- Thin ribbon (1/8 inch)
Watch the step-by-step video tutorial:
Instructions:
- Gather your supplies and materials.We’ll be tying this mini bow around a fork!
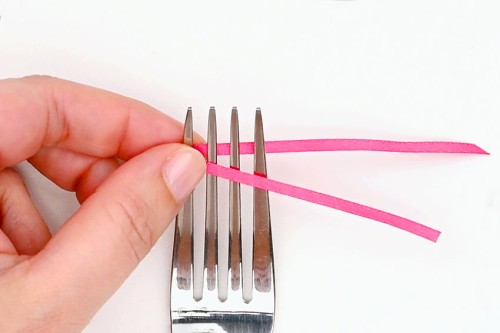
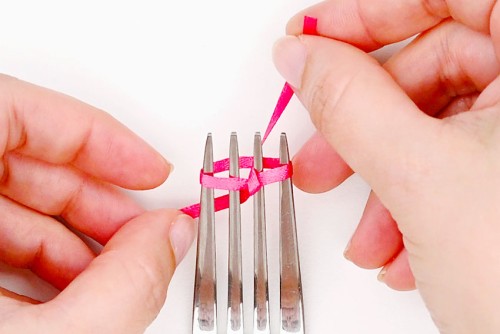
- Cut a 6 inch piece of ribbon and hold it around the fork tines, with the center of the ribbon at the left.
- Bring the bottom part of the ribbon up around the right of the fork. Then push the end down through the center of the fork (below the other section of ribbon).
- Grab the right section of ribbon (sticking out from the side of the fork) and pull it up to the center of the fork.Make sure you keep good hold of the rest of the ribbon, keeping it on the fork.
- Carefully flip the fork over and tie the ends of the ribbon together. Pull tight, so the knot is next to the fork.
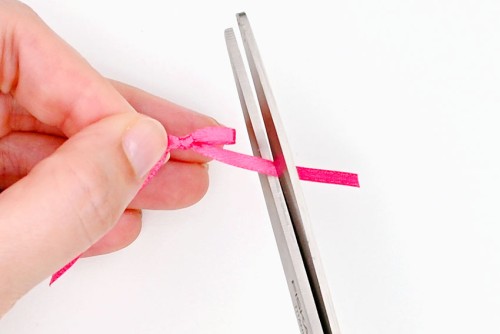
- Remove the bow from the fork by sliding the loops up, and then trim the ends to your desired length.
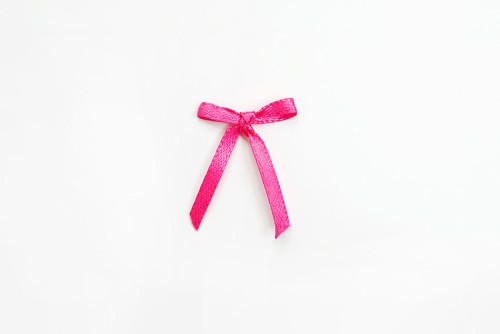
- Your mini bow is complete!


Helpful Tips:
- The wider the ribbon, the larger the bow. Choose a size of ribbon that works for your project!
- Start with a piece of ribbon longer than you think you need. You can always cut the tails shorter, but you definitely can’t make them any longer without sacrificing the size of the bow loops.
- Make sure the length and angle of the bow’s tails are even.

What size of ribbon is needed to make a bow?
You can make bows from all kinds of sizes of ribbon depending on their purpose. Bows made from thinner ribbon (1 inch and under) are great for attaching to crafts or using as hair bows.
Thicker ribbon makes larger bows that are useful for attaching to wreaths or used as a gift bow. For example, our red, layered bow is made with ribbon 3 inches wide.

What type of ribbon is needed to make a bow?
You can make a bow from almost any type of ribbon or fabric you’d like. We used satin ribbon to make our bows because we liked the shiny finish.
You can also make bows using grosgrain, burlap, organza, velvet, twine, lace, wired ribbon, etc. Different styles of bows may work better with a certain type of ribbon. Have fun experimenting to create the look you’re going for!
How can I finish off the tails on ribbon bows?
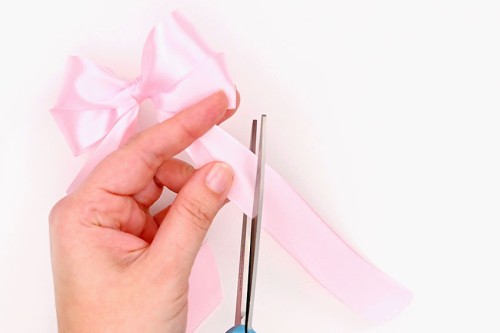
We like to cut straight up towards the bow, creating an angled tail. You can also create a double pointed tail (aka fish tail). To make the fish tail even, fold the ribbon in half and then cut up towards the center.
Satin ribbon has a tendency to fray. The angled cuts help prevent this, but you can also carefully and quickly pass a lighter over the edge to melt it. Test melt a scrap of ribbon safely over the kitchen sink before melting the edge of your actual bow to make sure it doesn’t burn or damage the ribbon.

Learn how to make a bow with our helpful step by step tutorials! Make a mini bow, a classic bow, a double looped bow, or a triple layered bow. They’re all so pretty!

Here’s some fun ways to use DIY bows:
DIY Beaded Christmas Ornaments


Our book Low-Mess Crafts for Kids is loaded with 72 fun and simple craft ideas for kids! The projects are fun, easy and most importantly low-mess, so the clean up is simple!

Where to buy:
You can purchase Low-Mess Crafts for Kids from Amazon, or wherever books are sold:
Amazon | Barnes and Noble | Books-A-Million | Indiebound | Amazon Canada


Leave a Reply