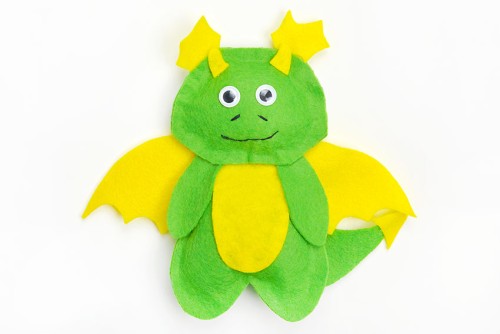
Use our FREE felt dragon pattern to make these super cute felt dragon plushies! This dragon craft is so fun and easy to make, perfect for storytime or pretend play.
Download our free, printable template to create a felt dragon, or use the pattern as a base to design your own colourful dragon! These DIY felt dragon toys can be as ferocious or cute as you’d like.

This post contains affiliate links. If you use these links to buy something we may earn a small commission which helps us run this website.
How to Make a Felt Dragon
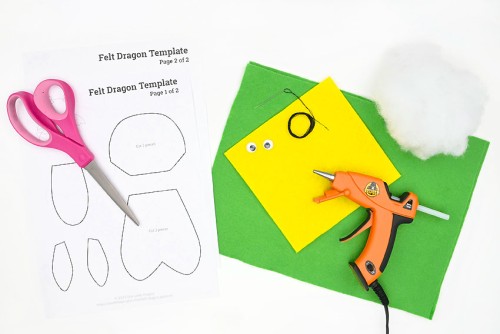
Materials:
- Free Printable Felt dragon pattern
- Felt (2 colours of choice)
- Polyester fiber fill
- Black thread
- Googly eyes (10mm)
Equipment:
Watch the step-by-step video tutorial:
Instructions:
Step 1: Find what you need
- Gather your supplies and materials.

Step 2: Cut out the pattern pieces
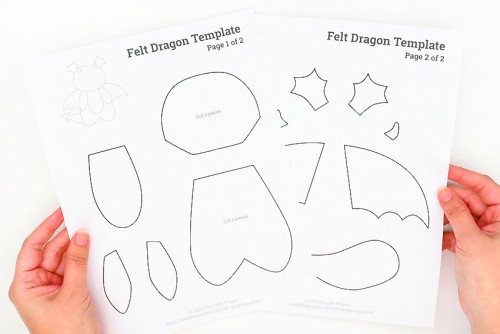
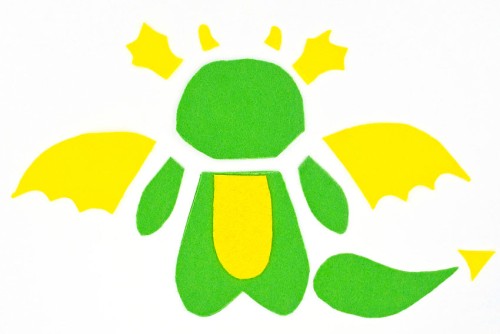
- Print our free felt dragon pattern. Find a link in the materials list above, or below the tutorial.The first page of the template shows how the dragon is put together. The grey and white pattern pieces represent the two colours of felt used. This makes it easy to know which piece to cut out in which colour!(Note: We adjusted the template after we photographed this tutorial. Click on the PDF pattern to see the different colours.)
- Cut out the pieces of the dragon from both pages of the template.
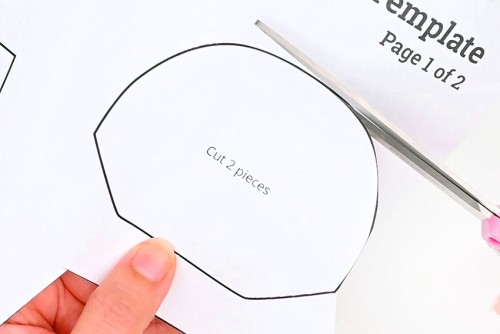
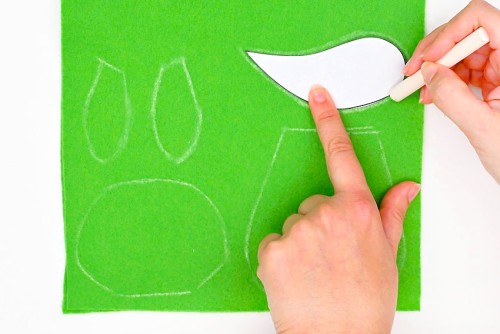
Step 3: Trace and cut out the felt
- Choose your first felt colour. This will be the dragon’s body, head, arms, and tail.Stack together 2 pieces of this felt.
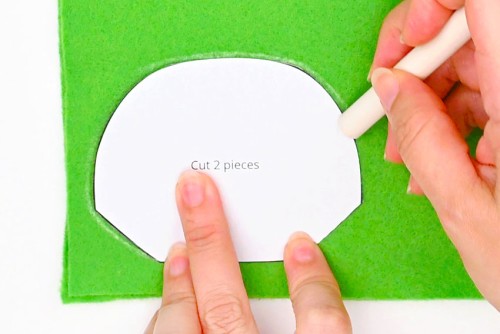
- Trace the head onto the double layer of felt with chalk.
- Repeat, tracing the body, arms, and tail onto the felt.
- For the head and body of the dragon, cut through both layers of felt.You can also cut these pieces out one at a time in a single layer if it’s easier for you.
- Cut only a single layer of felt for the arms and tail.

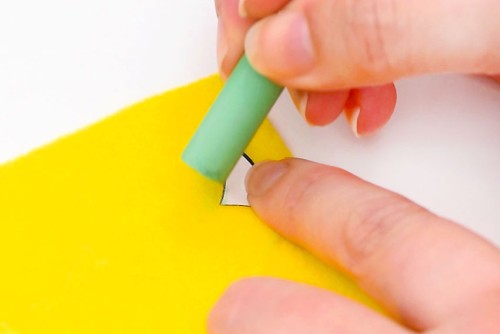
- Trace the remaining pieces (stomach, fins, horns, wings and tail tip) onto a single layer of felt in a complimentary colour.If you only have a small piece of felt, arrange the pieces ahead of time, before tracing them, to ensure they fit.
- Cut out the remaining pattern pieces.


Step 4: Glue together and stuff the dragon’s body
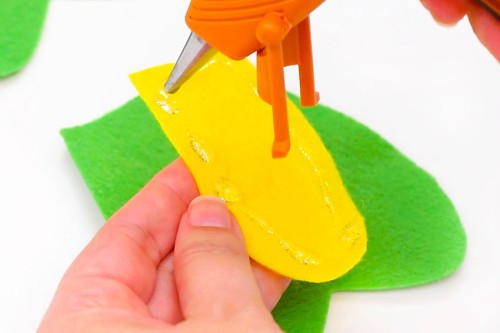
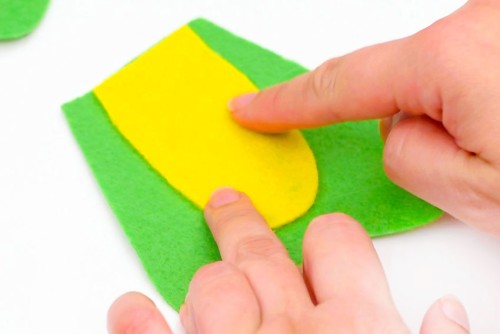
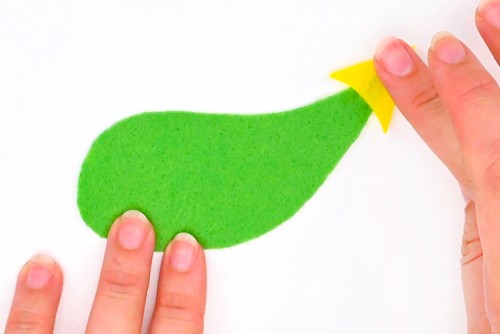
- Find the body and stomach pieces.Add hot glue along the edge of the stomach piece.
- Place the stomach onto one of the body pieces, with the top straight edges matching up.
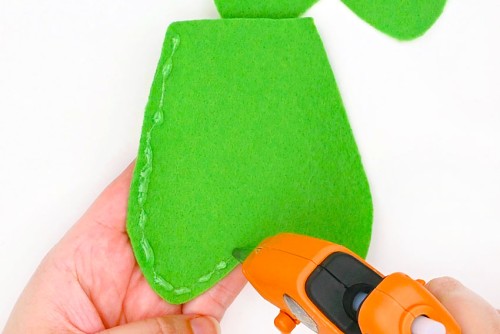
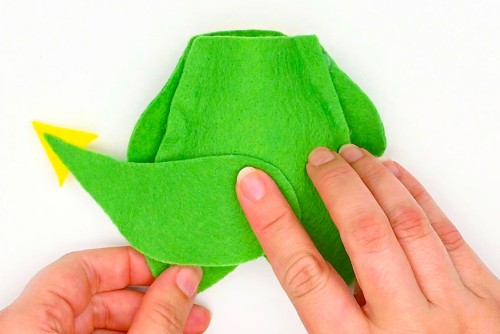
- Flip this piece over and add glue down one side of the back, as close to the edge as possible.
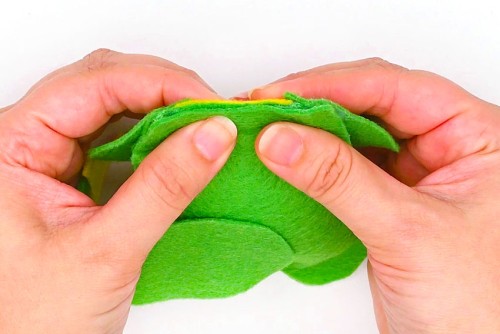
- Connect the other body piece in the glue, matching the two sides up carefully.Continue gluing so the other side is fully connected. Leave the top (neck) unglued so you can stuff it later.
- Add a dot of glue to the top (straight end) of the arms and connect them at the top of the body, on either side of the chest.
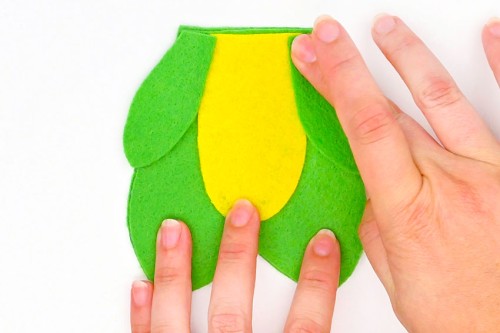
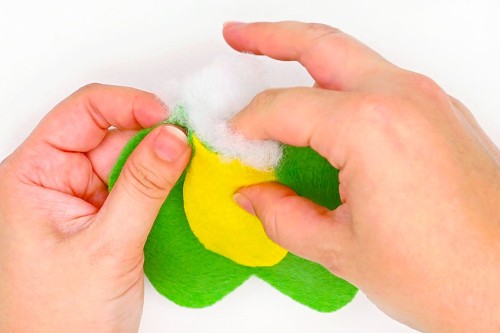
- Once the glue has cooled, add stuffing into the dragon body. Make sure it goes all the way down into the dragon’s feet. Use a pencil to push it down into the feet if needed.
- Glue the tail tip onto the pointy end of the tail.
- Attach the tail to the back of the dragon’s body, with a few dots of glue on the widest part.Before you connect the tail you may want to hold the tail on the back and flip the dragon over to see exactly where you’d like to place it.
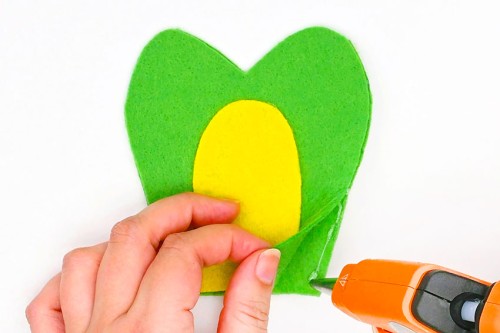
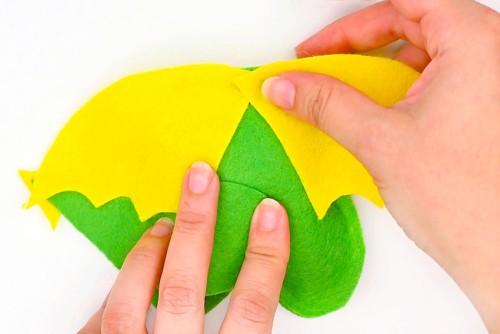
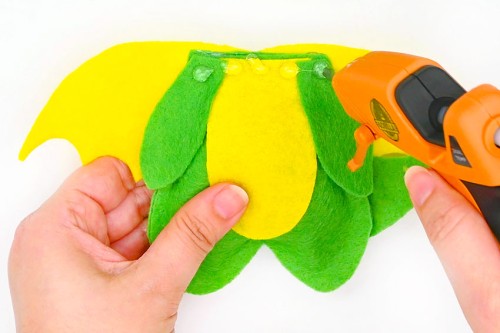
- Add a line of glue inside, along the top of the dragon’s body, and press the pieces of felt together.
- Position the wings on the back of the dragon. Then add a line of glue along the top of the body to connect the wings to the back of the body.
Step 5: Put together the dragon’s head
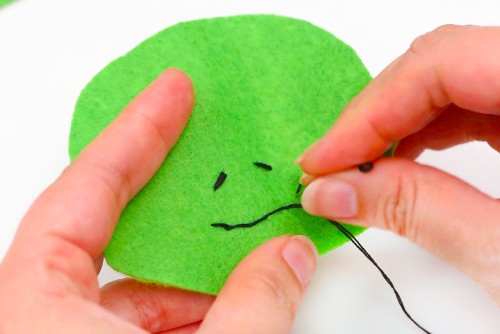
- Use black thread and a needle to create nostrils and a mouth for the dragon.For the dragon’s nose, make 2 short diagonal lines. To do this, pass your needle through the felt from black to front, and then to the back again.Repeat in the same spots, so that the nostril is more defined. Then make another line, about half an inch away from the first.Create the smiley mouth with a running stitch. Once your mouth is the right length, go back towards where you started, filling in the gaps.
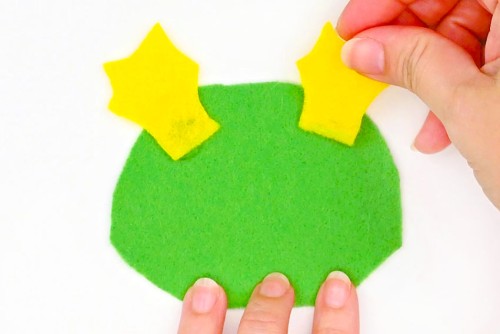
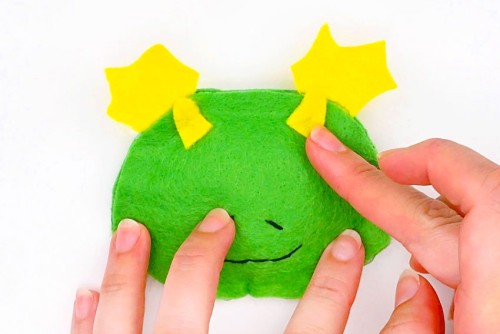
- Glue the spikey fins to the other side of the head.
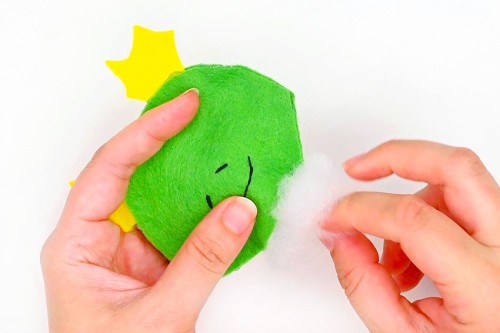
- Connect the two head pieces with glue, with the fins in-between the two layers.Leave the bottom of the head unglued and add stuffing once the glue is set.
- Glue together the bottom of the head and then attach the horns on the front of the head, near the fins.
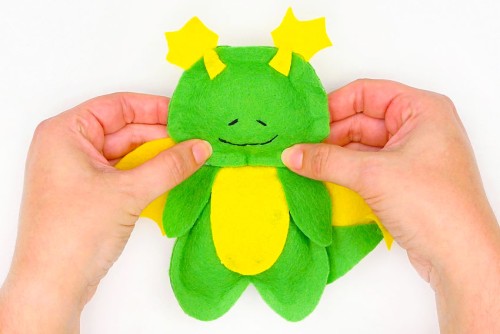
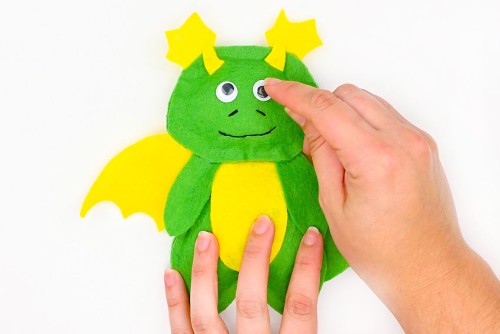
Step 6: Attach the head and add googly eyes
- Add a line of glue along the top front of the dragon’s body.
- Attach the head to the body, holding it in place until the glue has dried.
- Add glue to the back of 2 googly eyes and add them to the dragon’s face above the nostrils.
- Your felt dragon is complete!
Helpful Tip:
- Use a pencil or knitting needle to push the stuffing into small areas, like the dragon’s feet.

Download a free felt dragon pattern:
Click on the link or image below to download our free, printable felt dragon pattern! The 2 page PDF file will open in a new window. Then simply print the template on 8.5 x 11 (letter size) printer paper.
>>> Felt Dragon Pattern <<<

Can I sew my felt dragon instead of gluing it?
Yes, you can easily sew your felt together together instead of gluing it. Try using either a blanket stitch or a running stitch around the outside. We recommend using 3 strands of embroidery floss for the blanket stitch.
Do I have to sew the dragon face on?
If you don’t feel comfortable stitching the dragon nostrils and mouth you can draw them on instead using fabric paint. You can also use a permanent marker (like a Sharpie), but this tends to bleed into the felt, so it won’t look as nice.
Or you can cut the nose and mouth out of black felt and glue that on instead of sewing.

What type of felt is used to make a felt dragon?
We used inexpensive soft craft felt from our stash to make these felt dragons. It’s an inexpensive option that works well to make these DIY toys. You can buy this felt at the dollar store, craft stores, or online at Amazon.
Cheaper felt can pill if you play with it a lot, so use wool felt if you’d like your felt dragon to last longer. It’s more expensive, but it holds up better.
What size felt dragon does this pattern make?
These felt dragons are roughly 6-1/2 inches tall and 7-1/4 inches wide, including the wings. The exact size of your felt dragon will depend on the placement of the head, horns, and wings.

Get creative and use your imagination to design your own dragon, or use our free felt dragon pattern! These DIY toys are soooo cute and friendly looking, and it’s super easy to make your own soft and cuddly plush.

Here’s even more felt craft ideas:


Our book Low-Mess Crafts for Kids is loaded with 72 fun and simple craft ideas for kids! The projects are fun, easy and most importantly low-mess, so the clean up is simple!

Where to buy:
You can purchase Low-Mess Crafts for Kids from Amazon, or wherever books are sold:
Amazon | Barnes and Noble | Books-A-Million | Indiebound | Amazon Canada


Leave a Reply