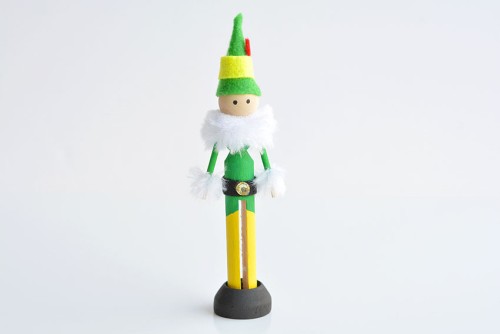
It’s so easy to make this clothespin elf craft! Paint a classic wooden clothespin and add felt and faux fur details to create these super cute DIY wooden peg elves.
These clothespin elves bring ‘elf on a shelf’ to a whole new level! They look so festive lined up on a mantel or side table, but they’re also lots of fun for pretend play. Make this adorable Christmas craft in traditional colours, like red and green, or create a whole troupe in your favourite colours!

This post contains affiliate links. If you use these links to buy something we may earn a small commission which helps us run this website.
How to Make a Clothespin Elf
Materials:
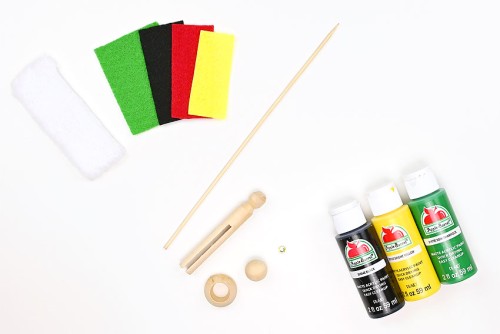
- Wooden doll clothespin
- Acrylic paint (yellow, black, green)
- Doll pin stand
- Wooden skewer
- Felt (green, yellow, red, black)
- White faux fur
- Wooden ball (3/4 inch)
- Rhinestone sticker (1/4 inch)
Equipment:
Watch the step-by-step video tutorial:
Instructions:
Step 1: Find what you need
- Gather your supplies and materials.

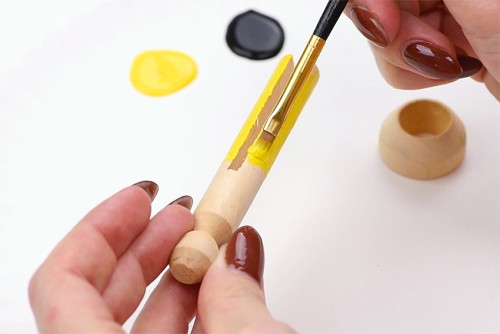
Step 2: Paint the wooden parts
- Paint the bottom half (legs) of the clothespin yellow, starting about 1/4 inch below the cut out notch.
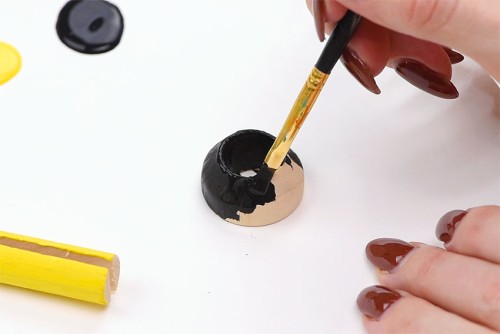
- Paint both the inside and outside of the doll pin stand black.
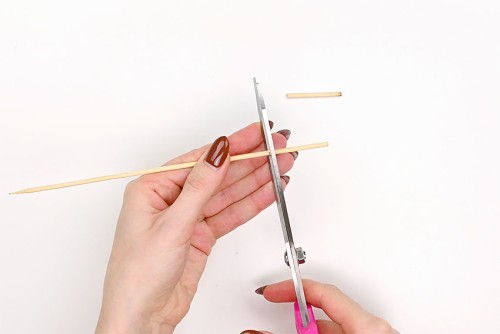
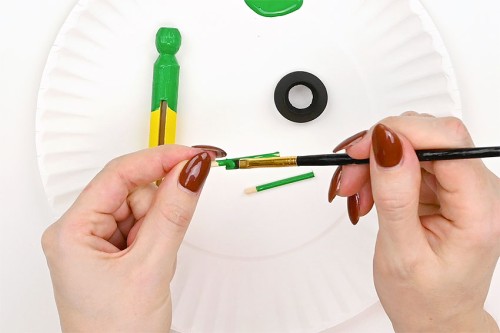
- Starting at the dull end of the wooden skewer, measure and mark with a pencil two sections of 1-1/2 inches each. Cut at each of the marks.(Keep the rest of the skewer for later.)
- Paint the top half of the clothespin green, including the ball part. Paint at a bit of an angle where the green paint meets the yellow, so it’s higher at the center of the clothespin.Paint around the skewers with green paint, leaving 1/4 inch of the end unpainted.

Step 3: Cut out the fabric pieces
- Cut a triangle shape with a rounded bottom from green felt. The sides of our triangle were about 1-3/4 inches, while the rounded edge was 2 inches.Cut rectangular strips about 1/4 inch wide and at least 3 inches long from yellow and black felt.Finally, cut a very small “feather” shape out of red felt. This should be 5 mm wide on the bottom and 3/8 inch long.

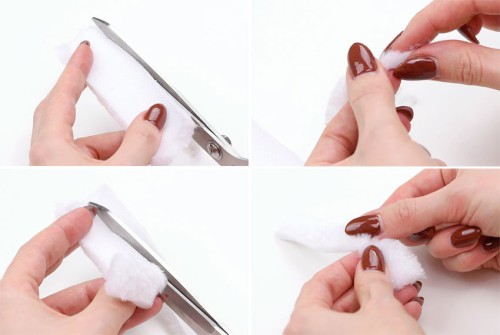
- Cut a thin rectangle from the faux fur, 3 mm wide and at least 1 inch long (it will be cut shorter later). Gently pinch off the loose fur.Cut another rectangle, 1-1/2 cm by 6 cm long. Again, pinch off any loose fur.

Step 4: Make the hat
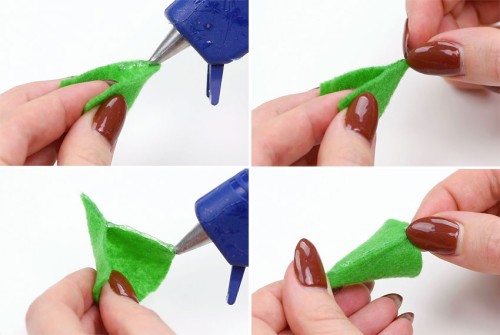
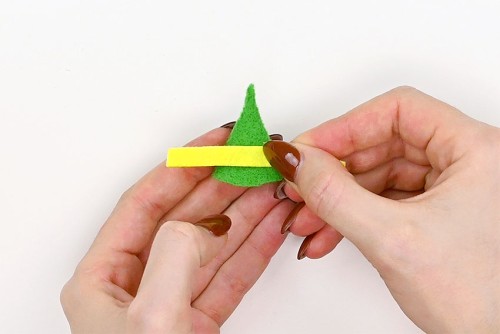
- Add a bit of hot glue to the top of the green triangle and pinch the felt together. Add a line of hot glue down the rest of one side and connect the two sides to make a cone hat.
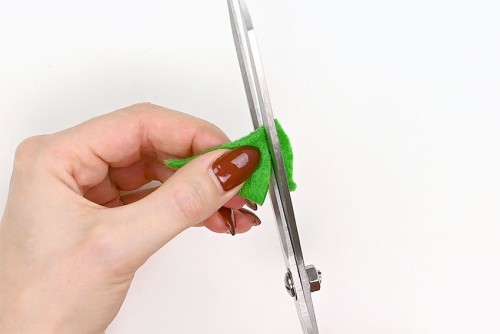
- The hat will be a bit too large at this point. Fit the hat over the wooden ball and see how much you’ll need to cut off. We cut off around 5 mm from the bottom of the hat.
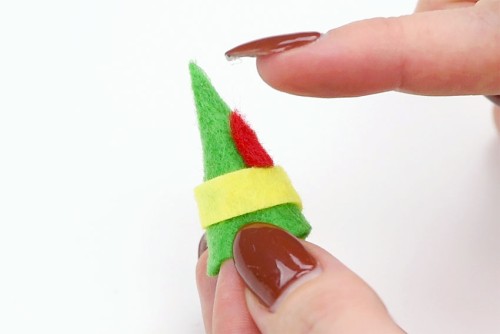
- Add a small dot of hot glue to the center of the yellow strip of felt. Attach it to the front of the hat, a little over 1/4 inch from the bottom.Bring one side of the yellow strip around to the back of the hat, and cut it where it meets the seam of the hat. Hot glue it into place and then cut and glue the other end of the yellow strip.
- Using hot glue, attach the red feather to the right side of the hat, above the band.
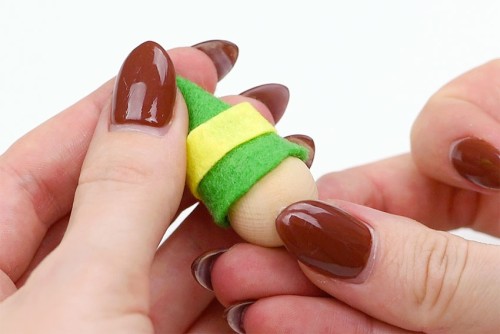
- Add a line of hot glue along the bottom inside of the hat and place it on the wood ball.
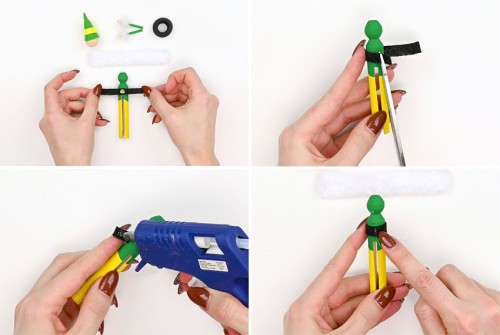
Step 5: Put the clothespin elf together
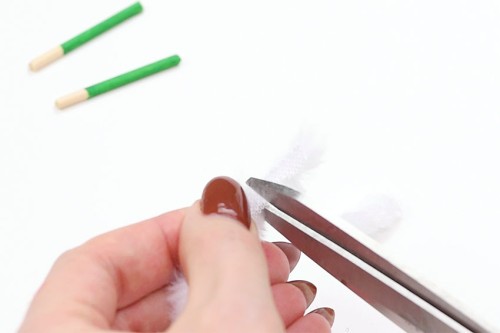
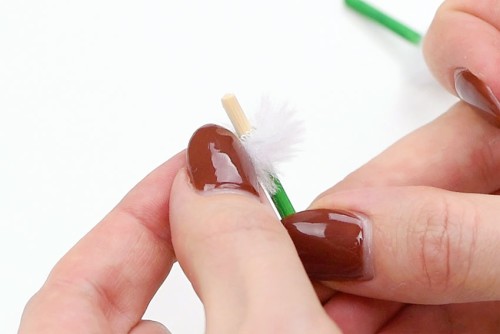
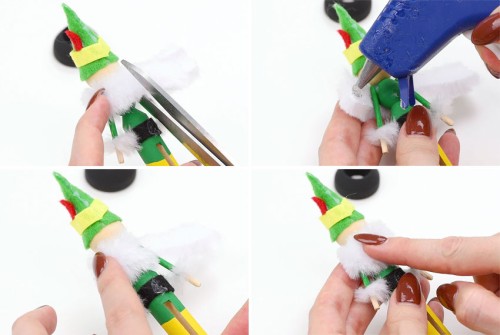
- From the skinny piece of fur, cut two sections that are each 1 cm long.
- Add hot glue to the fur and wrap them around the skewers where the painted section meets the unpainted section.
- Add the rhinestone to the center of the belt. Add a dot of hot glue to the other side of the felt and attach it to the front of the elf, just above the clothespin notch.Then take one side of the black strip around to the back of the elf and trim it roughly at the center back of the clothespin. Hot glue it into place and repeat with the second end, cutting it so it just meets the first side.
- Use hot glue to attach the skewer arms to either side of the top of the clothespin.
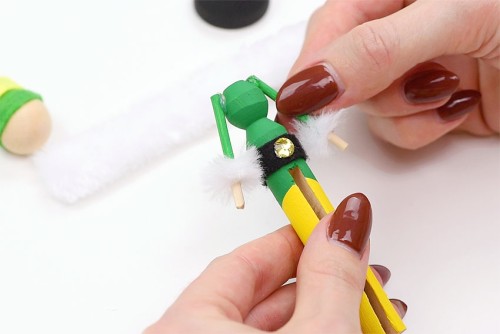
- Add hot glue to the very top of the clothespin and attach the wooden ball head to the elf, making sure to keep the seam in the hat at the back.
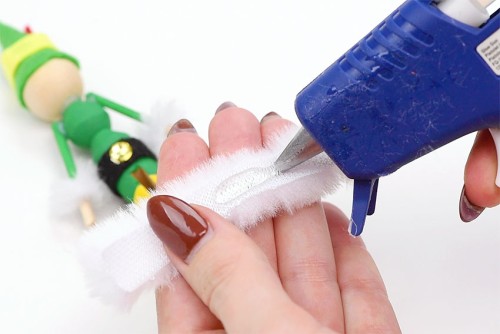
- Add hot glue to the center of the larger piece of fur.
- Attach the fur to the front of the elf, just below the head. Glue the rest of the collar in the same way as the hat band and belt — wrapping it around and cutting the excess before gluing it into place.
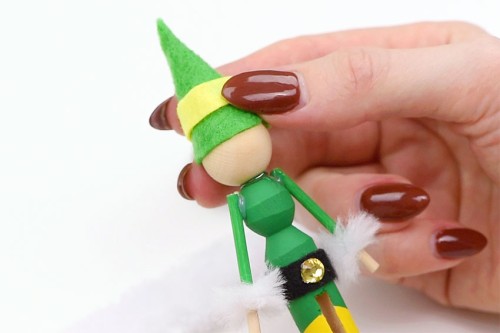
Step 6: Add the finishing touches
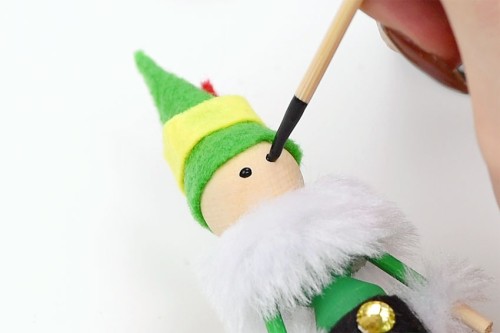
- Dip the pointed end of the wood skewer into black paint and dot on two black eyes to the front of the elf’s face.
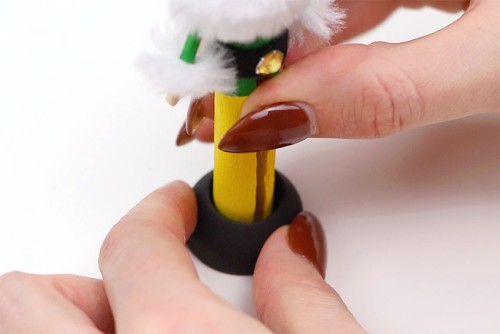
- Fit the elf into the painted doll pin stand.
- Your clothespin elf craft is complete!
TIPS:
- 1. Because you’ll be working with such small pieces of felt, it’s much easier to cut them a bit larger to start with and fit them to size like we’ve done here.2. Each paint job should take around 10 minutes to dry. You can work on other parts of the elf as the paint dries!

Where can I find this type of wooden clothespin?
These round headed, non-spring clothespins are easiest to find online or at a craft store. They’re often used to make wooden dolls. You can find them listed as “traditional wood clothespins”, “wood doll pins” or as “wood doll peg clothespins”.

What is a doll pin stand?
A doll pin stand is the flat bottomed, circular base seen at the bottom of our clothespin elf craft. The wooden clothespin fits perfectly inside, and the base allows the clothespin dolls to stand up!
You can buy doll pin stands at the craft store or online, and you can even buy a package of the clothespins and bases together.

Can I make a clothespin elf craft without the faux fur?
We love the fluffy look of the fur, but you can definitely make this craft without the fur. Try cutting a little collar and cuffs out of white felt, adding on the details with white paint, using white pipe cleaners or even just leaving them off entirely.

Where can I get faux fur?
Be sure to check the dollar store for white fur. You can buy an inexpensive Santa hat and repurpose the fur for crafts like this one! (That’s what we did).

These clothespin elf dolls are so cute and they remind me of little nutcrackers. The small felt details can be a bit finicky to work with, but I think the result makes it worth the effort — and they definitely get easier after you make 1 or 2!
You can also make this clothespin elf craft into a Christmas ornament by attaching a twine loop under the back of the fur collar.

Here’s even more fun Christmas craft ideas:
Popsicle Stick Christmas Trees


Our book Low-Mess Crafts for Kids is loaded with 72 fun and simple craft ideas for kids! The projects are fun, easy and most importantly low-mess, so the clean up is simple!

Where to buy:
You can purchase Low-Mess Crafts for Kids from Amazon, or wherever books are sold:
Amazon | Barnes and Noble | Books- A- Million | Indiebound | Indigo | Amazon Canada


Leave a Reply