
Get ready to make the holidays extra sparkly with this easy Christmas slime recipe! With glittery red, green, and iridescent white slime, this festive trio is so much fun to squish, swirl, and decorate with cute little Christmas charms.
It’s the perfect hands-on holiday activity for kids, classrooms, parties, or even to give as a homemade stocking stuffer. Mix up a batch in minutes and enjoy a cheerful and stretchy sensory craft that brings extra Christmas magic to your day!

This post contains affiliate links. If you use these links to buy something, we may earn a small commission at no extra cost to you. This helps support our website and allows us to keep creating fun, free content.
How to Make Christmas Slime
Materials:
Equipment:
Instructions:
Step 1: Find what you need
- Gather your supplies and materials.


Step 2: Mix together the first ingredients
- Pour 1/2 cup of clear glue into a bowl.
- Add 1-1/2 teaspoons of baking soda and stir to combine.
- Add a few drops of red food colouring to the bowl. Stir to combine.
- Then add red glitter, enough to cover the top of the mixture. We used fine glitter and more chunky glitter.


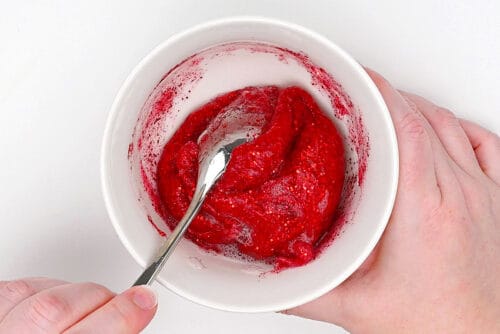
Step 3: Activate and knead the slime
- After stirring the glitter in, add 2-1/4 teaspoons of contact lens solution to activate the slime.
- Stir the slime until you can’t anymore, and it’s thick and pulling away from the sides of the bowl.
- Pick up the slime and stretch it with your hands. It will be sticky at first, but as you squeeze it the stickiness should go away. Add a few more drops of contact solution, if needed.

- If you want your slime to clear up, let it sit in an airtight container overnight so the bubbles go away. You can also play with your slime right away if you’d like!
- Repeat, to make green and white slime, so you have all the festive colours represented!
- Your Christmas slime is complete!Have fun with holiday themed charms and store the slime in airtight containers when not playing with it.


Helpful Tips:
- Try a clear version for extra sparkle: Skip the food colouring and make a clear slime instead. Then add red, green, and iridescent glitter for a super bright and shimmery Christmas combo.
- Add Christmas confetti for extra fun: Festive confetti is another really cute option if you don’t want to use food colouring. It adds instant holiday charm!

How can I play with this Christmas slime?
There are so many fun ways to enjoy this holiday slime! You can:
- Mix the colours together to look like candy canes or peppermint candies. (They eventually blend into a brownish shade, but the swirls look gorgeous at first!)
- Store the slime in jars decorated to look like Santa, Frosty, Rudolph, or any favourite Christmas character.
- Add Christmas charms like mini candy canes, snowmen, snowflakes, Santa, stars, or tiny trees.

What’s the best glue for making Christmas slime?
Clear glue is the absolute best choice for glitter slime — it lets the sparkle shine through beautifully. We highly recommend using Elmer’s clear glue, since it consistently gives us the perfect texture.

What activator works best for Christmas slime?
We usually use contact lens solution, but keep in mind that you’ll also need to add baking soda for it to work. Any clear slime made with baking soda will look a little cloudy at first, but it clears up nicely if you let it sit overnight.
You can also use a borax activator (1 teaspoon of borax dissolved in 1 cup hot water) or Elmer’s Magical Liquid, which works as an all-in-one activator.

This Christmas slime turns out so colourful, glittery, soft, and wonderfully stretchy — the perfect mix for festive sensory play. Whether you keep the colours separate or swirl them together, each batch feels magical in your hands and adds a sparkly, cheerful touch to holiday crafting.
Here’s even more slime recipe ideas:


Now available
Low-Mess Crafts for Kids Book
72 cute and fun crafts that kids and parents alike can enjoy. All with as little mess as possible!
Where to buy:
You can purchase Low-Mess Crafts for Kids from Amazon, or wherever books are sold:
Amazon | Barnes and Noble | Books-A-Million | Indiebound | Amazon Canada


Leave a Reply