Capture the magic of winter with these winter sensory bottles! DIY sensory bottles are so calming and mesmerizing, and they’re the ideal way to showcase the beauty and sparkle of the season.
Filled with glitter, snowflakes, and other winter-inspired treasures, these winter themed sensory bottles are perfect for keeping little hands and minds busy. Winter sensory play is a great way for kids to explore the sights and sounds of winter while they’re warm and safe indoors. So lets get started with this fun and easy craft!

This post contains affiliate links. If you use these links to buy something we may earn a small commission which helps us run this website.
How to Make a Winter Sensory Bottle
Materials:
- VOSS Water bottle
- Baby oil
- Sequins (blue and silver)
- Fine glitter (blue)
- Medium sized glitter (blue)
- Extra fine glitter (blue)
Equipment:
- Cotton round (or cotton ball)
- Rubbing alcohol (or Goo Gone; for cleaning off the label)
Watch the step-by-step video tutorial:
Instructions:
Step 1: Find what you need
- Gather your supplies and materials.


Step 2: Prepare your water bottle
- Rinse or wash out an empty water bottle to make sure it’s clean. Remove the label.
- Clean the outside of the bottle to remove any glue residue.You can wipe this with rubbing alcohol, Goo Gone, or simply soak the bottle in warm, soapy water.


Step 3: Add baby oil and add-ins to the bottle
- Fill the bottle most of the way with baby oil.
- Add about 1 Tablespoon of silver and blue sequins into the bottle.

- Pour between 1/2 to 1 teaspoon of fine blue glitter into the bottle.(No need to actually measure – just eye it and see how much glitter you think looks good!)
- Then add another teaspoon of chunkier blue glitter.
- Finally, pour in another 1/2 to 1 teaspoon of fine blue glitter.It helps to add different sizes and shades of blue to the bottle.


Step 4: Top up the bottle and close it
- Top up the baby oil in the bottle, filling it to the very top.
- Add the lid back onto the bottle, tightening it well.
- Shake the bottle back and forth, turning it upside-down and then right side up over and over again until all the add-ins are mixed in the bottle.
- Enjoy watching the winter ice storm float throughout the bottle.Your winter sensory bottle is complete!
- Then have fun making different types of winter sensory bottles.Keeping reading below for a list of add-ins that were used in these winter calm jars!


Helpful Tips:
- Once you’re happy with your sensory bottle you can use hot glue or super glue on the lid to prevent little hands from opening it.
- Be aware that if your snowflakes or sequins are coloured, the colour might bleed and discolour the baby oil eventually.
- Shaped beads fall nice and slowly in these sensory bottles.

What liquid is best for making winter sensory bottles?
We like using baby oil (scented mineral oil) in our sensory bottles. It’s inexpensive to buy at the dollar store and it makes the items fall nice and slowly.
You can also add a mixture of water and glycerin, like we did for some of our weather sensory bottles. Fill the bottle mostly with water and then mix in 1 Tablespoon of glycerin. This makes for really slow moving sensory bottles, especially with heavier objects, like beads.
Instead of glycerin you can also use clear dish soap, clear glue, clear hair gel, or white corn syrup. Play around with the ratios to get a good thickness, where the add-ins sink slowly.

What items did you add to your winter sensory bottles?
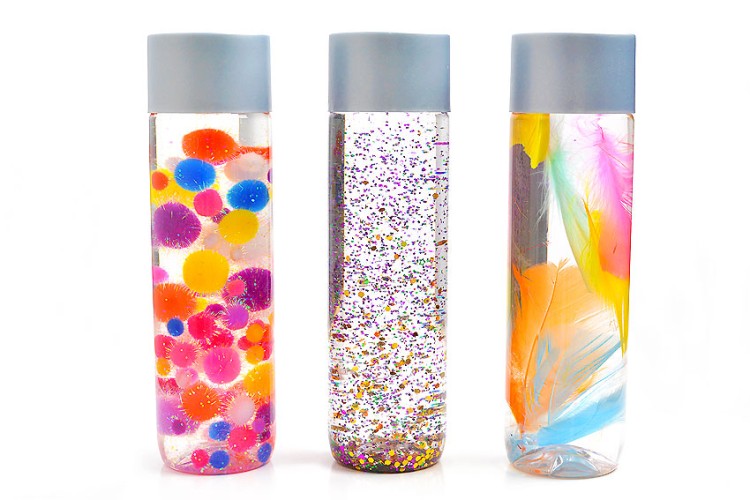
We made 3 different styles of winter sensory bottles. All of them are made with baby oil as the liquid, with different add-ins. Here are the ingredients for our winter weather sensory bottles:
- Snow Storm Sensory Bottle: white glitter, white iridescent tube confetti, star shaped glitter confetti, and white plastic snowflakes
- Ice Storm Sensory Bottle: silver sequins, blue sequins, and 3 types of blue glitter
- Stormy Day Sensory Bottle: clear sunburst beads, round clear beads, clear tri-beads, white holographic glitter, medium silver glitter, and chunky silver glitter

What other add-ins can I use to make winter sensory bottles?
There are so many fun items you can use to make your very own sensory bottle! Here are a few ideas that will work well to create a winter wonderland in a bottle:
- Small styrofoam balls
- Cotton balls
- Snowflake shaped confetti
- Flat glass gems or marbles
- White or light blue pom poms
- Holographic confetti
- Blue food colouring
- Clear plastic or glass vase filler
- Small winter figurines, like a snowman, penguin, or Christmas tree

These winter sensory bottles are SO mesmerizing to watch! The add-ins swirl and twirl around the bottle, sinking slowly down to the bottom. They’re such a fun representation of winter snowstorms and icy weather!
Grab a few simple dollar store ingredients and have fun making your own calm jar for winter sensory play. It’s perfect for quiet time, and they also make a creative homemade gift idea.

Here’s even more DIY sensory bottle ideas:


Our book Low-Mess Crafts for Kids is loaded with 72 fun and simple craft ideas for kids! The projects are fun, easy and most importantly low-mess, so the clean up is simple!

Where to buy:
You can purchase Low-Mess Crafts for Kids from Amazon, or wherever books are sold:
Amazon | Barnes and Noble | Books-A-Million | Indiebound | Amazon Canada


Leave a Reply