Send a balloon rocket flying in this super fun science experiment for kids of all ages! Did you know that you can demonstrate basic physics by making a rocket from a balloon?!
You only need a few simple supplies for this easy STEM activity, and it’s a great way to observe action and reaction. This hands-on activity is a lot of fun, so grab a friend and get ready for take off!

This post contains affiliate links. If you use these links to buy something we may earn a small commission which helps us run this website.
How to Make a Balloon Rocket
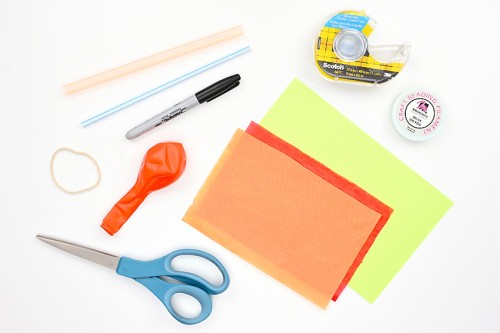
Materials:
- Balloon
- Smoothie straw (Wide opening)
- Plastic straw (Regular opening)
- Rubber band
- Tissue paper (red and orange)
- Colored cardstock
- Tape
- Black marker (optional)
- Fishing line
Watch the step-by-step video tutorial:
Instructions:
Step 1: Find what you need
- Gather your supplies and materials.

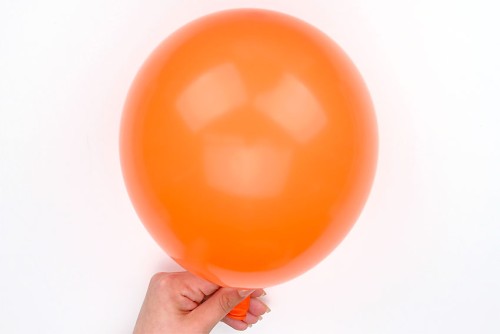
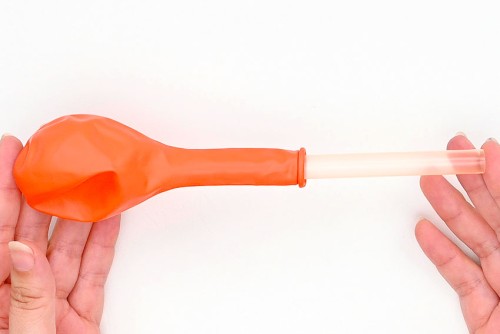
Step 2: Insert a straw in the balloon
- Blow up a balloon to stretch it out and then let it deflate.

- Insert a smoothie straw through the neck of the balloon. Push it almost all the way to the other end of the balloon.
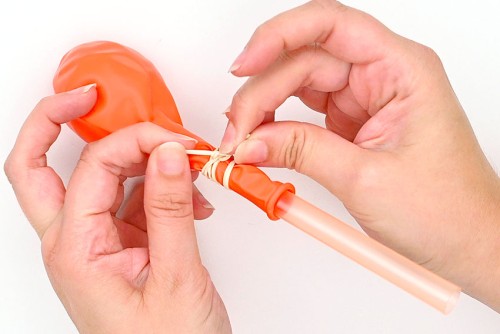
- Wrap a rubber band around the neck of the balloon to keep the straw in place.
Step 3: Add “flames” and fins to the balloon rocket
- Cut pieces of red and orange tissue paper to be about 6 inches long and 2 to 3 inches wide.Then cut strips about 3/8 inch wide down one side, creating a fringe.
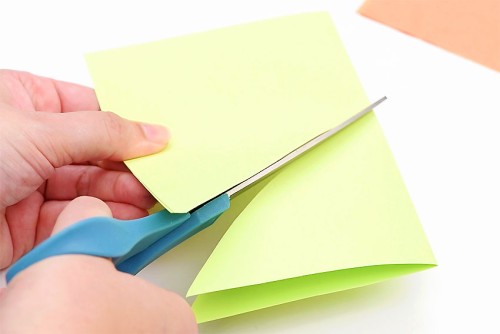
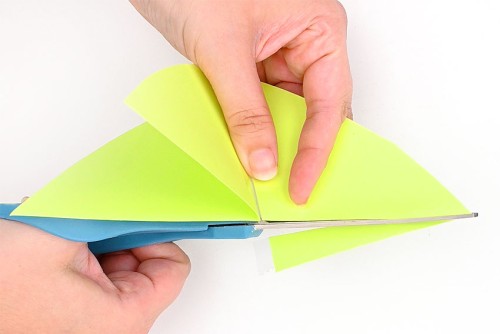
- Cut a rectangle from cardstock about 8.5 inches long and 3.5 inches wide.Fold the paper in half. Cut a slightly curved line, starting from the bottom corner of the open side. End the cut a little over halfway up the folded side. You should have a triangle shape that opens up into a wide triangle.
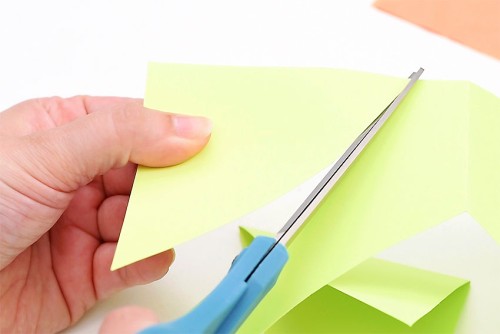
- Open up the remaining scrap of cardstock and cut another triangle shape. This time, a single layer that’s the same size as the previous triangle when it’s folded in half.
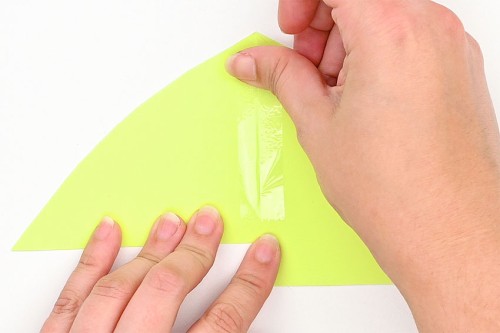
- Open the folded triangle and line up the top points of both cardstock pieces. Make sure the straight edge of the single triangle lines up with the center fold of the other triangle.Tape one side of the triangle in place.
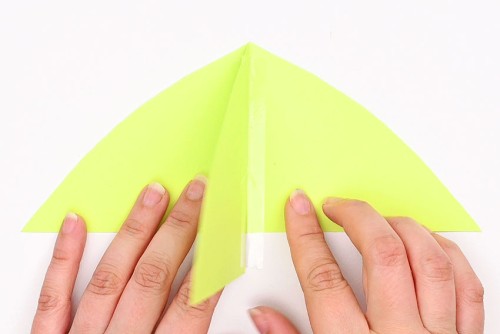
- Then tape the other side of the triangle. You’ve created 3D fins for the rocket!
- Trim the paper, if needed, so that the bottom lines are even.
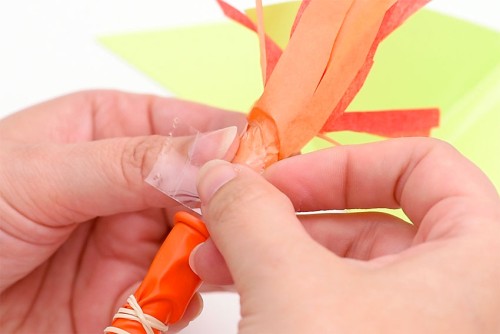
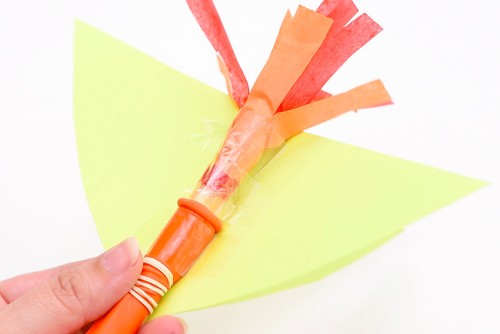
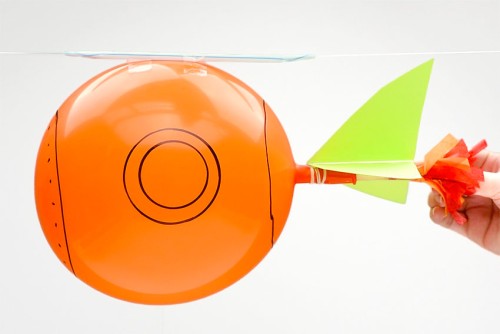
- Wrap the tissue paper flames around the straw and tape them into place. Leave about 1 inch at the end of the straw free so you can still blow into the straw to inflate the balloon.
- Tape the rocket fins so that the top center points towards the top of the balloon. The long edge should be just about even with the end of the straw.Add several pieces of tape across the straw to keep the cardstock in place.

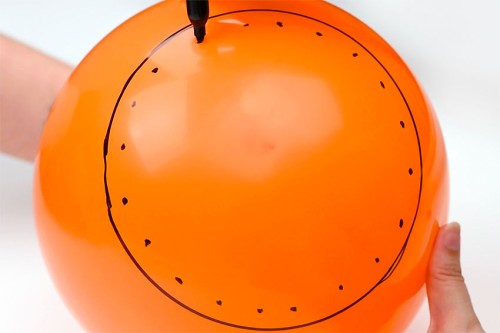
Step 4: Decorate the balloon (optional)
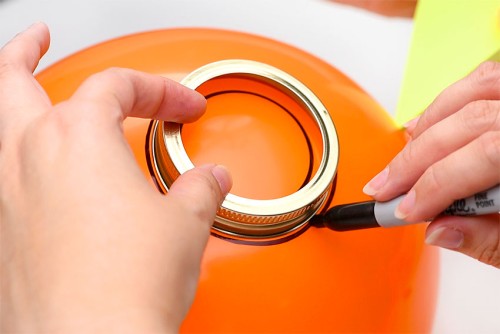
- Find a circular object (like a bowl or canning ring) and trace around it with a black marker to make porthole windows on both sides of your rocket.
- Then draw a large circle on the front with small “rivet” dots all around the inside. You can also draw a final circle around the bottom of the balloon where the fins and flames are. After drawing on the rocket you can let your balloon rocket deflate, but be careful where you set it – the marker tends to smudge easily!
Step 5: Attach the balloon rocket to a string
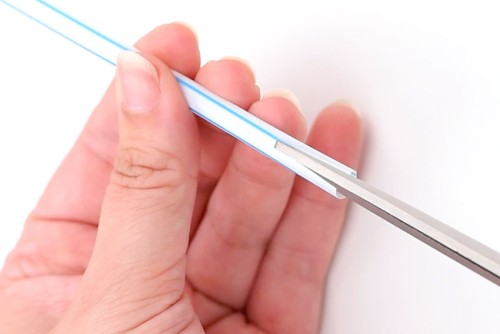
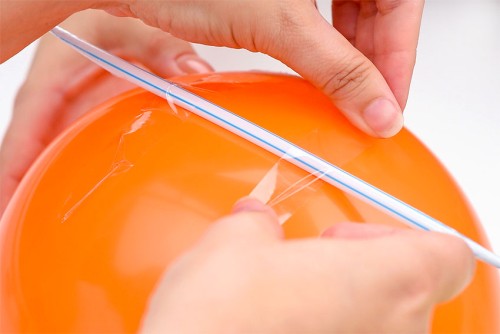
- Cut a 1 inch slit in both ends of the thinner straw.
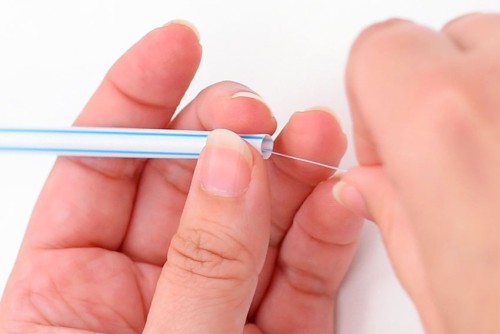
- Slide fishing line through the straw.
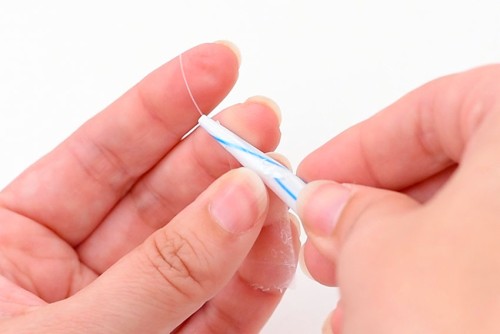
- Twist the straw ends around each other to make the straw thinner at the end. Tape it together. Repeat on the other side.This makes the rocket move more smoothly across the line.
- Tie fishing line to two items at least 10 feet apart and at a similar height. Chairs, table legs, and doorknobs work well.Blow through the end of the smoothie straw to inflate the balloon. Carefully hold your thumb over the end so it doesn’t deflate. Then have a friend tape the fishing line straw to the top of the balloon rocket.
- Bring the balloon to one side of the fishing line. When you’re ready, take your thumb off the straw and watch the balloon rocket go flying!Your balloon rocket is complete!
Helpful Tips:
- If you use a bendy straw, cut off the bendy part before adding the straw to the string. Otherwise it will snag on the string and slow down your balloon.
- Be careful when drawing details on the balloon with permanent marker because it doesn’t really dry on the balloon. After you deflate the balloon the marker will smudge onto whatever it touches. (Which is why we say that drawing on it is optional).

How do balloon rockets work?
Newton’s 3rd law of motion says that for every action there is an equal and opposite reaction. As the air escapes the balloon through the straw, the rubber of the balloon contracts and the air gets pushed out backwards. This propels the balloon in the opposite direction, moving it forward.
The straw and the fishing line keep your balloon flying straight. But you can also try setting your rocket off from the ground without a string. The balloon’s path is a little unpredictable without the string, but it will generally spin in a few circles as it rises into the air.
Why is my balloon rocket spinning in circles?
It’s normal for the balloon to spin in a few circles once it gets half way deflated. Adding fins and flames to the end of your balloon will help keep it weighted down so it spins less, but you won’t be able to get rid of all spinning.
What to do if my balloon rocket bounces and gets caught on the line?
Make sure your fishing line is as tight as possible. If the line is floppy, the straw will get caught on the line as it moves across. This will cause the balloon to bounce up and down and fly more slowly.
We also found that cutting a slit and taping the ends of the guiding straw to make them smaller really helped to keep our rocket from getting caught on the line. The balloon’s tendency is to rise up as it flies. So making the ends of the guiding straw small helps prevents the balloon from pushing up on the straw and stalling the movement.

Do I need 2 different straw sizes to make this balloon rocket?
No, you can use a regular sized straw to inflate your balloon rocket instead of using a smoothie straw. However, since less air is released through the smaller straw opening, your balloon rocket will fly quite a bit slower than with the smoothie straw. On the other hand, the energy will last longer so your rocket will actually fly farther.
What kind of string is best for making a balloon rocket?
It’s best to use a smooth string like fishing line, beading thread, or nylon kite string. These cords allow the balloon rocket to fly smoothly.
If you don’t have any of those options you can also use baker’s twine, a thin yarn, or even thread. But any string with texture will cause friction and make it more difficult for your rocket to move.
If you have both kinds of string, compare the smooth fishing line to the more textured yarn. Do you notice a difference in how the balloon rocket travels?

Where is the best place to set up my balloon rocket?
We played with our balloon rocket outside, tying the fishing line around two trees. You can also tie the strings to anything stationary indoors, like table legs, chairs, doorknobs, or cupboard handles.
Wherever you set up your rocket balloon, make sure that you tie each side of the string at the same height, and give the balloon a good distance to fly, at least 10 or 15 feet apart. Make sure the line is as tight as possible – if the string is too loose the balloon won’t travel properly.
If you don’t have a good place to tie the string, you can make little handles at the ends of the string and have 2 friends hold each end tightly!
How many times can I use my balloon rocket?
You should be able to use your rocket balloon over and over again. Just remember that balloons are a bit unpredictable – so be prepared for it to pop at some point if you’re using it many times.
To re-use the balloon rocket, simply blow into the straw at the end of the balloon to inflate it again. Then re-tape it to the small straw. If you’re careful you can even use the same tape multiple times.

See scientific principles in action as you use air power to send your rocket balloon flying! You could even try different sizes and shapes of balloons and compare how well they fly. Grab a friend or two and have a race with your balloon rockets!

Here’s even more fun STEM ideas:


Our book Low-Mess Crafts for Kids is loaded with 72 fun and simple craft ideas for kids! The projects are fun, easy and most importantly low-mess, so the clean up is simple!

Where to buy:
You can purchase Low-Mess Crafts for Kids from Amazon, or wherever books are sold:
Amazon | Barnes and Noble | Books-A-Million | Indiebound | Amazon Canada


Leave a Reply