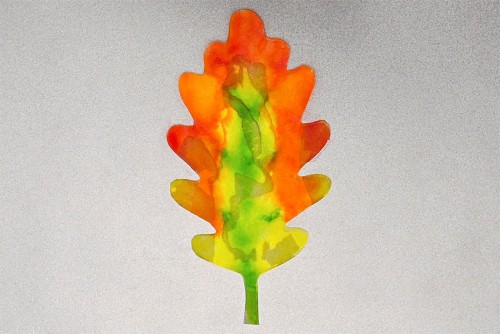
These coffee filter leaves are SO PRETTY! Use markers and water to transform a regular coffee filter into a beautifully coloured fall leaf.
We love coffee filter crafts around here. They’re so easy and really inexpensive to make! These coffee filter leaves are such a fun autumn craft, perfect for decorating the house for fall, Halloween, or Thanksgiving.

This post contains affiliate links. If you use these links to buy something we may earn a small commission which helps us run this website.
How to Make Coffee Filter Leaves
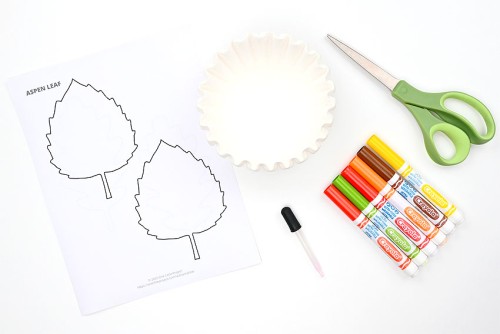
Materials:
- Free Printable Leaf template
- 2 Coffee filters
- Washable markers (fall colours)
- Water
Equipment:
Watch the step-by-step video tutorial:
Instructions:
Step 1: Find what you need
- Gather your supplies and materials.

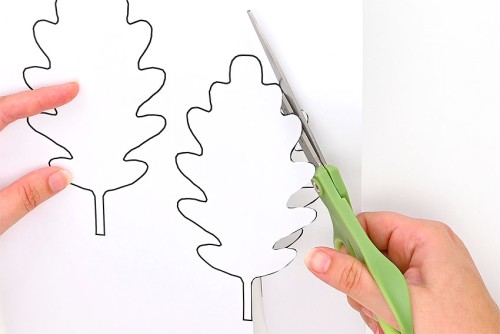
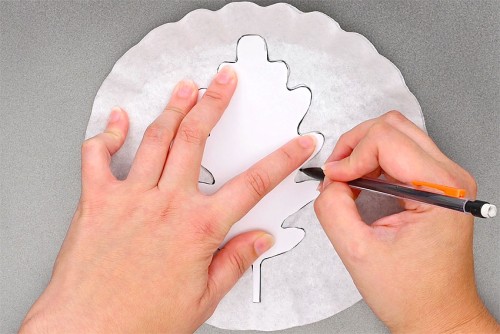
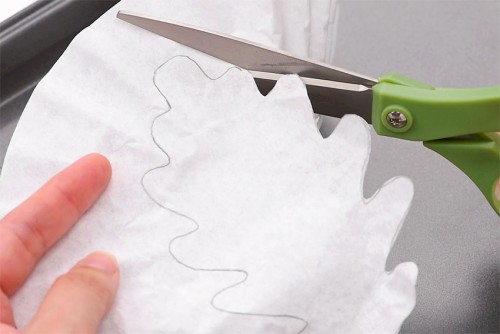
Step 2: Cut out your coffee filter leaves
- Print out a free leaf template (the link is in the list above) and cut out the leaf shape.
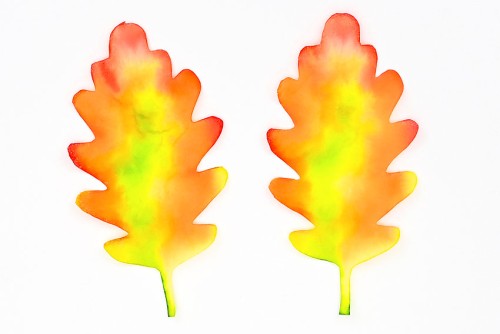
- Make a stack of two coffee filters.

- Trace the leaf shape onto the top coffee filter.
- Cut out the leaf shape while holding the two coffee filters together.

Step 3: Colour your coffee filter leaves
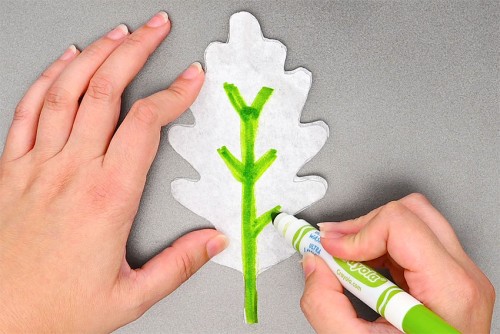
- Keep the two layers of coffee filter leaves together in a stack and place them on a baking sheet.Begin colouring on the leaf with washable markers. We drew the veins of the leaf down the center, but you can also just draw randomly.
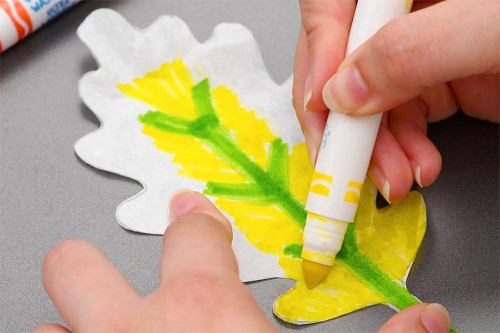
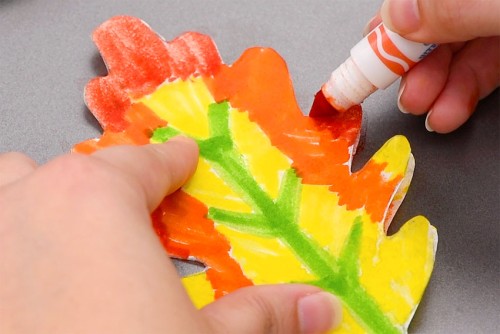
- Add a second colour of marker to the leaf. Choose colours that will blend well together.
- Continue colouring the leaf, with another colour or two.For a bright and vibrantly coloured leaf, colour the entire leaf without leaving any white space. If you leave white space on your leaves, they’ll end up being a light colour when they’re done.
Step 4: Add water to the leaves
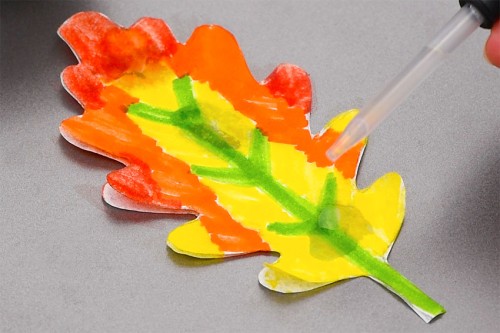
- Use an eyedropper to add one or two drops of water at a time to the leaf. Watch the water spread and blend the colours! Add more water to the dry parts of the leaf until the whole leaf is covered, but not drenched.
- Keep the leaves in a pile and allow them to dry. Do not use a paper towel to pat them dry – this will remove some of the colour.(For tips on drying the leaves quickly, see below.)
- Once they’re dry, separate the two leaves. Your coffee filter leaves are complete!
Helpful Tips:
1. Leave the coffee filter leaves as is, or once they’re dry use a thin marker to draw veins on them, just like a real leaf!
2. If you don’t have an eye dropper you can also use a spray bottle or a small measuring spoon to drop water on the coffee filters.
3. Don’t add too much water to the coffee filter leaves. If they’re soaking wet they’ll take a lot longer to dry.

Where can I find a leaf template?
We have 5 different types of leaf templates available for you in several different sizes! We used the medium leaves to make our coffee filter leaves.
>>> Leaf Template <<<
Click the link above to find templates for maple, oak, hawthorn, and aspen leaves, as well as a simple leaf shape. Each size and type of leaf is a PDF file that will open in a new window. You can print these templates on 8.5 x 11 inch regular printer paper.
What type of markers should I use?
You need to use washable markers to make these colourful fall leaves. Regular washable Crayola markers work really well, but Mr. Sketch scented markers also work.
Don’t use permanent markers like Sharpies because the colours won’t bleed and blend together.

Are there other ways to colour these coffee filter leaves?
Yes, you can also use liquid watercolour paint or food colouring. Simply combine a few drops with water and use an eye dropper or small spoon to add colour to the leaves.
How long do the coffee filters take to dry?
It takes between 2 and 5 hours for the coffee filter leaves to dry on the baking sheet out in the open. If you’d like to speed up the drying time there are a couple of options:
- Bake the coffee filters in a 125F oven (the temperature needs to be very low) for about 20 minutes. Keep a close eye on them and remove them as soon as they’re dry. (This is our favourite method).
- Place them outside in direct sun on a warm day to dry. Again, keep a close eye on them, because they’ll blow away as soon as they’re dry!

What can I do with my coffee filter leaves?
These coffee filter leaves look pretty sitting on the mantel or Thanksgiving dinner table. You can also tape or tie the stems to a string to make a fun autumn garland!
But where these coffee filter leaves really shine (literally!) is taped in the window as a suncatcher. As the sun shines through, these leaves glow and look soooo beautiful! We used small pieces of double sided tape to hang them in our window, but loops of regular tape will work as well.

These coffee filter leaves are such a fun and easy fall craft, perfect for learning about autumn leaves changing colour. Watch the colours spread, mix, and transform as you drop water on the coffee filter leaves. It’s so cool!

Here’s even more leaf craft ideas:


Our book Low-Mess Crafts for Kids is loaded with 72 fun and simple craft ideas for kids! The projects are fun, easy and most importantly low-mess, so the clean up is simple!

Where to buy:
You can purchase Low-Mess Crafts for Kids from Amazon, or wherever books are sold:
Amazon | Barnes and Noble | Books-A-Million | Indiebound | Amazon Canada


Leave a Reply