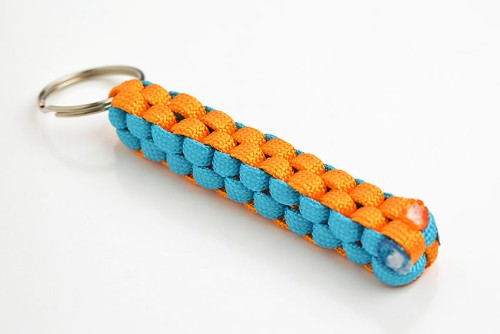
This paracord keychain is SO COOL! All you need is some paracord and a key ring to make this DIY keychain that’s perfect for hiking, camping, and the outdoors.
Choose your favourite colours and make a simple box knot (full instructions below!) to form this survival keychain in 15 minutes or less. These paracord keychains are fun and easy to make, and they can be unraveled for use in an emergency!

This post contains affiliate links. If you use these links to buy something we may earn a small commission which helps us run this website.
How to Make a Paracord Keychain
Materials:
- 6 feet Paracord (2 colours, 3 feet each)
- Split ring keyring (1 inch, or size of choice)
Equipment:
Watch the step-by-step video tutorial:
Instructions:
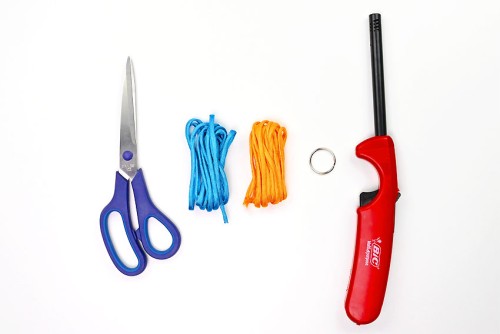
Step 1: Find what you need
- Gather your supplies and materials.

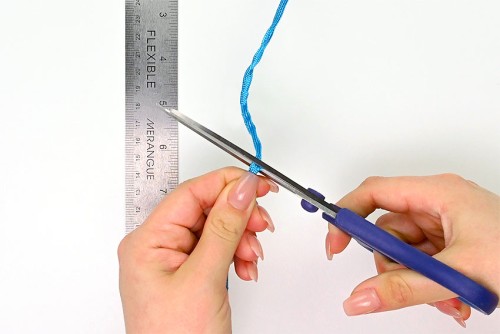
Step 2: Prepare your paracord
- Choose two colours of paracord and cut 3 feet lengths of each (6 feet total).
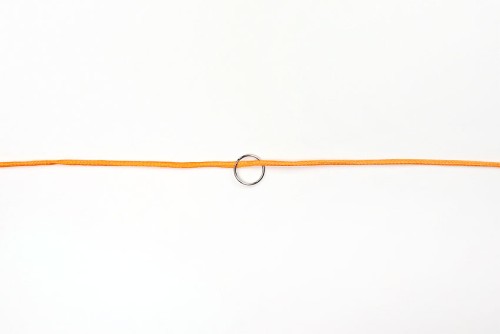
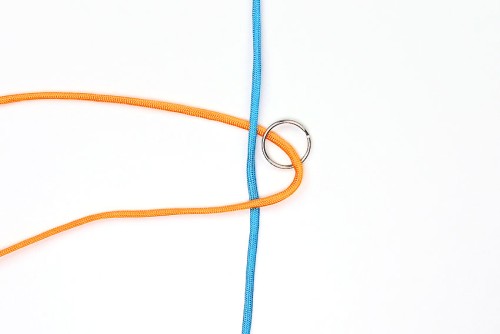
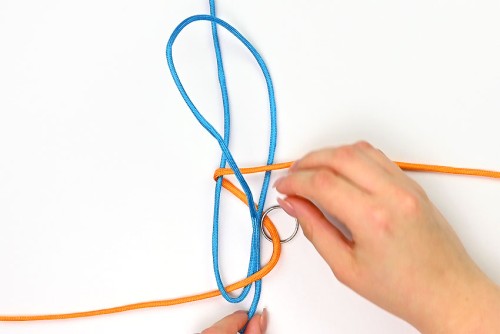
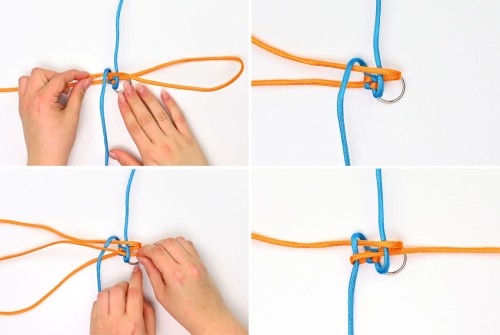
- Add a split ring to the center of one colour and lay it horizontal on your work space.
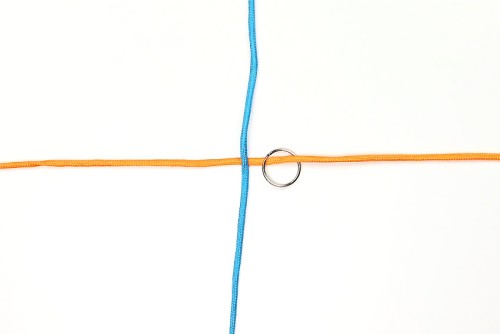
- Lay the second cord on top of the first, placing it vertically, with the center of the cord to the left of the key ring.
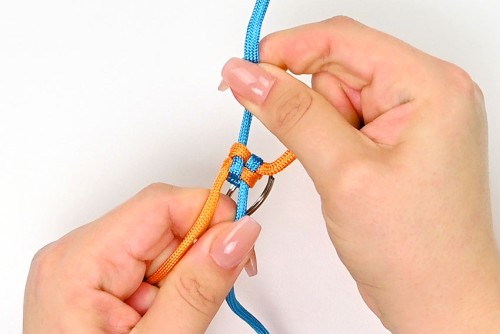
Step 3: Form a box knot
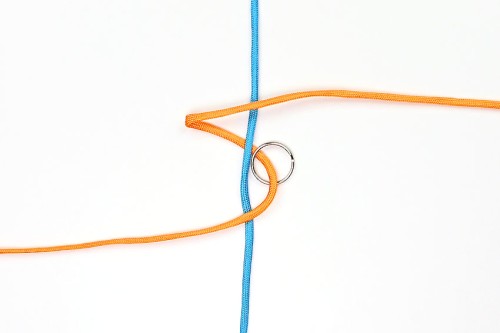
- Bring the right side of the horizontal (orange) cord over to the left, placing it below the left side of the orange cord.
- Take the top part of the orange cord and bring it over the blue cord to the right side. The orange cord should look like an “S”.

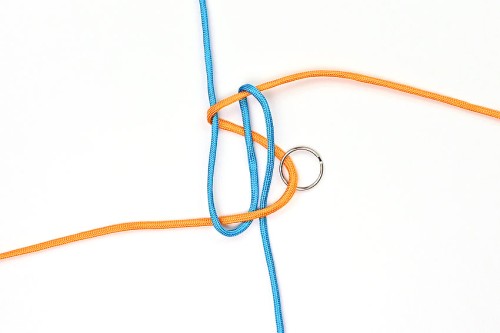
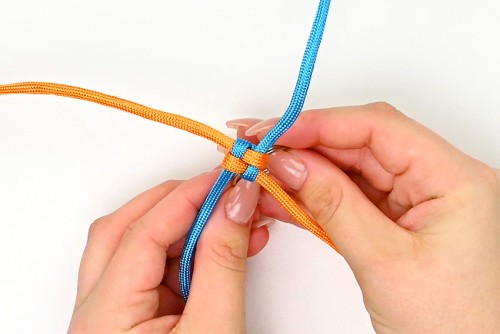
- Take the bottom of the blue cord and bring it up over two parts of the orange cord and under the top part of the strand.
- Pull it through so your knot looks like the photo below.
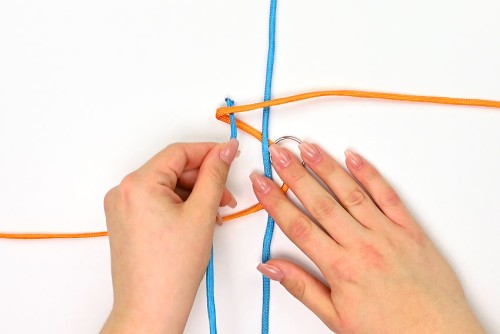
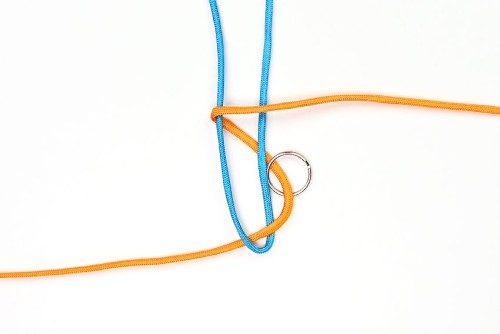
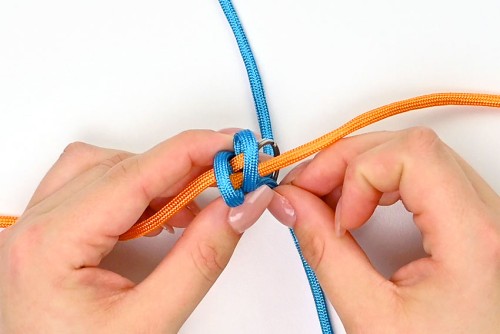
- Now bring the right part of the blue strand down, over the first two orange parts and under the bottom part of the strand.
- Again, pull it through so your knot looks like the photo below.
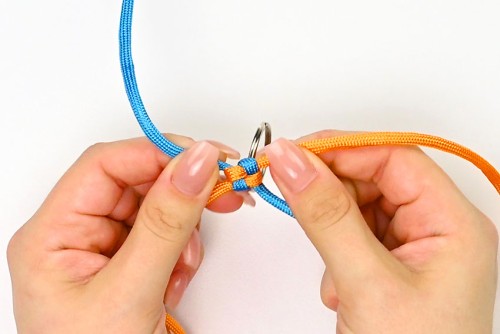
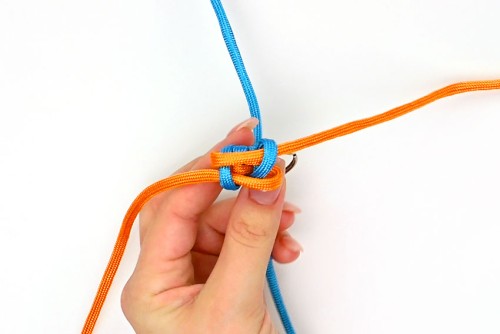
- Pull all four cords tight to form a box knot! You may need to work a couple cords at a time, pulling in opposite directions, to get a clean knot.
Step 4: Repeat making box knots
- The rest of the keychain is formed by making repeated box knots.To start, bring the vertical (blue) strands over top of the box knot in the opposite direction from which they come. The left strand comes down, and the right strand goes up.
- Bring the right orange cord over top of the right blue strand and under the left.Take the left orange strand and bring it over the left blue and under the right blue.

- Pull the cords tight to form another box knot.
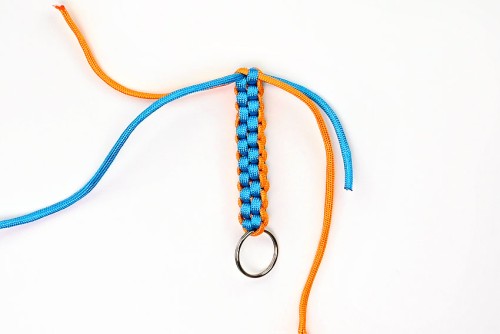
- Continue making box knots. When you have enough knots, you can pinch the cords against the existing knots to make loops on top. Then you can thread the other cord through these top loops to make your knots.
- When making the knots the horizontal (orange) cord will always go over the first blue cord and under the second.
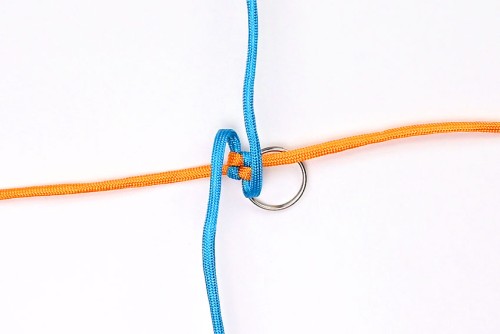
- Again, pull the cords tight.
- Continue making box knots until the keychain is the length you want. We made this one about 3 inches long.
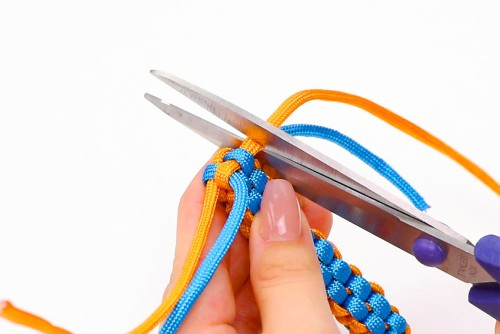
Step 5: Finish off the keychain
- Cut off one of the excess paracord strands, about 1/4 inch from the knots.
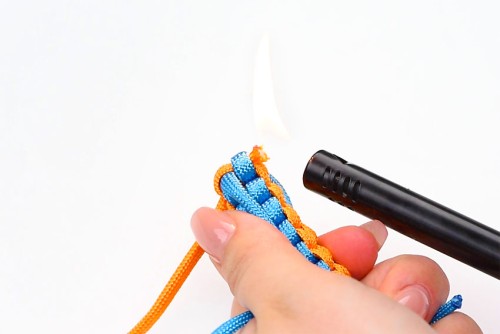
- Hold a BBQ lighter over the cut end for about 3 seconds to melt the end of the cut paracord.
- Press the lighter against the melted cord to stop the end from unraveling.Repeat, cutting and melting the rest of the strands, one at a time, until all 4 strands have been finished.
- Your paracord keychain is complete!

Helpful Tips:
- Form your knots slowly, making sure they’re tight and consistent. This will give you the best looking keychain.
- When pulling the knots tight you’ll need to pull all four sides, but it also helps to pull the opposite sides gradually. You can even pull on the strands individually to help tighten the knot nicely.
- If the ends of the cords are fraying as you work with them, melt the ends of them with a BBQ lighter. This will make it easier to tie the knots.

How much paracord does it take to make a keychain?
This will all depend on the length of keychain you’d like to make. By using 6 feet of paracord (3 feet of each colour) you should be able to make a keychain that’s just over 3 inches long.
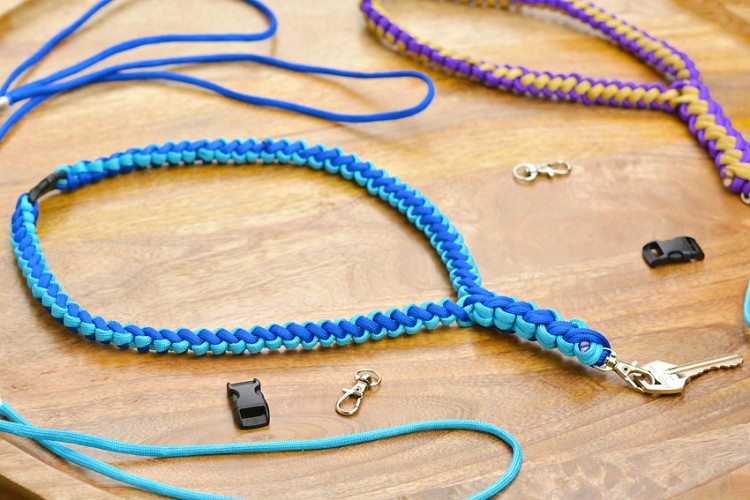
The longer keychains that you see in our pictures are are 4-1/2 inches long, and they were made with 8 feet of paracord (4 feet of each colour).

How do you finish a paracord keychain?
To finish a paracord keychain you will need to cut the excess paracord and then melt the ends with a lighter. Melting the paracord ends stops the unfinished edges from unravelling. It also makes the cord end wider, therefore keeping the knots in place.
Make sure you cut and melt the cords one at a time. If you cut all four cords at once there’s a chance your knots will loosen or fall apart.
This way of finishing the keychain also allows you to easily take the keychain apart if you need to use the paracord in an emergency situation.

What is the use of a paracord keychain?
These paracord keychains are great for holding your keys, of course. But they also make a cute backpack charm, luggage tag, or zipper pull!
The main advantage of paracord keychains is that they can be taken apart. The paracord can then be used in any number of wilderness survival situations, such as:
- Replace a broken bootlace or shoelace
- Tie a tarp to a tree for shelter
- Secure your tent stakes
- Tie a snare
- Fashion a splint with a branch and some paracord
- Tie a simple sling or use the paracord as a tourniquet
- Use the inner cords for makeshift fishing line

Tie one simple knot to make this super cool paracord keychain! Parachute cord is strong and versatile, and it’s a great material for crafting. These box knot keychains are such a fun camping craft, perfect for sleepovers, summer camp, and Scouts.

Here’s even more knotted craft ideas:
How to Make a Paracord Bracelet


How to Make a Macrame Keychain


Our book Low-Mess Crafts for Kids is loaded with 72 fun and simple craft ideas for kids! The projects are fun, easy and most importantly low-mess, so the clean up is simple!

Where to buy:
You can purchase Low-Mess Crafts for Kids from Amazon, or wherever books are sold:
Amazon | Barnes and Noble | Books-A-Million | Indiebound | Amazon Canada


Leave a Reply