This no-sew sock snowman is SO CUTE! It might be my favourite winter craft this year! It’s so adorable and cheerful, plus it’s sooo easy to make! It’s a great holiday decoration that you can keep out all winter long.
All you need are a couple of dollar store socks and a few simple craft supplies – no sewing skills required! This craft is kid-friendly, easy to do with a group, and it makes a great homemade gift!

This post contains affiliate links. If you use these links to buy something we may earn a small commission which helps us run this website.
How to Make Snowman with Socks
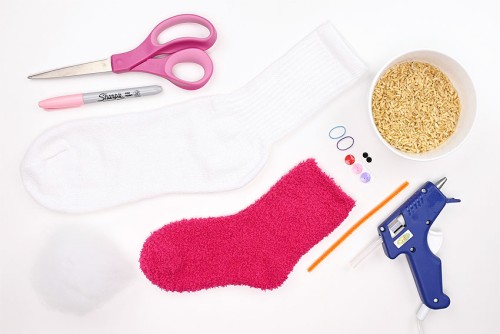
Materials:
- 1 White sock
- 1 Coloured fuzzy sock (or patterned)
- 1/2 cup Rice (uncooked)
- Polyester fiber fill (or old pillow stuffing)
- 2 Small elastics
- Orange pipe cleaner
- 2 Black rhinestones (5 or 6 mm size)
- 3 Button stickers (or regular buttons)
- Pink Sharpie marker
Watch the step-by-step video tutorial:
Instructions:
Step 1: Find what you need
- Gather your supplies and materials.

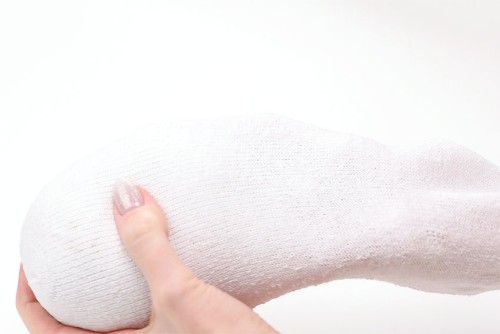
Step 2: Stuff the snowman’s body
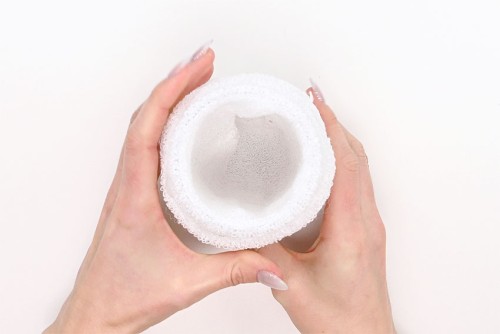
- Either ask a little helper to hold open the white sock, or place it over a drinking glass.
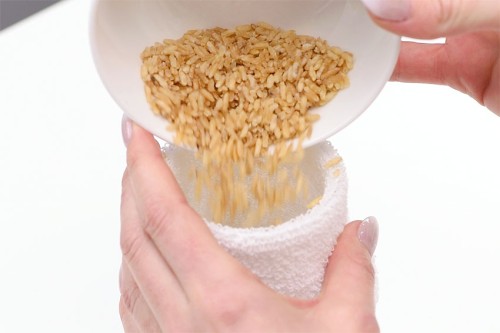
- Pour the rice into the sock. Remove the sock from the glass.

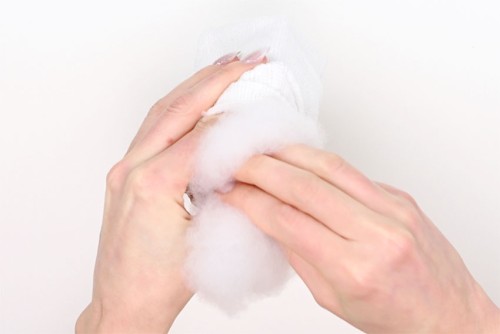
- Push stuffing into the sock to make the bottom of the snowman.
- Add more stuffing as needed, making sure it’s tightly packed. Re-arrange and stretch out the stuffing to fix any lumps or bumps.The bottom of our snowman was about 4 inches tall.
- Stretch an elastic around the sock as close to the stuffing as possible.
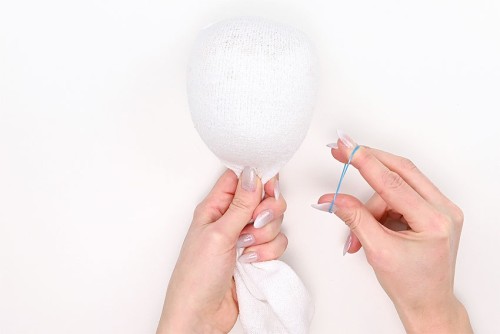
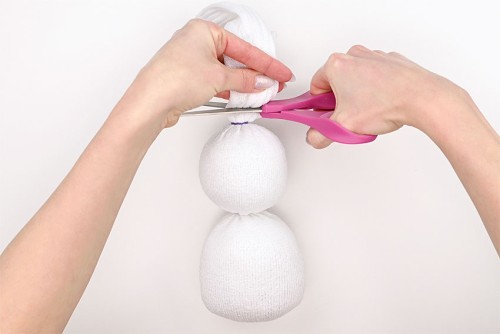
Step 3: Make the snowman’s head
- Add more stuffing to form the snowman’s head, making it slightly smaller than the bottom.Our snowman’s head was about 3 inches tall.
- Stretch another elastic around the sock above the stuffing, again trying to get it as close to the stuffing as possible.
- Cut off the extra sock above the second elastic.
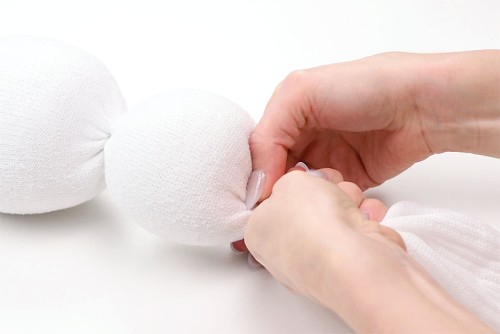
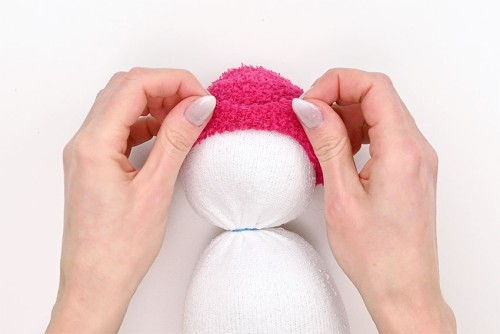
Step 4: Make the snowman’s hat and scarf
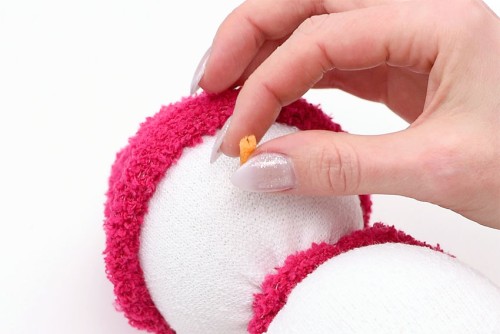
- Cut the toe off the coloured fuzzy sock so it’s about 4 inches long. This will be the snowman’s hat!
- Place the hat on the snowman’s head, folding up the edge to create a band at the hat’s bottom.
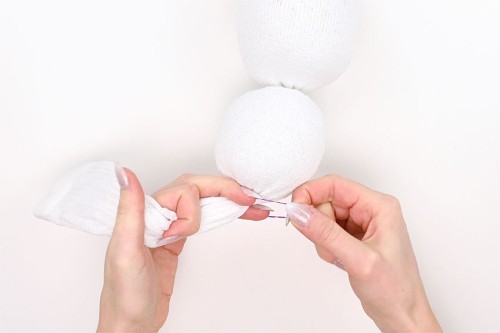
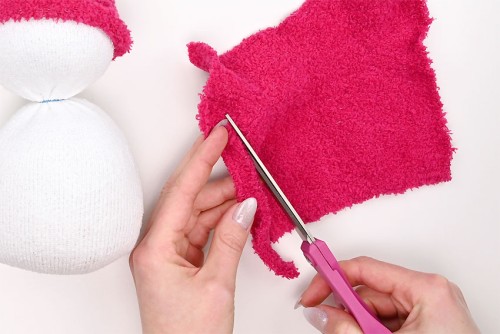
- Cut open the rest of the coloured sock. On the longest edge, cut a 1 inch wide strip to make a scarf for the snowman.
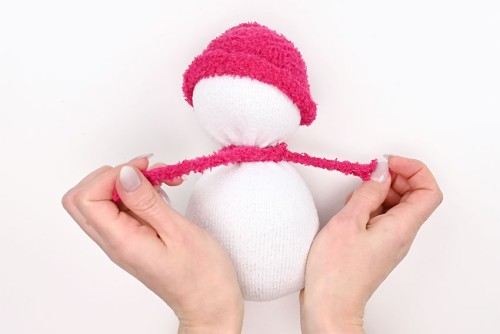
- Wrap this scarf around the snowman’s neck and tie it off to the side.

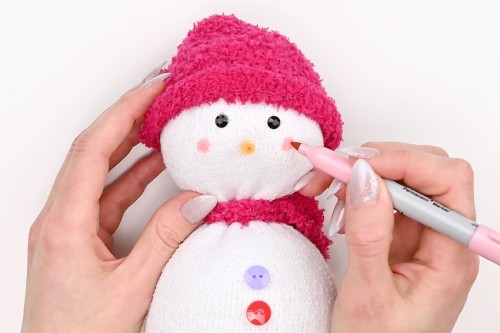
Step 5: Add details to the snowman
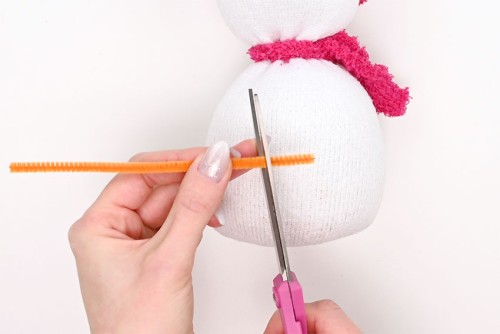
- Cut about 1 inch off an orange pipe cleaner to make the nose for your snowman.
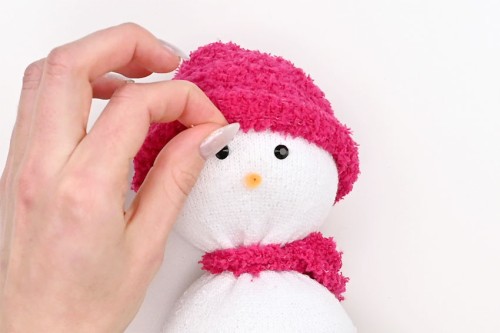
- Attach one side of the pipe cleaner to the middle of the snowman’s face with a glue gun.
- Use a glue gun to attach two black rhinestones above the nose for the snowman’s eyes.
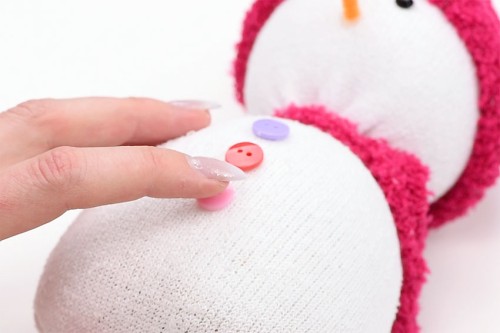
- Glue three buttons to the front base of the snowman.
- Draw rosy cheeks on the snowman’s face with a pink Sharpie marker.
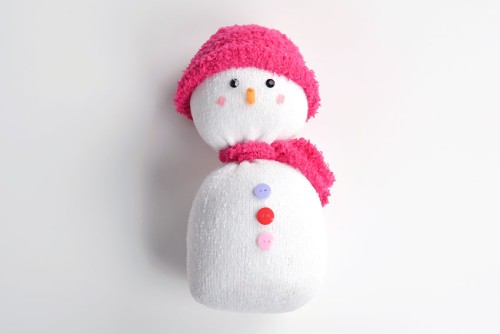
- Your sock snowman is complete!
What do you fill a sock snowman with?
You can use poly fill stuffing or rice (or a combination) to fill your snowman. We added 1/2 cup of rice to the bottom of the sock to help the snowman stand without falling down. Then we filled the rest of the snowman with stuffing from an old pillow.
You can find poly fill or fiber fill at the fabric store or most craft stores (or Walmart and Amazon). We don’t usually buy it though since it’s big and bulky to store – and using the stuffing from an old pillow is so much easier! You can also use scrap fabric, or even other spare socks, for soft filling.

Do you need to add rice to the bottom?
The rice at the bottom of the snowman helps your snowman stand up. If you’ll be making the snowman as a toy that doesn’t need to stand, you don’t need to add the rice.
But if you need your sock snowmen to stand, we definitely recommend adding rice or something else to weigh it down so it doesn’t fall over.
You can use rice, dried beans, floral pebbles, glass vase fillers, or Poly-pellets at the bottom of the snowman.

What can I use as a sock snowman’s nose?
We used a small piece of orange pipe cleaner, but there are a lot of great options for the snowman’s nose:
- orange felt
- a pom pom (left as is, or snipped into a triangle shape)
- polymer clay
- the tip of a wooden skewer or toothpick, painted or coloured orange with a marker
- an orange headed pin
- cardboard cut into a triangle shape and painted or coloured orange

How many socks are needed for this sock snowman craft?
You will need 1 white sock and 1 patterned or coloured sock to make this sock snowman. You can use mismatched socks from your laundry pile or buy 2 pairs of new socks (which will make you 2 snowmen).

How else can I decorate my sock snowmen?
Here are some fun ideas to change up your DIY sock snowman and really make it your own.
- Draw on a mouth with marker. Or you can also create a coal looking mouth by gluing on small black buttons or inserting black ball sewing pins.
- You can draw on the eyes with a black Sharpie or glue on black brads, small black buttons, black enamel dots, or black beads.
- Glue a pom pom to the top of the hat.
- Make a scarf with thick ribbon instead of using the sock, or cut one out of felt or scrap fabric.
- Add decorations to the snowman’s scarf. Glue on some foam shapes, like a star or a snowflake.
- To give the snowman his or her rosy cheeks, use real make-up blush, pastels, or a marker.
- You can even glue small sticks to the base of the snowman to give it arms!

These no-sew sock snowmen are a super fun decoration for winter and Christmas. They’re so cute that you’ll want to make a whole snow family using different size socks! Kids’ socks make adorable baby snowmen, while a men’s crew sock will make for a larger snowman.

Here’s even more sock craft ideas:


Our book Low-Mess Crafts for Kids is loaded with 72 fun and simple craft ideas for kids! The projects are fun, easy and most importantly low-mess, so the clean up is simple!

Where to buy:
You can purchase Low-Mess Crafts for Kids from Amazon, or wherever books are sold:
Amazon | Barnes and Noble | Books- A- Million | Indiebound | Indigo | Amazon Canada


Leave a Reply