

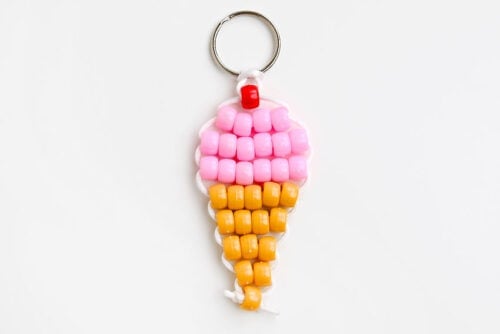
This pony bead ice cream cone is such a sweet summer craft! Made with colourful pony beads and cord, each little cone has rows of golden “waffle cone” beads and a bright scoop of ice cream on top. Add a key ring, and it becomes a fun backpack charm, keychain, or handmade accessory you can proudly show off.
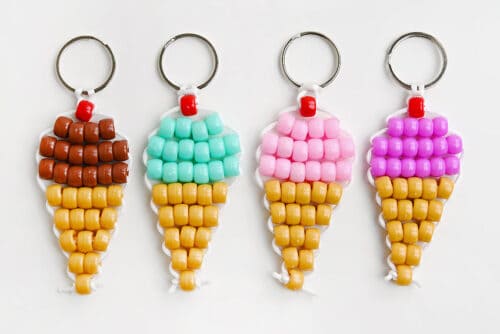
Kids can choose their favourite ice cream colours, from mint and strawberry to chocolate, vanilla, or rainbow-inspired scoops. This beaded ice cream cone is a cute project for summer camp, birthday parties, classroom crafts, or anytime you want an easy bead craft that’s bright, cheerful, and totally adorable.

This post contains affiliate links. If you use these links to buy something, we may earn a small commission at no extra cost to you. This helps support our website and allows us to keep creating fun, free content.
How to Make a Pony Bead Ice Cream Cone
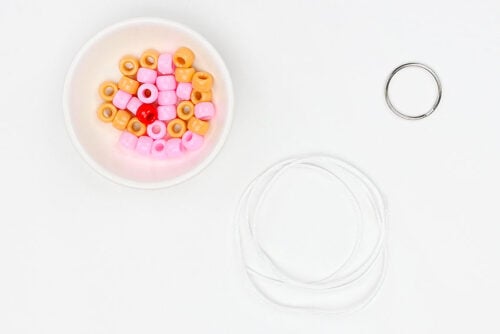
Materials:
Equipment:
- BBQ lighter (optional)
See the craft in action:
Instructions:
Step 1: Find what you need
- Gather your supplies and materials.

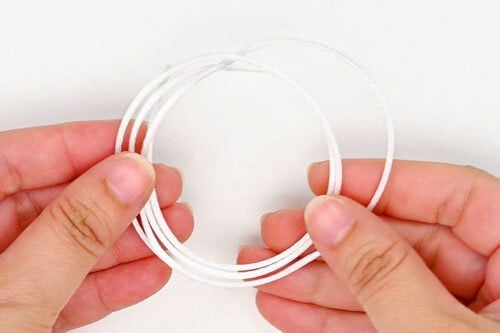
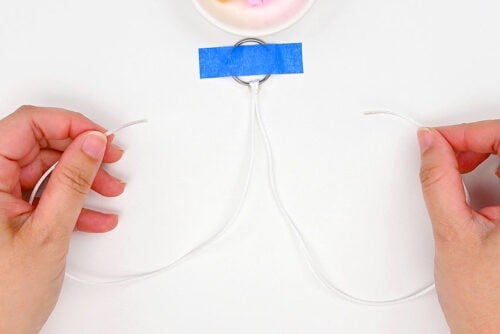
Step 2: Set up the cord
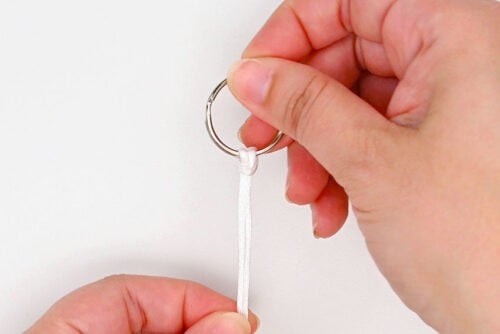
- Cut a 26 inch piece of white rattail cord.

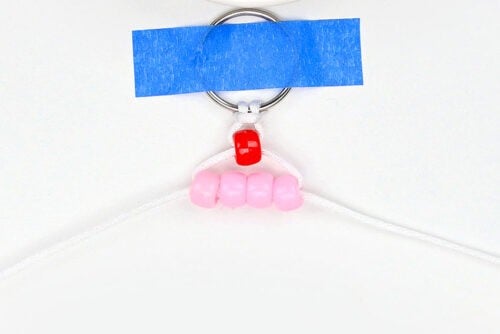
- Fold the cord in half and attach it to a split keyring using a lark’s head knot.To do this, put the folded end of the cord up through the keyring and back down around the keyring. Pull to tighten the knot.
- Then secure the keyring to your working surface using painter’s tape.
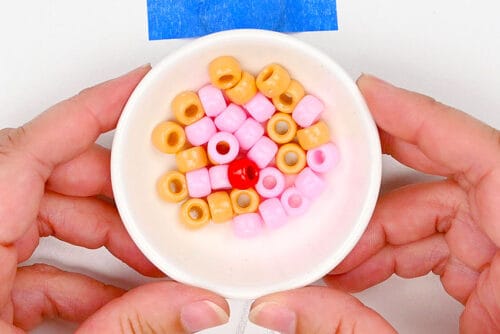
- Gather beads for the keyring. You’ll need a red bead for the cherry on top, as well as light brown for the cone, and pink (or another colour) for the ice cream.

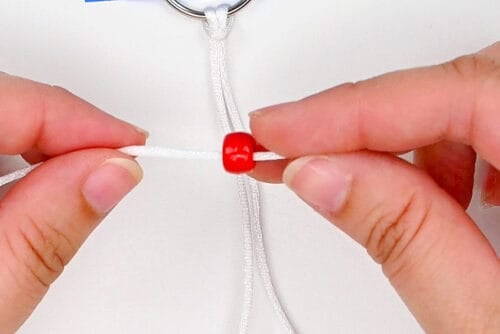
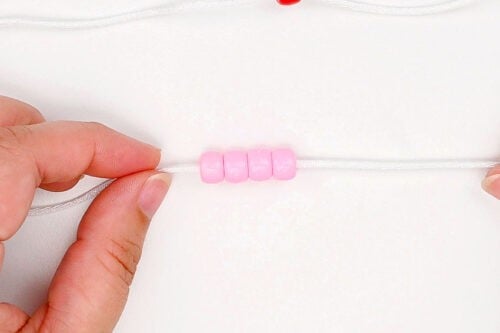
Step 3: Add the first bead
- To make this pony bead keychain we’re going to be working with the ends of the cords, attaching the beads to both strands.
- To start Row 1, add 1 red bead to the left cord.Since this is a symmetrical shape you can also start by putting beads on the right cord — whatever is more comfortable for you. The order of beads will be the same in either direction.
- Now take the end of the right cord and push it through the right side of the bead, so it’s attached to both cords.
- Pull the ends of the cords, so that the bead comes closer to the keyring. Pull outwards as you go, so the bead ends up in the center, below the keyring.
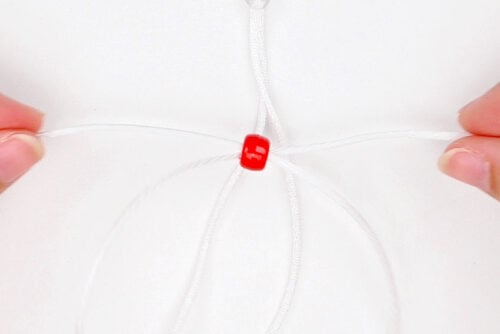
Step 4: Add the rest of the beads
- Row 2 begins the ice cream scoop. Add 4 pink beads to the left cord — or whatever ice cream colour you’d like.
- Add the right cord to the beads and pull both cords to center the beads below the first row.This is how all the rest of the beads will be added.
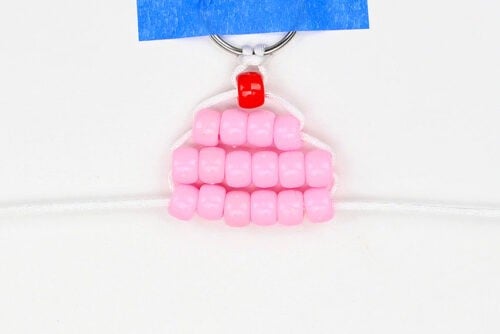
- For Row 3, add 6 pink (ice cream) beads. Repeat with Row 4, adding another 6 pink beads.
- The rest of the rows are made with light brown beads, to represent the ice cream cone. Follow this pattern:Row 5: 5 light brownRow 6: 4 light brownRow 7: 3 light brownRow 8: 2 light brownRow 9: 1 light brown

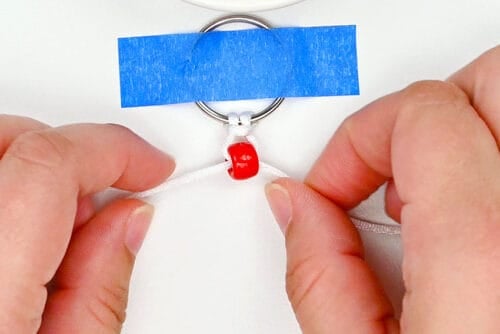
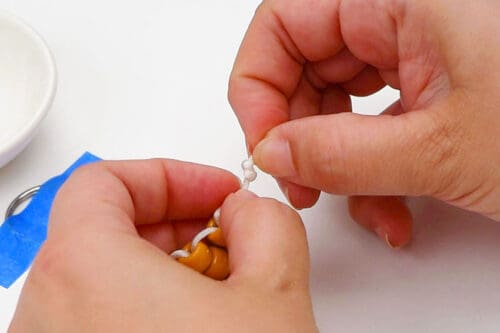
Step 5: Finish off the keychain
- Make a knot in each cord, as close to the last bead as possible.If needed, cut off the excess cord and use a BBQ lighter to melt the ends of the cord. This stops them from fraying.
- Your pony bead ice cream cone is complete!
- Have fun make one in all your favourite flavours!
Helpful Tips:
- Choose a bead colour to represent your favourite ice cream flavour! Use pink for strawberry, brown for chocolate, white for vanilla, light green for mint, blue for cotton candy, or any fun colour combination you like.
- If you’re sealing the cord ends with heat, make sure you’re using synthetic cord, like rattail. Synthetic cord will melt slightly to help secure the ends, but natural fibers like cotton will burn instead. This step should always be done carefully by an adult.

How many beads do I need to make one ice cream cone keychain?
Each pony bead ice cream cone keychain is made with 32 pony beads. You’ll need 1 red bead for the cherry, 16 beads for the ice cream scoop, and 15 tan beads for the cone.
What is the bead pattern for the ice cream cone keychain?
If you already know how to make pony bead keychains, here’s a simple pattern to follow. We’ve used “r” to represent the red cherry, “i” for ice cream colour, and “c” for cone colour:
- Row 1: 1r
- Row 2: 4i
- Row 3: 6i
- Row 4: 6i
- Row 5: 5c
- Row 6: 4c
- Row 7: 3c
- Row 8: 2c
- Row 9: 1c

What type of cord works best for pony bead keychains?
Rattail cord works really well for this pony bead ice cream cone because it’s smooth, flexible, and easy to thread through the beads. You can also use elastic cord, waxed jewelry cord, or micro paracord. As long as your cord fits through the pony beads twice and feels strong you can use it to make your pony bead ice cream cone keychain.

What else can I use this pony bead ice cream cone for?
This beaded ice cream cone makes an adorable keychain, but you can also use it as a zipper pull, backpack charm, bag charm, locker decoration, party favour, or summer camp craft. It’s also cute as a small ornament, whether you hang it on a Christmas tree or display it somewhere fun all year round.

This pony bead ice cream cone is a sweet little craft that’s easy to customize and fun to show off. Change the bead colours to make your favourite flavour, add a bright “cherry” on top, and turn it into a keychain, zipper pull, or bag charm that looks cute wherever it goes.
Whether you’re making one for yourself, crafting a whole batch with kids, or using them as colourful party favours, these beaded ice cream cones are a fun way to bring a little summer sweetness to any day!
Here’s even more pony bead craft ideas:


Now available
Low-Mess Crafts for Kids Book
72 cute and fun crafts that kids and parents alike can enjoy. All with as little mess as possible!
Where to buy:
You can purchase Low-Mess Crafts for Kids from Amazon, or wherever books are sold:
Amazon | Barnes and Noble | Books-A-Million | Indiebound | Amazon Canada


Leave a Reply