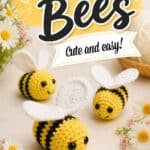
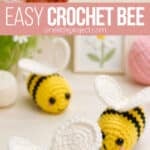
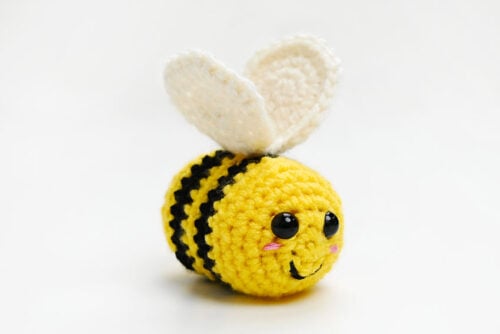
This crochet bee is as sweet as honey! With its bright yellow body, bold black stripes, and happy little face, this adorable amigurumi bee is such a fun project to make. It’s small, squishy, and full of personality, making it perfect for spring and summer crafts, handmade gifts, nursery decor, market makes, or anyone who loves cute crochet animals.
This crochet bee pattern is a great project for beginner crocheters who can work in the round and switch colours for the stripes. Use the FREE crochet bee pattern below or purchase the printable, ad-free pattern with BONUS Quick Guide from our Etsy shop! Whether you make one little bumble bee or a whole buzzing swarm, this cheerful crochet project is sure to make you smile!

This post contains affiliate links. If you use these links to buy something, we may earn a small commission at no extra cost to you. This helps support our website and allows us to keep creating fun, free content.
How to Make a Crochet Bee
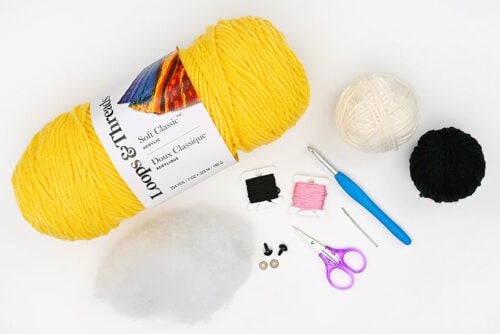
Materials:
- Worsted weight yarn (yellow, black, white)
- Safety eyes (8mm)
- Polyester fiber fill
- Embroidery floss (black, pink)
- Crochet Bee Pattern (No Ads)
Equipment:
See the craft in action:
Instructions:
Find what you need:
- Gather your supplies and materials.

Body:
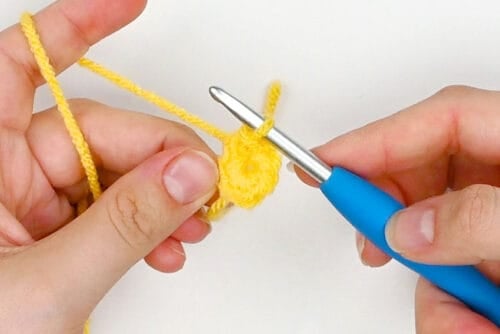
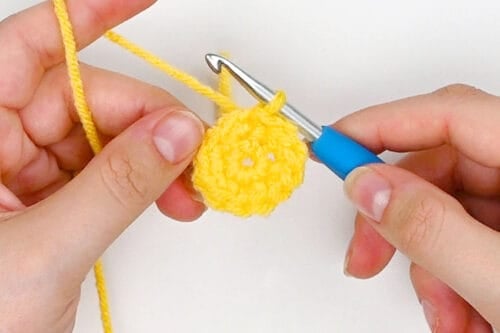
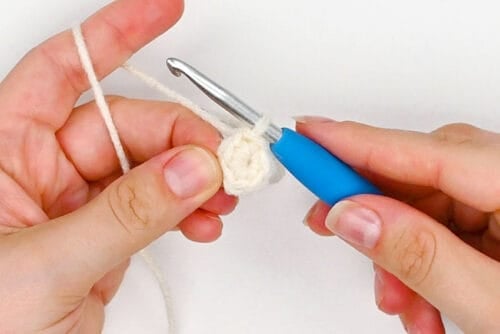
- Round 1:Using yellow yarn, work 6 single crochet in a magic circle.Pull the tail to tighten the circle and slip stitch in the first st to join the round. (6)
- Round 2:Chain 1 and insert 2 sc in each st around (an increase). Sl st in the first st to join the round. (12)

- Round 3:Ch 1 and *insert 1 sc in the first st. Inc in the next st.*Rep from * to * around. Sl st in the first st to join the round. (18)
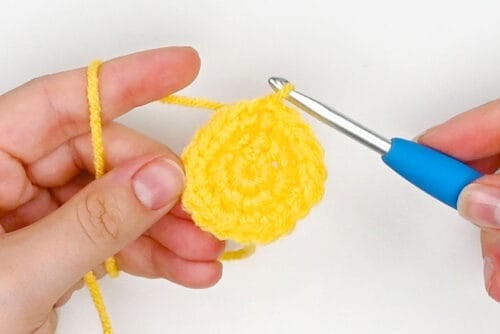
- Round 4:Ch 1 and *insert 1 sc in each of the first 2 sts. Inc in the next st.*Rep from * to * around. Sl st in the first st to join the round. (24)
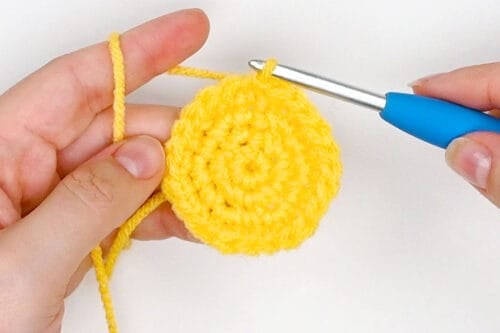
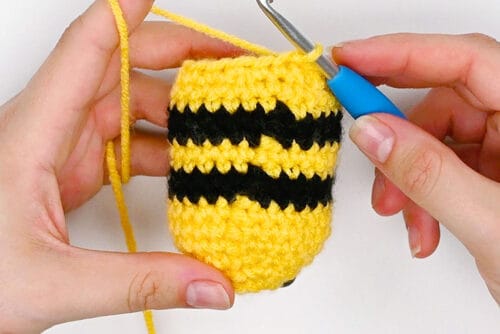
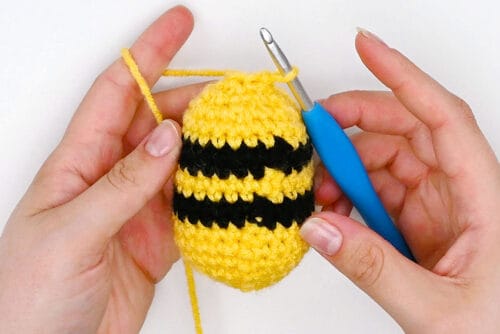
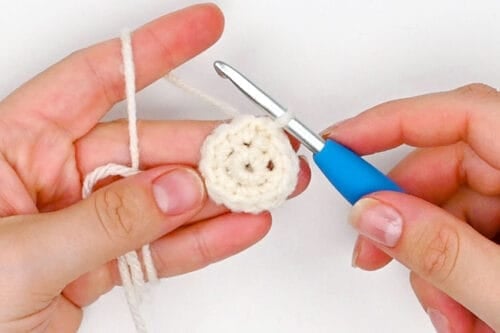
- Rounds 5–7:Ch 1 and insert 1 sc in each st around. Sl st in the first st to join the round. (24)
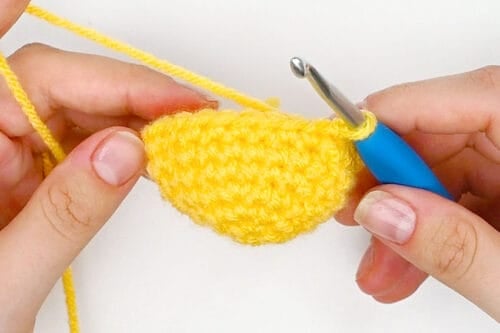
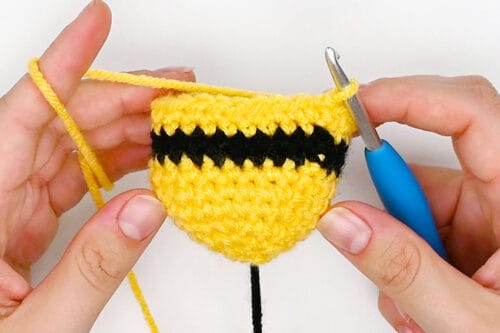
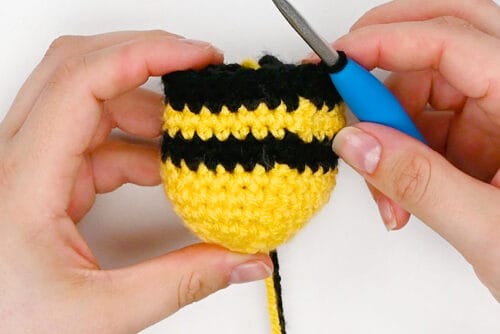
- Rounds 8–9:Switch to black yarn, but do not cut the yellow yarn.Ch 1 and insert 1 sc in each st around. Sl st in the first st to join the round. (24)
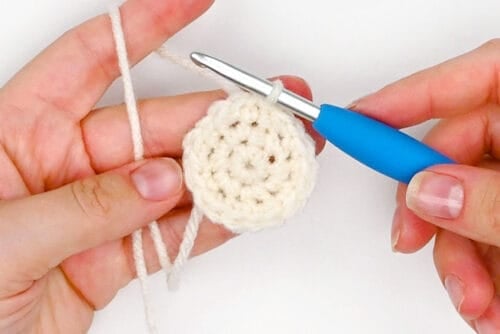
- Rounds 10–11:Pick up the yellow yarn again, but don’t cut the black yarn.Ch 1 and insert 1 sc in each st around. Sl st in the first st to join the round. (24)
- Rounds 12–13:Pick up the black yarn (again, don’t cut the yellow).Ch 1 and insert 1 sc in each st around. Sl st in the first st to join the round. (24)Cut off the black yarn.
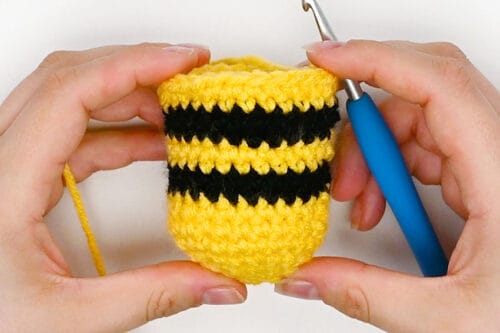
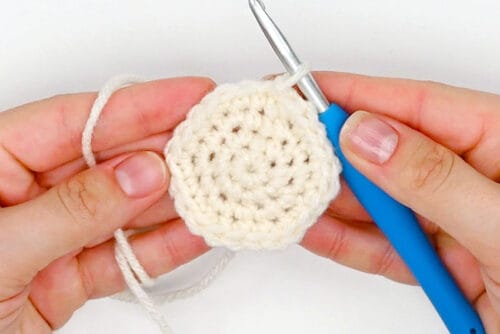
- Rounds 14–15:Pick up the yellow yarn and ch 1. Insert 1 sc into each st around. Sl st in the first st to join the round. (24)
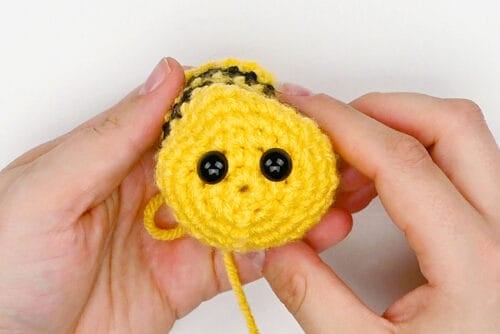
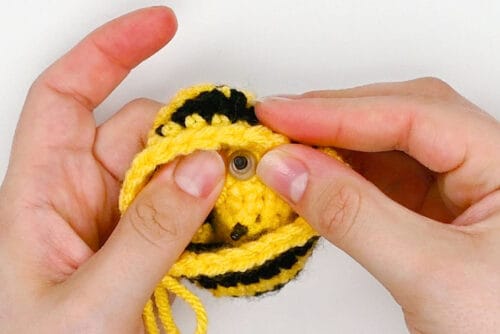
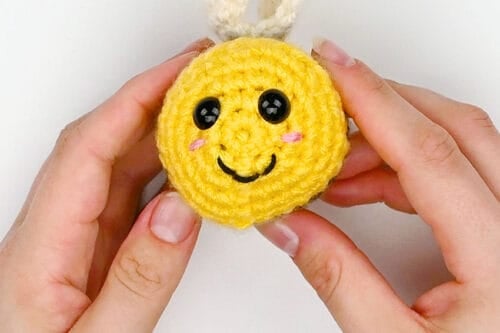
- Insert safety eyes between rounds 2 and 3, placing them about 3 sts apart.
- Add the backings to the safety eyes to secure them.
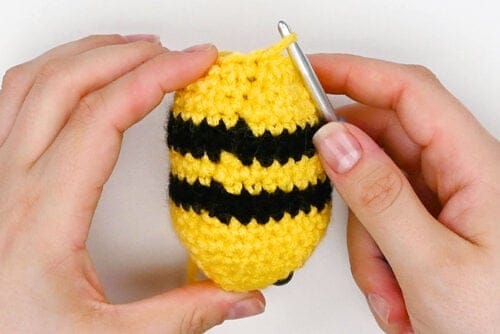
- Round 16:Ch 1 and *insert 1 sc in each of the first 2 sts. Sc the next 2 sts together (a decrease).*Rep from * to * around. Sl st in the first st to join the round. (18)
- Round 17:Ch 1 and *insert 1 sc in the first st. Dec across the next 2 sts.*Rep from * to * around. Sl st in the first st to join the round. (12)
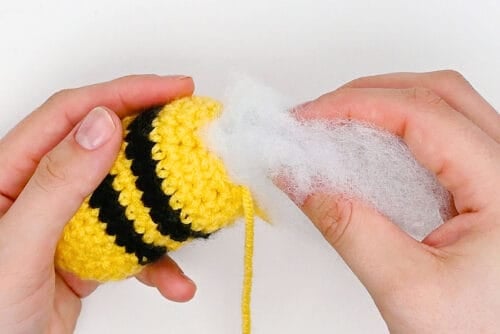
- Stuff the bee with poly-fil stuffing until it’s firm and holds its shape.
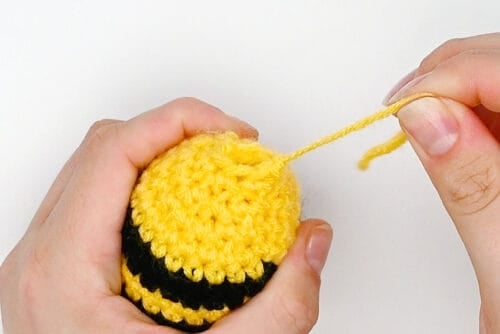
- Round 18:Ch 1 and dec around. Sl st in the first st to join the round. (6)
- Fasten off the yarn, leaving a 4 inch tail.
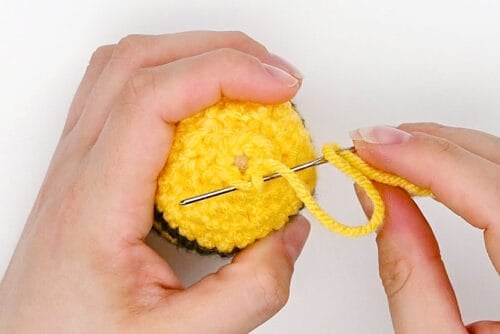
- Use the tail to sew a running st through all 6 sts in the last round.
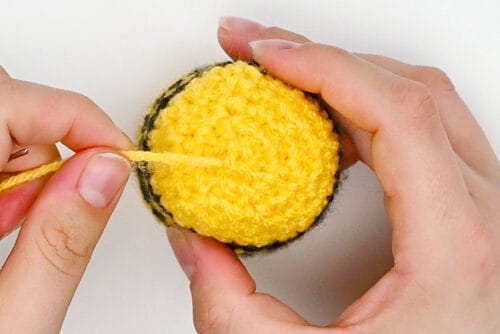
- Pull the tail to close the gap in the circle. Tie it in a knot to secure it, and then weave in the ends.

Wings:
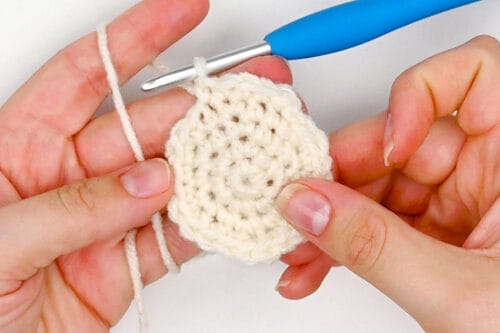
- Round 1:Using white yarn, work 6 sc in a magic circle. Pull the tail to tighten the circle and sl st in the first st to join the round. (6)
- Round 2:Ch 1 and inc in each st around. Sl st in the first st to join the round. (12)
- Round 3:Ch 1 and *insert 1 sc in the first st. Inc in the next st.*Rep from * to * around. Sl st in the first st to join the round. (18)
- Round 4:Ch 1 and *insert 1 sc in each of the first 2 sts. Inc in the next st.*Rep from * to * around. Sl st in the first st to join the round. (24)
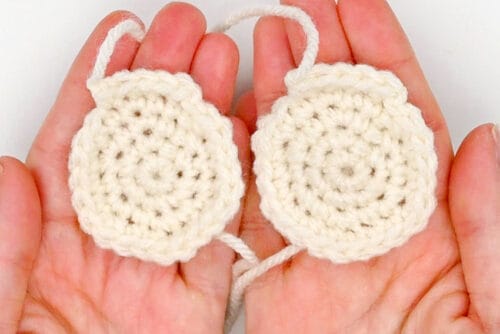
- Round 5:Ch 1 and insert 1 sc in each of the first 5 sts. (5)Fasten off the yarn, leaving a 6 inch tail.
- Repeat, making a second wing.
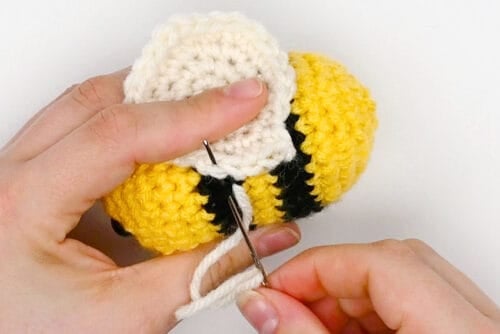
Assembly:
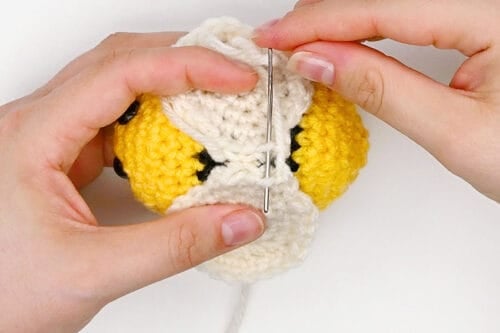
- Place the first wing on the center back of the body (you can line it up with the middle of the eyes at the front).Use the wing’s tail to attach the last round to the bee, sewing through the back loops only. (This is the loop that’s physically touching the bee when placed down.)
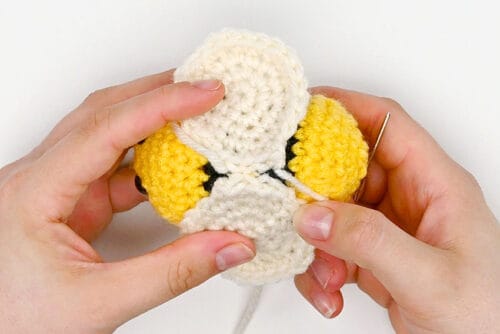
- Rep, sewing on the second wing directly next to the first.
- Use the same tail(s) to sew the wings together, going back and forth with a running st in the front loops.
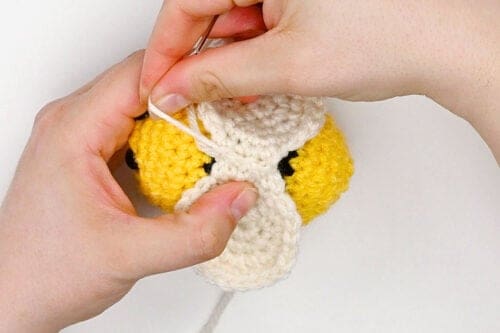
- Pull the tail to close any gap between the 2 wings. Secure the yarn’s tension with a knot.
- Weave in all ends.
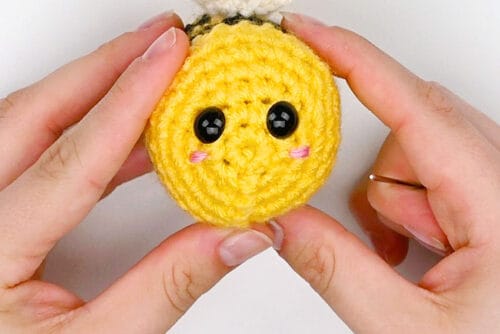
- Using pink embroidery floss, sew 2 small lines of blush below the eyes.
- With black embroidery floss, sew on a smiling mouth.
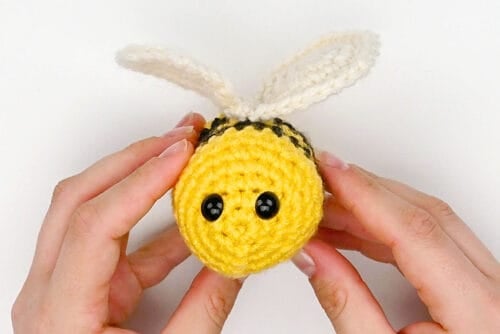
- Your crochet bee is complete!
Helpful Tips:
- New to crochet or want to brush up on popular stitches and techniques? Check out our crochet basics tutorials for step-by-step instructions, FAQs, and helpful tips.
- Attach a hanger to the back center of the wings to make your bee plushie into an ornament or decor for a nursery mobile! You can also make a whole swarm and attach them to a longer string for a fun spring and summer garland idea.
- Embroider the eyes on, or sew on felt eyes, instead of using safety eyes. This removes the choking hazard, making it safer for younger children.
Crochet Abbreviations & Terms:
This pattern uses standard US crochet terms. Here’s what each abbreviation means:
ch(s) = chain(s)
dec = decrease
inc = increase
rep = repeat
sc = single crochet
sl st = slip stitch
st(s) = stitch(es)

Get our crochet bee pattern:
You can follow the full crochet bee pattern with step-by-step instructions for free right here in this post (supported by ads). Or, if you’d like a printable amigurumi bee PDF pattern with BONUS Quick Guide, you can purchase it in our Etsy shop. It’s perfect to keep by your side as you crochet!
Printable Crochet Bee Pattern
Get the printable Crochet Bee Pattern PDF with step-by-step photos + BONUS Quick Guide in our Etsy shop!

What size crochet bee does this pattern make?
This crochet bee is about 3-1/4 inches long and 2 inches across. Each wing is about 2 inches long.
The exact size of your bee will, of course, depend on your specific yarn choice and tension.

What’s the best yarn for making a crochet bee?
To make a bee that looks like ours, and is the same size, use a worsted weight (size 4) acrylic yarn.
But you can easily change the size by using a different yarn weight. Choose thinner yarn for a smaller bee, or thicker yarn for a larger bee. Bulky chenille yarn makes a super soft amigurumi bee, while blanket yarn creates a larger, cuddly bee plush.

This crochet bee is such a sweet little project, and it’s the perfect way to use up small amounts of yarn from your stash. It’s a fun amigurumi pattern to make for spring, summer, baby gifts, nursery decor, ornaments, or craft markets.
Make one little cheerful bee, or crochet a whole buzzing bunch in different yarn weights and sizes. However you use your crochet bumble bee, this adorable plushie is sure to bring a little extra sunshine and honey sweetness wherever it goes!
Here’s even more fun crochet ideas:


Now available
Low-Mess Crafts for Kids Book
72 cute and fun crafts that kids and parents alike can enjoy. All with as little mess as possible!
Where to buy:
You can purchase Low-Mess Crafts for Kids from Amazon, or wherever books are sold:
Amazon | Barnes and Noble | Books-A-Million | Indiebound | Amazon Canada


Leave a Reply