

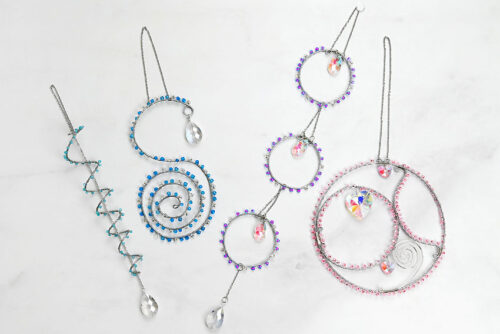
These wire wrapped suncatchers are such a fun way to turn a few simple supplies into something sparkly and beautiful. With curved wire shapes, colourful beads, and dangling crystals, each DIY suncatcher has its own style — and they’re absolutely gorgeous when the sunlight shines through them in a window.
This is a great craft for teens and adults, especially if you love projects that feel creative but still leave lots of room to play. Keep your wire suncatcher simple, twist it into a fun shape, or mix and match bead colours and crystal styles to make each one unique. They’re beautiful as handmade window decor, and they also make such thoughtful gifts for birthdays, Mother’s Day, or any special occasion!

This post contains affiliate links. If you use these links to buy something, we may earn a small commission at no extra cost to you. This helps support our website and allows us to keep creating fun, free content.
How to Make a Wire Wrapped Suncatcher
Materials:
- 10 gauge Wire
- 28 gauge Wire
- Glass seed beads (6/0)
- Teardrop crystal beads (3 x 20mm, and 1 x 25mm)
- Jump rings (8mm, 10mm)
- 2mm Jewelry chain
- Flat head eye pin(s) (40mm)
Equipment:
- Bail making pliers (or round nose pliers)
See the craft in action:
Instructions:
Step 1: Find what you need
- Gather your supplies and materials.


Step 2: Make the main frames
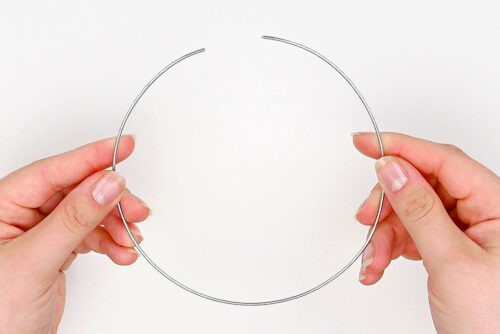
- Cut a piece of 10 gauge wire to be about 12 inches — or about 1-1/2 times longer than you want your circle to be around.
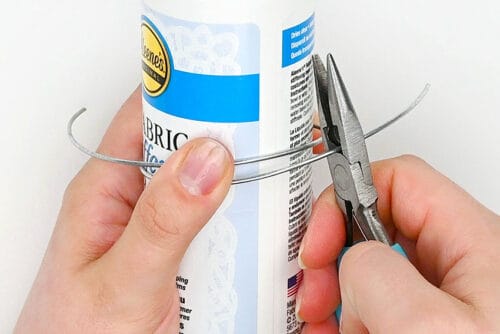
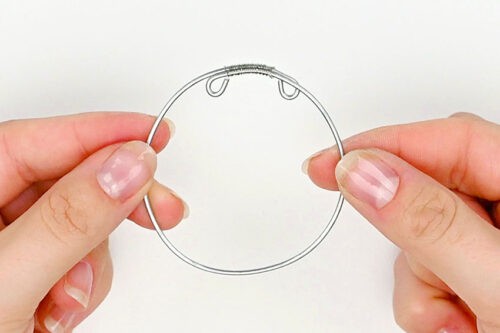
- Wrap the wire around something round, like a glue bottle, glass, or jar. Whatever object you choose will give you the size of your circle.Trim off the excess wire so that there’s about 1-1/2 inches of overlap between the 2 ends.
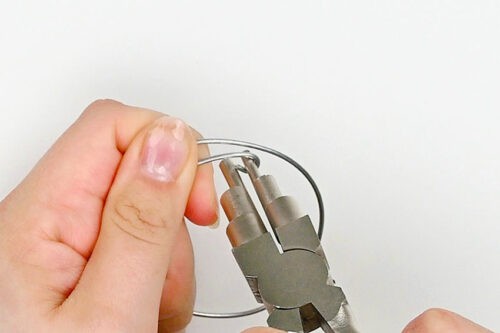
- Use bail making pliers (or round nose pliers) to curl in the ends, creating small loops on the inside of the circle.

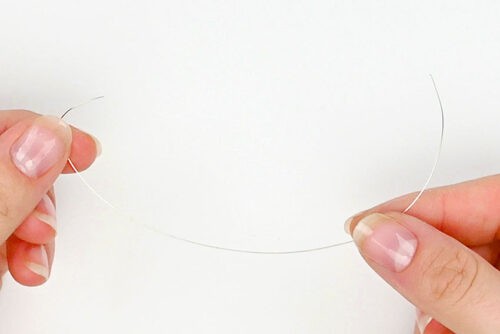
- Cut a 6 inch piece of 28 gauge wire.
- Wrap this wire tightly around the overlapped wire on the circle, between the 2 looped ends.This will secure the circle shape.
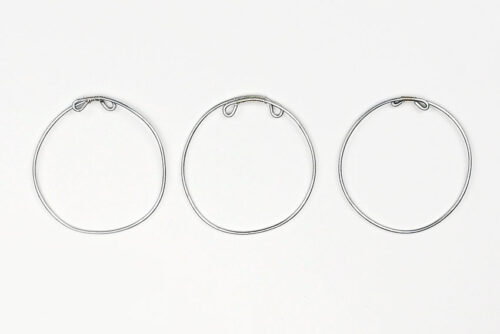
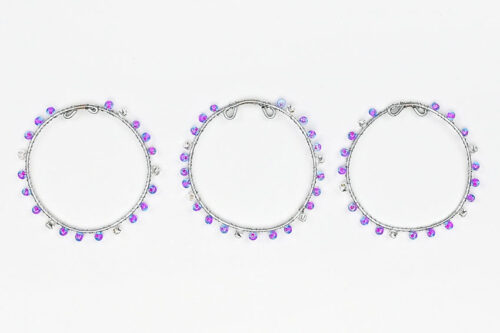
- Repeat all of step 2 to make another 2 identical circles (for a total of 3).
Step 3: Add seed beads to the circles
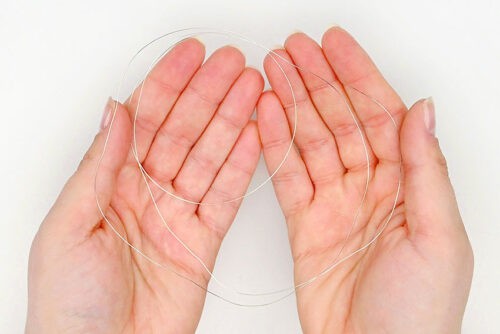
- Cut a long piece of 28 gauge wire — at least 3 feet long.
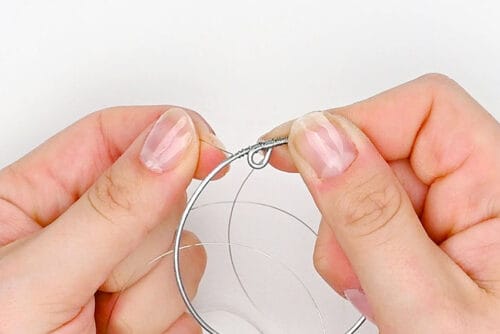
- Attach it to the circle by wrapping it around the thicker wire and through one of the loops a few times.Then continue wrapping it down the circle another few times.
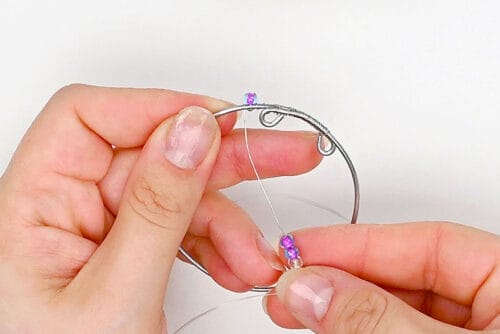
- Thread a few seed beads onto the thin wire.Hold one bead in place where you’d like it to sit, and wrap the wire around.
- Wrap the wire around another few times, and set the second bead in place.
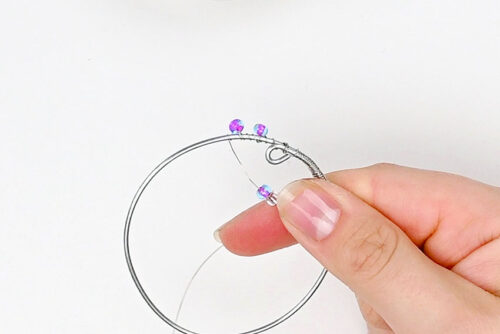
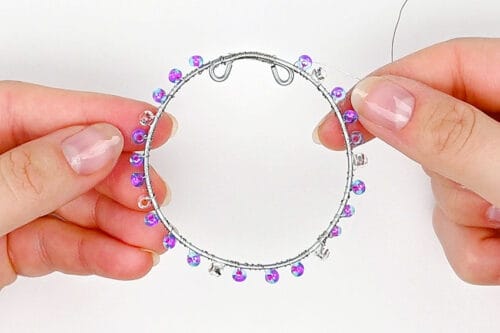
- Repeat, wrapping and adding beads all the way around the circle.
- Secure the end of the wire in the same way you attached it. Then trim off the excess wire and use needle nose pliers to push down the end.
- Repeat step 3, adding seed beads to the other 2 circles.
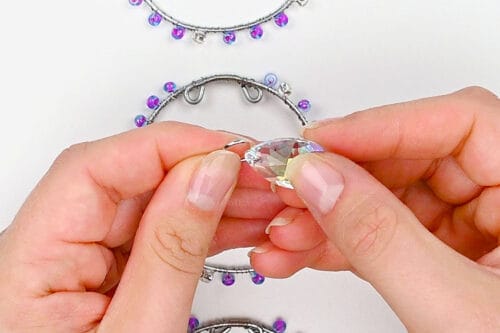
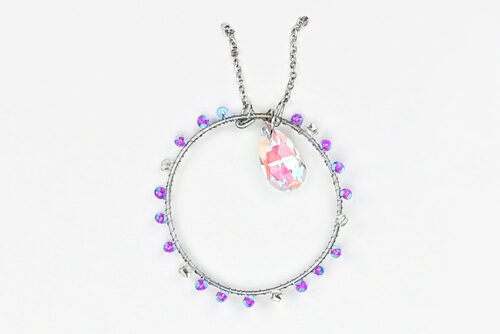
Step 4: Add the smaller teardrop crystals
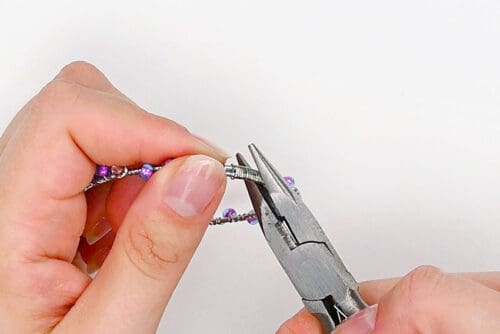
- Open a 10mm jump ring and attach it to one of the 20mm crystal teardrop beads.Don’t close the jump ring yet.
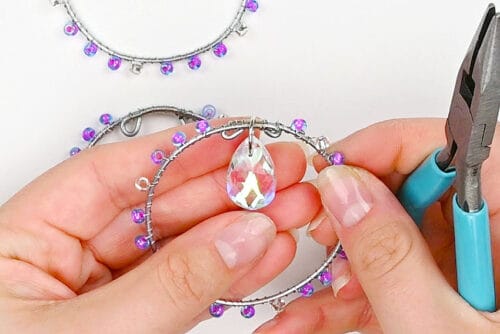
- Then attach the jump ring to one of the circles, placing it at the top between the 2 loops.Close off the jump ring. (Note: The easiest way to close jump rings neatly is to hold the jump ring with 1 set of pliers and use another pair to push the ring closed.)
- Repeat, adding teardrop beads to the other 2 circles.
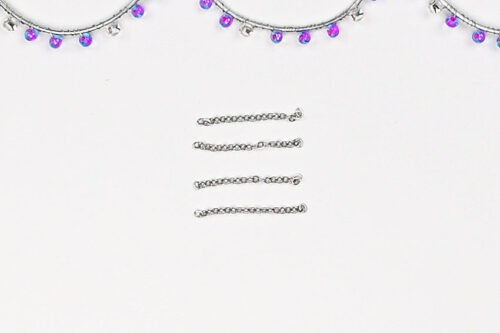
Step 5: Connect the 3 circles
- Cut 4 pieces of jewelry chain, each of them 1 inch long.Make sure the chains are exactly the same length (you can even count the loops to be sure).
- Attach an 8mm jump ring to one end of a chain and connect the jump ring to one of the loops at the top of a circle (it doesn’t matter which one).
- Repeat, adding another jump ring and chain to the other top loop of the same circle.
- Add the other 2 chains to a second circle.(The third circle will get a hanger at the top later.)
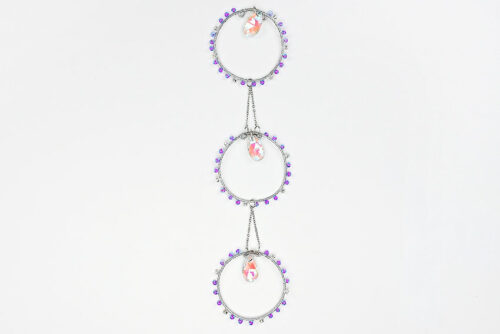
- Grab one of the circles with the chains. Open an 8mm jump ring and loop both chains through it.Then loop that same jump ring through the bottom of the circle without any chains. Close the jump ring.
- Add the last circle to the bottom of the second one in the same way.
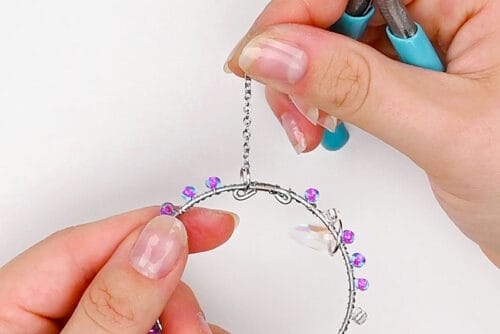


Step 6: Add the last crystal and a hanger
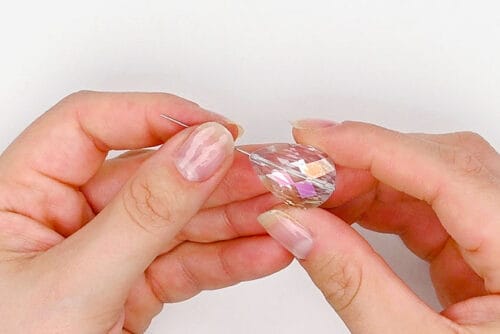
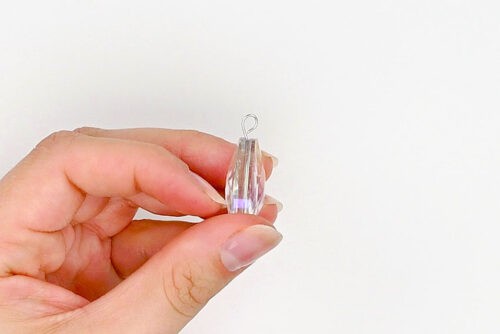
- Add a flat head eye pin through the largest teardrop bead.(Note: You only need an eye pin if the holes in your bead are vertical. Otherwise you can use a jump ring like you did with the others.)
- Use wire cutters to trim down the pin as needed, leaving at least 1/2 inch above the bead.Use the bail maker or round nose pliers to create a loop at the top of the crystal.
- Cut a 1-1/2 inch piece of chain. Attach an 8mm jump ring to the chain and then connect it to the crystal.Add another jump ring to the opposite end of the chain, attaching it to the bottom center of the bottom circle.
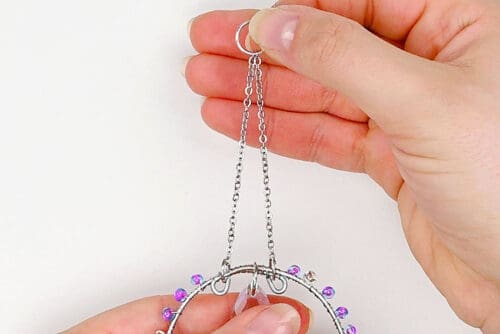
- Finally, cut another 2 pieces of chain to be 2-1/2 inches long. Connect the 2 chains using a 10mm jump ring.Then attach 8mm jump rings to each loose end of the chain. Attach these jump rings to the loops on the top of the top circle.This will be the hanger for the suncatcher.
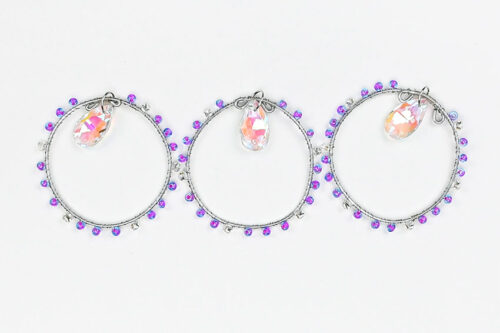
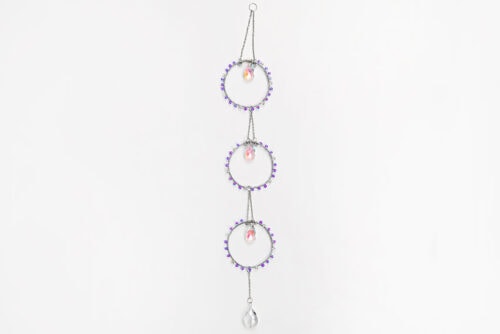
- Your wire wrapped suncatcher is complete!
- Now use these same basic techniques to make your own wire and bead suncatchers in all different styles and colours!

Helpful Tips:
- Start with a simple shape first: If you’re new to wire wrapping, begin with an easy circle design. Simple shapes are easier to bend neatly, and they still look beautiful once the beads and crystal pendants are added.
- Use a round object as a guide for smooth curves: Wrapping the wire around a glue bottle, jar, cup, or other round object can help you make even curves and circles. This is especially handy if you want your suncatcher to look more polished and symmetrical.
- Cut wire a little bit longer: It’s always better to have a bit of extra wire than to come up short. You can trim the excess later once your shape is finished and your loops are in place.

What type of wire do I need to make a wire wrapped suncatcher?
For the main body of the suncatcher, you’ll need a thicker wire that can hold its shape well. We recommend using 12 gauge or 10 gauge wire for the frame. This heavier wire is sturdy enough for circles, swirls, and other curved designs without bending too easily once your suncatcher is finished.
For the bead wrapping, use 28 gauge wire. This wire is very thin and very easy to maneuver neatly around the thicker frame wire. It also makes it simple to add beads and wrap them in place without creating bulky sections.

What beads do I need to make these wire and bead suncatchers?
For the small beads, we used 6/0 Czech glass seed beads. We really recommend using translucent glass beads for this project, since the sunlight shines through them much better than plastic beads. They add a lovely sparkle and give the finished suncatcher that light-catching look. (However, if you only have acrylic beads, they definitely will work too! And they’re a lot cheaper.)
For the larger hanging pieces, you can use acrylic or glass teardrop pendants. Hearts, stars, moons, and other faceted pendant shapes also work beautifully. In general, glass faceted beads and crystal-style pendants are the best choice if you want your suncatcher to catch and reflect the light nicely.

Do I need any special jewelry tools to make these DIY suncatchers?
You only need a few basic tools for this project:
- Wire cutters are important for trimming both the frame wire and the wrapping wire cleanly. Other pliers often include wire cutters, or you can buy a separate pair.
- Needle nose pliers to tuck in any loose ends of wire.
- Bail making pliers or round-nose pliers to create the loops at the ends of the wire. Those loops are what let you attach chains, pendants, and hanging pieces.
If you already have a set of basic craft pliers on hand, that will be more than enough to get started.
How can I hang my wire wrapped suncatcher?
There are a couple easy ways to hang your suncatcher, depending on where you want to display it. If you add a longer chain, you can hang the suncatcher from a small screw hook installed at the top of your window frame. Or, since these DIY suncatchers are lightweight, you can also hang them from a suction cup hook attached directly to the window.

Making a wire wrapped suncatcher is such a relaxing way to slow down and create something beautiful with your hands. Shaping the wire, adding the beads, and watching the design come together has a really calm, mindful feel, and it’s the kind of craft that lets you settle in and enjoy the process as much as the finished piece.
Once you get comfortable with the basic technique, you can use the same steps to make all kinds of different designs. Try swirls, hearts, moons, flowers, or other abstract shapes, and play around with different bead colours and styles of crystal accents to make each one unique. It’s a lovely craft to experiment with, and there are so many creative ways to make it your own!
Here’s even more wire wrapping craft ideas:


Wire Wrapped Snowflake Ornaments

Now available
Low-Mess Crafts for Kids Book
72 cute and fun crafts that kids and parents alike can enjoy. All with as little mess as possible!
Where to buy:
You can purchase Low-Mess Crafts for Kids from Amazon, or wherever books are sold:
Amazon | Barnes and Noble | Books-A-Million | Indiebound | Amazon Canada


Leave a Reply