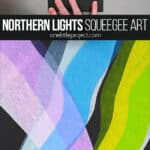
This northern lights squeegee painting project is SO FUN and it’s super cool see the aurora come to life in paint! Kids can use a simple squeegee painting technique to pull and blend bright paint across the page, creating dreamy, wavy bands that look just like the aurora borealis dancing in the night sky.
This easy winter art idea works beautifully for school lessons, art centers, and colourful creativity at home — and it’s a great way to practice colour blending without needing perfect brush skills. Add a simple snowy landscape or leave the black silhouette at the bottom, and you’ve got a stunning Northern Lights scene you’ve created yourself!

This post contains affiliate links. If you use these links to buy something, we may earn a small commission at no extra cost to you. This helps support our website and allows us to keep creating fun, free content.
How to Make Northern Lights Squeegee Art
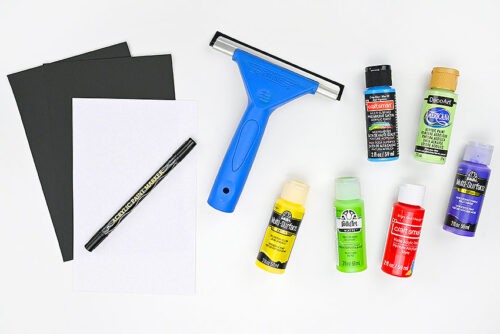
Materials:
- Black cardstock
- Acrylic paint (multiple colours)
- Black paint pen (or Sharpie)
- White cardstock
- Glue tape
Equipment:
See the craft in action:
Instructions:
Step 1: Find what you need
- Gather your supplies and materials.

Step 2: Add northern lights to the paper
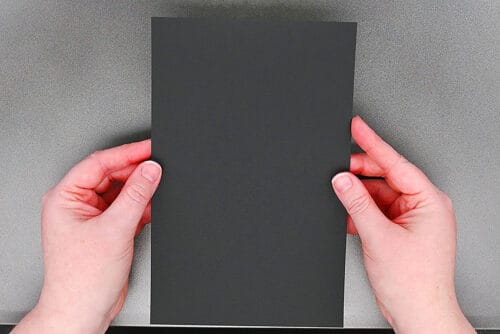
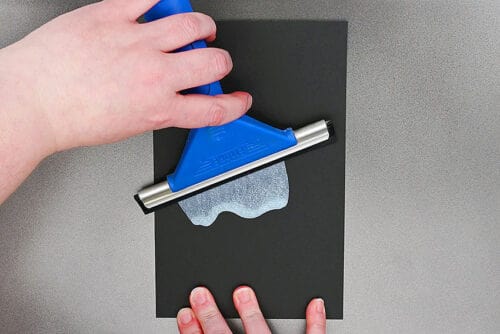
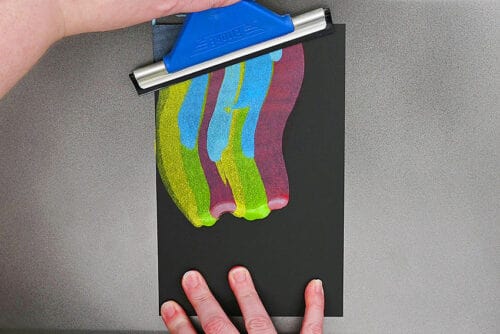
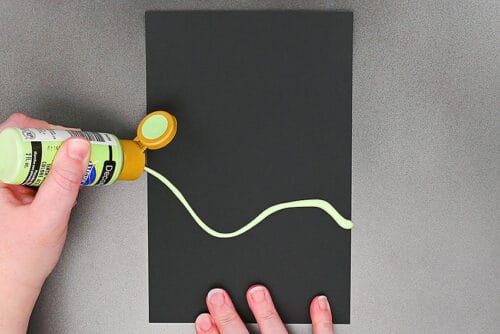
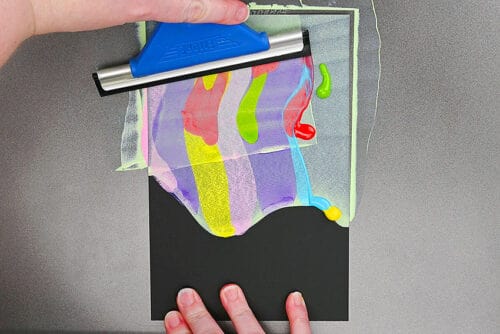
- To make your northern lights squeegee art you’ll need a piece of black cardstock and a protected surface to work on, like a baking sheet or silicone mat.
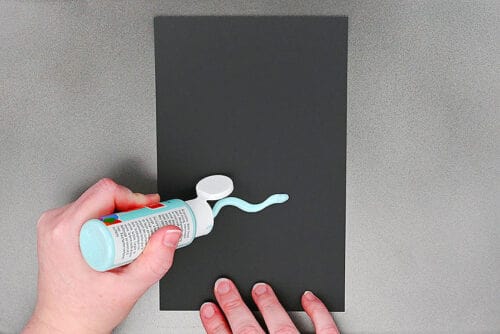
- Begin by adding a line of paint about 1/3 of the way up the page. Use white paint or a light pastel shade, like blue or green. It needs to be something that creates a base coat for your other colours.As you add the paint you can make a straight line, a curved line, a wavy line — whatever you feel like.
- Then take your squeegee and put it below the paint. Hold the bottom of the paper and use a bit of pressure as you begin to swipe the squeegee up.
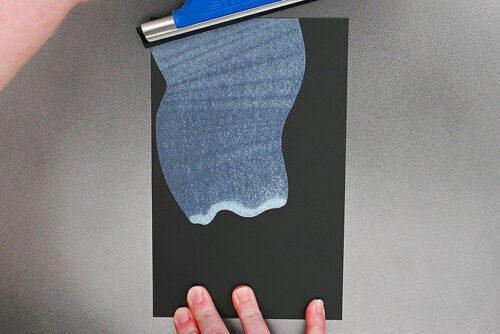
- As you move the squeegee up, however you move your wrist will determine where the paint goes.You can go straight up, go on a curved angle, or move your hand back and forth to create dancing lights.
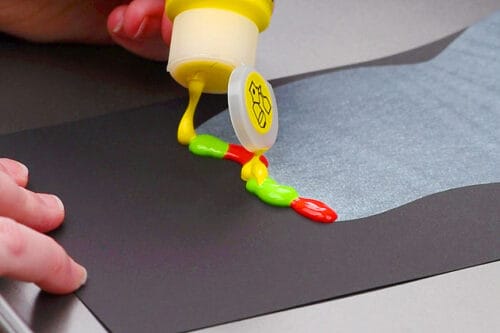
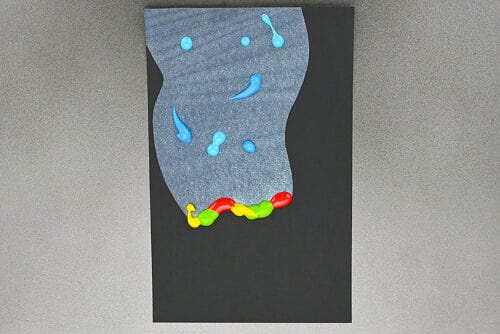
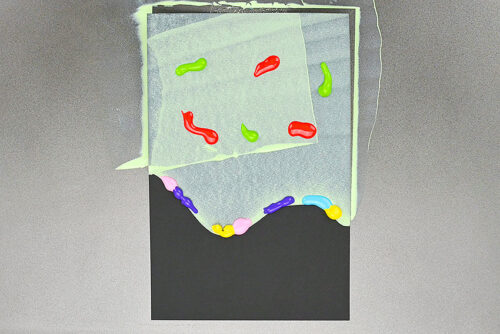
- Now you’ll add different colours of paint in the same location as your first line of paint. Look up the real northern lights online for inspiration of what colours to use.In our paintings we used all sorts of combinations of red, green, yellow, blue, pink, and purple.

- Now add a few lines or dots of a different colour within the first paint swipe.
- Bring your clean squeegee below the colours and swipe up. Try to follow the path of your first swipe, but it’s okay if it’s not perfect.Then allow to dry. It should only take a few minutes to be dry enough to work with.
Step 3: Finish off the picture
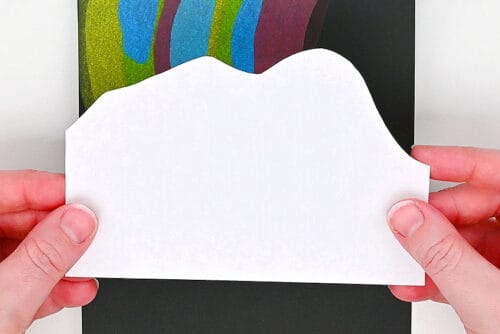
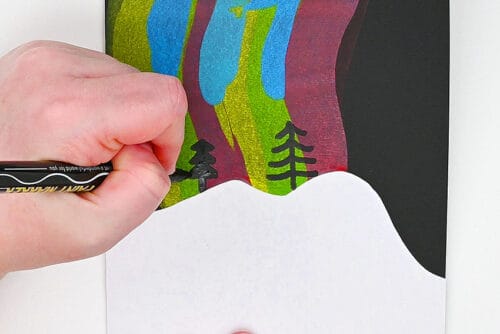
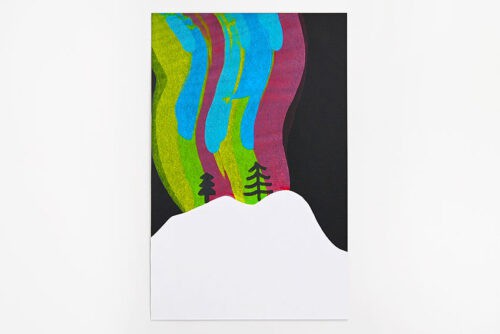
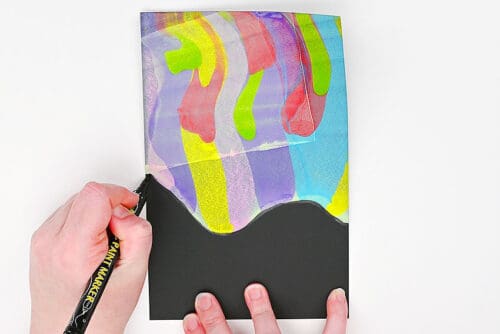
- Cut a snowy mountain from white cardstock, leaving the sides and bottom flat to match the paper.Measure how tall your hills need to be and then try to follow the same curves as your paint swipes.
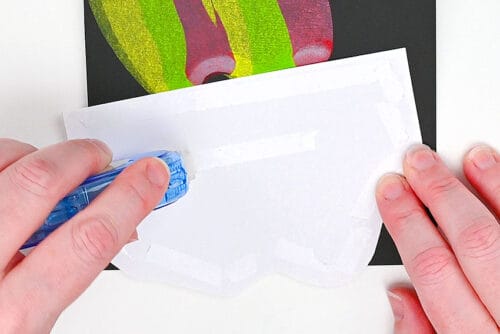
- Add glue tape or glue stick onto the back of the cardstock.
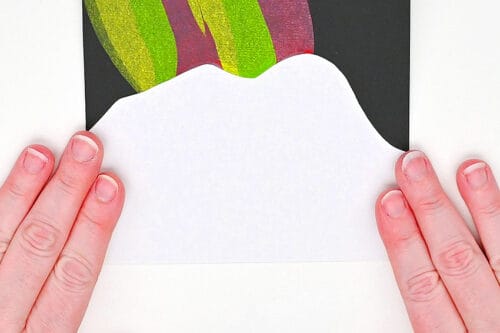
- Press the mountain into place, lining up the edges.
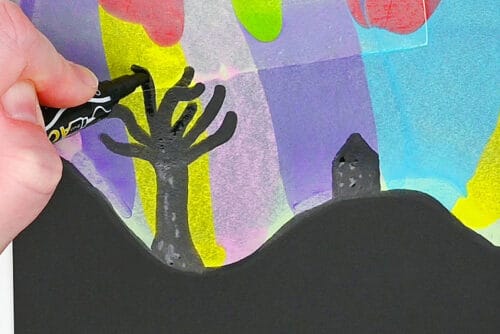
- Now use a black paint marker to draw silhouettes within the painted section. Here we drew a couple different styles of trees.
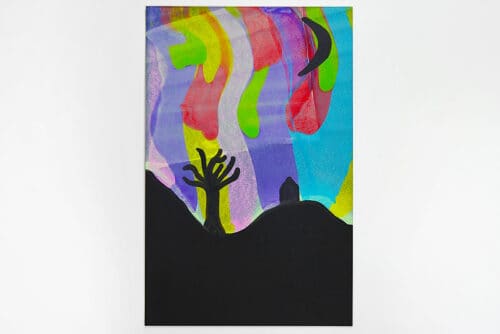
- Your winter northern lights squeegee painting is complete!
Step 4: Make another version
- You can also make northern lights that cover the entire sky. To do this, make a line of paint that goes across the whole paper.Then swipe the paint up so it covers the sky section.
- Add different paint colours to the bottom of the painted section and the sky. You don’t need to fill the bottom line entirely.
- Bring the squeegee up to spread the paint. If your squeegee is narrower, like ours, you may need to swipe again to get the whole page.Clean your squeegee between swipes.
- For a full sky of lights we like to go along the line of paint with a black paint marker to clean up the bottom edge.
- Then draw in the sky section of the paper. Here we drew a little house, a tree silhouette, and a moon.
- Your Northern lights squeegee art is complete!
Helpful Tips:
- Keep damp paper towels nearby: Wipe hands often and make sure to clean your squeegee between scrapes so your colours stay bright instead of turning muddy.
- Start with a light base layer: A swipe of white paint (or a light pastel colour) under your aurora bands helps the greens, blues, and purples look extra vivid — like they’re glowing in the sky.
- Experiment with angles and overlap: Try swiping from different directions and layering colours on top of each other. The fun part of this project is that every attempt looks different, and you’ll get new effects just by changing your pressure and angle.

Can I make scrape art without a squeegee?
You can, but a squeegee really does make this project easier. The handle gives you better control over where the paint goes and how much pressure you’re using — and they’re quite inexpensive (often found at the dollar store).
If you want to make your art right away and don’t have a squeegee, you can use a plastic ruler or an old gift card to scrape and blend the paint instead.

What silhouettes can I add to my northern lights squeegee painting?
Silhouettes are what make the aurora scene look finished and “real.” Here are some fun options to draw in:
- Moon and/or stars
- Trees (bare branches or pine trees)
- Houses, cabins, or tents
- Snowmen on a snowy mountain scene
- Animal silhouettes (wolf, deer, moose)
- Campfire
- Barn and/or silo
- Power lines

How can I get the best looking northern lights squeegee art?
The most realistic aurora effects usually come from layering a few colours, adding a couple of smaller splotches or streaks in the sky, and swiping at different angles so it looks like the lights are “dancing.”
Don’t worry about making it perfect — this is true process art, so it’s all trial and error. Some versions will be your favourites, and others will be a fun experiment, and that’s part of the magic!
Do I have to use black cardstock for this northern lights art project?
Not at all. We like black cardstock because it automatically gives the picture a night-sky vibe — even if your aurora section gets fully covered in paint.
But you can absolutely use white cardstock, watercolor paper, or whatever thicker paper you have on hand. If you use white paper, you can skip the light base coat (since the paper itself already does that job).

These northern lights squeegee paintings are such showstoppers! This art project is kid-friendly and fun for adults, and both the process and results are playful and dramatic. We love the swooshy colour blends and surprise patterns that appear, and the finished pieces definitely deserve a place of honour on the fridge, bulletin board, or even framed on the wall.
Since every swipe turns out a little differently, it’s the perfect craft to make more than once or do in a group setting, so you can see all the different versions. Have fun with colour and then add your favourite silhouettes to enjoy your very own aurora borealis — no late night or winter coat required!
Here’s even more squeegee art ideas:


Now available
Low-Mess Crafts for Kids Book
72 cute and fun crafts that kids and parents alike can enjoy. All with as little mess as possible!
Where to buy:
You can purchase Low-Mess Crafts for Kids from Amazon, or wherever books are sold:
Amazon | Barnes and Noble | Books-A-Million | Indiebound | Amazon Canada


Leave a Reply