
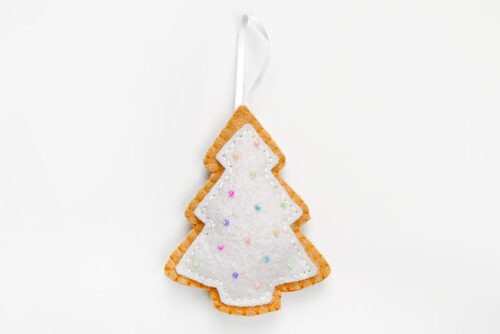
These felt cookies are the cutest little DIY ornaments for your Christmas tree! They look just like decorated sugar cookies, with hand-stitched details, soft felt “frosting,” and colourful bead sprinkles. And bonus, they’re just as fun to make as they are to display!
Using our printable pattern, you can easily create your own set of felt cookies in classic holiday shapes like stars, candy canes, and Christmas trees. This sweet and simple sewing project adds a cozy, handmade feel to your holiday decor and they also make great fake food for pretend play.

This post contains affiliate links. If you use these links to buy something, we may earn a small commission at no extra cost to you. This helps support our website and allows us to keep creating fun, free content.
How to Make Felt Cookies
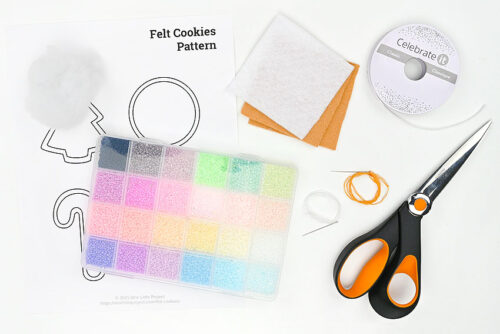
Materials:
- FREE Printable Felt Cookies Pattern
- Felt (tan and white)
- Sewing thread (or embroidery floss)
- Seed beads (2mm)
- Thin white ribbon
- Polyester fiber fill
Equipment:
Instructions:
Step 1: Find what you need
- Gather your supplies and materials.

Step 2: Cut out the felt pieces
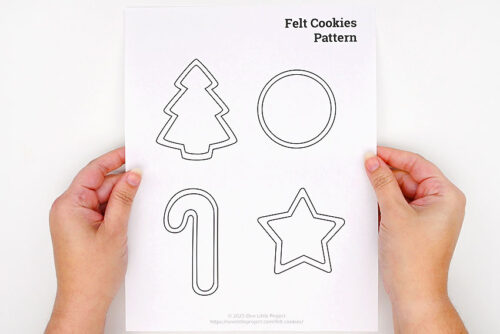
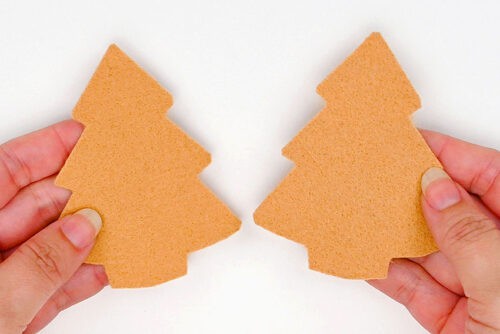
- Print our felt cookies template (find the pattern link in the materials list above!) and cut out the larger outlines for the cookies you’d like to make.
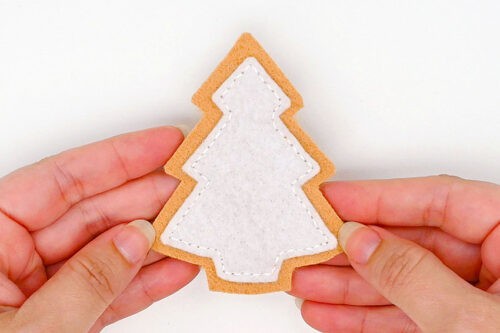
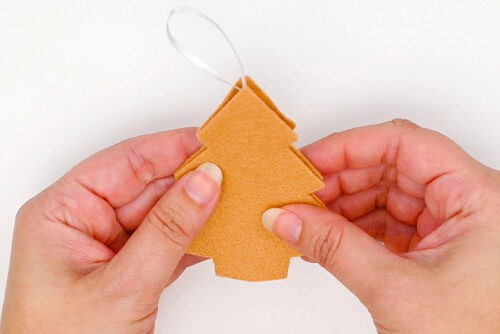
- Cut 2 of the shapes from tan felt.
- Then cut the smaller (inside) shape from the paper pattern. Use the smaller shape to cut 1 piece of icing from white felt.

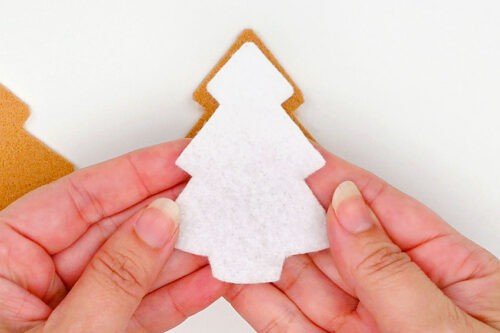
Step 3: Sew on the icing and ornament hanger
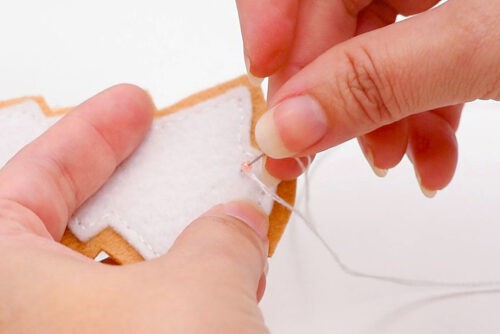
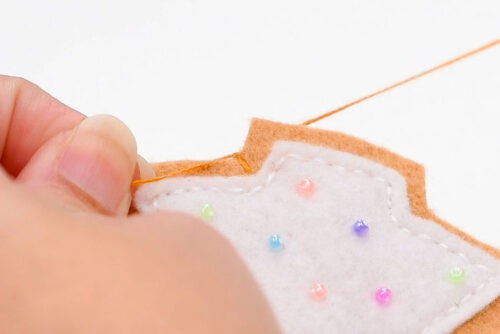
- Use a backstitch to sew the icing onto one piece of the cookie. To do this, set the icing in the center of the felt and bring your threaded needle up through both layers.Bring the needle down about 1/8 inch away, creating a small first stitch. Then bring the thread up 1/8 inch away from the last stitch. Push the needle back down where the first stitch ends.
- Repeat the backstitch, working your way around the cookie. Tie more thread onto the needle as needed.
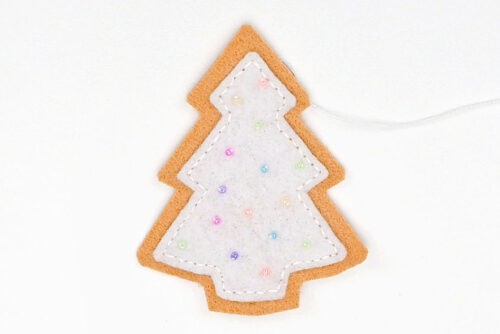
- To add the bead “sprinkles”, bring the needle up from the back where you’d like the sprinkle to sit.Add the seed bead onto the needle and then push it down through the felt, right next to where it came up.
- Repeat, adding different colours of “sprinkles” randomly across the icing.
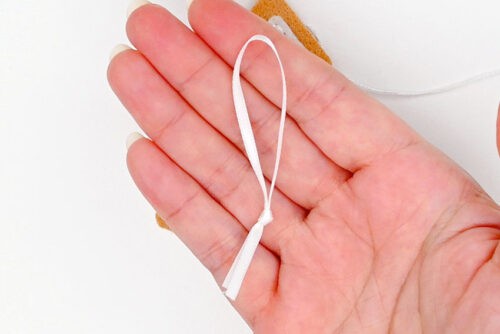
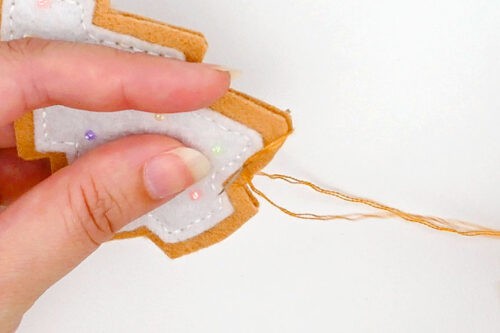
- Cut an 8 inch piece of white ribbon and tie it into an ornament hanger loop.
- Sew the ornament hanger to the top back of the cookie piece, going through the backstitch section several times to secure it in place.


Step 4: Sew both sides of the cookie together
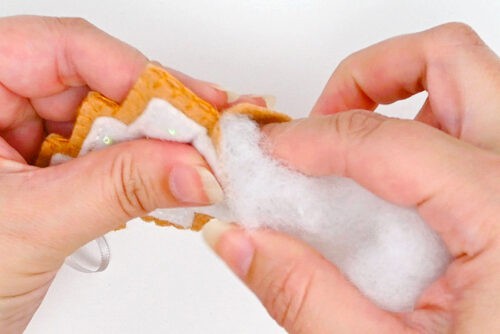
- Set the second cookie piece on top of the back, lining up the edges.
- Sew the cookie together with a blanket stitch. To do this, first bring the needle up through both pieces of felt, about 1/8 inch away from the edge.Bring the thread almost all the way through and tie a double knot to secure the first stitch. Tuck the tail inside the cookie.
- To make the blanket stitch, bring the needle up about 1/8 inch away from the previous stitch. Before bringing the needle all the way through, wrap the thread around the needle.
- Continue making blanket stitches around the cookie until there’s 1 to 2 inches left unsewn.
- Add stuffing into the cookie until it’s nicely firm, but still relatively flat.
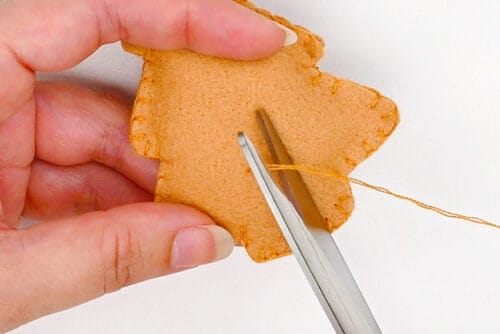
- Continue the blanket stitch to close off the cookie. Finish off the thread by going through the last stitch a few times.
- Then push the needle down at the seam and bring it up through the cookie. Cut off the excess thread and pinch the felt to hide the thread inside the cookie.
- Your felt cookie is complete!


Helpful Tips:
- Use a tool for stuffing: To help fill the small areas of the ornament, use a pencil, knitting needle, or chopstick to gently push the stuffing into place.
- Secure your pattern pieces: Pin the paper pattern to your felt to hold it steady, or trace it with a gel pen or chalk for easy cutting.

Download our free felt cookies pattern:
Click on the link below to download our free, printable felt cookies pattern! The PDF file will open in a new window. Then simply print the template on 8.5 x 11 (letter size) printer paper.
>>> Felt Cookies Pattern <<<

Do I have to sew these felt cookies?
We recommend sewing the felt cookies, especially if you want a more durable, long-lasting ornament with a polished look.
If sewing isn’t your thing, you can also glue them together! Use hot glue or tacky glue, applying a small line of glue near the edge of the felt. Be sure to add the stuffing before sealing up the final edge.

What can I use to stuff my felt sugar cookies?
We love using poly-fil, which is a soft polyester stuffing you can find at most craft stores. You can also repurpose materials like stuffing from a dollar store pillow or use scrap fabric, yarn ends, or even tiny bits of felt.

These felt cookies are such a sweet craft to make during the holiday season — they’re perfect as ornaments for the tree, fun felt food for pretend play, and even make a thoughtful homemade gift.
With the printable pattern, you can create any cookie style you love, whether it be classic frosted sugar cookies, festive gingerbread shapes, or even felt chocolate chip cookies! However you decorate them, they’re a fun and creative way to add something cozy and personal to your Christmas.
Here’s even more felt Christmas craft ideas:


Felt Christmas Trees with Candy Canes

Now available
Low-Mess Crafts for Kids Book
72 cute and fun crafts that kids and parents alike can enjoy. All with as little mess as possible!
Where to buy:
You can purchase Low-Mess Crafts for Kids from Amazon, or wherever books are sold:
Amazon | Barnes and Noble | Books-A-Million | Indiebound | Amazon Canada


Leave a Reply