
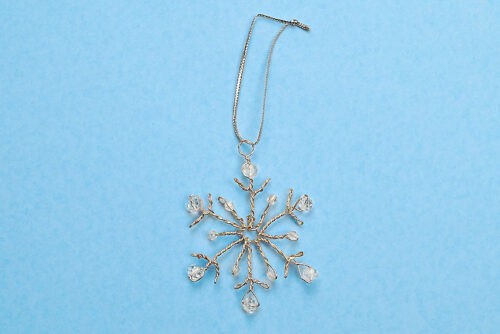
How to Make a Wire Wrapped Snowflake
Have fun making this wire wrapped snowflake using jewelry wire and clear beads. It’s simple to customize and so stunning, you’ll want to keep it on display as winter decor long after the Christmas tree is put away!
Yield: 1 wire wrapped snowflake
Cost: $2
Materials
Instructions
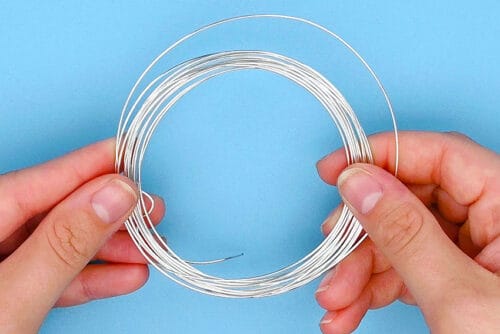
Step 1: Find what you need
- Gather your supplies and materials.

Step 2: Add beads to the wire
- For this craft we'll be working with the wire attached to the spool. This ensures you have exactly the right amount of wire for the snowflake you'd like to make.
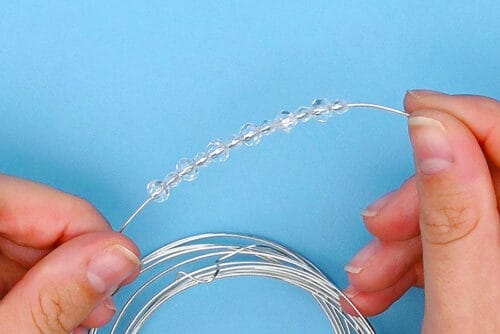
- Begin by adding a 6mm bead to the wire, and then a 2mm bead.
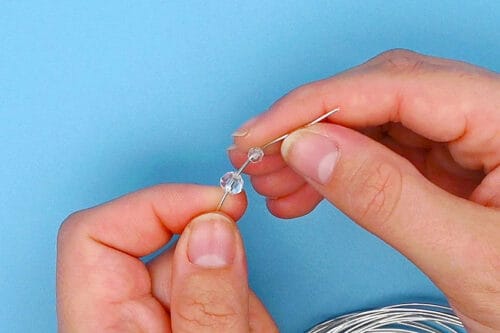
- Repeat until you have 6 of each size bead on the wire.
Step 3: Create the first 2 sections of the snowflake
- Let the beads fall farther down the wire and fold the end of the wire, at about the 1 inch mark.
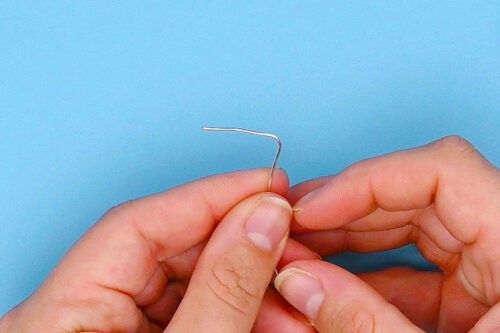
- From the first fold, bend the wire again, going down about 3/4 inch.

- Bring the last bead (a 2mm one) back to this point.
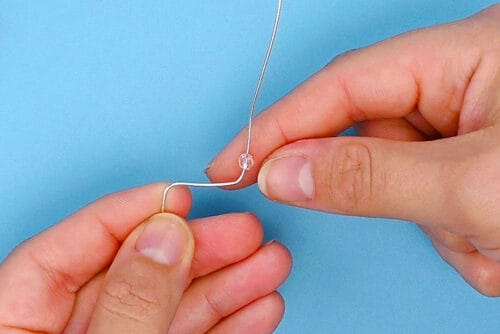
- Fold the wire down, trapping the bead in the fold, and then back up again at the 3/4 inch mark.

- From the last fold, measure 2-1/2 inches up. Bend back down again, creating a longer section of the snowflake.
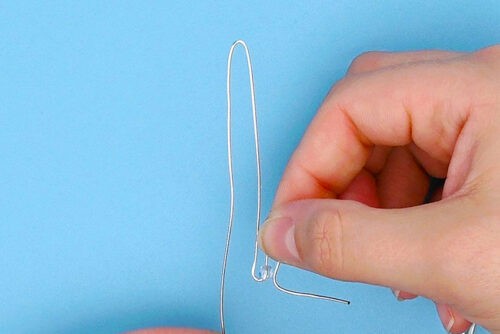
- Push a 6mm bead up to the top of this section.
- Again, bend the wire back up at the 2-1/2 inch point, so it matches the bottom of the rest of the folds.
Step 4: Make the rest of the snowflake sections
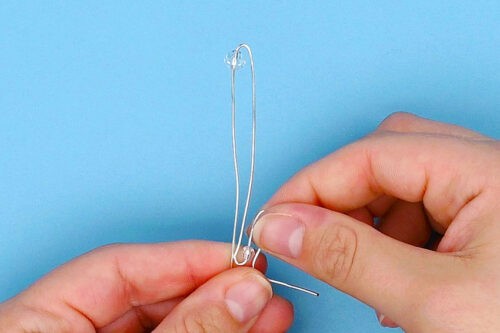
- Repeat Step 3, using all the beads to create 12 total sections for the snowflake.Make the last tall section about 1/4 inch longer than the rest.
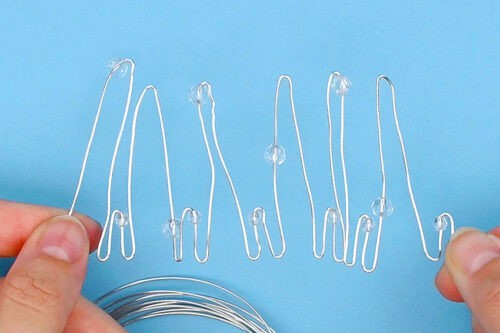
- Then cut the end of the wire about 1 inch away from the last fold.

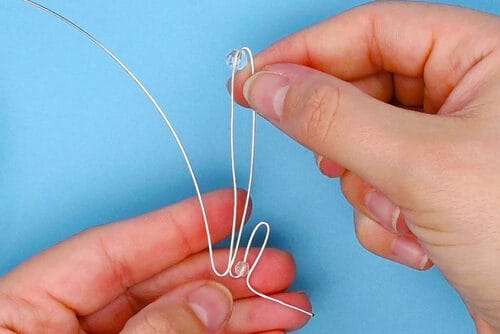
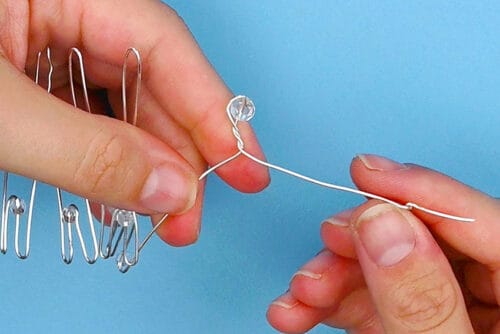
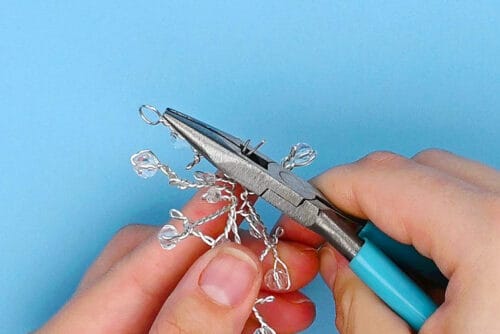
Step 5: Twist the first snowflake sections
- Starting back at the first section, make sure the bead is at the top (near the "loop") and use pliers to twist the section together at least 4 times. This will create texture on the snowflake and keep the bead in place.

- Move on to the next section, the first long one. Push the bead to the top and secure it in place with just a couple twists. Then separate the wires so they're going straight out, in opposite directions.
- Hold the wire with pliers on one side, right next to the twists. Then fold the wire down.
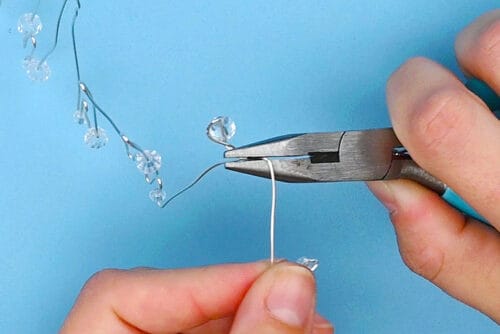
- Repeat on the other side.
- Fold the wires back in to the center, and then back down below the bead. It should look like a cross or a "t".
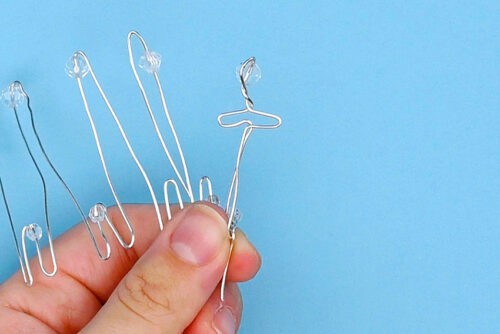
- Use pliers to twist each side section a couple of times. Then twist the rest of the section together.
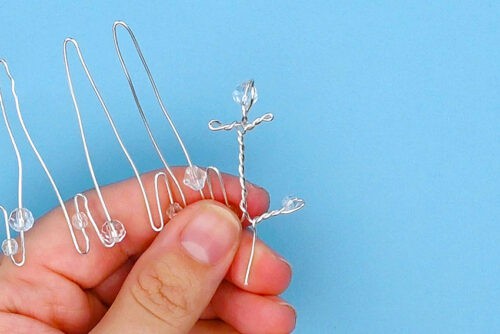
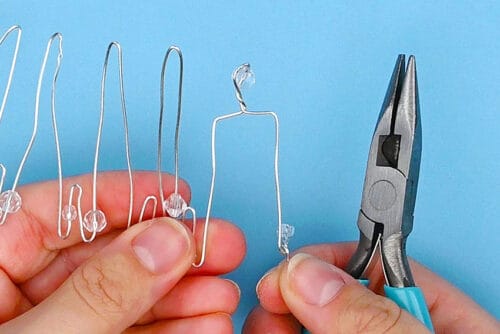
Step 6: Form the rest of the sections
- Repeat Step 5 until you reach the last section.

- Before pushing the bead to the top of the section, use round nose pliers to create a loop at the top. This is where you'll attach an ornament hanger.
- Then push the bead up next to the loop and secure it with a couple of twists.

- Complete the last section, making the same twisted 't' that the rest of the long sections have.

Step 7: Finish the snowflake ornament
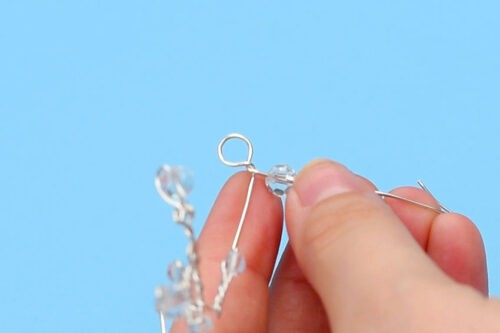
- Bring the two ends together, connecting the snowflake. Use pliers to twist the ends together, as close to the base of the sections as possible.
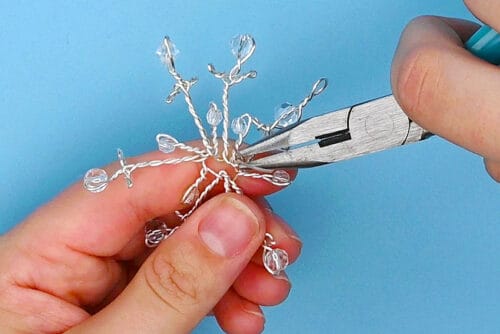
- Then cut off the excess wire. Push the twisted ends up against one of the sections so they blend in.
- Now bend the snowflake into shape, so all the sections are evenly spaced and facing the right way.

- Finally, cut an 8 inch piece of metallic cord. Put it through the looped end and tie it into a knot, creating an ornament hanger.

- Your wire wrapped snowflake is complete!
Video
Notes
Looking for more wire wrapping crafts? Here's a few of our favourites:
Beaded Butterfly Ring
Wire Wrapped Rings
Wire Wrapped Pendant