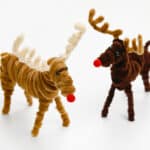
How to Make a Pipe Cleaner Reindeer
Make an adorable pipe cleaner reindeer with just a few simple craft supplies! This fun and easy Christmas craft is perfect for kids, classrooms, or holiday decorating at home.
Yield: 1 pipe cleaner reindeer
Cost: $5
Materials
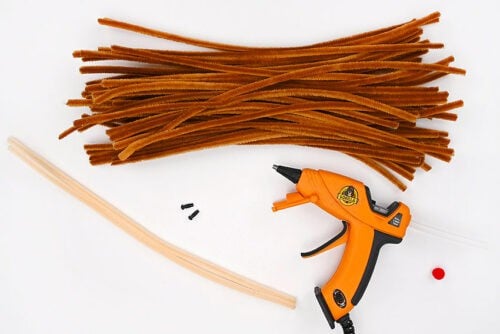
- 45 Brown pipe cleaners
- 2 Pipe cleaners (cream or tan)
- Safety eyes (5mm)
- Red pom pom(s) (10mm)
Instructions
Step 1: Find what you need
- Gather your supplies and materials.
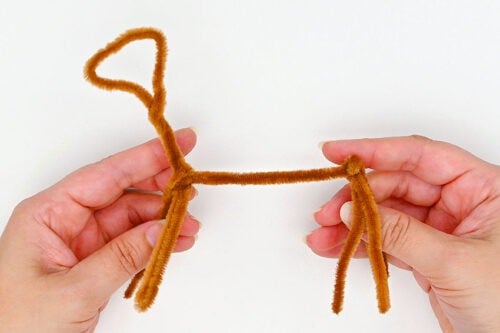
Step 2: Create the basic reindeer shape
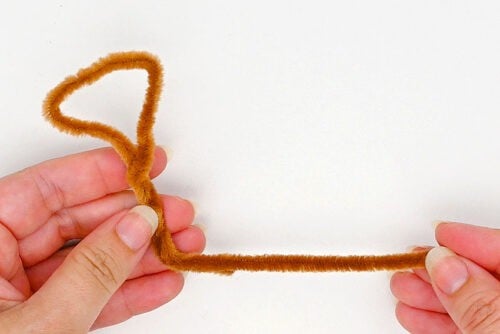
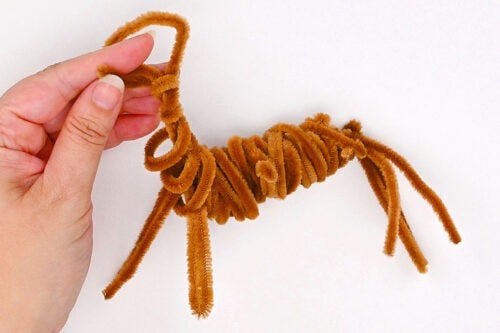
- Begin by folding a brown pipe cleaner at the 1/3 mark. Place this horizontal to form the reindeer's spine.
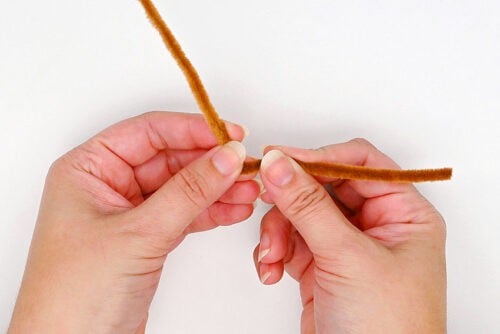
- Then curve the remaining 2/3 of pipe cleaner into a head and neck shape. Secure the end of the pipe cleaner by wrapping it around the neck.
- Use 2 brown pipe cleaners to create the 4 legs. Fold each pipe cleaner in half and then in half again. Wrap the folds around the spine, one at the end of the spine and one at the base of the neck
- Fold another pipe cleaner in half. Place it around the top of the spine, wrapping it to keep it in place.Then form a rounded rib cage that comes down before going towards the back at a gradual curve. Leave the excess pipe cleaner straight along the spine.
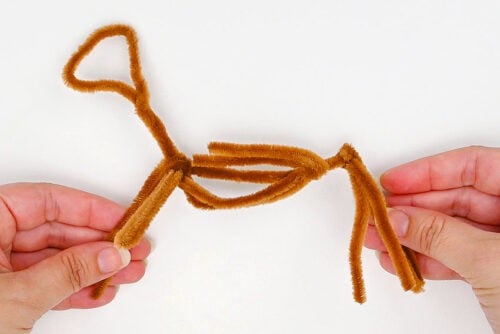
Step 3: Wrap pipe cleaners around the body
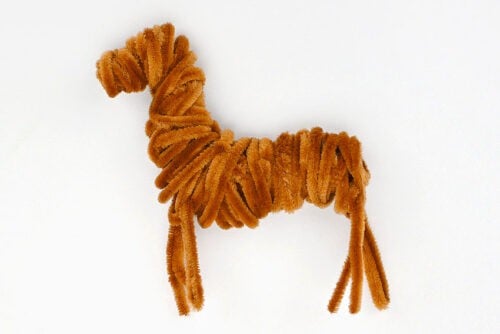
- Wrap a pipe cleaner around the rib cage. Don't wrap it too tight - it should still keep the base shape you've created.Once you get to the end of the pipe cleaner, attach a second one to create a longer pipe cleaner and keep wrapping. Tuck the end in to secure it.
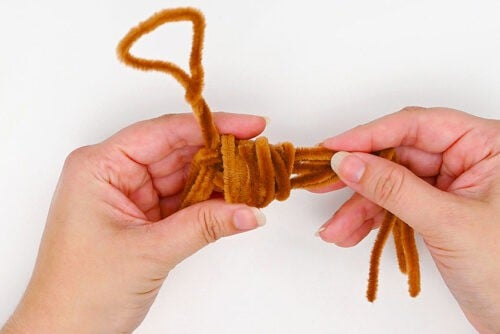
- Tuck another pipe cleaner into the rib cage and wrap it around the rest of the spine. Keep attaching pipe cleaners and wrapping around the whole spine section until the basic shape of the reindeer body is formed (we used about 6 pipe cleaners for this part).
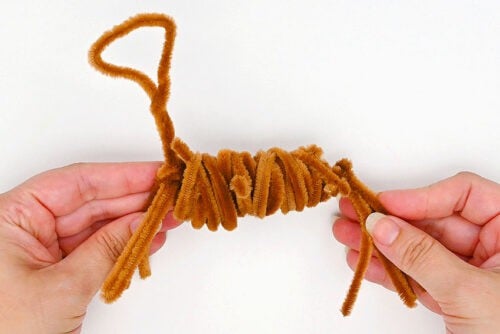
- Connect another pipe cleaner and wrap it around the neck, creating a form for the upper rib cage and wider neck.
- Keep wrapping up the neck and around the head. Use another 6 pipe cleaners or so to form the neck and head shape.

- Once you're happy with the basic shape of the head and neck, use another 5 pipe cleaners or so to bulk up the body shape more.At the back, wind the pipe cleaner around and through the top of the legs a few times before tucking the end in.
Step 4: Form the legs
- Once you're happy with the body shape, add some bulk to the front legs. Wrap pipe cleaners from the bottom up. You'll want to use about 2 pipe cleaners per front leg. If you have extra at the end, wrap it around the rib cage.

- Then add bulk to the back legs. Again, start wrapping at the bottom of the leg and use about 3 pipe cleaners for each leg, creating larger haunches at the top.Wrap the last pipe cleaner between the legs and around the whole body a couple times before tucking it under a previous wrap.
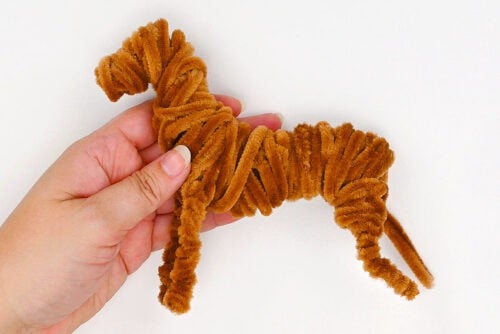
- Repeat with the last leg. Then add another few pipe cleaners to bulk up the back end, wrapping around the body and between the legs until you feel the shape is secure.

Step 5: Add bulk where needed
- Wrap another few pipe cleaners around the body to create a smooth finish. Start these by tucking them into a previous wrap, and don't connect the next pipe cleaner. Finish by tucking the end under a wrap, and start the next pipe cleaner the same way.

- Repeat at the neck, wrapping another couple pipe cleaners.

Step 6: Attach a tail and antlers
- Cut a 4 or 5 inch piece of brown pipe cleaner and fold it in half, leaving it rounded at the fold.

- Slide the ends down into the back of the reindeer's body, leaving the rounded fold sticking out as the tail. Bend the tail however you'd like.

- Grab a lighter cream colour of pipe cleaner to make one of the reindeer's antlers. Start by folding about 2/3 of the pipe cleaner up.

- Bend the long piece down, creating a "loop" about 1 inch tall. Wrap around the shorter part to secure in place.

- Continue, creating gradually smaller antler sections (5 total), spacing them about 1/8 inch apart. Leave at least 3/4 inch plain at the end so you can connect them.

- Repeat, making a second antler.

- Slide the ends of the antlers into the reindeer's head, so that the "loops" on the antlers point in. You may want to secure these with a bit of glue.

Step 7: Add the eyes and nose
- Place the safety eyes near the top of the head. Push them down between wraps, securing them with hot glue.

- Add a dot of hot glue to a red pom pom and attach it to the end of the snout, at the top edge.

- Your pipe cleaner reindeer is complete!

Video
Notes
Looking for more pipe cleaner crafts? Here's a few of our favourites:
Pipe Cleaner Christmas Tree
Pipe Cleaner Dog
Flower Headband with Pipe Cleaners