
How to Make a Felt Jellyfish
Make this felt jellyfish soft toy using our easy to follow instructions. You only need a few simple supplies to make this fun jellyfish craft!
Yield: 1 felt jellyfish
Cost: $3
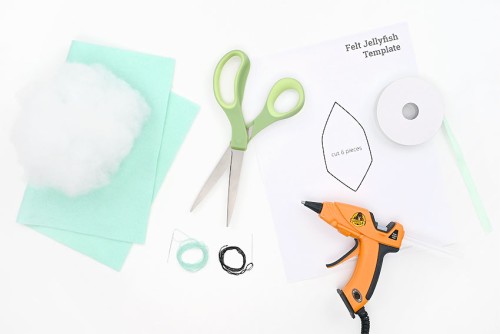
Equipment
Materials
- FREE, Printable Felt Jellyfish Pattern
- Satin ribbon (3/8 inch wide; colour to match felt)
- Sewing thread
- Felt (colour of choice)
- Polyester fiber fill
- Embroidery floss (black)
Instructions
Step 1: Find what you need
- Gather your supplies and materials.
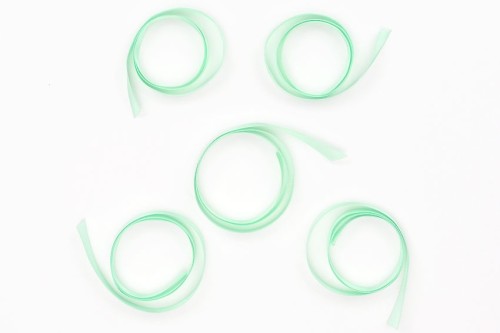
Step 2: Make the tentacles
- Cut 4 to 8 pieces of ribbon. The number of ribbon lengths will be the number of tentacles your jellyfish will have.We cut 5 ribbon tentacles for this jellyfish. 2 that are 20 inches and 3 that are 24 inches. (They'll get gathered and shortened later in the tutorial.)If you'd like some longer tentacles you can cut other pieces of ribbon to be 30 inches long.
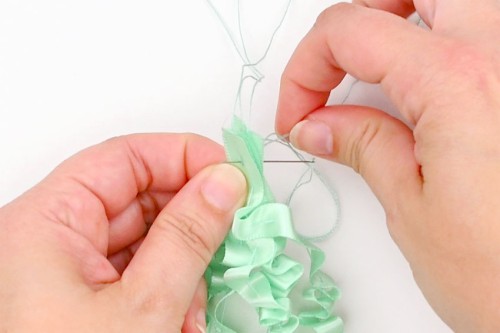
- Thread a needle with thread (or embroidery floss) that matches the ribbon, and insert the needle at one end of the 20 inch ribbon, coming back up about 1/2 inch away.Pull the thread almost all the way through and secure it with a double knot.
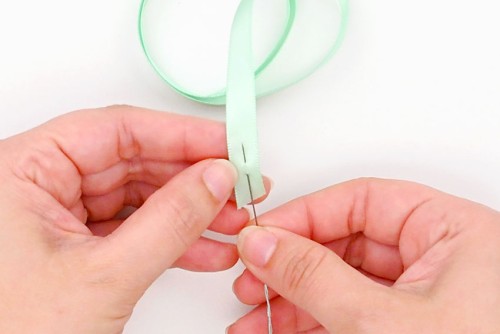
- Sew up the length of the ribbon with a running stitch, going back and forth between sides.
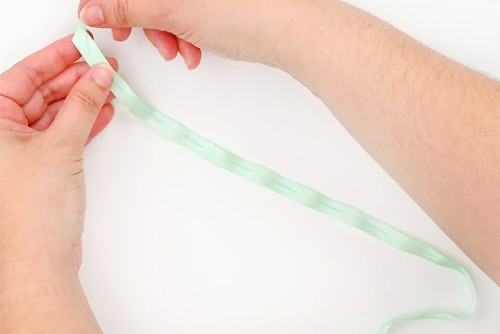
- Once you reach the top of the ribbon, cut off the excess thread, but don't tie it off yet.Gather the ribbon by holding it while pulling on the loose thread.
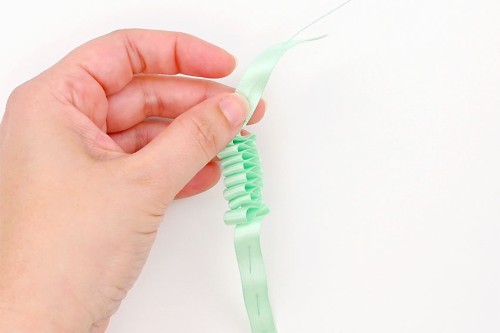
- Distribute the gathering along the length of the ribbon. Adjust the thread so that the ribbon tentacle is about 8 inches long.
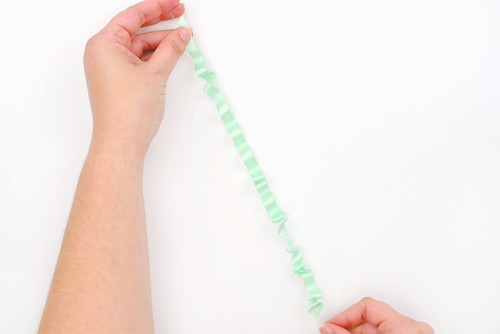
- Repeat, making gathered tentacles with the rest of the ribbon lengths.The tentacle lengths should vary, with the shorter ones about 8 inches long and the longest ones about 12 inches long.
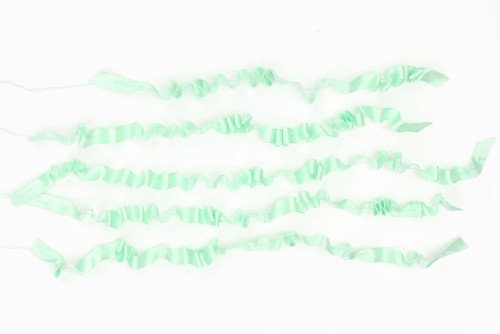
- Match up the tops of the tentacles, stacking them in a pile.
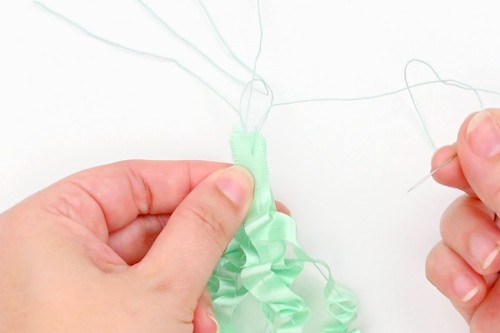
- Make a few stitches through the ribbon to sew the tentacles together.You can also tie the top threads in a knot, if you'd like.
Step 3: Cut the jellyfish templates
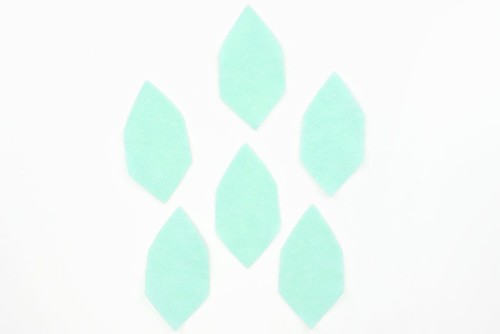
- Print our free felt jellyfish pattern (find the link in the materials list above!) and cut out the shape.

- Hold the pattern piece on top of the felt to cut it out.You can also pin the pattern to the felt to make it easier to cut, or trace around the template with chalk or a gel pen.Repeat, cutting out 6 pieces total.
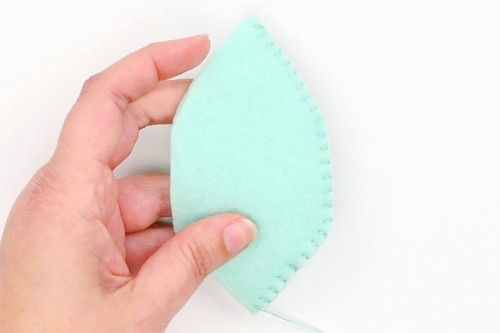
Step 4: Sew the first 2 felt pieces together
- Set 2 pieces of felt together, one on top of the other.
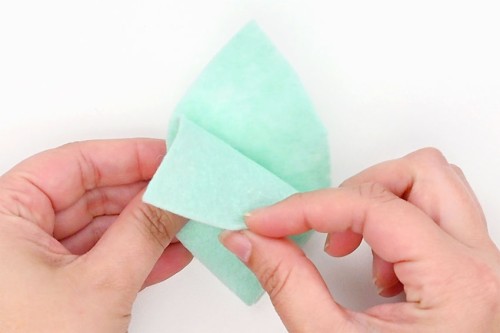
- Begin sewing the felt pieces together with a blanket stitch.Starting at the top, put your needle up through both layers of felt. Pull on the thread until you have a 1 to 2 inch tail. Tie the tail to the thread in front in a double knot.
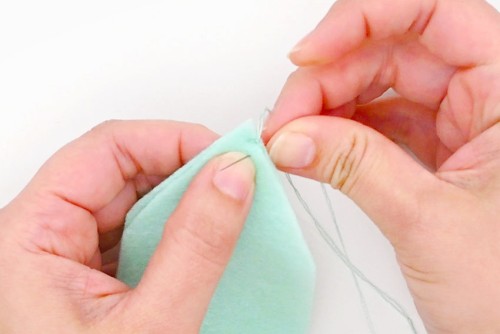
- Tuck the tail end between the two layers of felt and bring your needle back up about 1/4 inch away from the last stitch.Before you pull your needle all the way through, wrap the thread around the needle.Continue sewing a blanket stitch all the way down the right side.
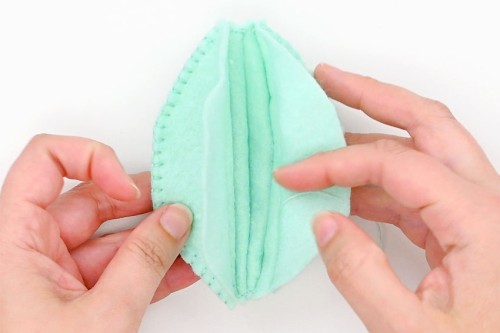
Step 5: Connect the rest of the felt jellyfish pieces
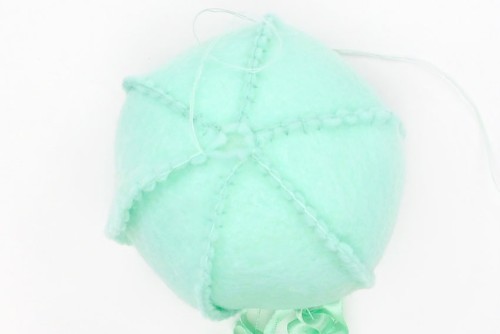
- Open up the connected pieces. The blanket stitched seam will be on the bottom.
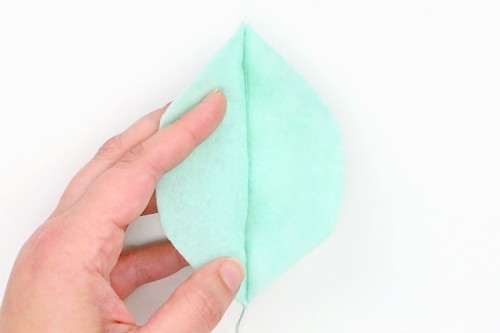
- Place a third piece of felt on the right, matching them up at the bottom.
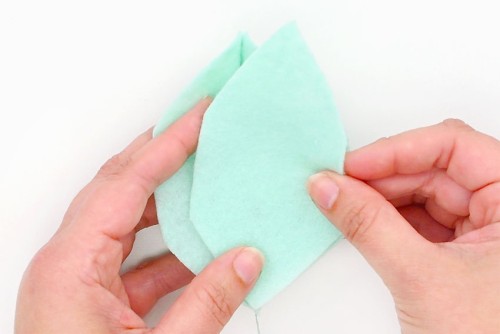
- Begin sewing this piece to the last with a blanket stitch.

- Continue stitching until you reach the other side.The three pieces should be sewn together, connected side by side.
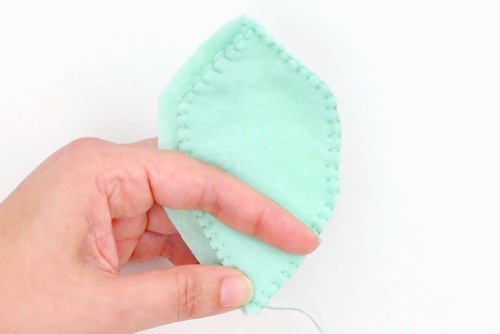
- Repeat, sewing each piece of the jellyfish to the last until they're connected in a row.
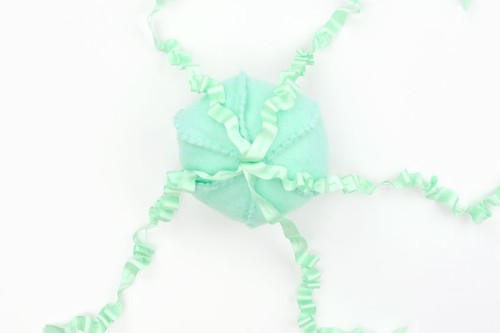
Step 6: Attach the tentacles and stuff the jellyfish
- You should have 2 unsewn edges that will connect together to form the jellyfish body.But first, set the ribbon tentacles inside the jellyfish at the bottom right side.
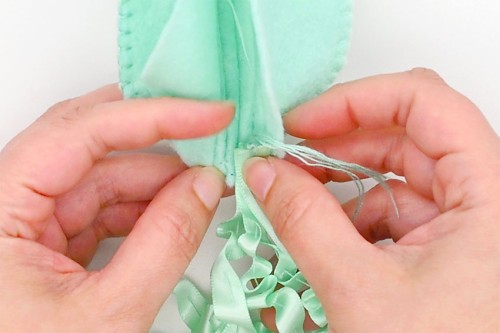
- Make a few stitches through the tentacles to keep them in place.Then sandwich the tentacles between the two open sides of the jellyfish and begin sewing the jellyfish edges together with a blanket stitch.
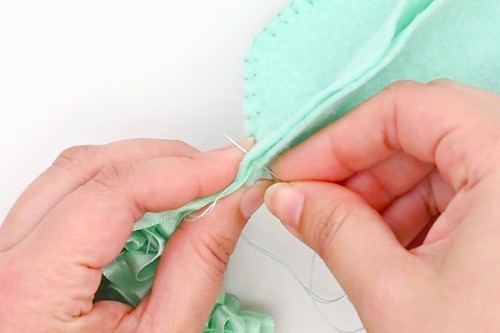
- Stop sewing when you're half way up the side, leaving about a 2 inch gap.
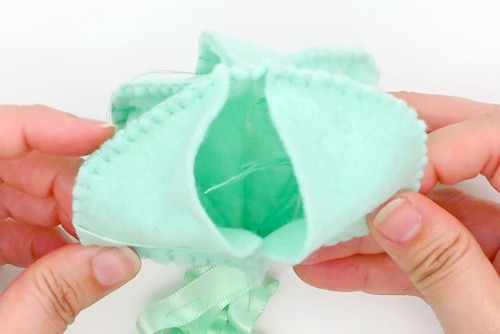
- Add poly-fill stuffing to the jellyfish body until it's as soft or as firm as you'd like.
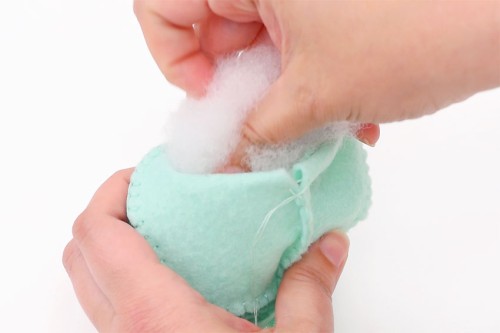
- Once your jellyfish body is evenly stuffed, continue the blanket stitch until the top.There will be a small gap at the top center of your jellyfish. This will get closed in the next step.
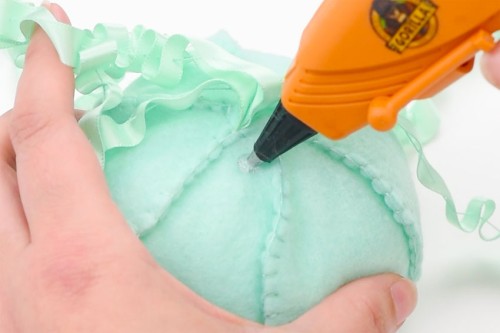
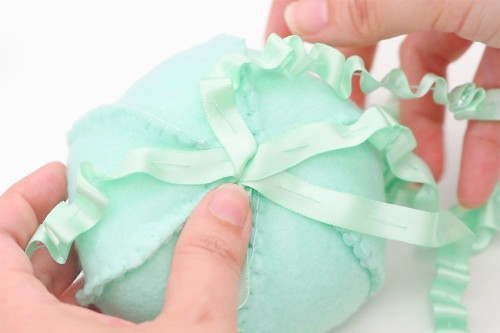
Step 7: Attach a ribbon hanger
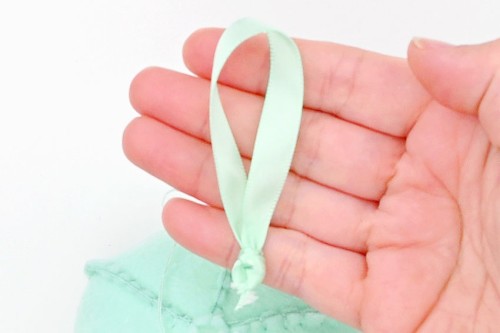
- Cut an 8 to 10 inch piece of ribbon. Fold it in half and tie a knot at the bottom, creating a hanger for the jellyfish.
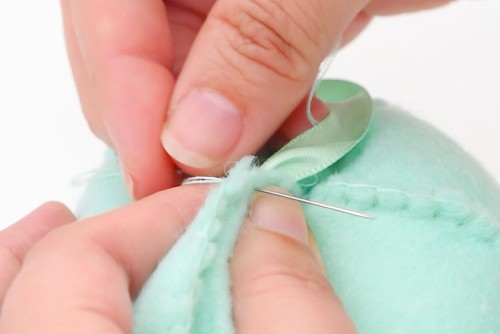
- Insert the knot into the gap at the top of the jellyfish.

- Pinch the felt around the hanger and sew it closed, securing the ribbon hanger in place.
Step 8: Separate and glue the tentacles
- Turn over the jellyfish, setting it upside down.Separate the tentacles, draping them evenly around the body.
- Lift one of the tentacles and place a dot of hot glue onto the body of the jellyfish about 1/2 inch from the middle.
- Place the tentacle back down into the glue, securing it in place.Repeat with all of the tentacles. This will separate the tentacles from one another so they don't hang down in a single line.(You can also stitch the tentacles into place, rather than gluing them.)
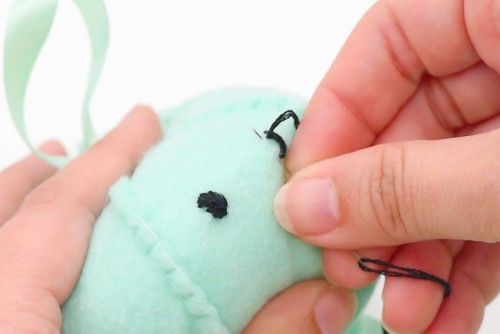
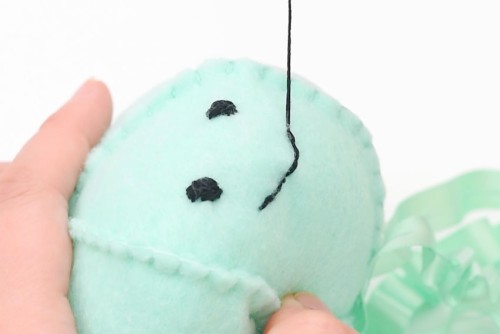
Step 9: Add a face to the jellyfish (optional)
- Choose a section of the jellyfish to be the front and use 4 strands of embroidery thread (or 2, doubled up) to sew eyes onto the jellyfish.Start by poking your needle in about 1 inch away from where you want the eye to be. Then bring the needle up, finding the perfect spot for the eye.Pull the thread just until it disappears under the felt.Make small vertical stitches, side by side in an oval shape to create the eye. Then repeat to make the second eye.
- Use the same thread to make a running stitch for the mouth.Start at one corner and go down and up through the felt until the smile is as long as you'd like. Then go back towards the start, filling in the mouth.Finish by sticking your needle down through the mouth and bringing it up an inch or two away. Cut the thread as close to the felt as possible and then squish the felt to make the thread disappear.
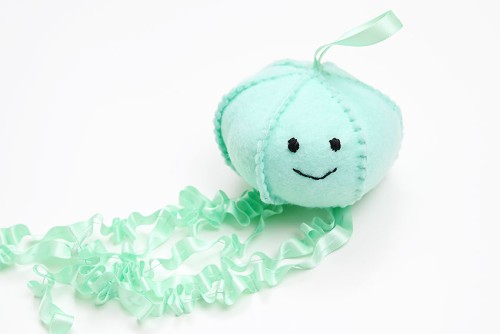
- Your felt jellyfish is complete!
Video
Notes
Looking for free felt patterns? Here's a few of our favourites:
Felt Monster Pattern
DIY Felt Dragon
Felt Pumpkin Pattern