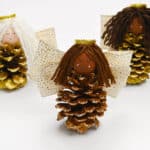
DIY Pine Cone Angels
Make these charming pine cone angels using simple craft supplies like pine cones, ribbon, and yarn. This easy Christmas craft is perfect for teens and adults and adds a beautiful handmade touch to your holiday decor!
Yield: 1 pinecone angel
Cost: $2
Equipment
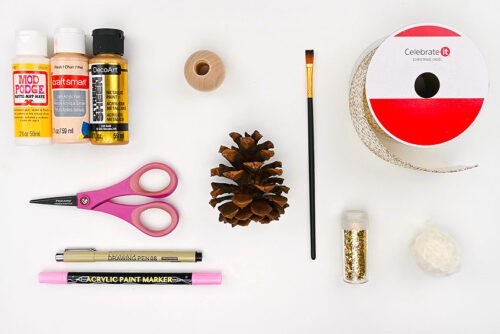
Materials
- Pinecone
- Metallic acrylic paint (gold)
- Matte Mod Podge
- Glitter (gold, to match paint)
- Wood beads (1-1/2 inch)
- Acrylic paint (skin tone)
- Black fine tip marker (0.5mm)
- Acrylic paint markers (pink)
- Yarn (neutral hair colour)
- Metallic pipe cleaner(s) (gold)
- Gold wired ribbon (2-1/2 inches wide)
Instructions
Step 1: Find what you need
- Gather your supplies and materials.
Step 2: Decorate the pine cone
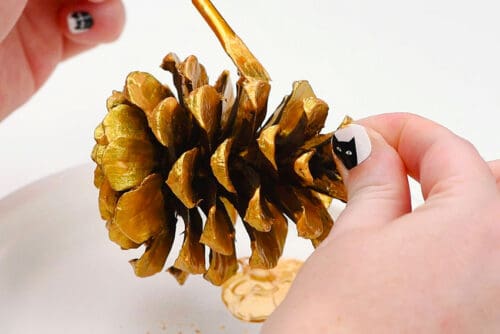
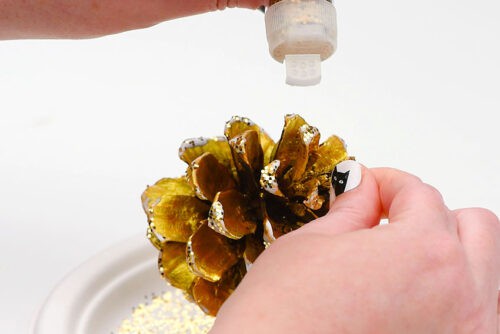
- Paint the tips and top of each "petal" of the pine cone with gold acrylic paint (or another metallic colour). Allow to dry.
- Then, once the paint is completely dry, add Mod Podge just to the edges of each petal.
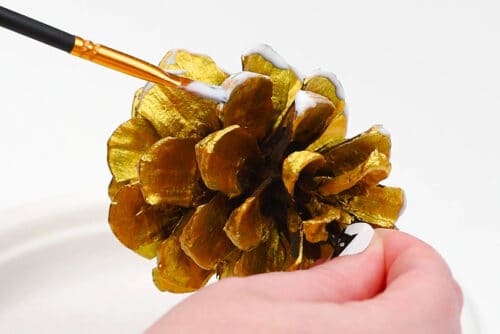
- Sprinkle gold glitter over the Mod Podge, making sure it gets well covered. Allow to dry again.
Step 3: Make the angel's head and halo
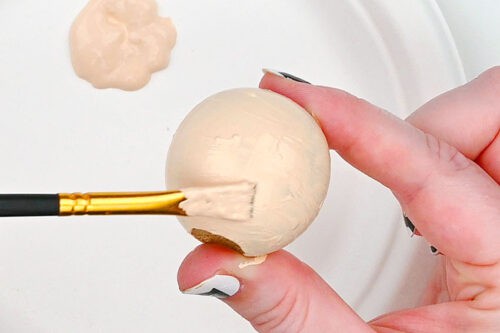
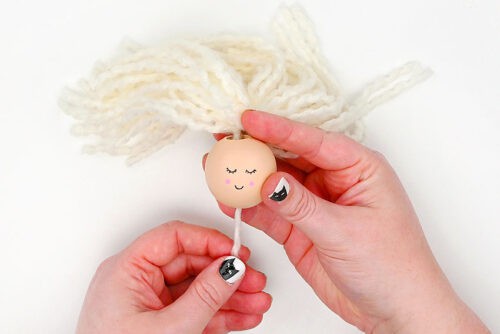
- Paint a wooden bead the flesh tone of your choice.Once we painted most of the bead we found it helpful to stick it on our pinkie finger. This allows you to get all the way around without smudging the paint near the edges.Allow to dry.
- Draw eyes and a mouth with a fine tipped black marker or drawing pen. Then use a pink paint pen or marker to add 2 rosy cheeks.

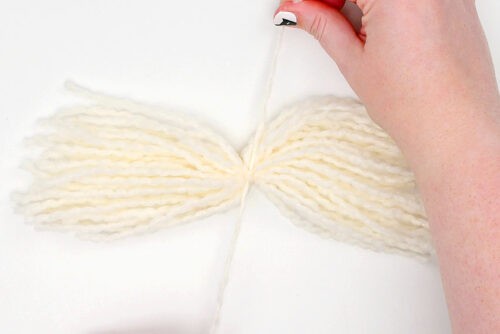
- Cut 30 strands of yarn to be about 9 inches long. Use another piece of yarn to tie a double knot in the middle, creating the angel's hair.(This creates a generous amount of hair. Use less strands if you want a finer look.)
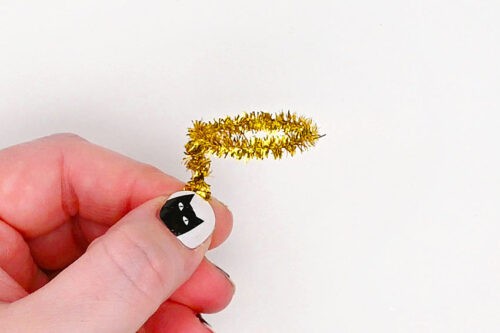
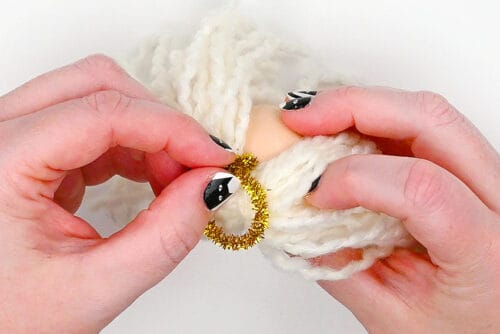
- Form a circle with a gold pipe cleaner (we wrapped it around our glitter container, but you can also form it yourself).Secure the circle with a few wraps, and cut off the excess, leaving a straight section at least 1/2 inch long. Bend it at a 90 degree angle to the circle to create the angel's halo.
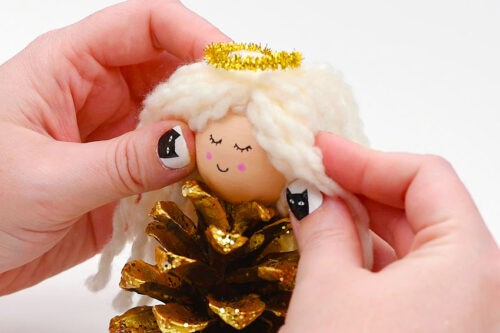
- Attach the hair to the head by pulling the tied strands down through the bead.
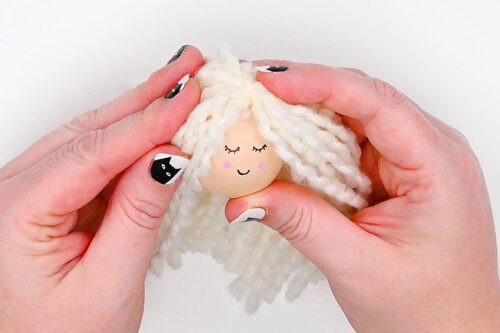
- Use hot glue at the top of the head and at the base of the bead to keep the hair in place. Cut off the excess yarn at the base so it doesn't stick out of the head.

- Then add glue to the sides of the head and gently press the hair down so it sits where you'd like.
- Add the halo to the head by pushing the hair to the side and adding some glue into the bead hole.Stick the end of the halo into it and adjust it so it's straight and centered. Then push the hair back around it.
Step 4: Create the wings
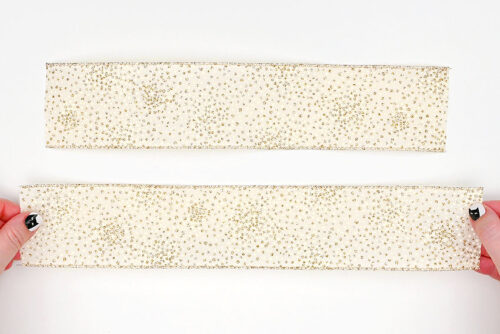
- For the angel's wings, cut 2 pieces of wired ribbon, one 12 inches and another 14 inches.
- On both pieces, fold the edges in to the middle, so that the good sides face outwards.
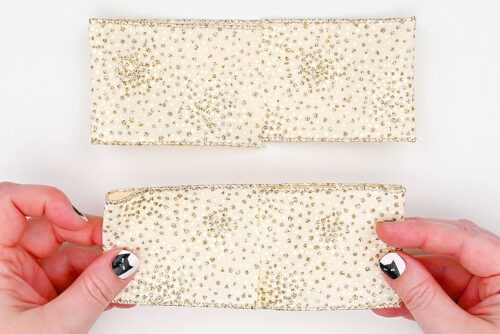
- Then set the smaller piece on top of the larger, with the open edges on the inside.
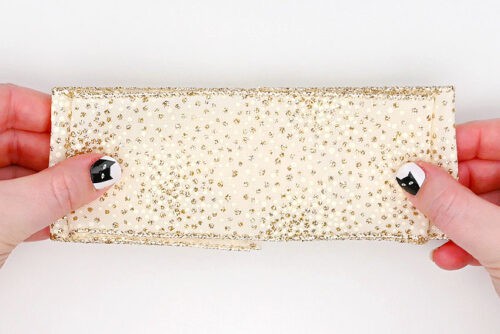
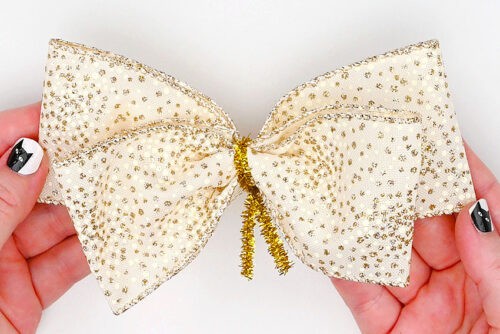
- Pinch the ribbons together in the middle and secure the "bows" with the rest of the gold pipe cleaner. Pull the edges of the smaller bow down.Make sure you've left at least 1/2 inch of pipe cleaner sticking out on the front of the bow (the side with the shorter "bow" in front).
Step 5: Assemble the angel
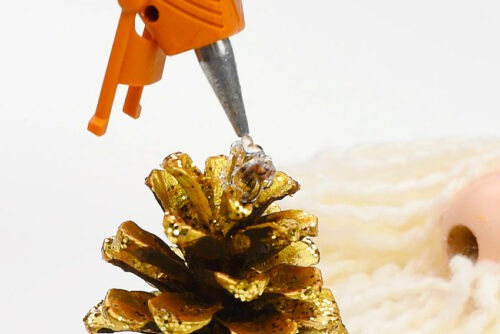
- Decide what "side" of the pinecone will be the front of the angel. Then add a generous amount of glue to the top of the pinecone.
- Place the angel head on top of the pinecone, adjusting it at the proper angle and holding it in place for a moment while the glue dries.
- Figure out where the wings will sit and add glue to the back of the pine cone. Stick the pipe cleaners into the pinecone, between the petals, and press the wings down until they stay in place.

- Separate the hair so some is at the front and some is at the back. Then trim the ends so they're nice and even.
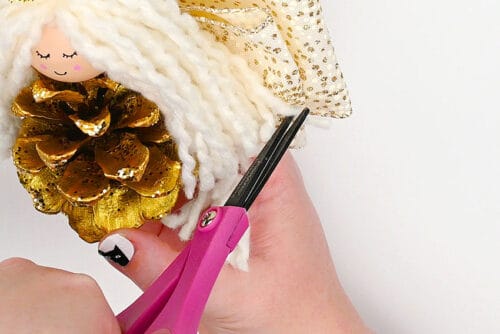
- Then add glue to the back of the head, pressing the hair down gently so it stays in place and the bead doesn't show through.

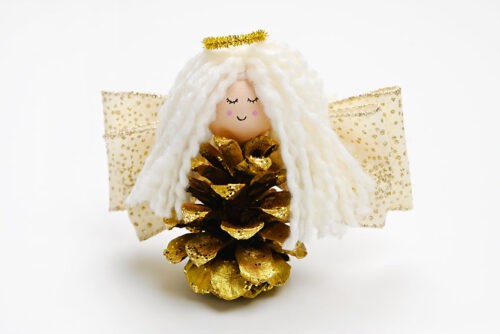
- Your pine cone angel is complete!
Notes
Looking for more angel crafts? Here's a few of our favourites:
Wine Cork Angel
Angel Pipe Cleaner Ornament
Pipe Cleaner Angel