
This pipe cleaner angel is such a magical Christmas craft! With their soft hair, glittery wings, and tiny bells, these sweet angels bring a handmade charm that feels straight out of a holiday storybook.
They’re simple to make using easy-to-find supplies, like pipe cleaners, a wooden bead, and yarn for hair. It’s the kind of cozy craft that kids love helping with, and the finished angels look beautiful perched on the Christmas tree or sitting on a shelf with twinkling lights behind them.

This post contains affiliate links. If you use these links to buy something, we may earn a small commission at no extra cost to you. This helps support our website and allows us to keep creating fun, free content.
How to Make a Pipe Cleaner Angel
Materials:
- 8 Pastel pipe cleaners (blue, or another colour)
- Cardstock (to match pipe cleaners)
- Metallic pipe cleaner(s) (1 gold, 2 white)
- Wooden bead(s) (20mm)
- White glue
- Fine tipped black marker
- Yarn (hair colour)
- Small jingle bell
See the craft in action:
Instructions:
Step 1: Find what you need
- Gather your supplies and materials.


Step 2: Fold the body pieces
- Fold a 12 inch pipe cleaner in half and cut it into two even pieces.
- Fold these pieces and cut them in half again. This gives you 4 pieces that are 3 inches each.
- Fold the pipe cleaner pieces in half so they’re rounded at the fold.
- Repeat with 7 other pipe cleaners (giving you 32 pieces total).


Step 3: Make a paper cone
- Cut a cardstock circle with a 6 inch diameter. You can trace a bowl or use a compass.
- Fold the circle in half and cut it down the middle. You’ll only need 1 half to make your angel.
- Roll the paper around itself to create a cone. Make sure the bottom will stand flat. Secure the cone with hot glue or a piece of tape.


Step 4: Add pipe cleaners to the cone
- Add a short line of glue near the bottom of the cone, about 1/2 inch up.
- Set a folded pipe cleaner piece into the glue so about 1/3 of it (the rounded part) hangs below the edge of the cone.
- Repeat, adding folded pipe cleaners around the cone.
- Once the first row is full, add a second layer of pipe cleaners so they overlap the first row by about 1/3.
- Then add a third row of pipe cleaners, once again overlapping them.Don’t place the pipe cleaners at the very top of the cone — you’ll need this space to add the head later.
- Fold the bottoms of the pipe cleaners up and out, almost like a flower petal.
- Twist 2 of the remaining pipe cleaner pieces and use them for the angel’s arms.
- Curve them slightly and then glue them to the body, lining up the tops of the pipe cleaners with the top row.


Step 5: Attach the head
- Add a dot of white glue to a wooden bead.
- Use your finger to spread the glue into a very thin layer. Allow to dry. Now you’ll be able to draw on the wood without it bleeding.

- Use a black marker to draw 2 eyes and a mouth.
- For the hair, cut 15 pieces of yarn about 8 inches long. Use another piece of yarn to tie the hair together in the middle.
- Thread the tied yarn down through the bead and use hot glue to secure these pieces near the base of the head, inside. Cut off the excess yarn.
- Then add glue to the top of the body and set the head in place.


Step 6: Make the wings and halo
- Fold a white metallic pipe cleaner in half, keeping the fold rounded in a wing shape. Fold one half back on itself and then back again, creating a second loop.Use the other part of the pipe cleaner to create 2 smaller wings. Twist the ends together to secure the loops.Then make a second wing with another pipe cleaner. Twist both wings together in the center.

- Add hot glue to the back of the angel. Set the wings in place just below the head, with the larger wings at the top.
- Separate the hair so that some of it is in front and some is at the back. Glue the hair down at the back of the head so it stays in place. Then cut the hair so it’s nice and even.
- Form a circle with a gold metallic pipe cleaner. Twist the pipe cleaner around itself to secure the halo and cut the pipe cleaner about 1/2 inch below the circle.
- Fold the straight end of the halo down, so it’s at a right angle to the circle. Add a dot of glue to this end and stick it in the top of the angel’s head.
- Finally, add a dot of glue to each of the hands and place the bell so the angel is holding it.
- Your pipe cleaner angel is complete!
- Now have fun making more pipe cleaner angels in different colours! They look so pretty together in a display, and they also make a thoughtful homemade gift.


Helpful Tips:
- Use cardstock for the cone: Cardstock provides a sturdy base and keeps your angel’s shape looking neat. Regular paper is too thin and can cause finger burns when you hot glue the pipe cleaners in place.
- Use inexpensive scissors or wire cutters: This will help preserve your good craft scissors, since pipe cleaners can dull blades quickly!

If I don’t have a jingle bell, what else can my pipe cleaner angel hold?
There are so many fun and festive options! Try one of the following:
- Star: Made from gold scrapbook paper or glitter foam
- Mini harp: Plastic ornament or shaped gold wire or pipe cleaner
- Heart shape: Felt or foam; perfect for representing love and peace
- Cross: Formed from a glitter pipe cleaner
- Mini ornament: Small bead or pom pom that looks like a Christmas bauble
- Candle: Short white pipe cleaner with a yellow tip for the flame
- Gift: Tiny cardstock or foam box wrapped in shiny paper with a bow (you can buy small presents too!)
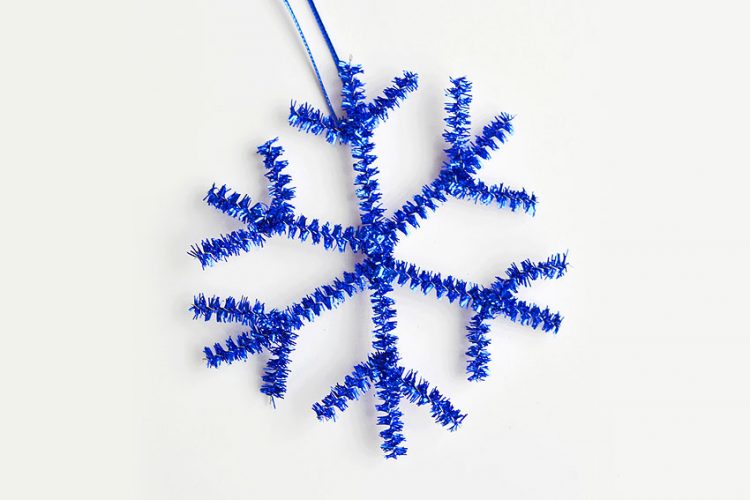
- Snowflake: Mini plastic or paper snowflake
- Music note: Cut from black cardstock or shaped pipe cleaner
- Scroll: A tiny rolled-up piece of paper tied with thread

How do I make a cone for the base of the pipe cleaner angel?
Trace a bowl or plate to make a 6-inch circle. You can also use a compass or circle cutter. Cut the circle in half and wrap it into a cone shape.
If you don’t have a way to make the right size circle, you can print and use the cone template from our pipe cleaner Christmas tree craft. You might want to scale it a bit smaller to make this same size of angel.
Can I turn this pipe cleaner angel into an ornament?
Absolutely! While we love it as a standing decoration, you can easily turn your angel into an ornament. Insert a hanger made from ribbon or twine into the head (right behind the halo works best), or attach one at the back, near the base of the head.

What type of glue works best for making a pipe cleaner angel?
Hot glue is the best choice. It dries quickly and holds the pipe cleaners securely. Tacky glue will also work, but you’ll need to wait longer for it to dry between steps.
For safety, use a low-temperature glue gun, since you’ll be pressing pipe cleaners against cardstock and can feel some heat through the paper.

Making a pipe cleaner angel is such a lovely way to add a handmade touch to your Christmas decor. With just a few simple materials, both kids and adults can create a sweet little angel that’s full of personality and charm.
These handmade angels look beautiful perched on the Christmas tree, standing on a mantel, or added to a holiday centerpiece. Keep one for yourself or give them as as a thoughtful homemade gift. These pretty angels are a wonderful reminder that the best decorations are often the ones made with love (and a little sparkle!).
Here’s even more Christmas craft ideas:


Now available
Low-Mess Crafts for Kids Book
72 cute and fun crafts that kids and parents alike can enjoy. All with as little mess as possible!
Where to buy:
You can purchase Low-Mess Crafts for Kids from Amazon, or wherever books are sold:
Amazon | Barnes and Noble | Books-A-Million | Indiebound | Amazon Canada


Leave a Reply