
DIY Paint Pouring on Terracotta Pots
Use pouring paint to decorate these terracotta clay pots! It's such an easy and fun gardening craft.
Yield: 1 pour paint pot
Cost: $2
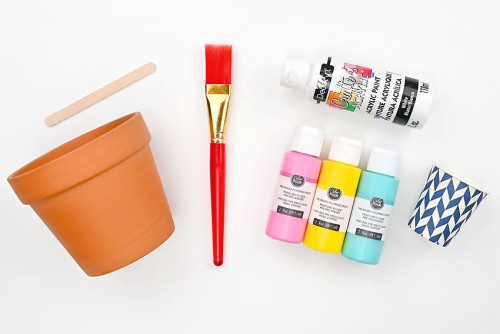
Equipment
- Painter's tape (or masking tape)
- Small plastic cup(s) (2 ounce size)
- Drop cloth (and/or tray for containing mess)
Materials
- Medium clay pot(s) (4-1/2 inch diameter)
- White acrylic paint
- Acrylic pouring paint (multiple colours)
Instructions
Step 1: Find what you need
- Gather your supplies and materials.
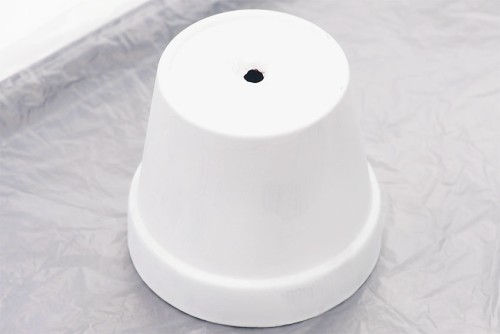
Step 2: Prepare the pot
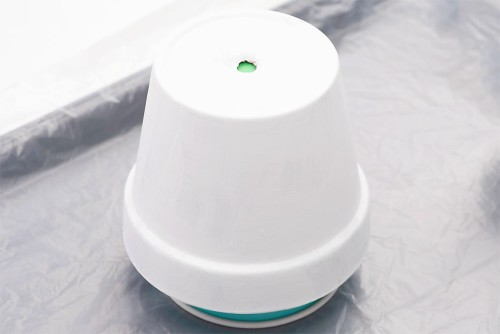
- Paint the outside of the pot with white acrylic paint. This provides a neutral background for the pouring paint, stopping it from being absorbed into the pot.Allow to dry.
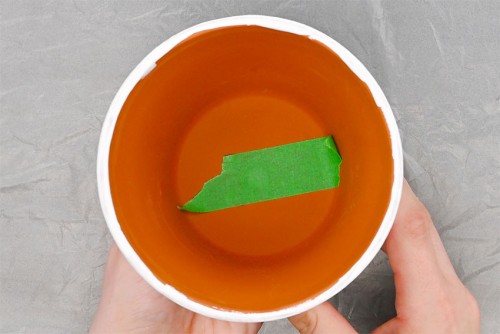
- Press a piece of painter's tape (or masking tape) on the inside bottom of the pot, covering the hole in the bottom. This will prevent paint from going inside the pot.You can also cover the whole outside bottom of the pot with tape if you'd like, since you won't see the painted bottom anyway.
Step 3: Combine your pouring paints
- Choose your colours of pour paint. Pour a generous amount of the lightest colour (white, for us) into the 2 ounce disposable plastic cup.This will be your paint mixing cup.
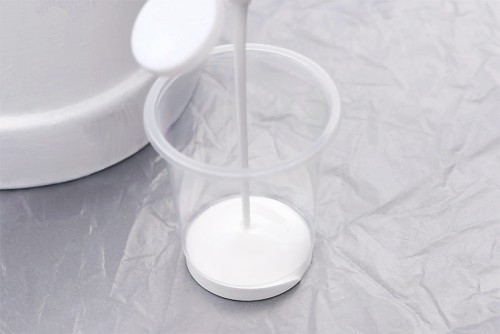
- Add your other colours of paint to the same mixing cup. Add your second colour (teal, for us) on top of the white paint. Then pour in your third colour (pink).Alternate adding more of your second and third colours (teal, pink, teal, pink, etc) until the cup is full of paint.

Step 5: Pour paint onto the clay pot
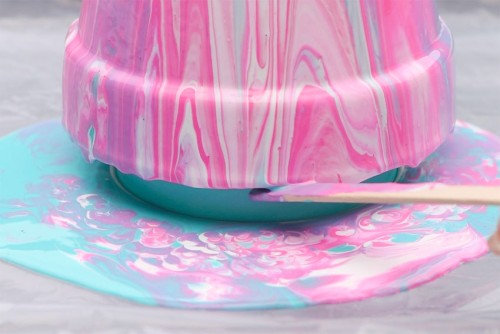
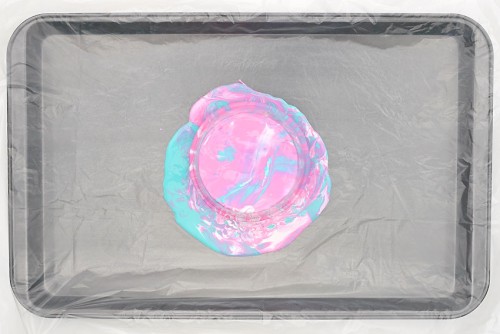
- Make sure you protect your working surface with a plastic drop cloth and/or a tray. A tray or turn table base is useful, since you can turn the pot without touching it.Set a larger plastic cup down, bottom up, and then set the pot on top of it, also upside-down. The clay pot should be sitting above working surface, not touching it.
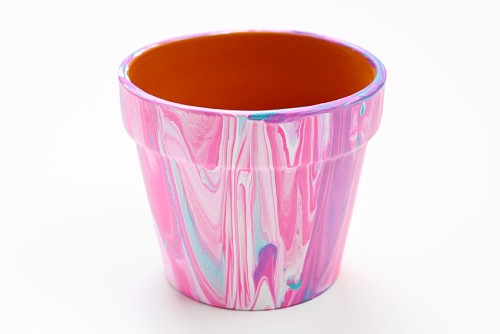
- Begin pouring the layered paint onto the pot, starting at the top (the actual bottom of the flower pot). Go back and forth, pouring the paint over the sides, creating a marbled look.Continue until you're happy with the look and the pot is completely covered in paint.

- If the paint starts pooling at the top, use the edge of a popsicle stick to push it over the side.
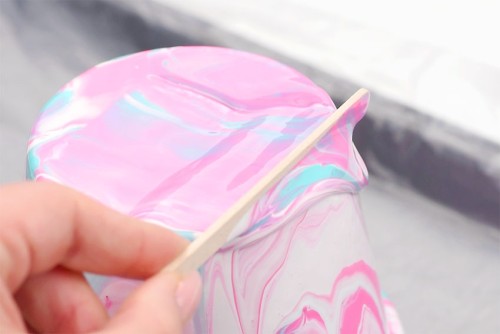
- Once the paint has stopped dripping, wait a few minutes and then brush a popsicle stick along the top (current bottom) rim. This will remove any large drips, stopping them from drying in place.
- Allow the pot to dry, untouched, overnight.
- Your pour paint flower pot is complete!
Video
Notes
Looking for more clay pot crafts? Here's a few of our favourites:
Clay Pot Animals
Gnome Ornaments
Halloween Clay Pots