
How to Make St. Patrick's Day Gnomes
Have fun making a DIY St. Patrick's Day gnome this March! Use our free template to make this super cute and easy St. Patrick's Day craft.
Yield: 1 St. Patrick's Day gnome
Cost: $2
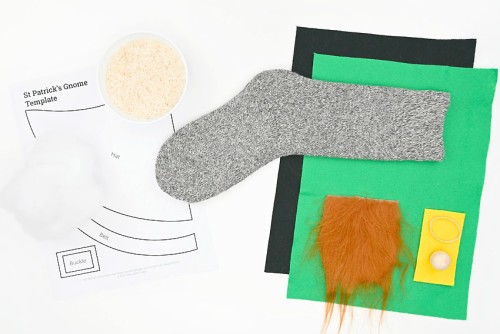
Materials
- FREE Printable St. Patrick's Day Gnomes Template
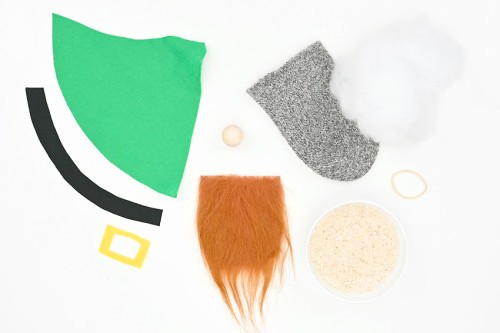
- Felt (green, black, yellow)
- Grey sock (or other colour of choice)
- Rice (or dried beans)
- Fiber fill stuffing
- Rubber band
- Gnome beard (orange or ginger colour)
- Wooden ball (1 inch)
Instructions
Step 1: Find what you need
- Gather your supplies and materials.
Step 2: Cut out the pieces for the gnome
- Print our free St. Patrick's Day gnome template -- find the link in the materials list above!
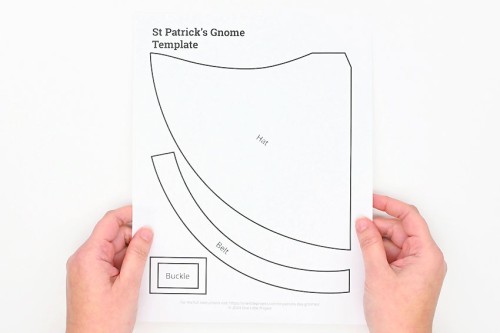
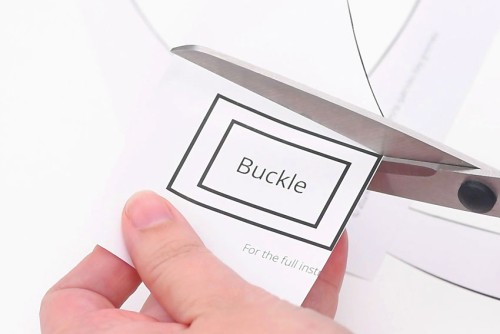
- Cut out the pieces from the template. To cut the center part of the buckle, fold the piece in half.
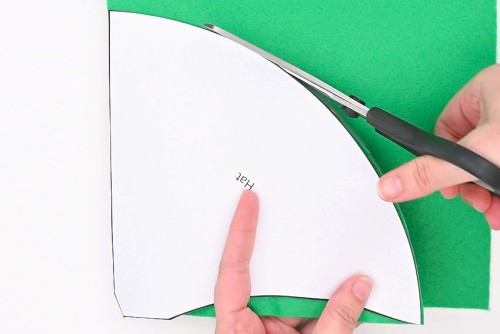
- Place the hat pattern piece on green felt and cut around it. You can also trace it first with chalk or a gel pen.
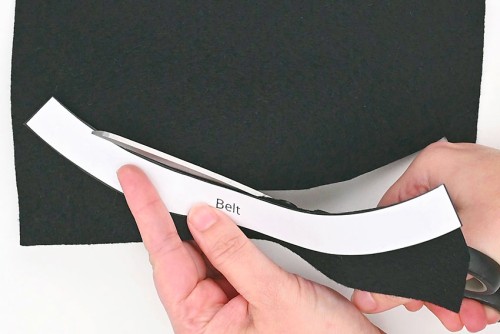
- Place the belt template onto black felt and cut around it.
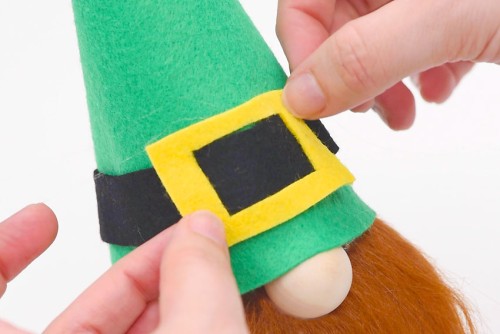
- Finally, cut the buckle piece from yellow felt.
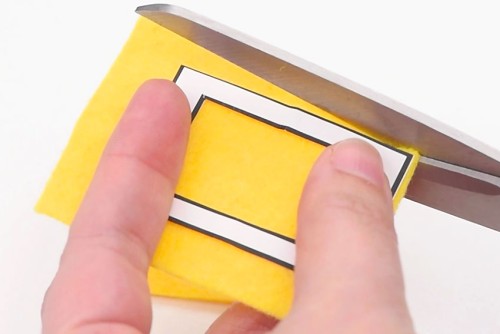
- To remove the center of the buckle, fold the felt in half with the buckle template still on it. Cut inwards on either side, and then cut across to make the cutout.

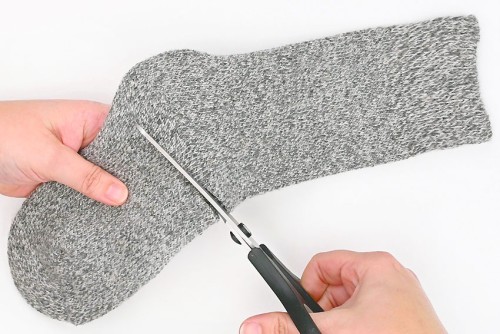
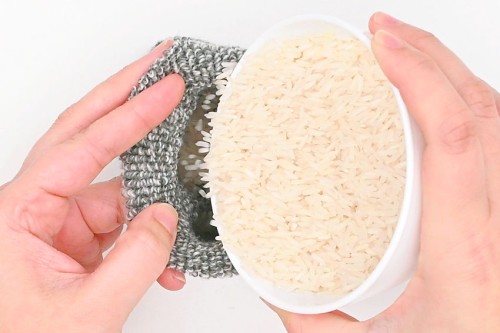
- Cut the toe portion off an adult sized grey sock, just before the heel.
- To make your leprechaun gnome you'll also need dried rice and stuffing for the gnome, as well as a wooden ball for the nose and a faux fur beard.
Step 3: Assemble the gnome
- Pour 1 cup of dry rice into the bottom of the sock.If you need help stretching out the sock you can ask a friend to help, or stretch it over the top of a drinking glass.The rice will help the gnome to stand without falling over.
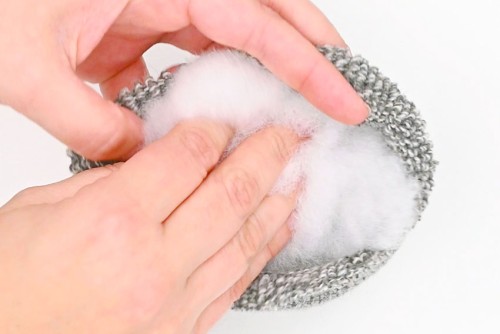
- Add stuffing into the gnome until you're happy with the size and firmness of its body.
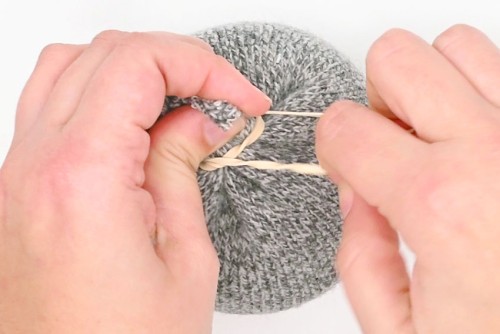
- Use a rubber band to close off the top of the sock. If you don't have an elastic you can also use a piece of string.
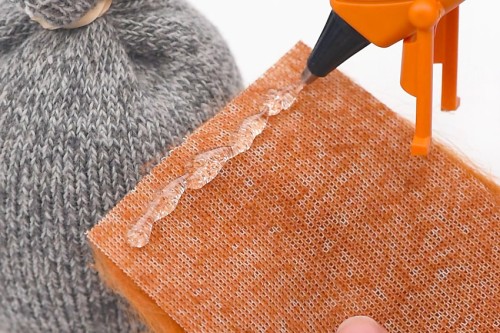
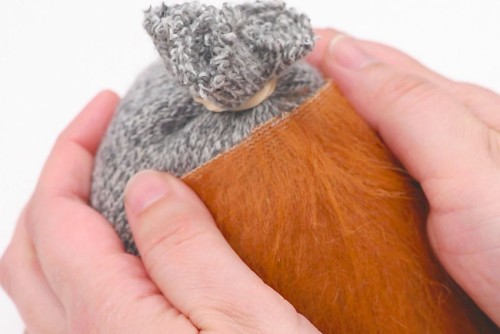
- Add a line of hot glue along the top edge of the back of the beard.
- Press the beard to the gnome's body, so the bottom of the beard reaches the bottom of the gnome.
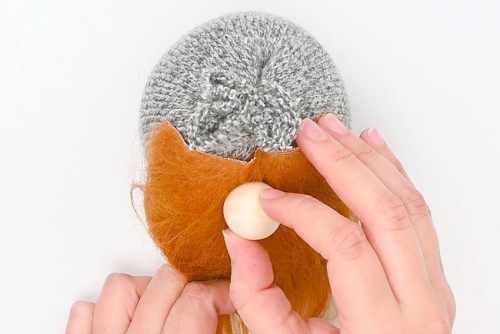
- Add glue to one side of the wooden ball and attach it towards the top of the beard.
Step 4: Make and attach the gnome's hat
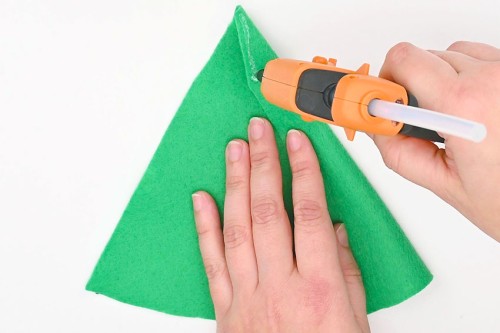
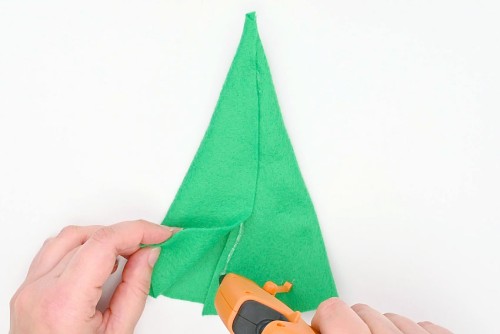
- Place the green felt hat piece with the point at the top. Fold 1/3 of the hat over and add a short line of hot glue along the top edge.
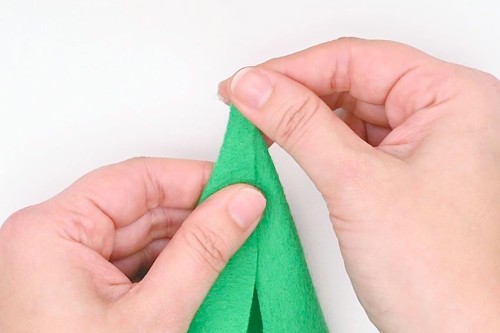
- Fold the other side of the felt into the glue, holding it together until the glue is dry.
- Add hot glue down the rest of the edge of hat, connecting the other side.
- Add a line of hot glue to the back of the hat (the side with the seam) close to the bottom edge.
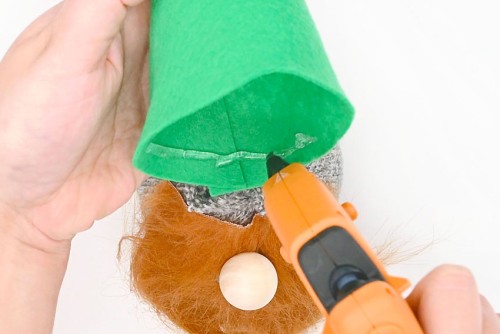
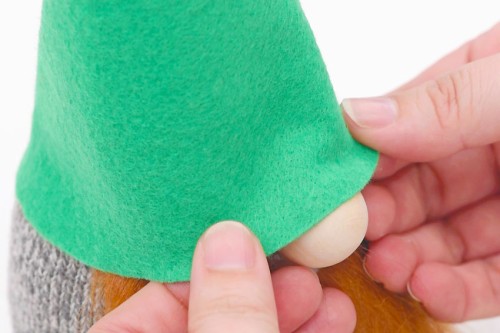
- Place the hat on the gnome, with the seam at the back (opposite from the nose).
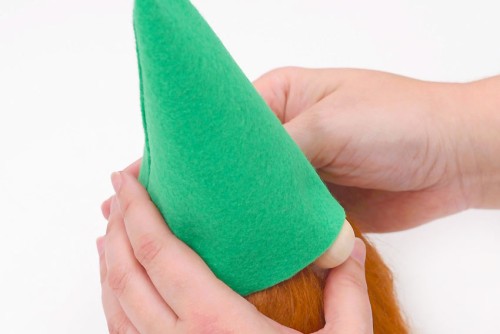
- Roll the hat up a bit at the front and add about 1 inch of glue just above the nose.
- Roll the hat back down so that the glue sticks to the top of the nose.
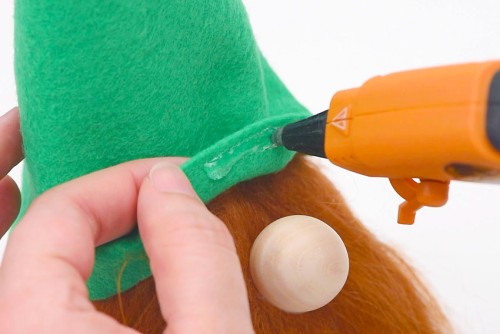
- Add a line of glue to the center third of the hat belt.
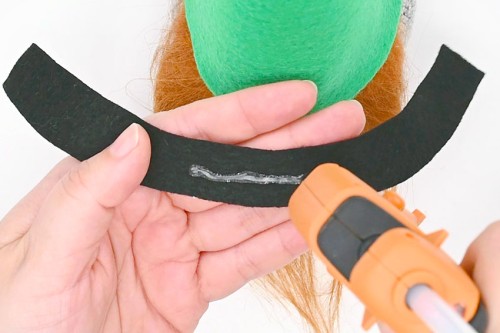
- Attach the belt to the hat about 7/8 inch above the bottom, with the center of the belt at the front.Then glue the rest of the belt in place, going around the hat.

- Add glue to the belt buckle and attach it to the front center part of the belt.
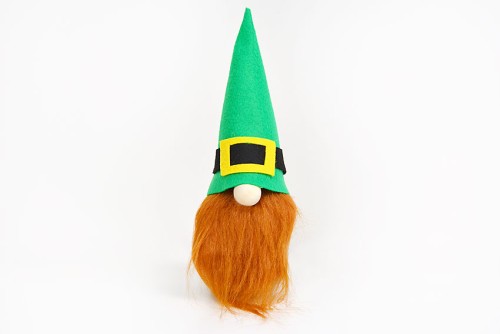
- Your St. Patrick's Day gnome is complete!
Video
Notes
Looking for more gnome crafts? Here's a few of our favourites:
Gnome Hat Pattern
DIY Valentine Gnome
Gnome Ornaments