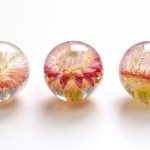
How to Preserve Flowers in Resin
Learn how to preserve flowers in resin and create this flower paperweight! It's such a pretty display piece and it's really easy to make.
Yield: 1 resin paperweight
Cost: $5
Equipment
- Jumbo popsicle stick (or silicone stir stick)
- Rubbing alcohol (in spray bottle; optional)
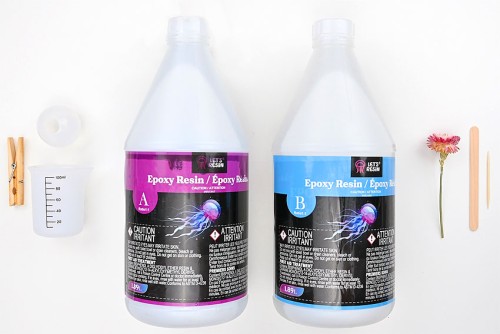
Materials
Instructions
Step 1: Find what you need
- Gather your supplies and materials.
Step 2: Add the flower into the mold
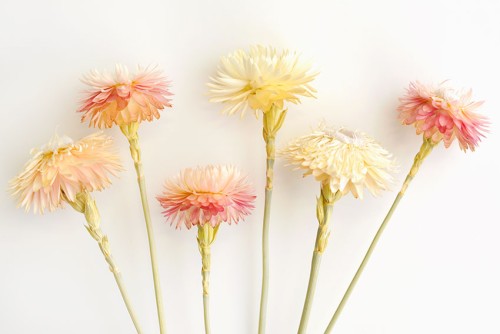
- Dry flowers from a wedding bouquet or another special occasion (read below for helpful tips!), or buy already dried flowers.We purchased dried strawflowers on Amazon - the exact ones we used are linked above.Trim your flower's stem so there's only a couple inches left.
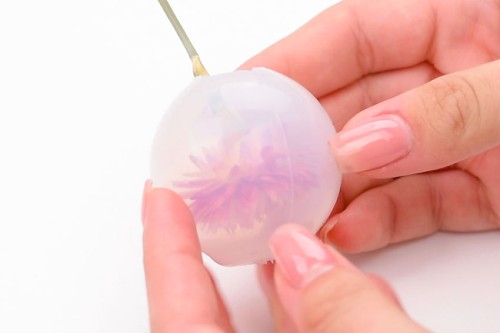
- Choose a silicone mold that will fit the size of your flower. Our sphere mold has a 1.85 inch diameter.
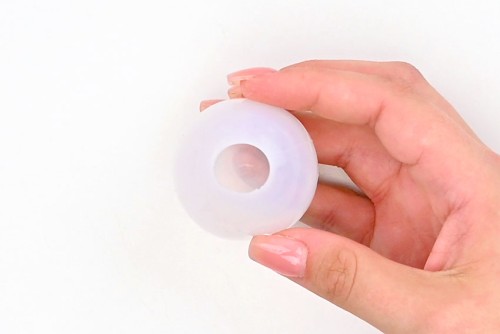
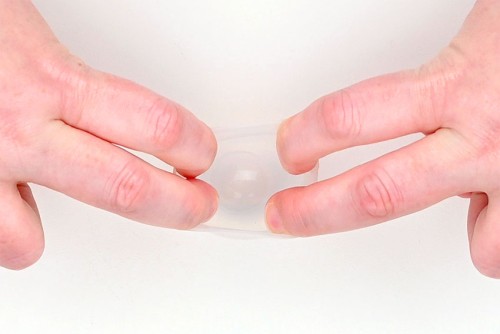
- Stretch open the silicone mold. (It's great if you have a helper to stretch the mold open for you!)
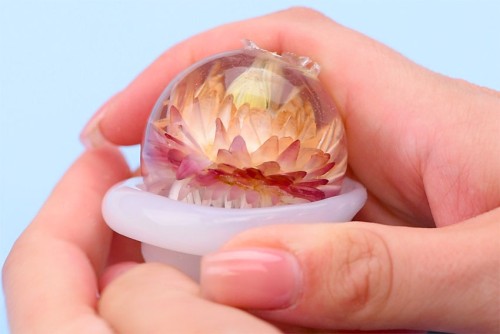
- While the mold is stretched open, carefully insert the flower into the mold.
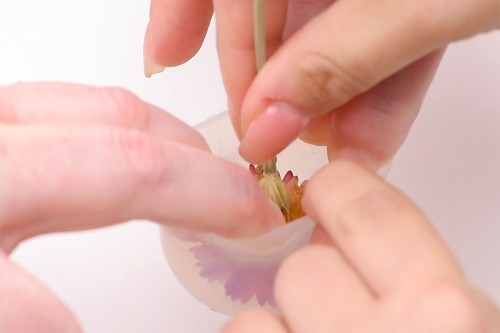
- Slowly let go of the mold so that your flower is contained within the mold.
Step 3: Mix the resin
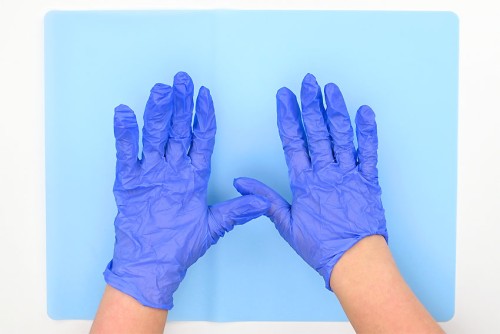
- Make sure you protect your working surface with a silicone mat, wear protective nitrile gloves, and eye protection.Depending on the resin you may also need to wear a respirator.
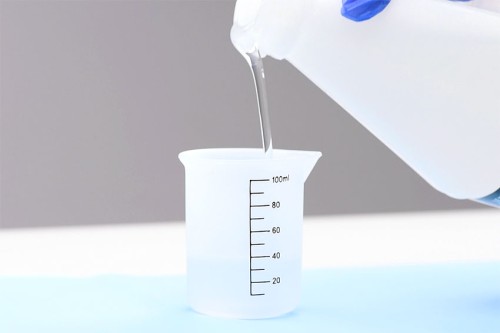
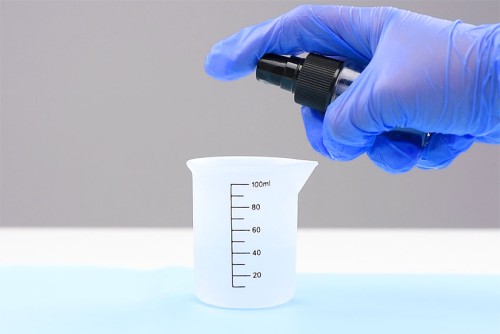
- First, mix enough resin to fill about 2/3 of your mold. (Read below to know how much resin you'll need.)Follow your specific resin's instructions for ratios, drying times, and curing times.Start by adding 1 part of Part A to the silicone measuring cup.
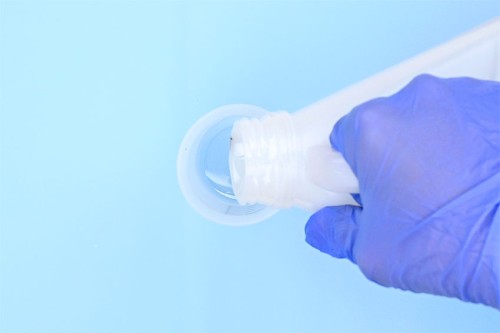
- Add an equal amount of Part B to the measuring cup. (Or whatever ratio your brand of resin suggests.)
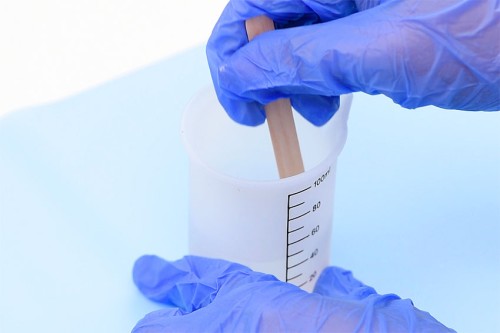
- Mix the resin and hardener together with a popsicle stick or a reusable resin stir stick.Stir slowly, scraping down the sides and bottom of the measuring cup. Continue mixing for 3 minutes or until the mixture is clear.
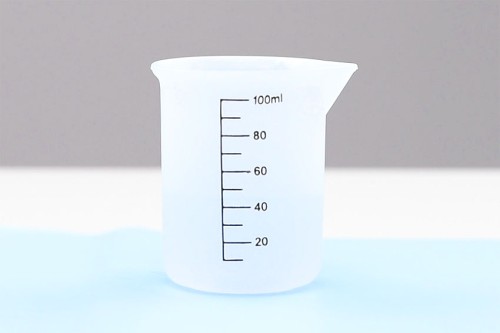
- Allow the resin to sit for 5 to 10 minutes. This allows any air bubbles to surface.
- If there are any bubbles on the surface, give the resin a quick spritz of rubbing alcohol to pop them.
Step 4: Add the first resin into the mold
- Pour the resin, a bit at a time, into the mold with the flower in it.
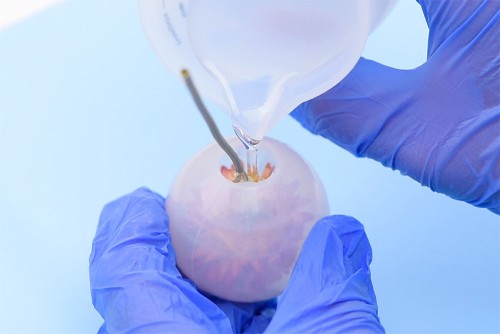
- Slowly swirl the flower around, coating the petals with resin. This helps to remove any air pockets and bubbles.
- Continue adding resin until the mold is about 2/3 full. Or follow your resin's instructions for casting depth.
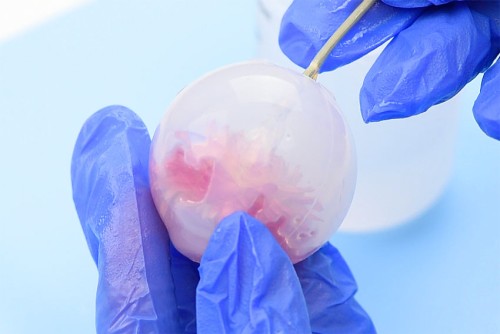
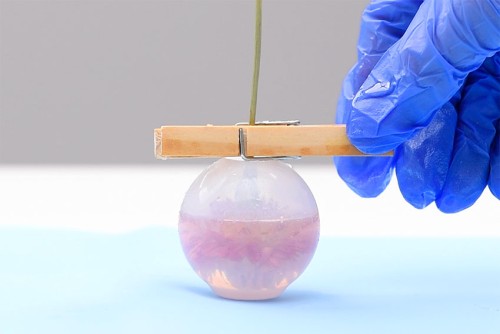
- Add a clothespin to the flower's stem and set it on top of the mold. This will keep the flower in place, stopping it from rising to the surface.Allow the resin to sit for the recommended layering time. Our resin suggests 3 to 5 hours.
Step 5: Add the 2nd layer of resin
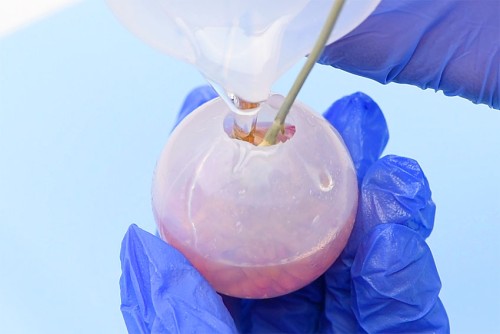
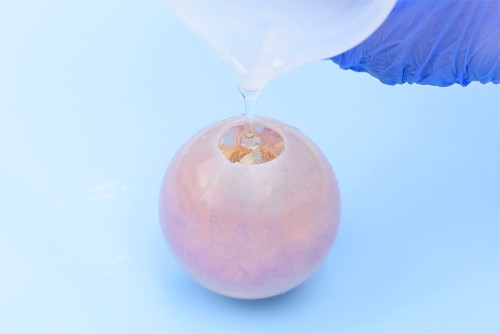
- Trim off the flower stem so that the whole flower will be covered in resin.

- Mix another batch of resin to fill the remaining 1/3 of the mold, following the instructions above.Pour the resin into the mold, filling it to the top.
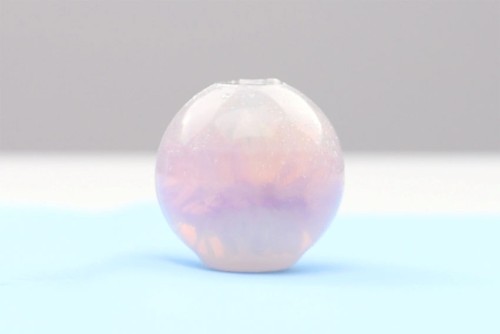
- Let the mold sit, untouched, for the recommended dry (or demold) time. Our resin's dry time is 8 to 12 hours.
Step 6: Demold your resin flower
- Once your preserved flower paperweight is dry you can unmold it.Grab the top edge of the silicone and stretch it. Be careful when handling the top, since there might be sharp edges on it.
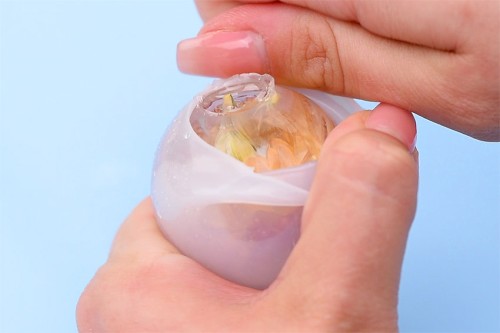
- Pull and roll the silicone mold until your resin piece pops free.
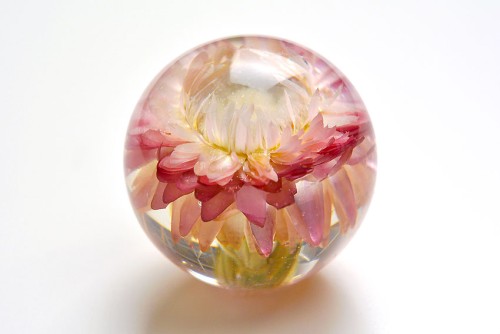
- After 24 hours (or after a longer curing time), sand down any rough edges on the bottom of the paperweight.Your flower is now preserved in resin!
Video
Notes
Looking for more flower crafts? Here's a few of our favourites:
How to Press Flowers
Pressed Flower Lanterns
How to Make a Flower Crown