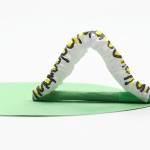
How to Make a Moving Caterpillar Craft
This moving caterpillar craft is SO COOL! Use straws to move the caterpillar along the leaf. It's such a fun and easy paper craft for kids!
Yield: 1 caterpillar craft
Cost: $1
Materials
Instructions
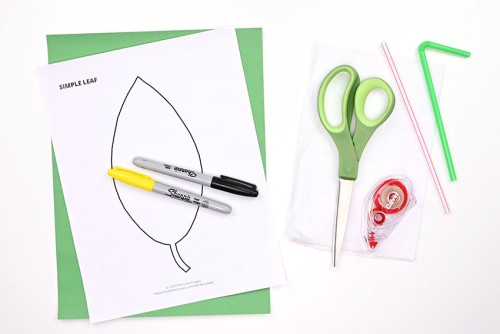
Step 1: Find what you need
- Gather your supplies and materials.
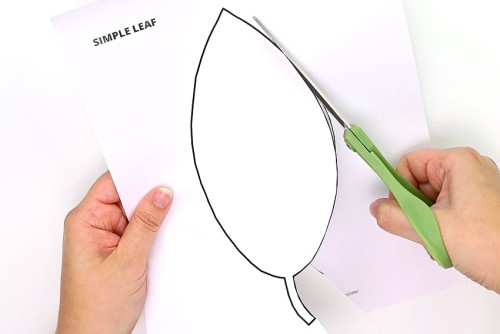
Step 2: Cut out the caterpillar's leaf
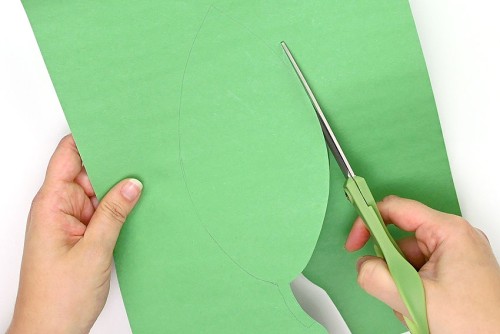
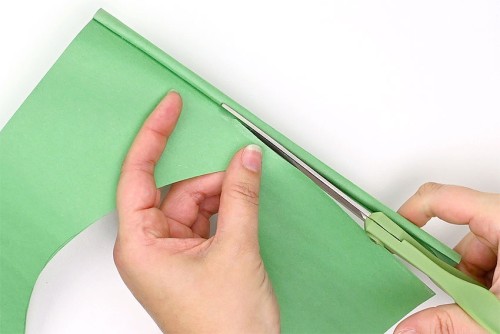
- Print off a free leaf template (find the link in the materials list above) and cut out the leaf shape.
- Trace the leaf onto a piece of green construction paper.
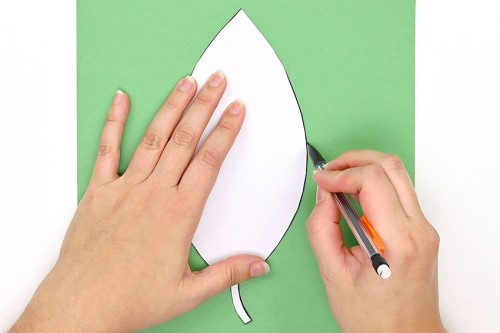
- Cut out the construction paper leaf and set aside the rest of the paper for later.
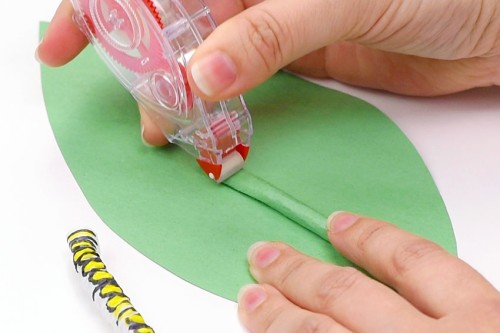
Step 3: Attach the straws to the leaf
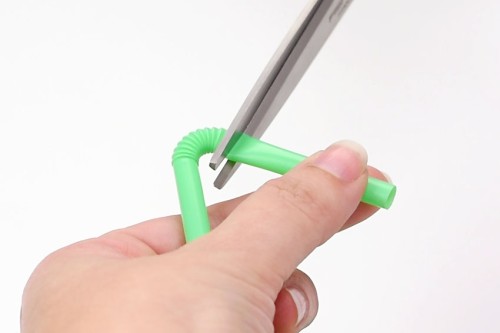
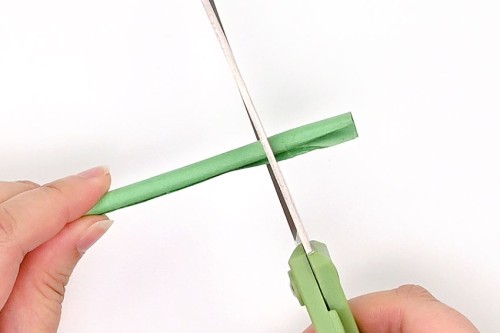
- Cut off the top part of the larger straw, above the bend. (The piece should be about 1-1/2 inches long.)Keep the rest of the straw for later.
- Add glue tape to the stem and lower part of the leaf.
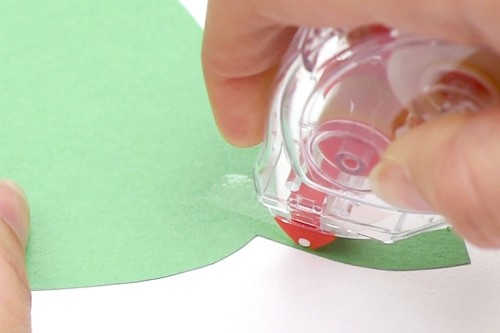
- Press the small straw piece onto the glue tape.
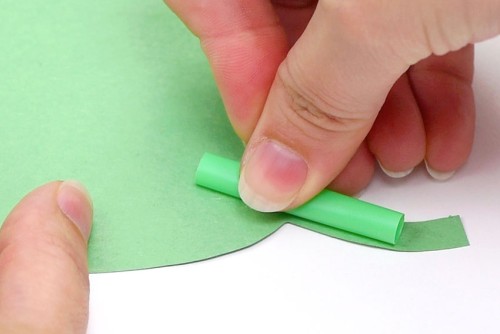
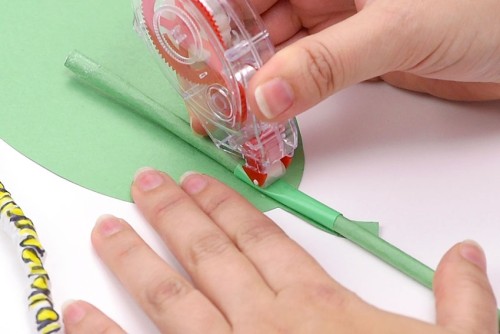
- Add several lines of glue tape to the edge of the scrap construction paper. Press your smaller straw onto the glue tape, close to the edge of the paper.

- Roll the straw until it's wrapped in green construction paper and cut off the extra paper.
- Now cut off any extra paper so that it's even with both ends of the straw.
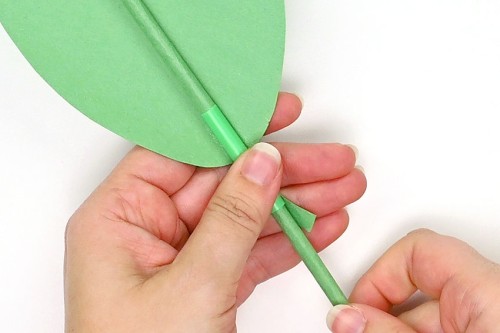
- Slide the wrapped straw inside the larger straw piece that's attached to the leaf.
Step 4: Make the caterpillar
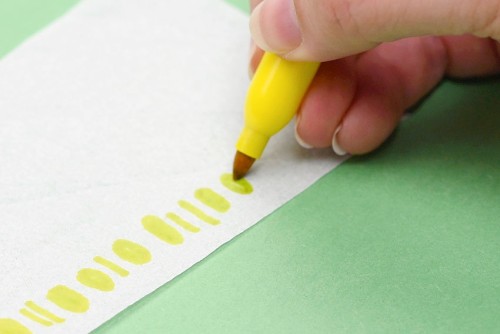
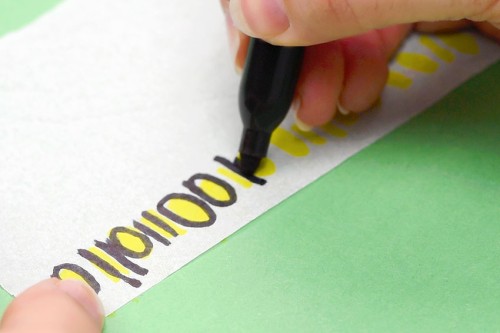
- Cut a piece of tissue paper to about 4-3/4 inches long by 2-3/4 inches wide. Use a coloured marker to draw a caterpillar pattern of ovals and lines along one of the long edges.
- Use a black marker to outline the ovals and draw extra lines in the pattern.
- Add a line of glue tape along the bottom of the tissue paper, just below where you drew the design.
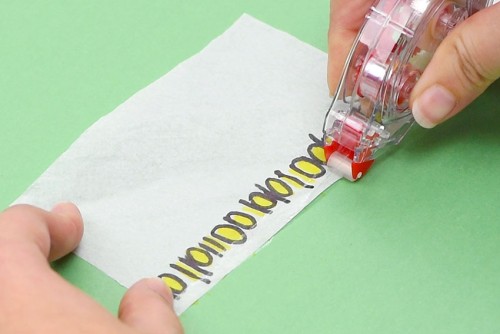
- Wrap the tissue paper loosely around the remainder of the larger straw, eventually connecting the tissue paper to itself with the glue tape.
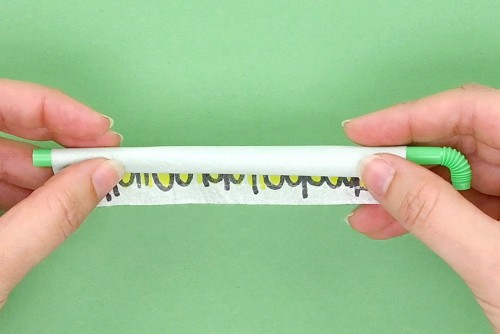
- Carefully scrunch the caterpillar down, one small bit at a time, and then remove it from the straw.
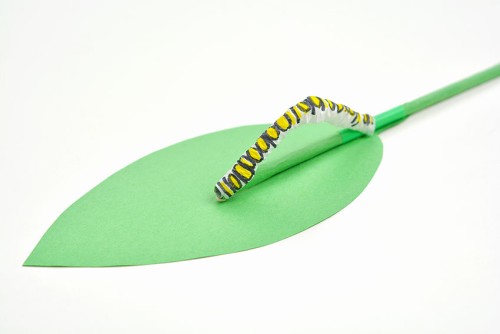
Step 5: Attach the caterpillar to the movable straw
- Add glue tape to the top of the paper wrapped straw.
- Add more glue tape to the top half of the larger, outside straw.
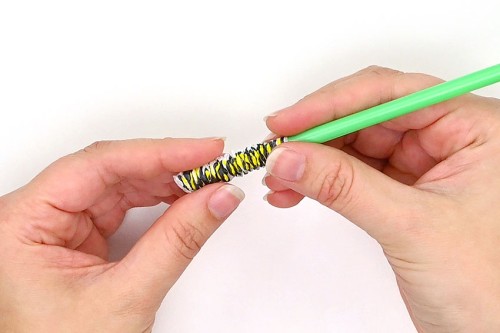
- Attach the ends of the caterpillar to each glue tape spot.

- To move the caterpillar, hold the short piece of straw with one hand while moving the long, construction paper covered straw in and out with your other hand.Your caterpillar craft is complete!
Video
Notes
Looking for more interactive crafts? Here's a few of our favourites:
Flapping Butterfly Craft
Flapping Bat Craft
DIY Spinner Toy