Well, my baby boy still isn’t sleeping very well. He’ll be a year old in a few days, and for the last week he’s been back to waking up two or three times a night. Teething maybe? Morning comes way too quickly and I still need to wake up to help the girls get dressed and get their hair done in time for school. We always seem to manage to get to school before the bell rings, but I tell you, I have no idea how it happens!
My husband feels guilty waking me up, so I told him to start sending in our three year old to be my alarm clock. And wow, does it ever work! She came in this morning at 7:30am with her cheery voice saying, “Wake up Mommy! Open your eyes Mommy! It’s snowing Mommy! Get out of bed and come look Mommy!” And really, how can you argue with a three year old!? She got me out of bed in less than 30 seconds. I was painfully groggy and my eyes were barely open, but I was up. All I can say is thank goodness for coffee!
So yes, it’s official! We have snow on the ground! At least 3 or 4 inches of it! My girls have been through the roof excited. And it’s that wonderful wet snow that’s perfect for making snowmen too!
I’ve wanted to make these snowflake window clings for ages now, but it didn’t seem right without snow on the ground. So this weekend was the perfect time! And I’m so glad we made them, because they’re adorable and they’re going to be so festive for Christmas!
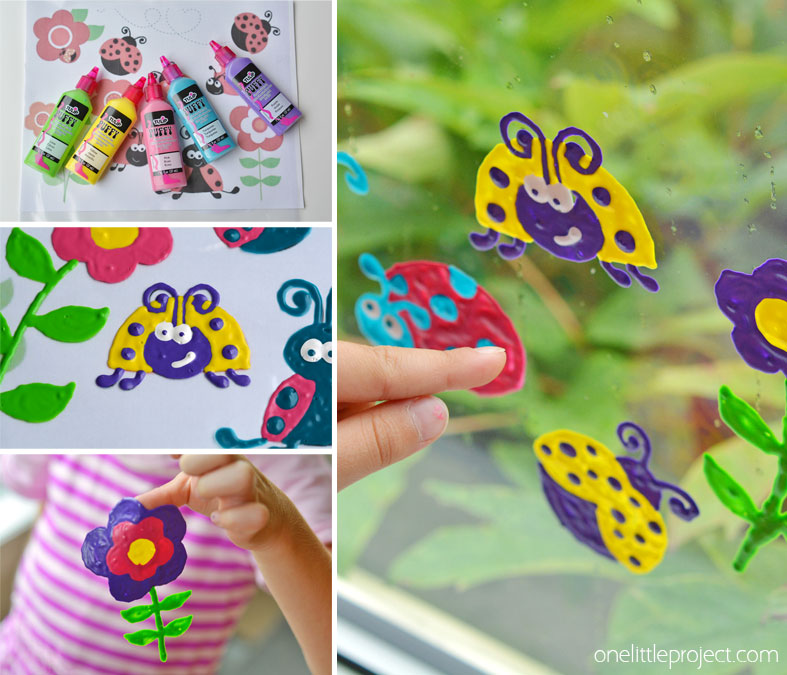
I love making window clings! I made ladybug window clings in the summer, and they turned out beautifully. So we stepped it up a notch this time by adding glitter and they’re even more awesome!
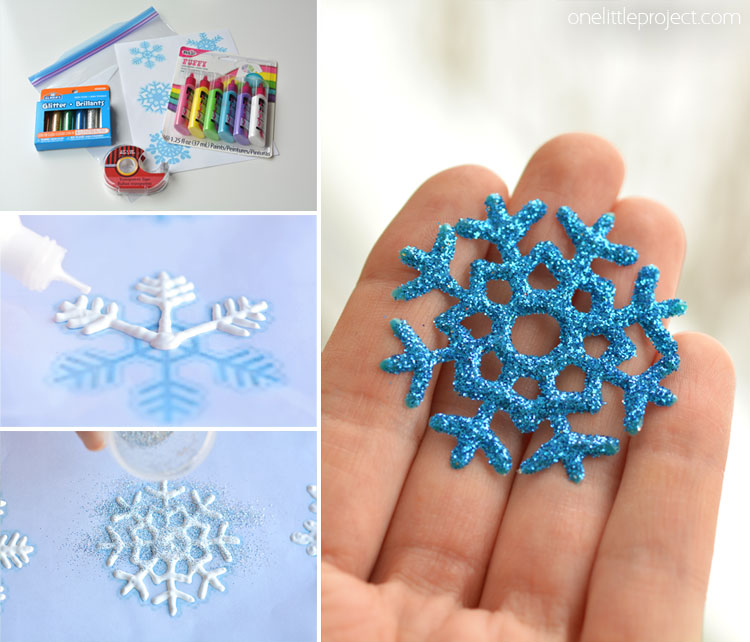
How to Make Snowflake Window Clings
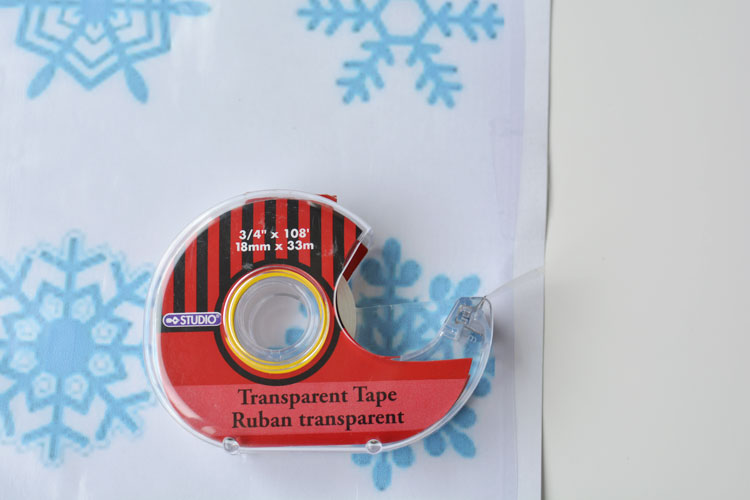
Here’s what you’ll need to make them:
- Tulip brand puffy paint
- Glitter
- Tape
- A large freezer bag
- A snowflake template (Here’s a pdf of my snowflake template that you can print out on regular sized paper. It’s kind of fuzzy, but it works to give you the snowflake shapes.)
Cut off the zipper part of the freezer bag – it will just get in the way. Slide your template into the freezer bag.
The bag is just slightly shorter than the paper (or at least ours was). Make sure the paper is all the way to the end of the bag, and add a piece of tape to both the front and back to keep it from slipping and sliding around in the freezer bag.
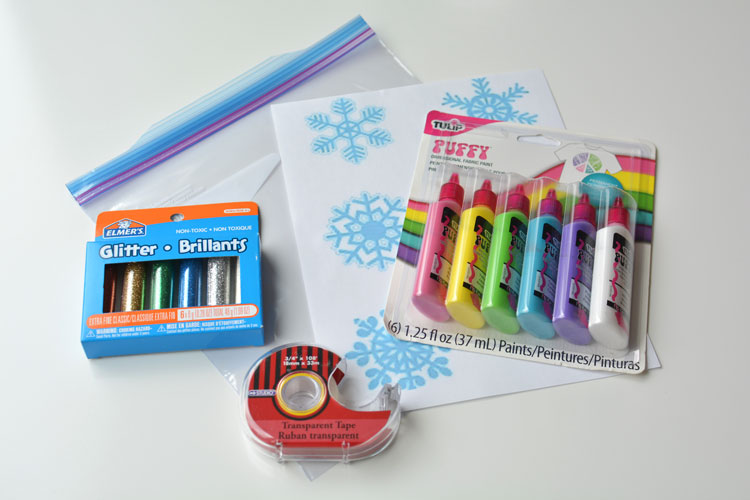
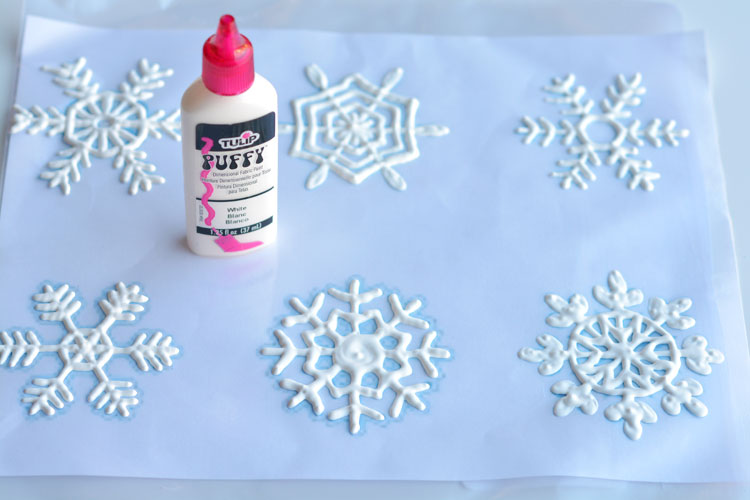
Use the puffy paint to trace over the snowflake shape on the template. Don’t be stingy with the puffy paint or you’ll never get them to peel off.

Trace out all your shapes and you’ll end up with something like this:
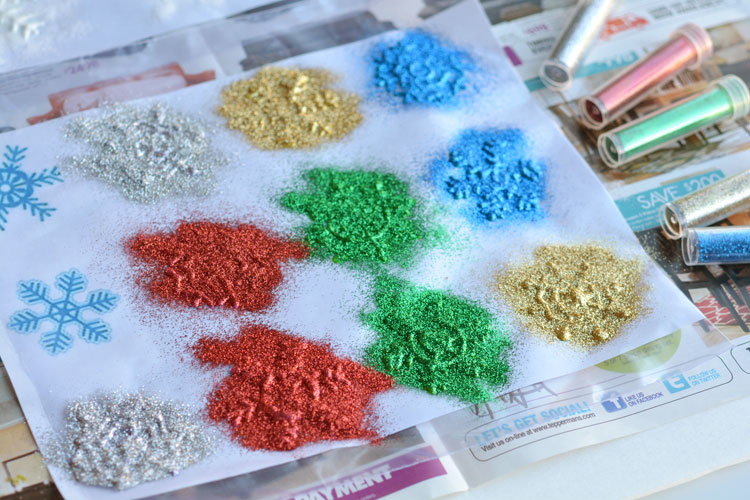
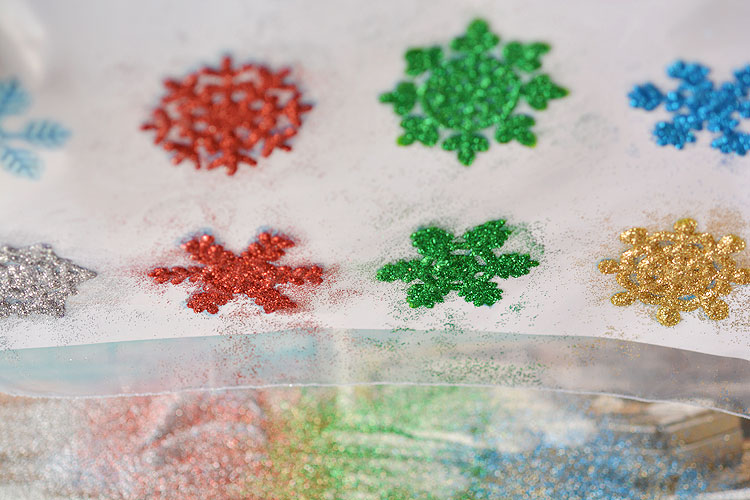
Now the fun part – GLITTER! This is the first time I’ve attempted anything with glitter since my kids were born. The idea of getting glitter everywhere kind of terrified me, but the clean up really wasn’t bad at all.

I scaled down the snowflakes and made some smaller ones too. And for the smaller ones, I used the other colours of puffy paint.
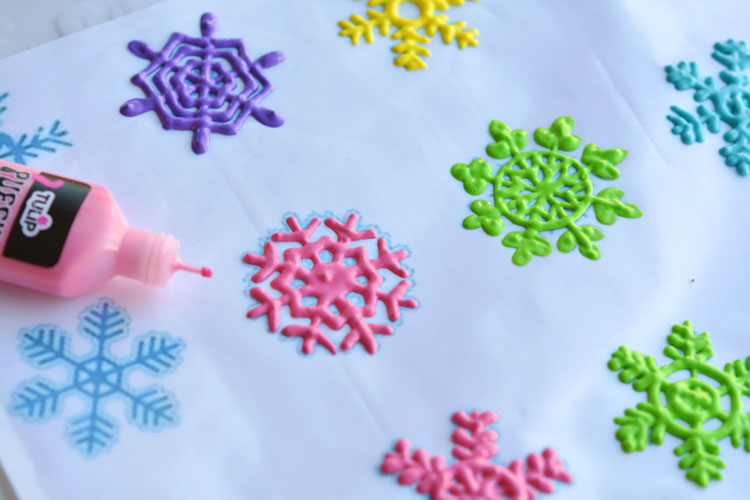
Not that it really mattered what colour they were, because once I put the glitter on, the puffy paint colour was completely hidden.
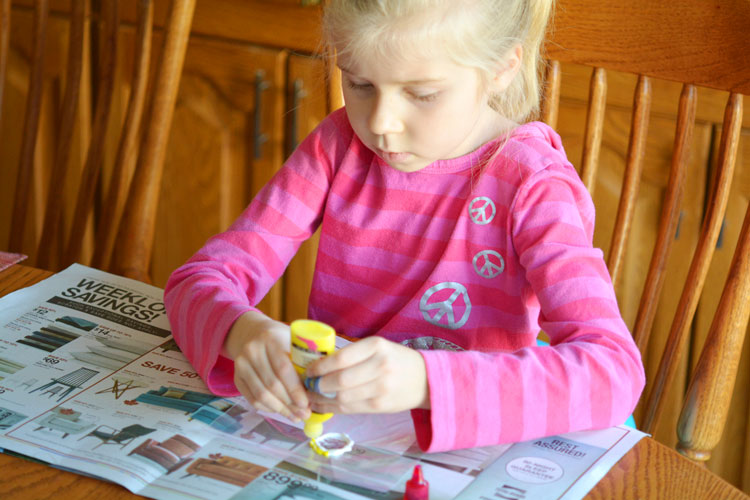
My kids LOVE making window clings! My five year old decided she wanted to go rogue, so I gave her a small zip lock bag to paint on, and she drew herself a glittery Rapunzel window cling.
Now here’s the kicker, and this part totally sucks – You have to wait at least 48 hours for the puffy paint to dry. You might be able to get away with waiting 24 hours, but I prefer to be on the cautious side.
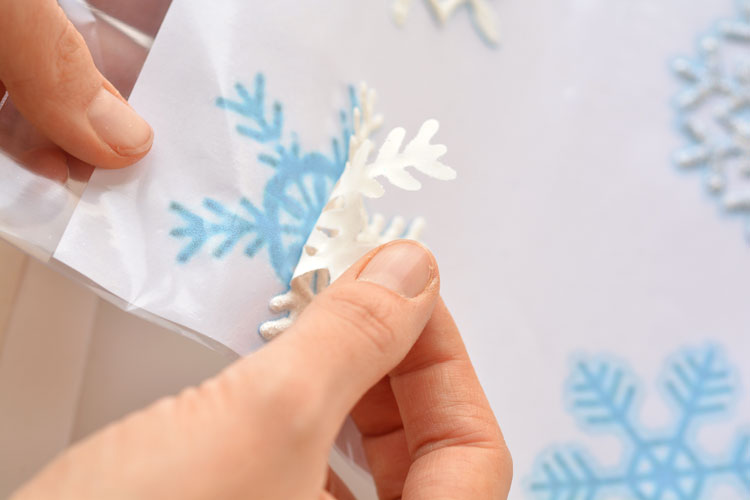
Once they were dry, I gently shook off the excess glitter onto some newspaper. And then I took the sheets outside to dust them off. It was a bit windy, so I’m pretty sure the sweater I was wearing is going to have glitter permanently embedded in it.
The snowflakes were a little more difficult to peel off than the ladybug window clings, just because they have so many fine edges. If you have trouble, just take them out into the cold weather, or put them in the fridge for a few minutes, and they peel right off.
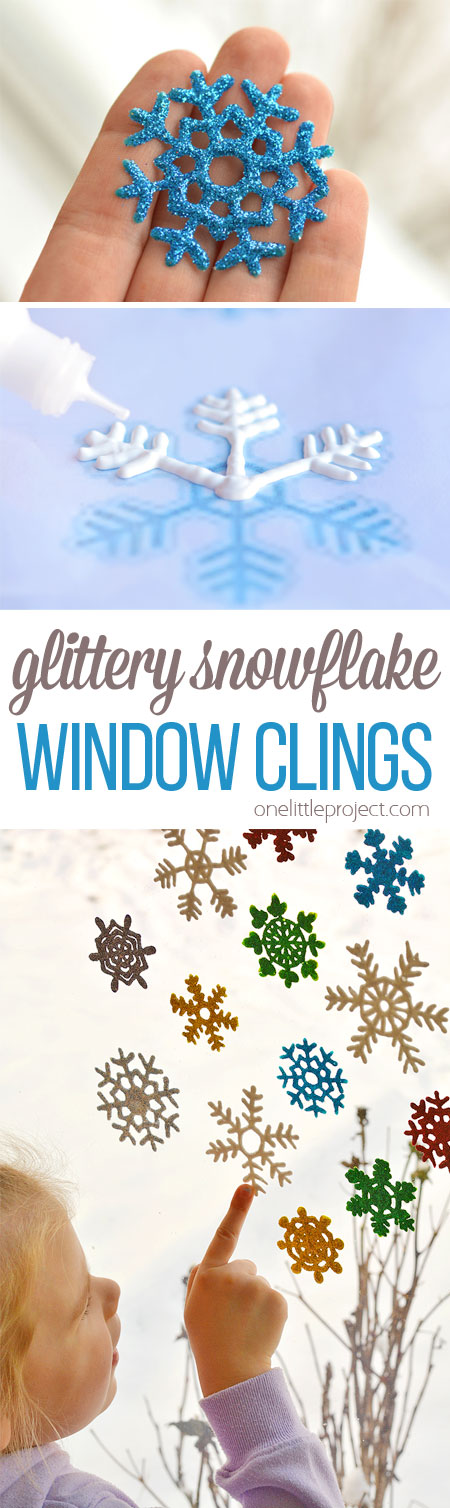
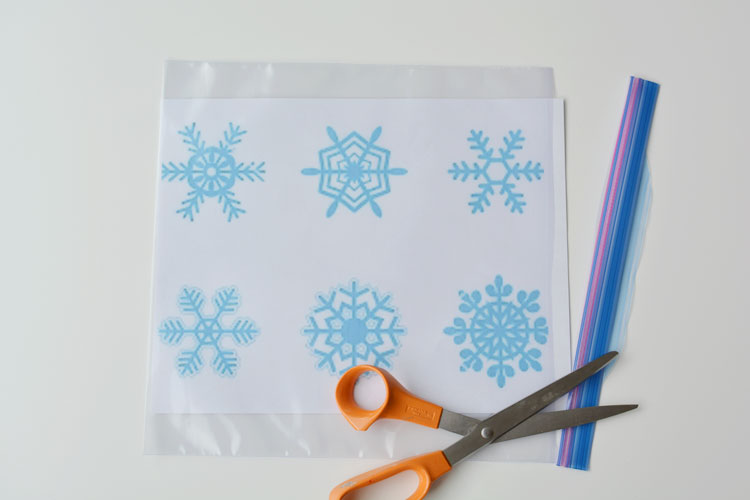
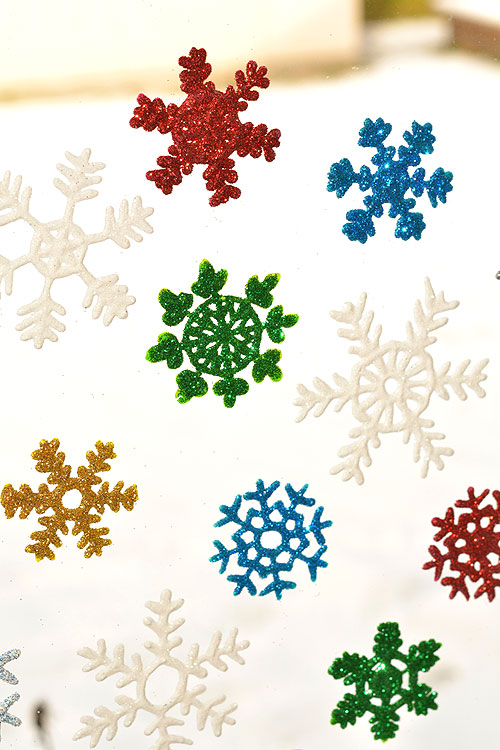
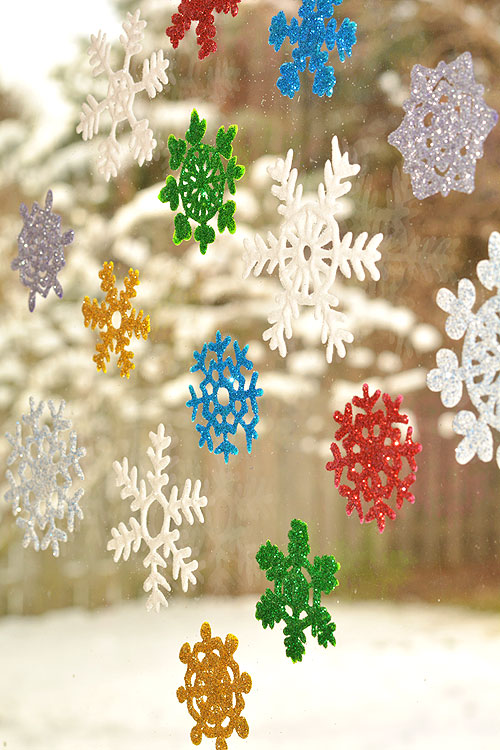
Aren’t they pretty!?!
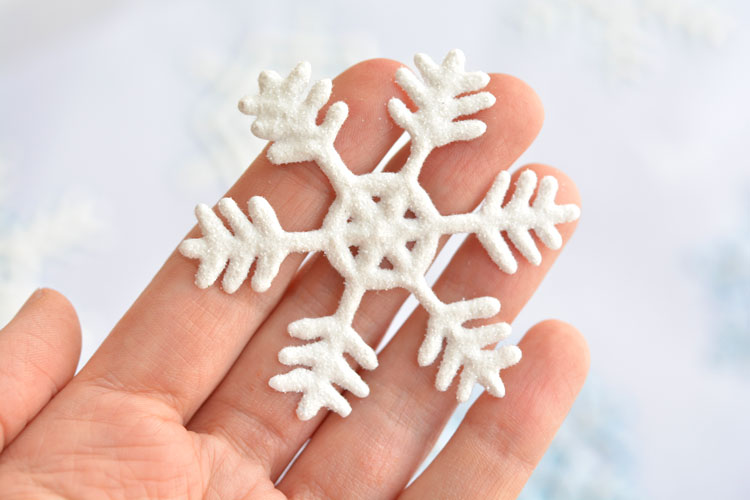
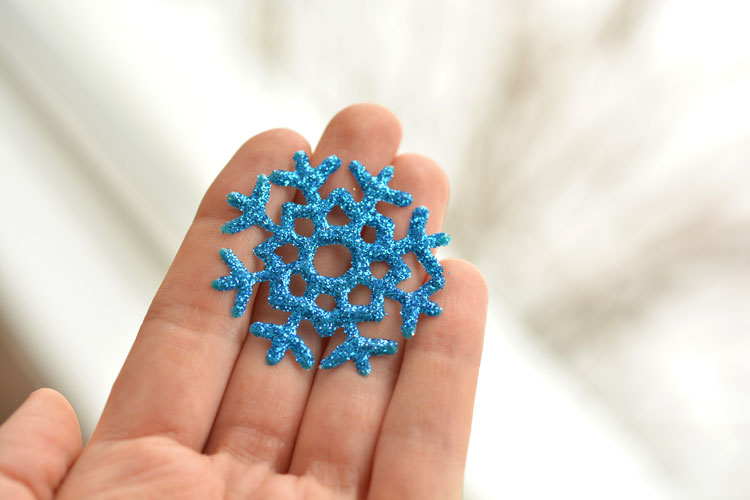
The glitter was amazing! They look beautiful!
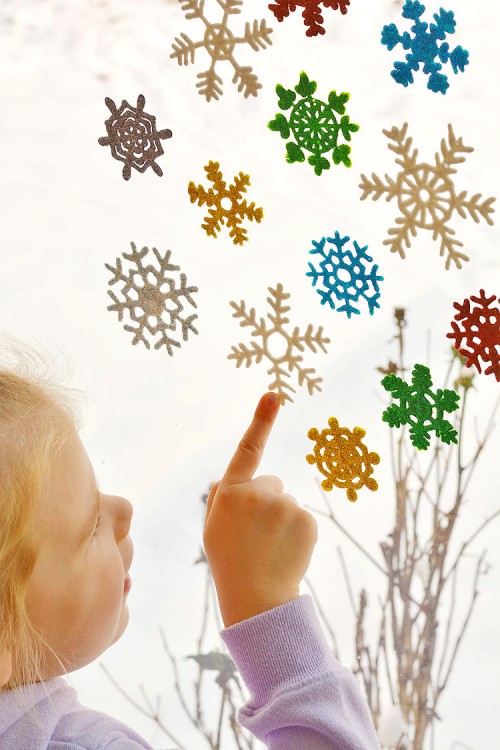
It’s kind of hard to photograph glitter, but hopefully you can see it?
My girls played with the ladybug window clings for months. They have held up really really well.
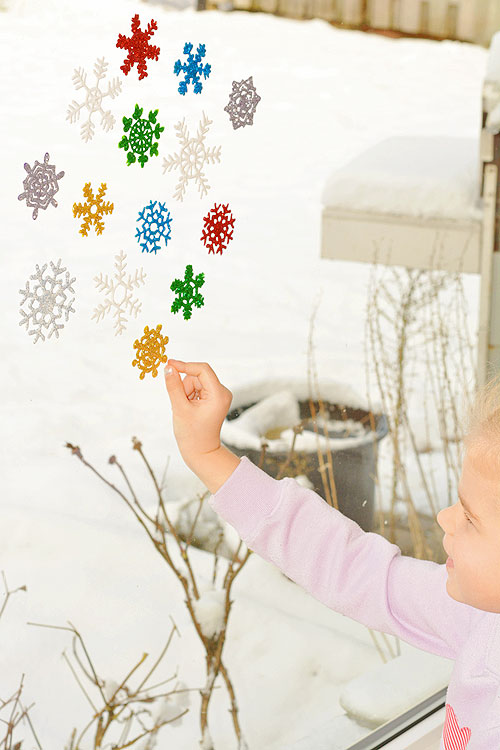
These snowflakes are a bit more intricate, so I don’t think my kids will be able to move them around as easily without ripping them. But that’s okay – they’ll just be festive and sparkly decorations for however long we decide to keep them up. Perfect for Christmas!
I’ve read that the Tulip brand puffy paint makes the best window clings, so that’s the only type I’ve ever tried using. I found both the puffy paint and the glitter at Walmart in the craft section.
These snowflake window clings are so easy to make and they end up looking so pretty! They’re a great Christmas decoration that can be left up all winter! If you or your kids love crafts, then you have to try making these! This is definitely one of my very favourite crafts!
You can also check out our ladybug window clings here:


Leave a Reply