Hi everyone! It’s Megan from Homemade Ginger again and I’m sharing another incredibly easy yet adorable craft today. This one is great for the kiddos to do with very little help from anyone!
Like most people, I have a million photos on my phone and computer, but ironically not many around my house. It always seems like the biggest chore to actually get my photos printed. I’ve been trying to be better about having actual real photos in my home and I’m always trying to come up with easy ways to display them and switch them out. I made some copper wire photo holders that I love but I wanted to come up with a version that kids could create themselves.
These come together so quickly and are relatively inexpensive to make. You can find a bag of smooth river rocks at the craft store and some copper wire at the hardware store, or pretty much anywhere! Paint the rocks solid colors or mix it up with patterns. You could even just keep them unpainted for a more rustic feel. These little photo holders would be such a cute gift for dad or Grandpa for Father’s day. Wouldn’t they look adorable sitting on an office desk?
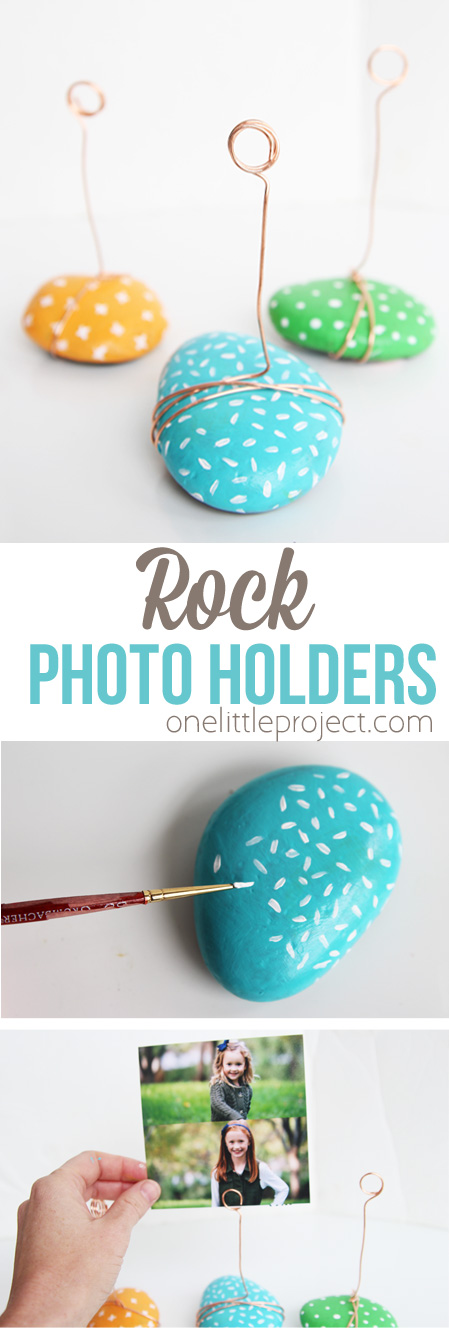
I was inspired by these photo holders but decided to mix it up a bit by making bright painted versions! They can be customized for any decor. I think they would also look really classy if you just painted them white or gray!
Rock Photo Holders
The full instructions are at the bottom of this post, but here’s what you will need:
- Smooth Rocks
- Copper Wire
- Needle Nose Pliers
- Acrylic Paint
- Mod Podge
Stick photos in between the wire loops to hold them upright! Such a cute DIY idea!

It’s hard to believe how easy these are!
Rock Photo Holders
Materials:
- Smooth rocks
- Copper Wire
- Acrylic Paint
- Mod Podge
Equipment:
Instructions:
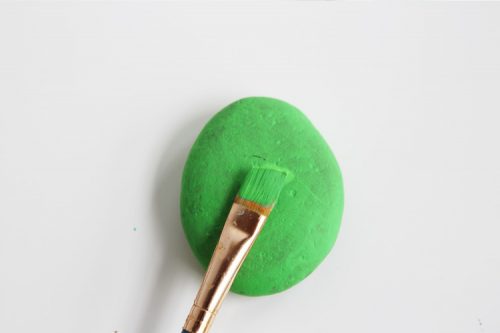
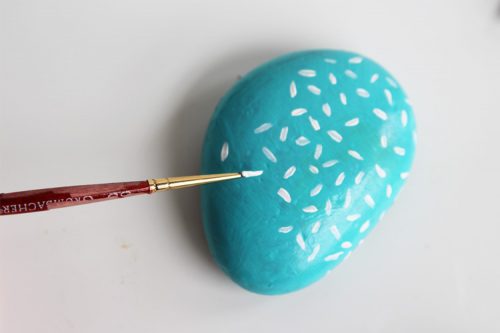
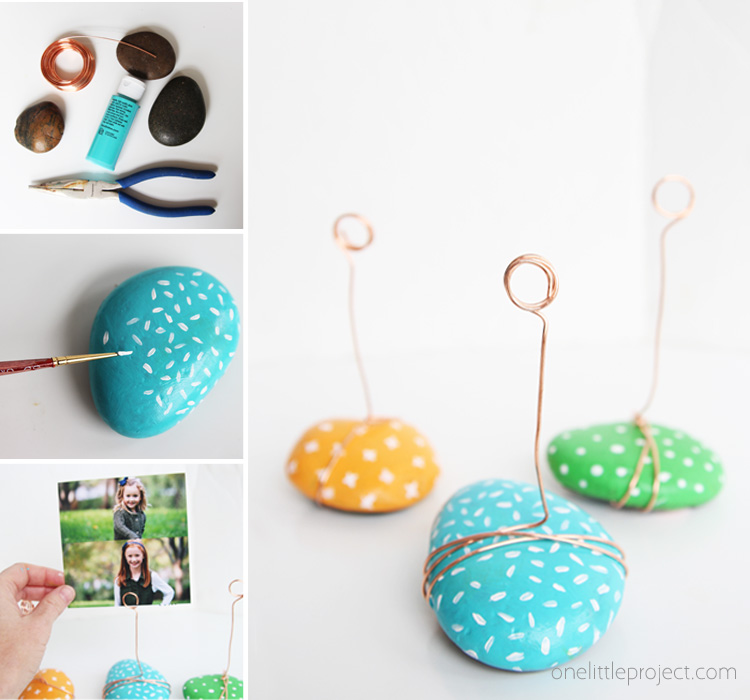
- Paint a rock a solid color, adding multiple coats if necessary to make it opaque.

- Once dry, take a small brush, and add in some patterns (polka dots, lines etc.)
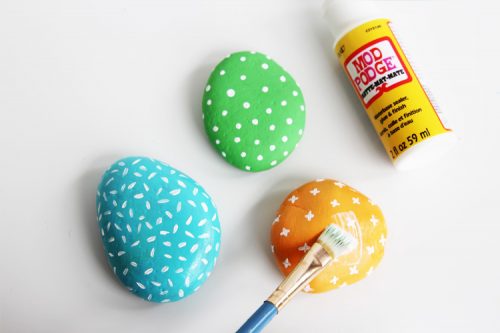
- When the patterns have dried, add a layer of Mod Podge to preserve the colour of the paint.
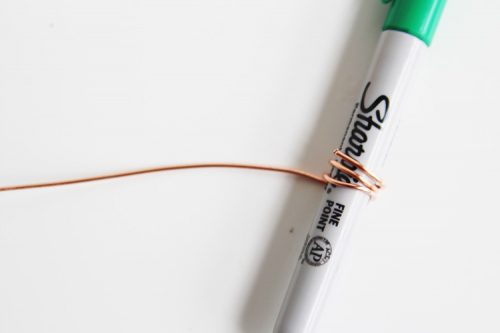
- Wrap a wire around a pen or marker a few times to make some loops. This is where the photo will be held.
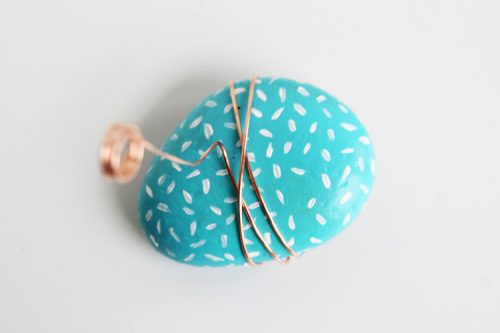
- Straighten out the rest of the wire underneath the loops. Wrap the rest of the wire around the stone.
- Stick a photo in between the loops to hold it upright.
- Your rock photo frame is complete!


Make a few or a bunch of these rock photo holders to give away. Your kids will love helping with this project!


Leave a Reply