
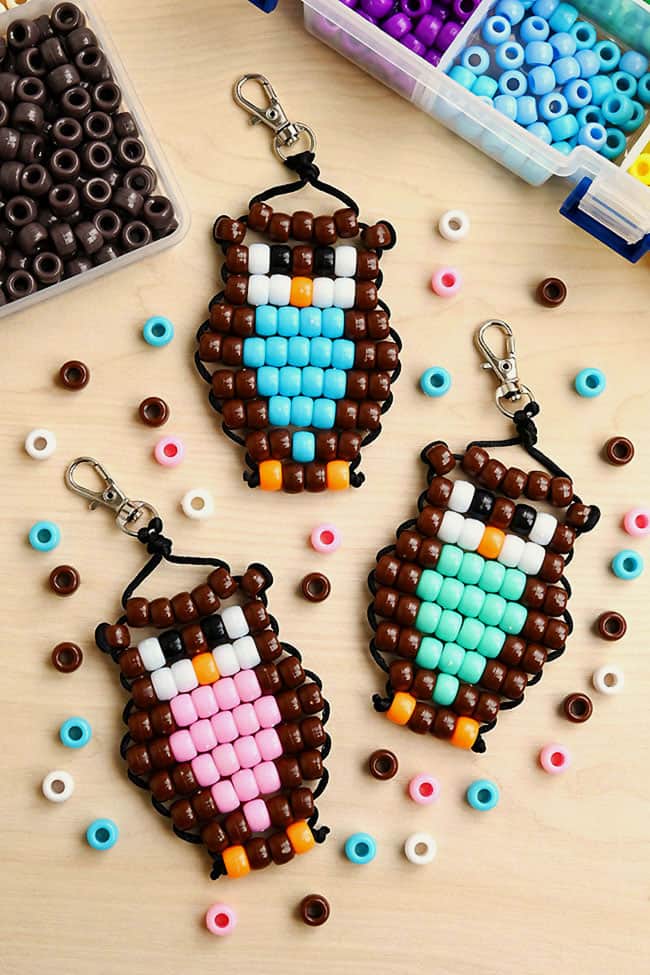
This pony bead owl pattern turns a handful of colourful beads into the cutest little wide-eyed owl! With its chunky shape, tiny orange feet, and big expressive eyes, it’s a fun bead project that feels full of personality — especially when you start experimenting with different colours for the belly.
Clip your finished owl onto a backpack, pencil case, zipper, or set of keys, or make a whole little flock in different colour combinations. The simple rows of pony beads make this a satisfying project for kids and adults, and once you’ve made one, it’s hard not to start planning the next owl colour right away.
This post contains affiliate links. If you use these links to buy something, we may earn a small commission at no extra cost to you. This helps support our website and allows us to keep creating fun, free content.
How to Make a Pony Bead Owl
Equipment:
See the craft in action:
Instructions:
Step 1: Find what you need
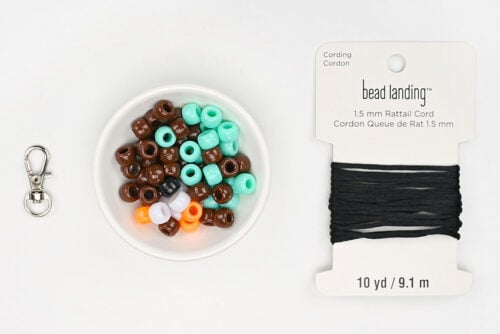
- Gather your supplies and materials.

Step 2: Organize your cord and beads
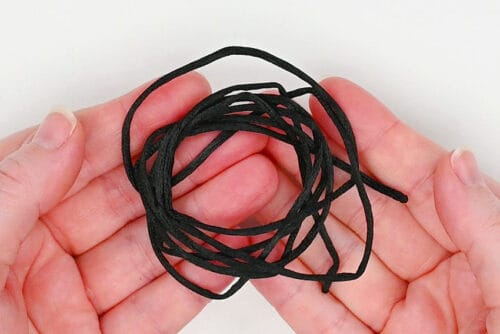
- Cut a 4 foot (48 inch) piece of rattail cord.
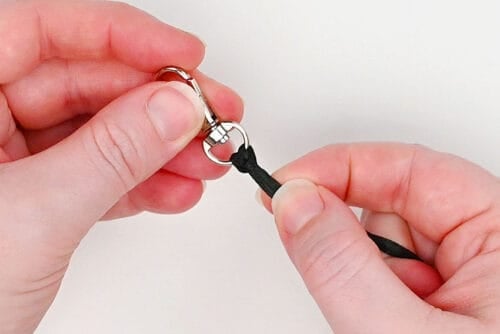
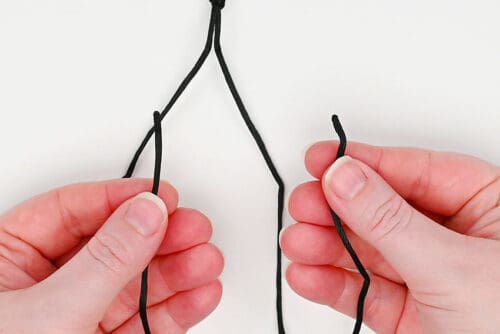
- Fold the cord in half and attach it to the keychain hardware using a lark’s head knot. To do this slid the loop through the keychain, open the loop and bring it back around the keychain. Pull tight.
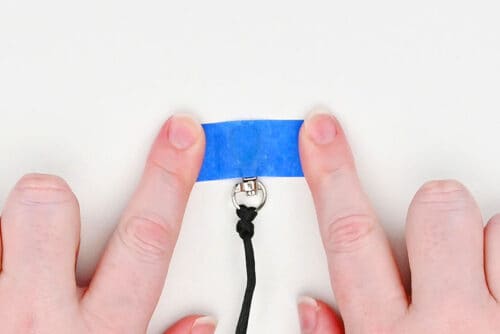
- 3 – Make another regular knot below the lark’s head knot.Then tape the keychain to your working surface. This will make it easier to add the beads.
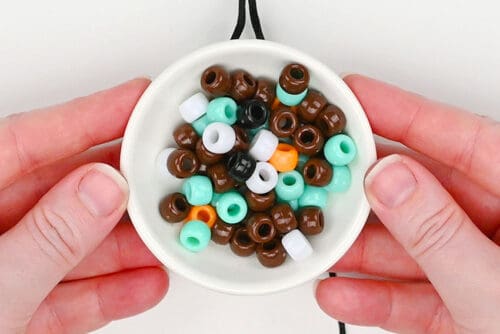
- Gather pony beads in brown, black, orange, and whatever colour you’d like for the chest of the owl. We’re using mint green here.
Step 3: Add the first beads
- To make this pony bead owl we’re going to be working with the ends of the cords, attaching the beads to both strands.
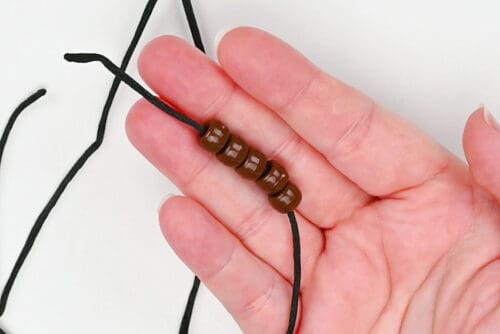
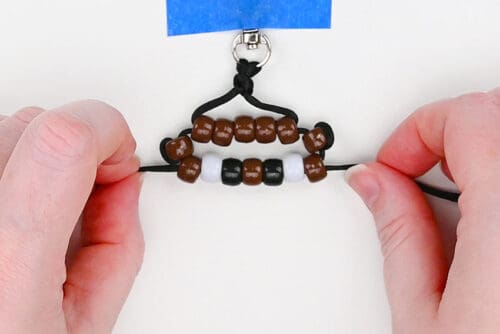
- To form Row 1 add 5 brown beads to one of the cords.Right or left, it doesn’t matter, since it’s the same pattern in either direction.
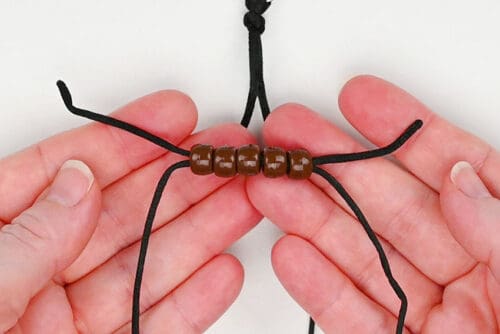
- Now take the end of the other cord and push it through the opposite side of the beads until the first row is attached to both cord ends.
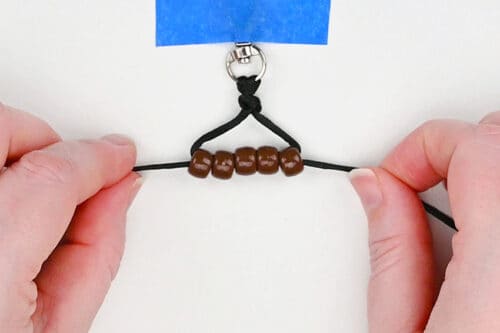
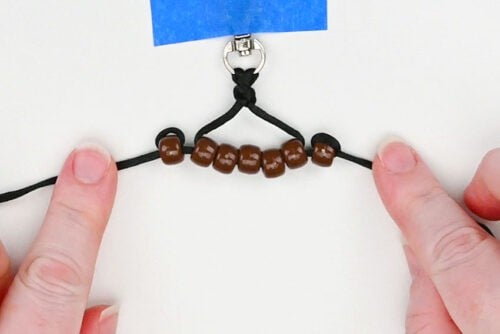
- Pull the cord ends down and out until the beads are centered under the knots.

Step 4: Form the “ears”
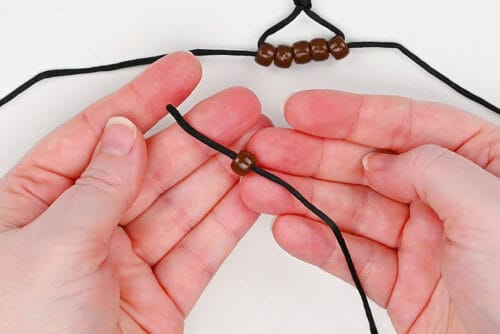
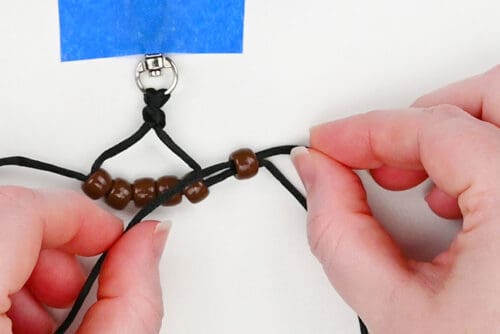
- To make one of the owl’s “ears” add 1 brown bead to the right cord. Let it fall next to the first beads.
- Take the same cord end and put it through the bead going in the opposite direction. Hold the bead in place next to the first beads as you pull the cord through.
- Repeat on the left cord.
Step 5: Make the rest of the owl
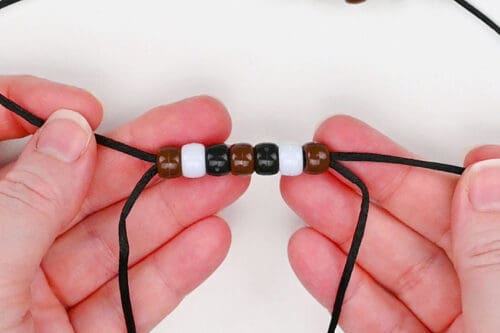
- For Row 2 add beads in this order: 1 brown, 1 white, 1 black, 1 brown, 1 black, 1 white, 1 brown. Connect the other cord just like you did for the first beads.
- Pull the cord ends so this row of beads sits below the first.
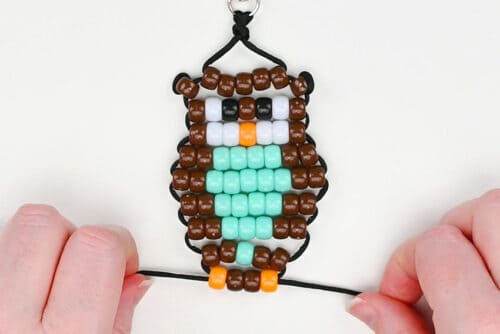
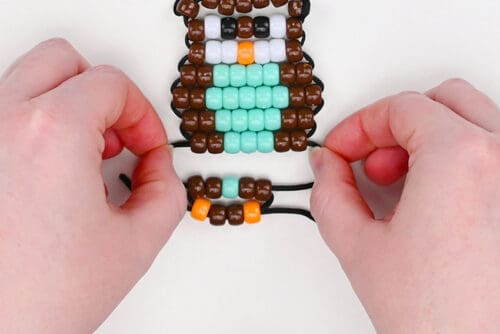
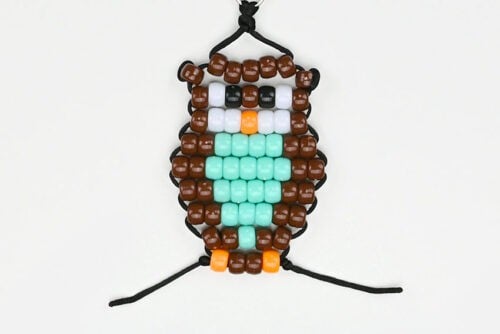
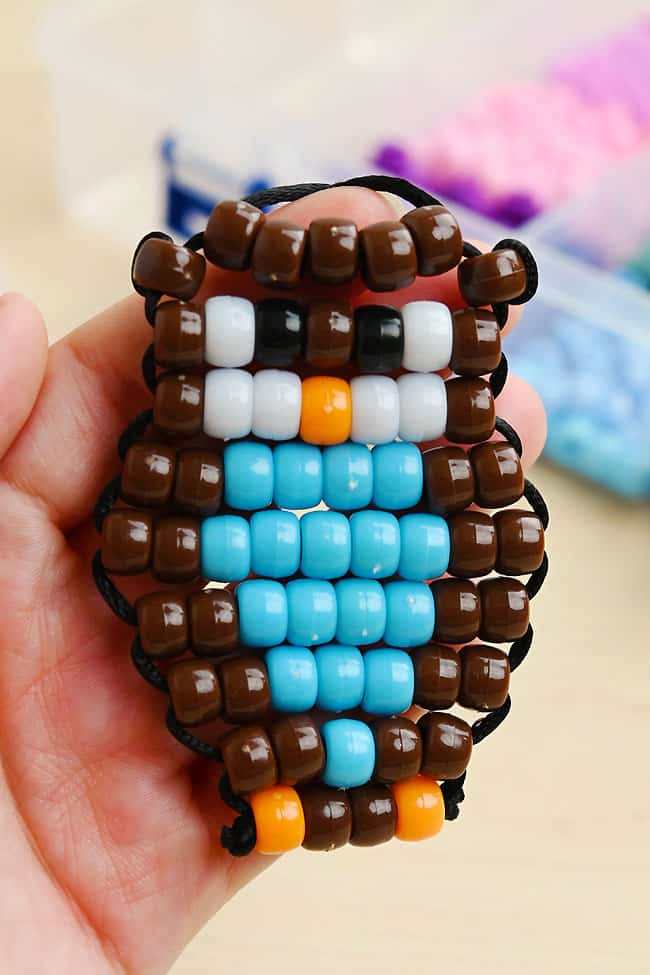
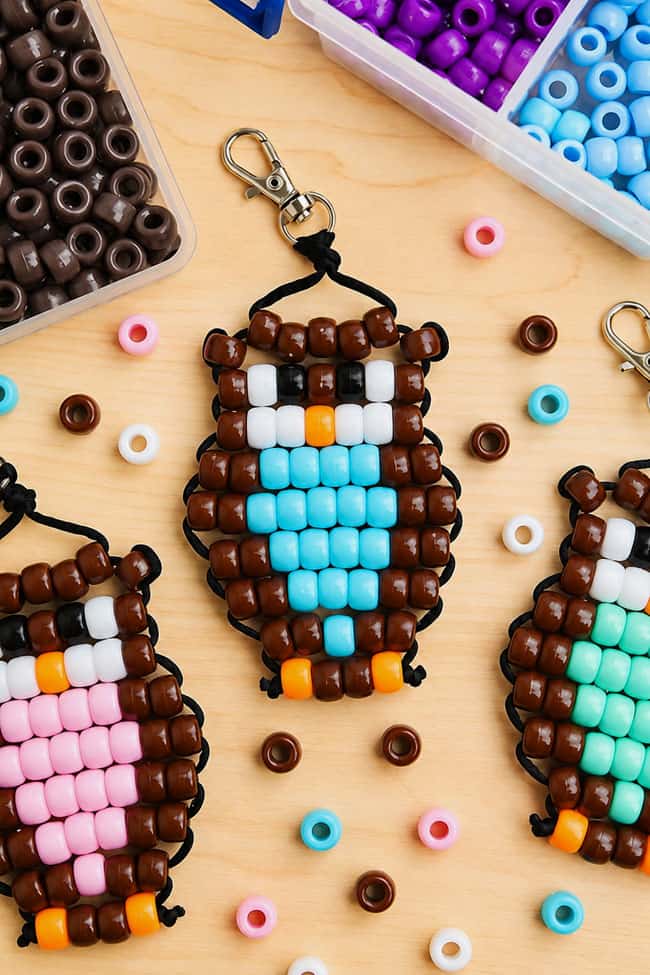
- Form the rest of the owl in the same way, following this pattern:Row 3: 1 brown, 2 white, 1 orange, 2 white, 1 brownRow 4: 2 brown, 4 mint green, 2 brownRow 5: 2 brown, 5 mint green, 2 brownRow 6: 2 brown, 4 mint green, 2 brownRow 7: 2 brown, 3 mint green, 2 brownRow 8: 2 brown, 1 mint green, 2 brownRow 9: 1 orange, 2 brown, 1 orange
Step 6: Finish off the keychain
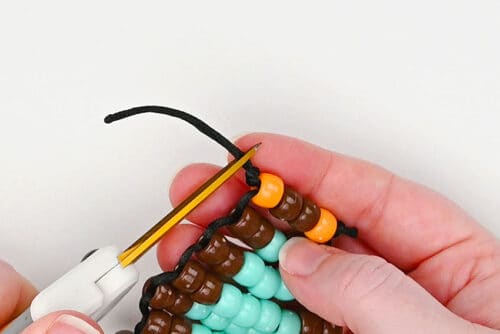
- After you’ve add all the beads it often helps to readjust the rows, starting at the top. Pull on the side loops, going down row by row.
- Once you’re finished with adjusting the cords tie a knot in each cord as close to the last bead as possible.
- Cut off the excess cord close to the knots.Optional: Hold a lit BBQ lighter next to the cut cord ends for a second or two. This will melt the cord, stopping it from fraying.
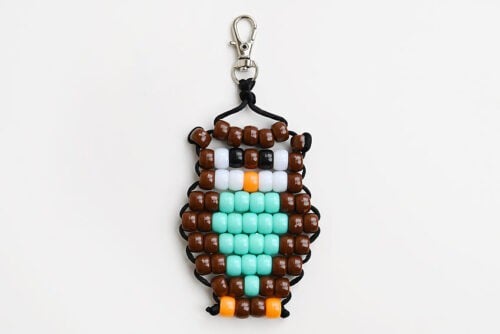
- Your pony bead owl is complete!
Helpful Tips:
- Only melt synthetic cord ends: If you’re using a synthetic cord like rattail, you can carefully melt the cut ends to help prevent fraying. Don’t do this with natural fibres like cotton or hemp, since they’ll burn rather than melt.
- Have fun with the chest colour: Choose a bright or pastel colour for the owl’s chest feathers like we did, or use tan, beige, or another earthy shade for a more realistic-looking owl.
What’s the pattern for this pony bead owl?
If you already know how to make a basic pony bead keychain, you can follow the pattern below. Read our tutorial above, or see the next question for more details on making the owl’s little “ears” in Rows 1a and 1b.
We used “b” to represent brown, “w” for white, “e” for the black eyes, “o” for orange, and “c” for the chest colour.
- Row 1: 5b
- Row 1a: 1b
- Row 1b: 1b
- Row 2: 1b, 1w, 1e, 1b, 1e, 1w, 1b
- Row 3: 1b, 2w, 1o, 2w, 1b
- Row 4: 2b, 4c, 2b
- Row 5: 2b, 5c, 2b
- Row 6: 2b, 4c, 2b
- Row 7: 2b, 3c, 2b
- Row 8: 2b, 1c, 2b
- Row 9: 1o, 2b, 1o
How are the “ears” made on the pony bead owl?
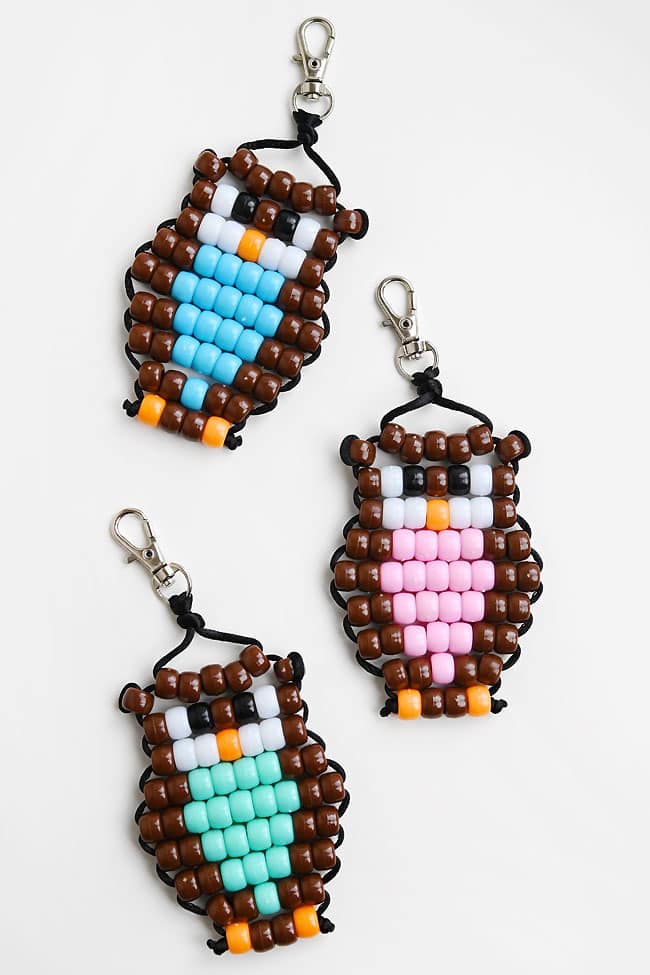
Start by making Row 1 with 5 brown pony beads to form the top of the owl’s head. The 2 ear beads are then added separately, one on each side.
To add an ear, slide 1 brown bead onto one cord. Bring that same cord back through the bead in the opposite direction, creating a small loop that holds the bead beside the first row. Pull the cord snug so the bead sits next to the owl’s head and sticks out slightly. Repeat on the other side with the second cord, then continue with Row 2.
How many pony beads do I need to make this owl craft?
You’ll need 62 pony beads total for one owl:
- 34 brown beads
- 6 white beads
- 2 black beads
- 3 orange beads
- 17 beads for the chest (We used light blue, light pink, and mint green for our owls, but you can use any colour you like.)
What can I do with a pony bead owl?
These little owls make cute accessories, decorations, and even a fun classroom activity. Make one for a woodland animal or bird unit at school, clip it onto a backpack or set of keys, or hang it from a pencil case or locker.
You can also leave off the keychain hardware and use the cord loop at the top to hang your owl as an ornament or window decoration.
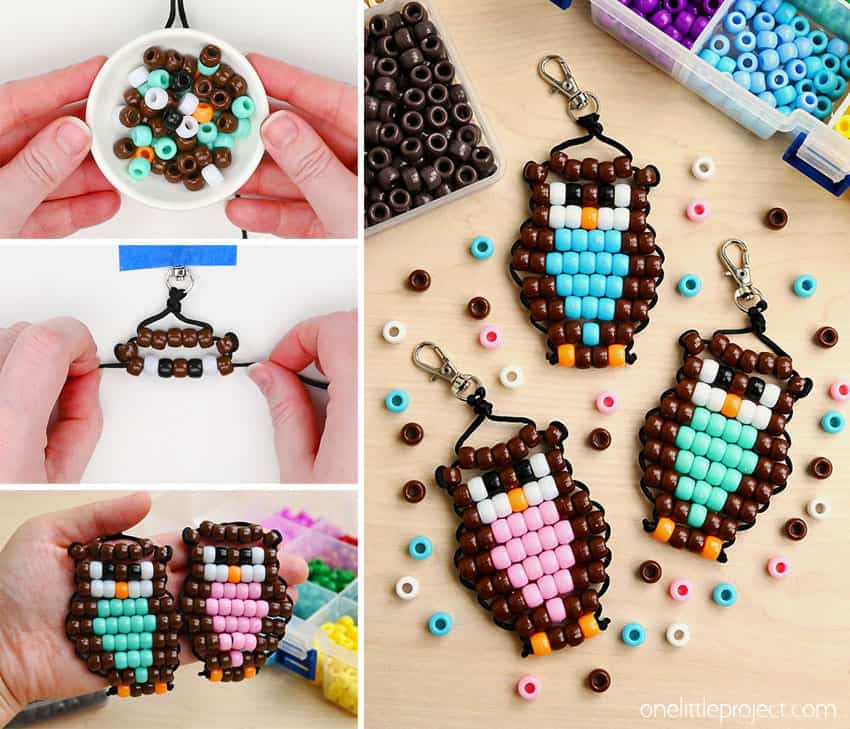
These pony bead owls are a fun little project, whether you stick with natural owl colours or give each one a bright, colourful chest. Once the pattern clicks, they’re quick to repeat, so it’s easy to make a whole parliament of owls for keychains, backpacks, ornaments, or small handmade gifts.
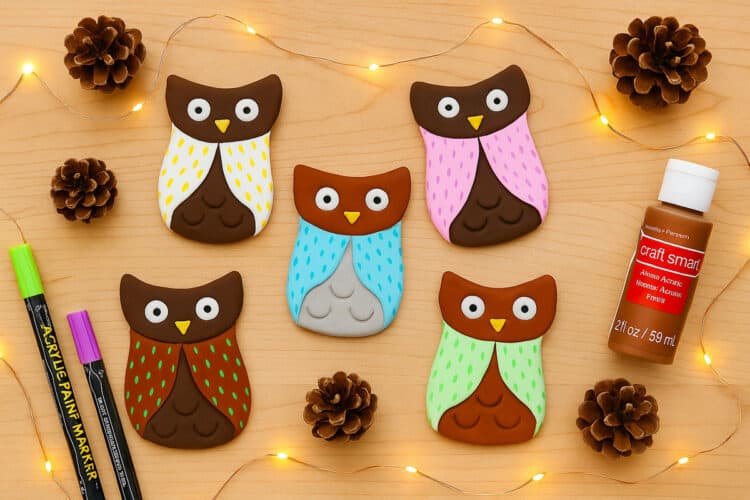
Here’s even more owl craft ideas:


Now available
Low-Mess Crafts for Kids Book
72 cute and fun crafts that kids and parents alike can enjoy. All with as little mess as possible!
Where to buy:
You can purchase Low-Mess Crafts for Kids from Amazon, or wherever books are sold:
Amazon | Barnes and Noble | Books-A-Million | Indiebound | Amazon Canada


Leave a Reply