
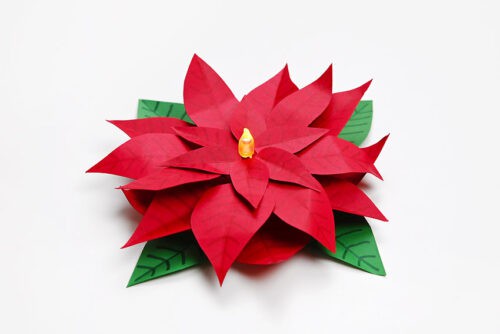
Bring a little holiday magic to your home with this paper poinsettia tea light craft! With just a few layers of red and green paper and a simple LED candle, you can create a glowing poinsettia that looks absolutely stunning on a mantel, dinner table, or windowsill.
This Christmas craft is perfect for tweens, teens, adults, and seniors who love handmade holiday decor. The printable template makes it super easy to assemble, and the finished flower shines beautifully with the soft glow of the candle in the center. It’s a relaxing, creative project that adds a touch of festive charm to any space!

This post contains affiliate links. If you use these links to buy something, we may earn a small commission at no extra cost to you. This helps support our website and allows us to keep creating fun, free content.
How to Make a Paper Poinsettia Tea Light
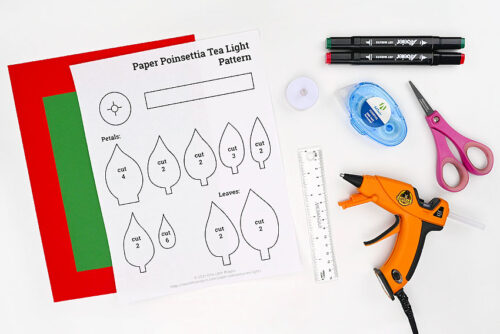
Materials:
- FREE Printable Paper Poinsettia Template
- Red cardstock
- Green cardstock
- Alcohol markers (red and green; or Sharpies)
- Battery operated tealight candle
Instructions:
Step 1: Find what you need
- Gather your supplies and materials.

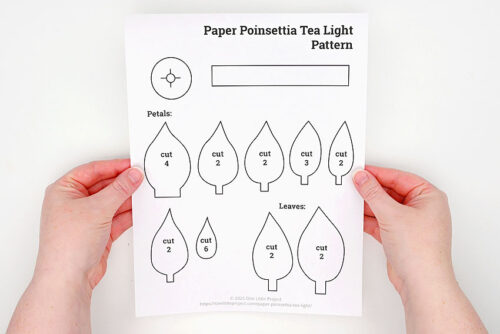
Step 2: Cut out and prepare the template pieces
- Print our paper poinsettia tea light template and cut out the pieces.
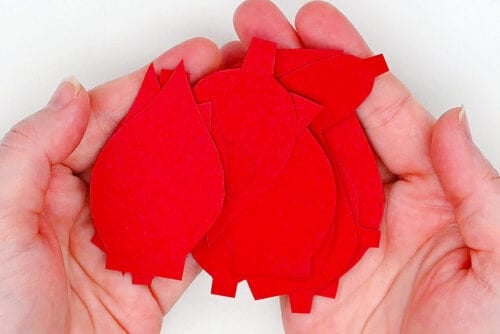
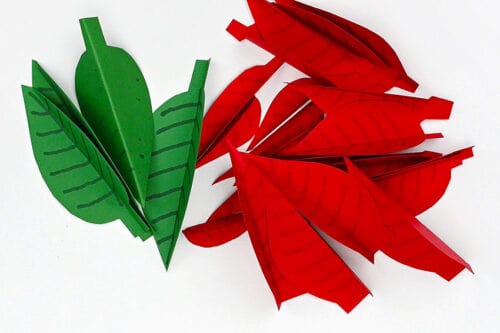
- Trace the petal templates onto red cardstock and cut them out. Follow the pattern’s instructions for how many of each to cut.
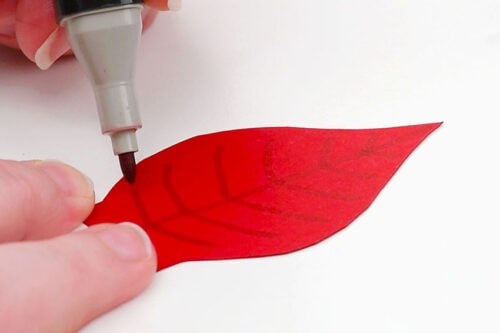
- Use a red marker to add veins to a petal. Repeat for the rest of the petals.

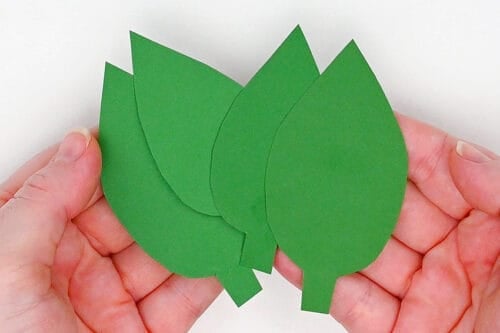
- Trace 4 leaves onto green cardstock and cut them out.
- Add the same vein details to the leaves, using green marker.
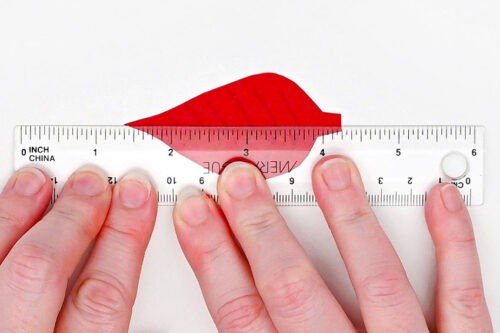
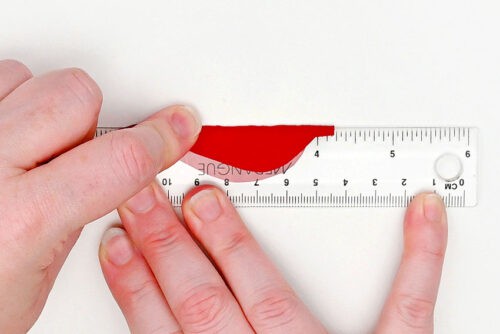
- Set a ruler on top of a petal, lining it up with the point and the center vein.
- Fold the petal along the ruler, creating a bend in the center.
- Repeat with the rest of the petals and leaves.
- Then use the template to cut out the band and circle for the tea light. Make sure you cut 4 slits around the center of the circle.


Step 3: Add the first details to the tea light
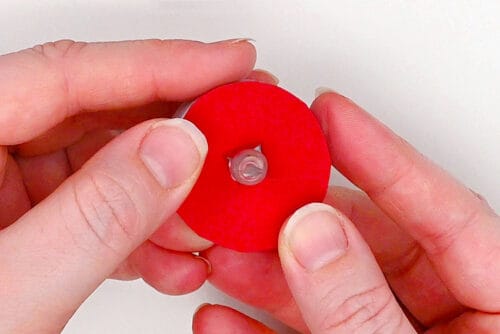
- Add glue tape to the top of an LED tea light candle.(This is optional, if you don’t have glue tape, but it does help keep the paper in place.)
- Press the cardstock circle down over the “flame” to cover the top of the tea light.
- Use hot glue to attach the rectangle around the side of the tea light.(You can also use a bit of glue tape to stick the middle part down, but hot glue is recommended to keep the ends secure.)
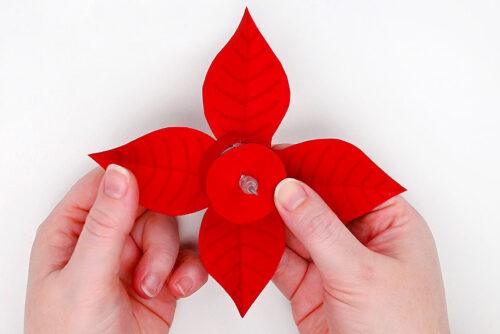
- Add hot glue to one of the largest petals (the ones with the flat bottom).
- Attach this first petal to the bottom of the candle, on the edge so it doesn’t cover the switch.
- Add the 3 other large petals around the bottom of the tea light.
- Then roll/bend the petals so they point up a bit.


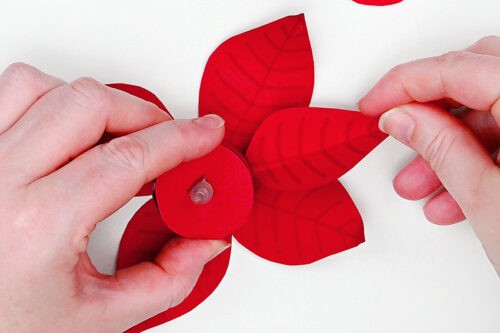
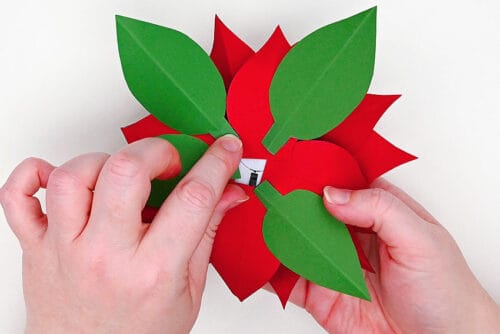
Step 4: Glue on petals and leaves
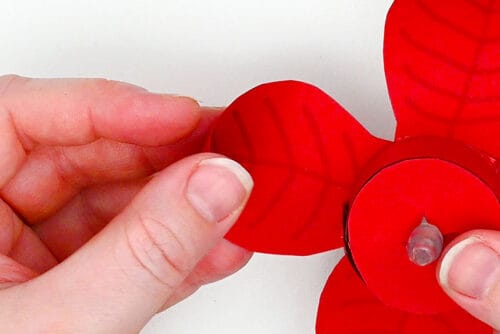
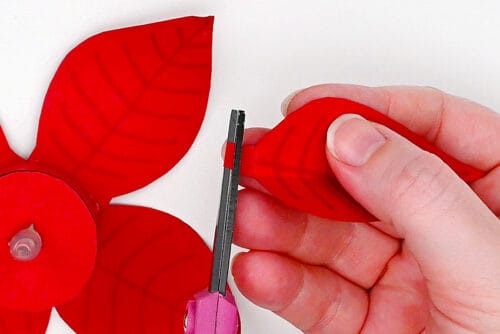
- Now pick up one of the medium sized petals. For these next petals, you may want to cut the ‘stem’ part a bit shorter, so they don’t sit too high above the first row of petals.
- Bend the end of the petal down and add a dot of hot glue to the stem.
- Set the petal in place so it sits between 2 of the first petals. Press the little ‘stem’ against the side of the candle.
- Add 3 more medium petals between the last ones.
- Glue more petals between these ones. Then curl the petals up or down to make them more life-like.
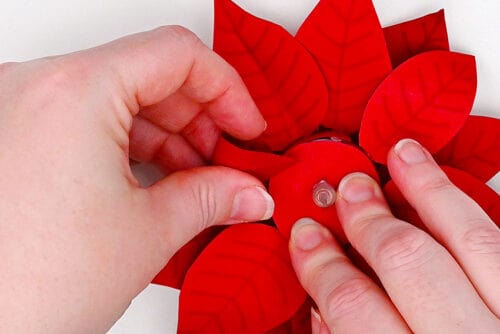
- Add the thinnest petals with ‘stems’ at the end. You can place them wherever you see the biggest gaps.Then add glue to the back of one of the small petals (the ones without stems).
- Set the petal in place on top of the candle, so the rounded part is right up against the “flame”. Repeat, layering the rest of the petals so they fit evenly around the flower.
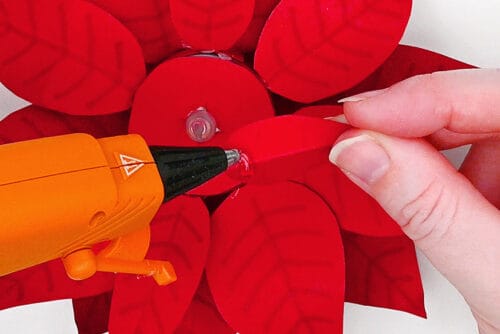
- Finally, glue the leaves to the bottom of the candle, placing them where there are the biggest gaps.Decide from the top where you’d like the leaf to go, but check on the bottom before gluing so that you don’t accidentally glue it to the candle switch.
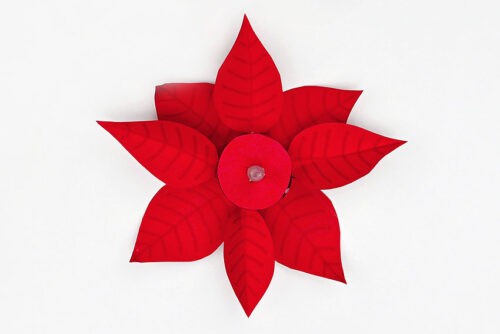
- Your paper poinsettia tea light is complete!


Helpful Tips:
- Test your tea light first: Before you start crafting, check that your LED candle has a working battery. The last thing you want is to finish your project and realize your tea light doesn’t turn on!
- Display it beautifully: Place your glowing paper poinsettias on a mantel, windowsill, or use them as a stunning centerpiece on your Christmas dinner table. They add such a warm, handmade touch to any holiday decor!
- Save time with a cutting machine: If you have a Cricut or similar machine, you can convert the printable PDF template into an SVG file. Let your machine cut out all the petals and leaves for you — it’s a huge time-saver!

Get our free printable paper poinsettia template:
The link below will take you to our free, printable poinsettia pattern! The PDF file will open in a new window. Then simply print the pattern on 8.5 x 11 (letter size) printer paper or cardstock.
>>> Paper Poinsettia Template <<<
Do I have to use the poinsettia template to make my tea light decoration?
Not at all! You can draw your own petals and leaves if you prefer. You’ll need about 4 to 6 small petals for the top layer, around 15 medium and large petals for the base layers, and 3 to 4 green leaves to complete your flower.

What type of paper works best for this craft?
We recommend using 65 lb cardstock for both the petals and leaves. It’s sturdy enough to hold its shape but still flexible enough to bend and curve nicely.
Thinner printer paper is a bit too fragile for making this decoration, while thicker cardstock won’t bend as easily and doesn’t look as natural.

How can I shape my paper poinsettia petals to make them look more natural?
Using a mix of different petal sizes and shapes definitely makes for a more realistic look, which is why our template has so many options. You can also try placing some petals “upside down” so they face in different directions.
Folding each petal in half helps to add extra dimension, and you can also roll the petal around your fingers (or a marker) to gently curl the edges. Don’t worry about making them perfectly uniform; a few petals angled differently give the flower a lifelike, natural appearance.

This paper poinsettia tea light craft is simple to make, but is such a beautiful way to bring the glow of the season into your home. With its layered petals and soft candlelight, it looks wonderfully elegant on display.
Whether you’re crafting one as a table centerpiece or making several to give as gifts, these glowing poinsettias are sure to add a cozy, handmade touch to your Christmas decor.
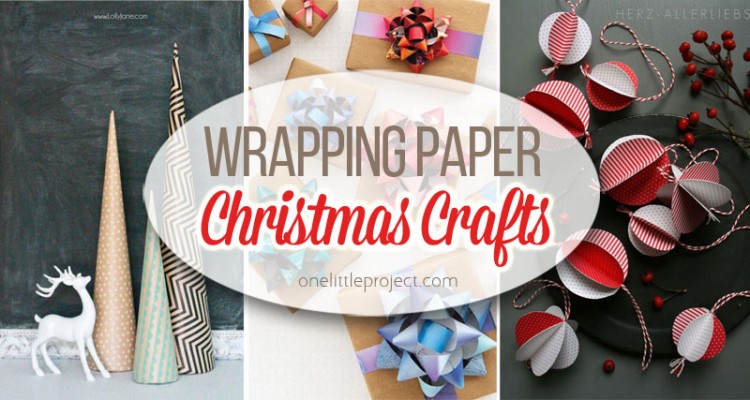
Here’s even more DIY Christmas decor ideas:
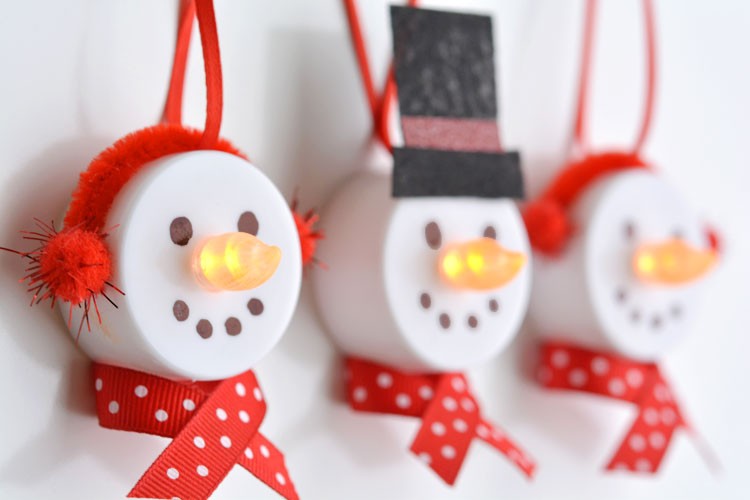
Ping Pong Ball Snowman Tealights


Now available
Low-Mess Crafts for Kids Book
72 cute and fun crafts that kids and parents alike can enjoy. All with as little mess as possible!
Where to buy:
You can purchase Low-Mess Crafts for Kids from Amazon, or wherever books are sold:
Amazon | Barnes and Noble | Books-A-Million | Indiebound | Amazon Canada


Leave a Reply